[Editor’s note: This article was originally published in the April 2012 issue of JLC.]
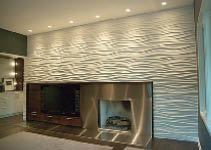
As part of a recent whole-house remodel, we built a media room featuring a stainless steel fireplace surround set in an accent wall covered with sculptural panels. Manufactured by Modular Arts (206/788-4210, modulararts.com), these interlocking 32-inch-by-32-inch panels have a gypsum core and a fiber-reinforced hard-shell surface. They come in about two dozen different designs; we used a pattern called Dune.
Our original plan was to finish only the fireplace wall, but we ended up with enough leftover material to wrap the panels around the corner into the adjacent butler’s pantry, too.
Wall Prep
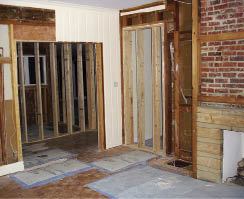
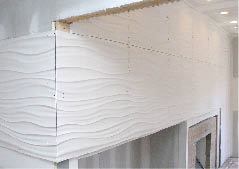
Although they’re noncombustible, the panels are not fire-rated, so they have to be installed over drywall or another code-compliant substrate. In the media room, we installed new drywall over the existing wall framing. Since the framing wasn’t very straight, we then flattened the wall with shimmed 1-by furring (photo, below left).
In the pantry, we installed the panels directly over drywall using mollies. This is a manufacturer-approved method that supposedly minimizes prep time if the wall is flat, but we found it to be slower than fastening the panels to a solid substrate (photo, below right).
Installation
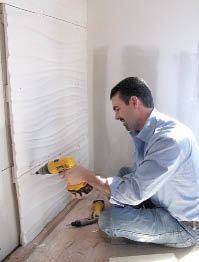
We fastened the panels to the furring with galvanized drywall screws, driving them through countersunk holes predrilled by the manufacturer around the perimeter of each panel (photo, below). When installing cut panels, we drilled our own countersunk holes, but quickly learned not to drill in the pattern valleys. That’s where the reinforced shell seems to be thinnest, making it difficult to avoid punching through to the lightweight gypsum core. We also glued the panels to each other at the edges with construction adhesive.
To cut the panels, we used a dry diamond blade mounted in a small circular saw. Even though our saw was connected to a shop vac, this process still created a lot of dust.
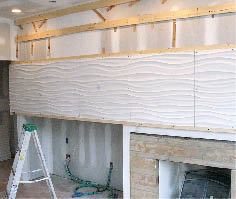
Outside corners aren’t covered in the manufacturer’s manual, but the obvious solution was to miter the factory edges to allow the pattern to flow around the corner into the pantry (photos, below).

Finishing
We filled the panel seams with two coats of a dry-mix spackling compound provided with the installation kit. We used the same material to fill the miters on the outside corner. A flexible application tool also included in the kit made it easier to apply compound over the uneven pattern.
It took some finesse to sand all the joints smooth so the wall would look seamless. We discovered that it’s easy to over-sand and make a mess.
After sanding, we sprayed on a primer/sealer. The walls can be finished with any color wall paint, though flat finishes are best at hiding the seams.
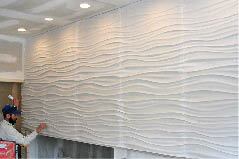
The finished sculptural wall panels.
Cost
At approximately $120 each, the panels cost about the same as extra-large format porcelain or stone tiles. Installation and finishing take about one man-hour per tile, according to the manufacturer. That seems about right for a first-time installer, though I suspect subsequent installations would go a little faster.


