Even for clients who are generally happy with their cabinetry, a common kitchen upgrade in my area is to change out an existing laminate countertop with one made from granite, quartz, marble, or some other natural or synthetic stone. The problem, though, is that stone countertops are much less forgiving of out-of-level cabinetry than laminate countertops are. The Marble Institute of America recommends the top surface of the cabinets be within 1/8 inch (3mm) of flat and level across a distance of 10 feet (3 meters). If your clients currently have a laminate-type countertop, odds are that their cabinets don’t meet this recommendation.
That’s where I come in. For the past several years, I’ve specialized in prepping cabinetry for stone countertop installations for several big-box home centers in my area. To be profitable, I’ve had to develop a fast and accurate way of leveling existing out-of-level cabinetry for this popular upgrade.
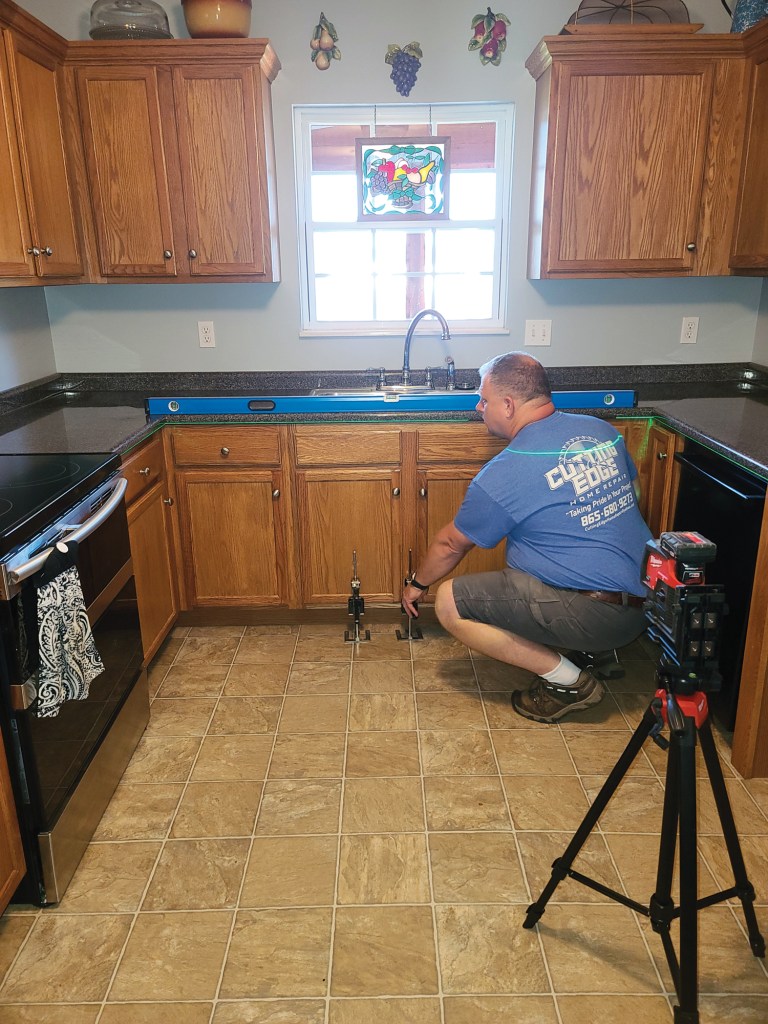
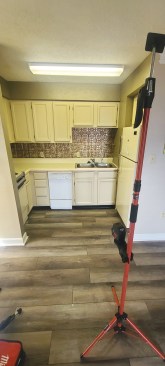
Establishing a baseline level. The most efficient way to establish a level line for cabinets is with a self-leveling laser, though it is possible to do this with a spirit level if the level’s accurate and long enough to span the longest run of cabinets. Trying to achieve a variation of 1/8 inch or less over the total span of a set of cabinets just isn’t possible using a short spirit level on top of each box, which might itself be level but still be out of plane with other cabinets.
The first step in measuring a kitchen for a new stone countertop is to assess whether the existing cabinetry is within 1/8 inch of level across 10 feet; if not, the cabinetry will need to be leveled.
I schedule about four to five hours to prep the cabinets in an average-size kitchen. I start by carefully disassembling the sink so I can remove the countertop. To properly level the cabinets, I need to be able to see both front to back and left to right of all the cabinet tops.
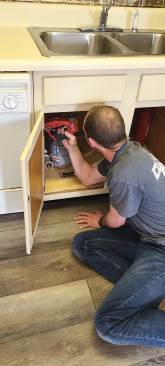
If shims will be required, the sink, dishwasher, and other plumbing and electrical fixtures must be disconnected.

A right-angle drill is handy for disconnecting the countertop from the cabinets, and the cabinets from each other.
I position the laser where the beam will cover as much of the cabinetry as possible, and adjust it up or down as needed until I find the cabinet’s high point (it’s always easier to raise a cabinet than to lower it). If the beam doesn’t reach all of the cabinets, I place painters’ tape on the front of the cabinets and mark the laser line. Then I reposition the laser, align it with the reference elevation marked on the tape, and continue the process until I’ve determined the highest point of all of the cabinets; this is the level to which the rest of the cabinets must be raised prior to the stone countertop installation.
Evaluating the cabinets. I use both tapered composite shims and strips cut from hardboard, placing them as needed either underneath or on top of the cabinets (I don’t use cedar shims, which can compress under the substantial weight of a stone countertop). The under-cabinet method allows the stone countertop and the top of the cabinet to be flush, but older site-built cabinets often cannot be raised from the bottom, in which case the shims must be placed on the top.
Shimming under the cabinets. I start by marking the laser line on the back wall with a pencil. Sometimes during the leveling process, the laser can be obstructed by the front face of the cabinet, and the pencil mark makes for a good target that is easy to see. Next, I locate and remove all of the fasteners that were used during the cabinet installation. Normally, cabinets are screwed to the studs at the top rear of the cabinets, though sometimes installers place screws on the inside of the cabinets through the back panel. If the cabinets have been attached to each other from the sides, these fasteners will need to be removed as well. With face-frame cabinets, the fasteners are often located behind the door hinges. The front toe kicks also need to be removed from the cabinets.
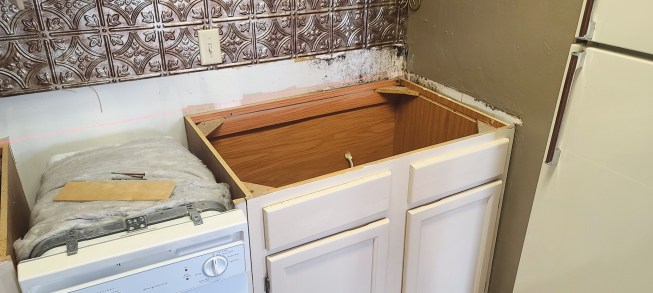
With the countertop removed, it’s easier to see where the high and low points are in a run of cabinets and how far cabinets have to be lifted to the level line.
While cabinets are often installed as one big assembly, it is easier to raise them as individual boxes. Trying to level the cabinets as an assembly can stress the frames and cause them to crack. Special consideration must also be taken when raising cabinets, such as sink cabinets, that have openings for plumbing or electrical. To provide clearance, I enlarge the openings as needed with a multi-tool. If the plumbing comes through the wall and the cabinet does not have a back, this step can be skipped.
To lift cabinets up to the level line, I use a pair of Viking Arm portable handheld jacks (see “Viking Arm Handheld Jack,” Jul/Aug/21), which have the ability to precisely raise or lower weights up to 330 pounds per jack. Once the back of the cabinet is lifted to the laser (or pencil) line, I screw it to the studs to maintain this elevation. Then I place tapered composite shims as needed under the cabinet until the front face is also aligned with the laser. The best result is to split the laser line across the front and back of the cabinet, where I can see the top half of the line across the back of the cabinet and the bottom half of the line across the face of the cabinet. This ensures that the cabinet is level front to back and left to right.
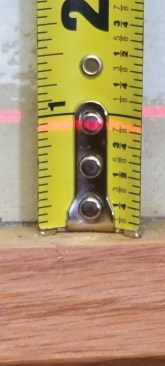
With the laser line indicating the level mark, the tape measure shows that the cabinet must be raised almost 15/16 inch.
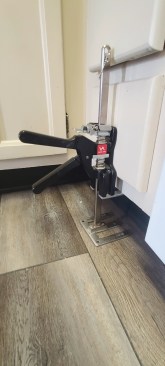
The author uses Viking Arm jacks to raise cabinets to level and hold them in position while he screws the backs to the wall and fits shims under the fronts.
Once all the cabinets are aligned to the laser, I reattach them to each other with Wurth assembly screws, either through the face frames or the side panels. When I’m done, I check to make sure the laser line is still touching the tops of all the cabinets at both the front and rear and readjust as necessary. Finally, I mark and trim the shims to length so they won’t interfere with the toe kick when I reattach it. To keep the shims from shifting, I glue them to the floor, the cabinet, and each other with hot-melt adhesive or cyanoacrylate (CA) glue. If the shims create a gap between the toe kick and the flooring, I cover the gap with trim such as a shoe mold.
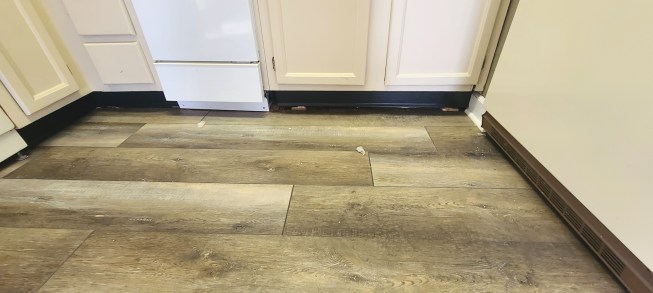
Raising the cabinets often creates a visible gap between the finish floor and the toe kick. The author uses shoe molding to cover this gap.

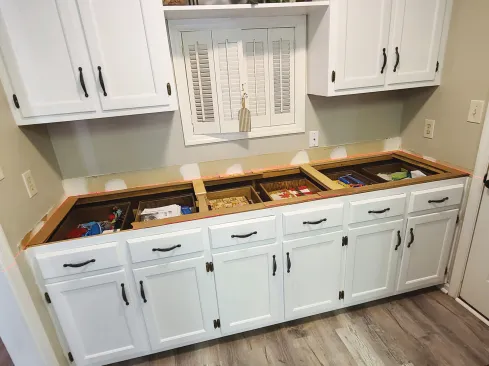
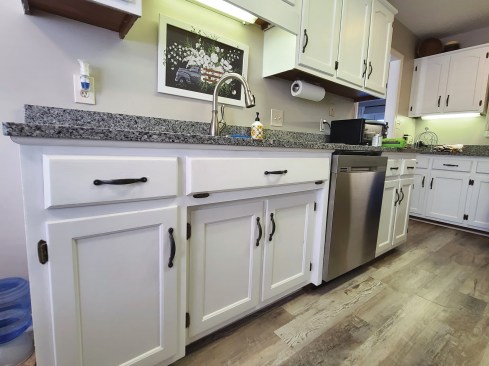
Once the cabinets are leveled, the old countertop can be temporarily reinstalled in short sections so the kitchen can be used while the new countertop is fabricated.
Shimming on top. I rip strips of 1/8-inch and 1/4-inch hardboard on a table saw to use as shims on the tops of cabinets. Depending on how far the cabinets are out of level, the shims may need to be layered to achieve the proper height. I start with the back, gluing and tacking the first layer to the tops of the cabinets with 23-gauge headless pins, then add layers as needed until the shims just touch the laser line.
In some cases, custom and site-built cabinets cannot be easily lifted up without damage to the cabinets, and must be leveled at the top with shims. The author layers strips of 1/8- and 1/4-inch-thick hardboard as needed, gluing and tacking the strips to the top edge of the cabinets, then uses a belt sander to level out the shims to the laser line.
Along the fronts of the cabinets, I build the hardboard shim layers up so that the gap between the countertop and cabinets will be completely filled. Then I use a belt sander to level out the shims flush with the laser line. If the gap that I’ve filled with shim material to level the cabinets is greater than 1/2 inch, I also completely cover the tops of the cabinets with a layer of 1/2-inch cabinet-grade plywood to act as a base for the stone. Finally, I check to be sure that none of the shim material sits proud of the front or side of the cabinet.
It will be a few weeks before the new countertops are ready, so I reinstall the old ones without screws, first cutting them into 4- or 5-foot-long sections to make them easier to handle. To make the kitchen functional, I reconnect the plumbing.
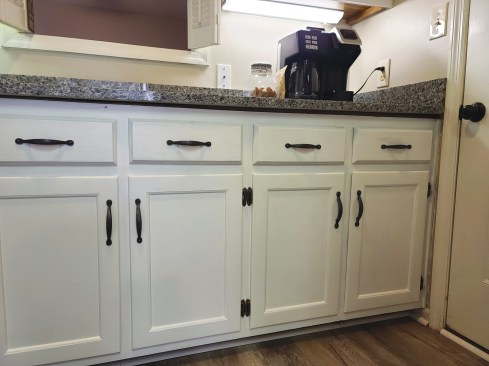
Leveling the tops of the cabinets with shims typically leaves a gap between the countertop and the cabinets.
The author covers this gap with simple trim sized so that it won't interfere with drawer and door operation.
After the fabricators return to install the new stone countertop, there will often be a gap between the tops of cabinets and the countertop, which can be covered by a piece of trim. When determining what trim to use, I pay close attention to the tops of drawer and door clearances to make everything fit as it should.
Photos by Chris Land


