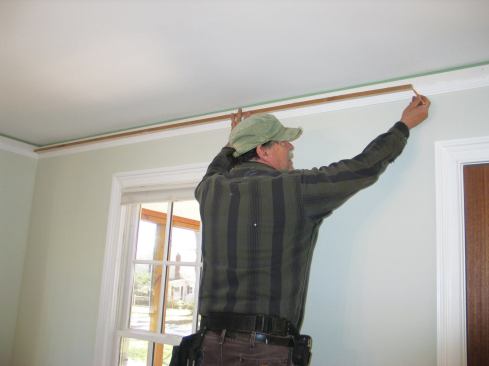
Twenty-five years ago, I landed a job installing crown molding in a home. Thinking that I’d need a second pair of hands to handle the long, flimsy material, I hired a helper. But as the job progressed, I noticed that my helper spent much of his time watching me cut the material and fuss with each joint. After that I developed techniques to do the job by myself.
Laying Out the Job
Before I install crown molding, I take a few minutes to make a full-size cross-section drawing. This drawing lets me know how far down the wall to mark for the bottom of the molding, where to mark for any returns required, and how big to make back-up blocks, if needed, for fastening. Although I don’t cut my crown in the “nested” position (tilted up against the fence at the 38-degree angle of the crown), a full-size drawing can also show you where to set up a block to hold the crown at the proper angle as you cut it.
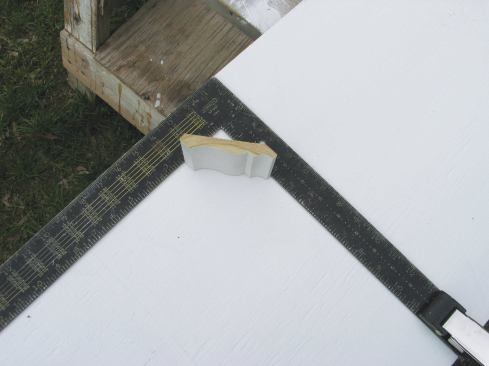
To make the drawing, I clamp a framing square to a sheet of plywood and scribe along both legs of the square: one line for the ceiling and the other for the wall. I place a short piece of the crown molding against the legs of the square, making sure both edges are tight inside the square. Then I scribe all the way around the molding. If you’re cautious, as I am, you can check the angle of the back line with a Swanson Speed Square to make sure the crown is sitting at the desired 38-degree angle.
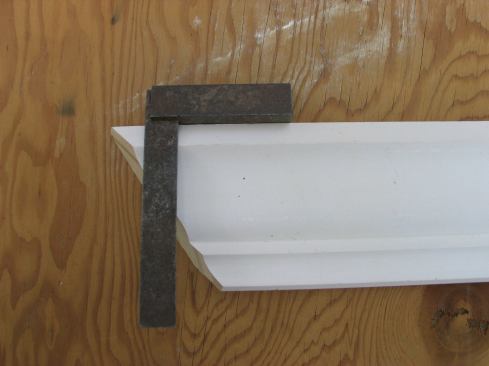
When I’m installing a single layer of molding, I’m done at this point. But for the project in the photos, I also needed to draw the upside-down base molding that expanded the profile, so I removed the square, held the base in place, and scribed around its profile as well.
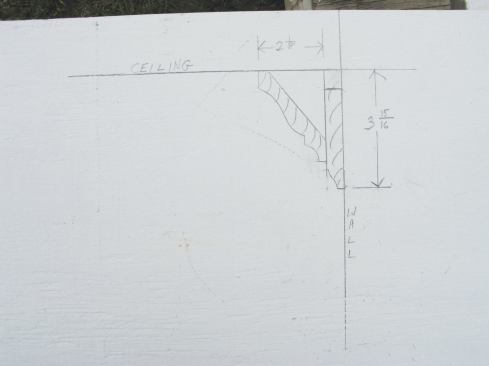
After finishing the full-size drawing, I make some measurements. First, I find the distance from the bottom of the molding to the ceiling, in this case, 3 15/16 inches. Next, I determine the length of my returns. This project had three returns at 2 1/8 inches from the corner.
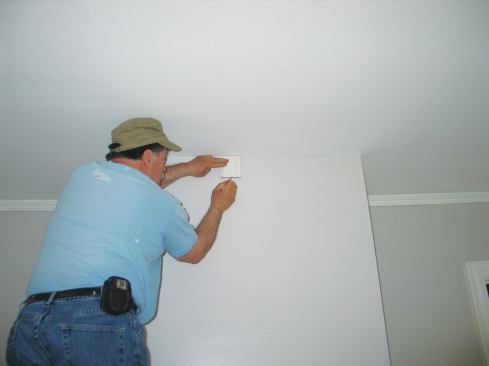
With these measurements in hand, I mark the bottom of the crown profile on the wall using a scrap that I cut exactly 3 15/16 inches long. I make marks at roughly 32-inch intervals, and at each of the return locations, I mark 2 1/8 inches in from the outside corners.
John Carroll
To make a full-size drawing, I clamp a framing square to a sheet…
Measurements Without a Helper
A standard tape measure is just about useless for a single person taking overhead measurements. Despite boasts of up to 11 feet of “stand-out,” these tapes can be read only with the numbers facing up. Working at ceiling level, you need to turn the tape over to read the numbers, and when you do that, the tape inevitably collapses.
To overcome this problem, I use a different technique. For an outside corner, for instance, I mark the length of a piece in place. First I take a rough measurement while standing on the floor, then I cut the piece a few inches longer than I need. After cutting and fitting the inside corner, I hold the piece in place with one or two trim screws. On the back of the molding, I mark the outside edge of the wall. This mark represents the short point of the bottom of the cut for the outside corner.
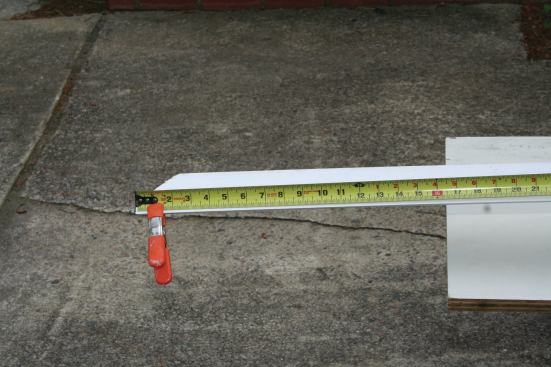
When I need to measure from one inside corner to another, I use a measuring stick and rulers. For the measuring stick, I cut a strip of wood exactly 100 inches long. I butt this strip into one corner and mark the end. Then I measure back from the other corner to the mark using an inexpensive metal ruler (I have several lengths) and add that dimension to 100 to find the total length.
If the wall is longer than the length of the material available (usually 196 inches, or 16 feet), I make up the length with two pieces so I don’t need to measure corner-to-corner. Instead I usually install the first piece, then hold and mark the length of the second piece without measuring it.
If the wall is between 172 inches and 196 inches long, I first mark 100 inches as described above. Then I use my 72-inch ruler and mark 70 inches from the opposite corner. I am left with two marks a short distance apart. I measure that distance and add it to 170 to find the length I need.
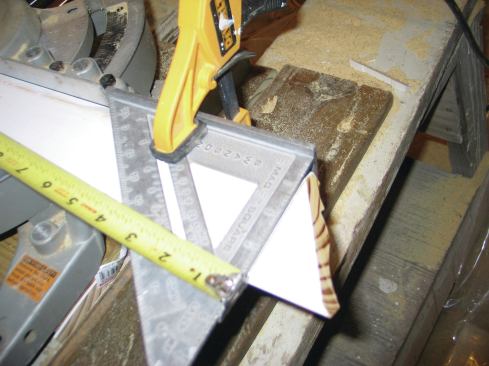
Transferring measurements to a floppy piece of molding can be challenging, especially when measuring from an end that’s cut at an angle. When measuring from the long point, I hold the tape in place with a spring clamp to make sure it stays put as I mark the measurement. To measure from the short point of a cut, I clamp a Speed Square across the piece at that point and then hook the tape over the square.
Installing the Crown without a Helper
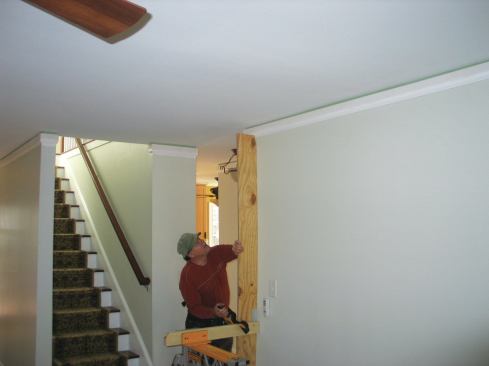
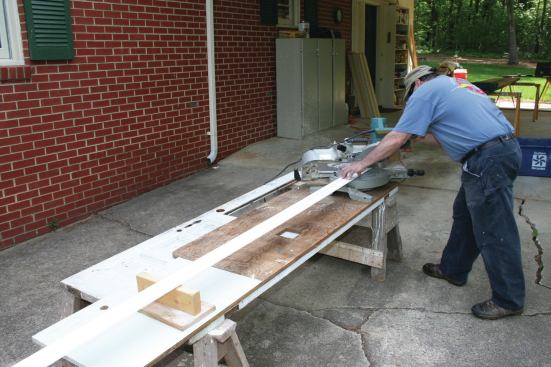
To hold up the far end of the material as I fuss with the joint and install the piece, I use a simple rig that I assemble on site. My support system starts with a horizontal 2×4 a couple of feet long clamped in a Rockwell JawHorse. To this 2×4, I attach a vertical strip of plywood about 8 inches wide and about 80 inches long. I slide the strip up to the correct height and clamp it to the 2×4 with a one-hand bar clamp. This system sets up and moves easily, yet provides plenty of support for the material.
Although they aren’t essential to working alone, I’ve found that work benches can speed up the installation and save trips up and down the ladder. I use a pair of benches that are 6 feet long and 22 inches high with 2×12 tops. When I’m standing on them, my head is below the ceiling and I’m at a comfortable height for installing crown for an 8-foot ceiling. When they’re combined, I can walk from one end of the piece to the other as I install the material.
Setting Up the WorkStation
As most carpenters know, taking a few minutes to set up a workstation at a job always pays dividends in safety, quality of work, and time. When you’re working alone, a good workstation is a necessity.
My workstation isn’t fancy—just a pair of sawhorses with an old door placed across them. To set up my sliding compound miter saw (SCMS) for a job like this, I lay a piece of plywood over the door for a smooth surface. I position the saw all the way to the right of the table, and I set a simple, site-built support on the left side for the material. My SCMS table swivels both left and right for miter cuts and tilts both left and right for bevel cuts, so I never need to flip the positions of the saw and the material support to make cuts.
Next to my workstation, I keep a bucket of clamps. You can quickly clamp material, and at times, tools, if you have the right clamps. For clamping small items, such as my tape measure to the molding, I use spring clamps. For stronger clamping, such as holding the crown in place while coping, I use one-hand bar clamps, which allow me to hold the jigsaw with two hands. I never use C-clamps at my workstation: They take way too much time.
Tricks for Making Compound Cuts
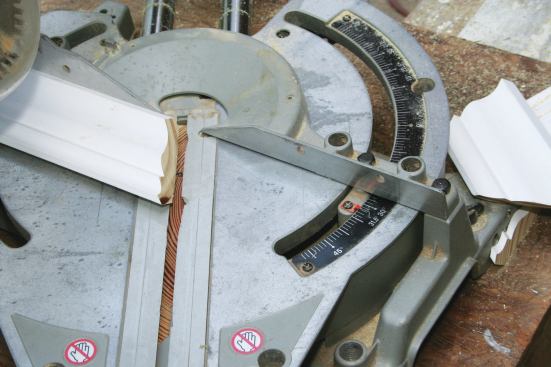
Working alone I find it easier to keep crown molding flat on the table of the saw instead of resting it at an angle against the fence. On most saws, the scales for both of these actions are clearly marked for the angles needed to make square corners with 38-degree crown molding: 31.6 degrees for the miter and 33.9 degrees for the bevel.
Even with these settings, it can be confusing to set the saw to the right combination of angles. So, to make it easier to visualize the orientation of the cuts, here are a few simple rules.
First keep in mind that the bottom of standard crown molding has the cove. For inside corners, the long point of the miter cut is always at the bottom, and the short point of the bevel cut is always at the front face of the molding.
For outside corners, the short point of the miter cut is always at the bottom, and the long point of the bevel cut is always at the front face of the molding.
To see immediately if you’re on the right track, look at the top of the cut. When you’re making cuts for either inside or outside corners, the cut along the flat, vertical section at the top of the molding should always run perpendicular to the top edge.


