Referrals make up most of my business these days, with a recent insurance job offering a great example of how the process works. The client had experienced a small fire in his home resulting in lots of water damage, and I had been recommended to him by both of his business partners to tackle repairs. No one wants to have their lives disrupted by unanticipated repair work in their home, but in this case, the clients looked at the fire as an opportunity to make some changes.
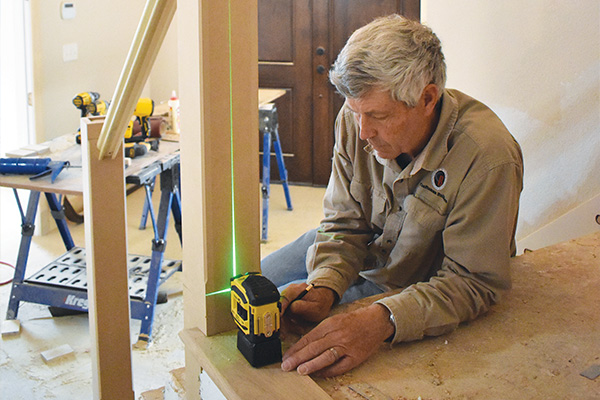
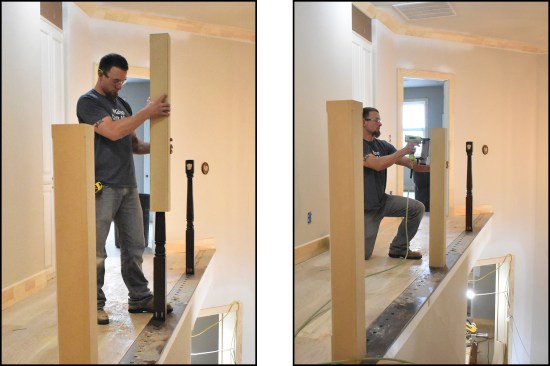
The author uses a laser to locate and mark the centerline for a new handrail during the stair makeover project.
New floor coverings and paint colors don’t take a lot of planning, but the clients decided they also wanted to make major changes to their entry staircase. The railing was serviceable but dated, with iron balusters and dark oak ball-top newel posts, and they wanted to replace it with a more contemporary-looking railing without busting the budget. They liked pictures I shared of painted staircases with square wood balusters and simple newel posts. The replacement stair parts were pricey, so I decided to buy lumber and make our own.
Most of the work was on the long upper balcony, but there was also some on a short run of open stairs at the entry and on an intermediate landing.
Removing the old stair. It only took a couple of hours to demo the staircase using a reciprocating saw and a hammer, but we were careful to leave the newel posts in place. My plan was to sleeve the turned oak posts to transform them into contemporary square posts, so we sliced off the top of each newel post.
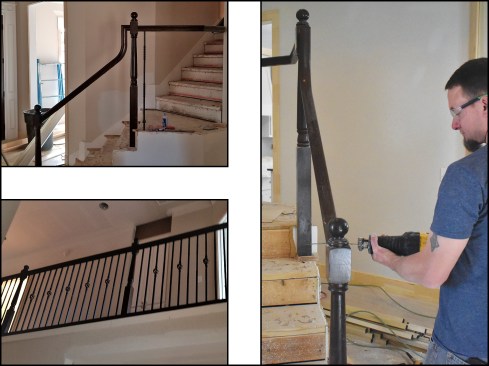
The staircase’s railing was serviceable but dated (left, top), and the homeowners wanted the iron balusters and dark oak ball-top newel posts (left, bottom) replaced with something more contemporary. Workers removed the old rails and balusters but left the turned newel posts in place. The oak ball-tops of the newels were removed (right).
The posts were sound, but a few of them needed shoring up. I drilled pocket holes and used long Kreg screws to tighten them up. One notched newel post had to be removed and reset so we could remove the damaged riser behind it.

The old newels were reinforced with pocket screws (above left, right).

The landing newel post had to be relocated, so the author reinforced the connection with construction adhesive (left) and structural screws driven through the base of the newel post into the framing (right).
Making the posts. The newel posts were going to be painted, so we made the sleeves out of Trupan, a high-grade MDF. As we carefully glued and clamped up each sleeve, we used spacers about 1/16 inch bigger than the oak newel posts to create a snug fit while ensuring that the sleeves would slide down over the posts.
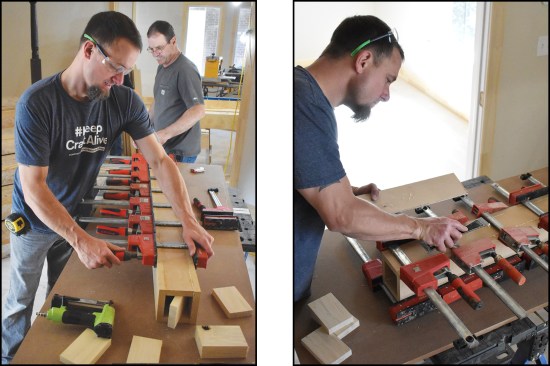
The crew used spacer blocks when clamping the sleeves to ensure they would fit over the old newels (left, right).
After the glue cured and we removed the clamps, we cleaned up the joints using a router with a flush trim bit, then sanded everything smooth. I always build projects like these sleeves oversized, then trim them to exact length later. Finally, we chamfered the corners of the sleeves with a compact router, clamping stop blocks to the assembly to make sure the chamfers were consistent. That added just a little detail and eliminated the sharp edges.
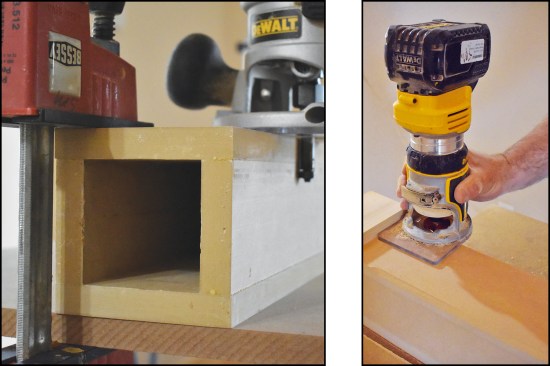
A router with a flush trim bit was used to clean up the glue joints (left), while a 45-degree chamfer bit was used to profile the sleeve corners (right).
We made the post caps out of poplar. To avoid showing end grain, which is always a little rough and just won’t take paint or stain the same as edge grain, we made the post caps out of four mitered pieces, which we pocket-screwed and glued together.
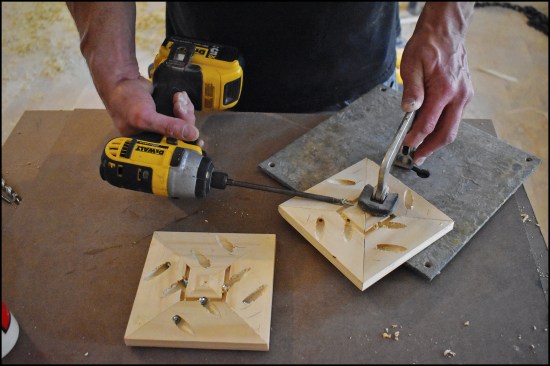
Post caps were glued and pocket-screwed together.
As it turned out, the old oak posts weren’t exactly straight and varied in size a little, so our sleeves barely slid in place over them even with the extra 1/16 inch of width that we’d added to their design. With this snug fit, it probably wasn’t necessary, but we did shoot a few 18-gauge brads into each sleeve to hold it in place.
The sleeves fit snugly over the old newel posts (left), then were held in place with a few 18-gauge brads (right).
Hand rail. The rail was more of a challenge. Square balusters require a plowed dado on the bottom of the rail to house the top of each baluster, so the rail had to measure a minimum of 1 5/8 inches wide on the bottom face in order to accommodate the 1 1/4-inch-square balusters. The rail was going to be finished with stain, but to avoid the strong grain pattern of oak, we decided to use poplar instead.
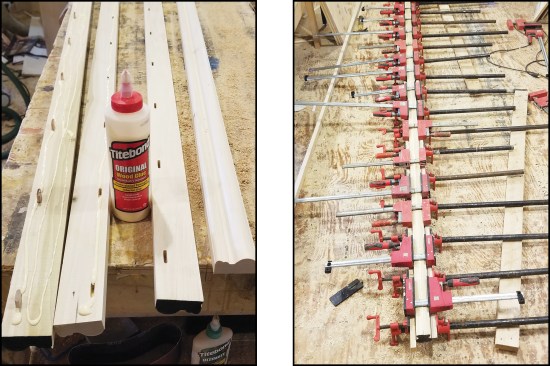
The author milled the poplar handrails in two pieces, then joined them using glue, Festool dominoes, and plenty of clamps (left, right).
There are certain standards a handrail must meet to be considered grippable, so if you decide to make your own rail, make sure you consult with a building inspector first. I made the two profiled rail sides on a Woodmaster molder out of the straightest 6/4 poplar I could find. Then, to make a code-approved graspable rail profile that is 2 5/8 inches wide at the widest point and 2 1/8 inches wide along the bottom edge, I glued and clamped the two halves together, using Festool dominoes for alignment. After one of the more patient members of my team scraped and hand-sanded the rail blanks, we finished up by making two passes on a table saw fitted with a dado head to prep the rail bottom.

A table saw fitted with a dado head was used to cut the baluster channel in the underside of the rails (left, right).
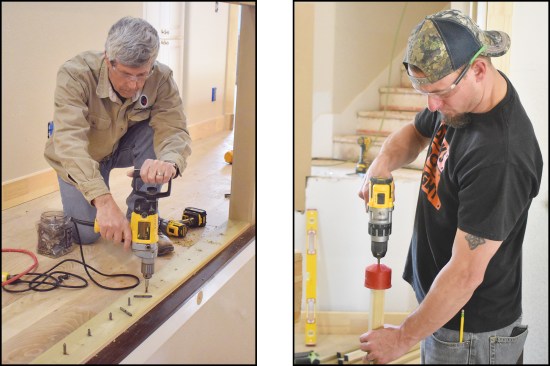
After precisely measuring and cutting each rail section to length, we drilled pairs of pocket screw holes in the end of each rail piece to prep them for installation.

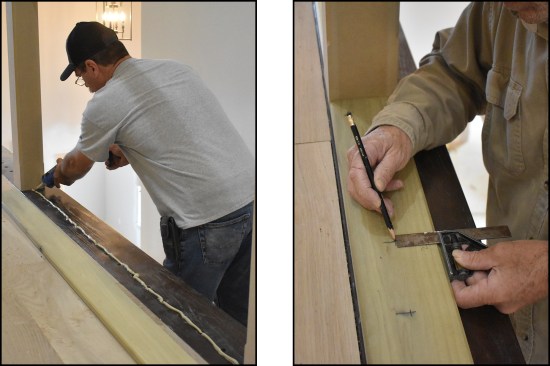
For a precise fit between the stair newels, the author laid the stair rails across the treads to mark their length.
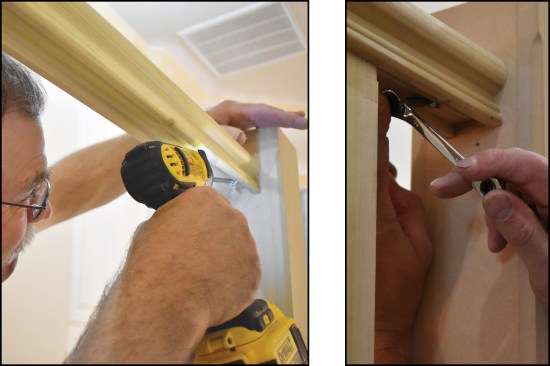
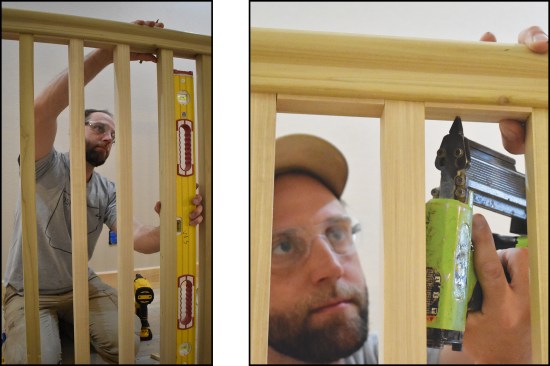
After checking the fit, a worker drills holes for the pocket screws that will be used to fasten the rails to the posts (left, right).
Balusters. I made the 1 1/4-inch-square balusters from clear 6/4 poplar that we ripped to width. We then ran the stock through a planer with sharp knives, hitting all four faces to clean them up. We ran the material full-length, then cut the balusters to length, making sure to trim off any snipe at the ends.
Using dowel screws (bolts with wood threads on each end) is the best way I know of to attach balusters. Instead of trying to fill the old baluster holes, we added a new piece of poplar over the flooring between the newel posts, first laying down a bead of construction adhesive before nailing the poplar in place.
A piece of poplar was installed between the newel posts to cover up the existing baluster holes. A continuous bead of construction adhesive was applied before the poplar “plate” was nailed in place (left). The author laid out the balusters using a combination square as a marking gauge (right), then drilled 1/4-inch-diameter pilot holes for the dowel screws.
Code calls for balusters to be evenly spaced such that a 4-inch-diameter ball can’t fit between them. To lay the balusters out, I start with a center mark between newel posts, then decide if it is better to place the baluster in the center of the run or 2 inches off-center, so that the space between the first and last baluster and the adjacent newel posts are equal.
Using a combination square as a marking gauge, I located and drilled 1/4-inch-diameter pilot holes, then drove the dowel screws in place (a driver bit is available from most stair parts companies). To drill the pilot holes in the end of the balusters, we used a special cup that has a drilling guide (also available from stair parts companies). The hardest part of the whole job is twisting the balusters in place onto the dowel screws; it makes for a real forearm workout.
A special driver bit was used to install dowel screws (left), while a cup-shaped drilling guide helped center the holes in the balusters (right).
On the angled landing and the open stairs, I used a laser to locate and mark the rail centerline (see first photograph). To make sure I didn’t exceed the allowed maximum spacing, I placed a couple of baluster cutoffs on the centerline and spaced them an equal distance from the diagonal joint. Then I pulled my layout in both directions from those two cutoffs.
Assembly. It took some time to work the rail pieces into place on top of the snug-fitting balusters. Then, with the rail in position, there wasn’t any way to use a drill to drive the long pocket screws that fasten the rail to the newel posts; each one had to be hand-driven using a small ratcheting driver.
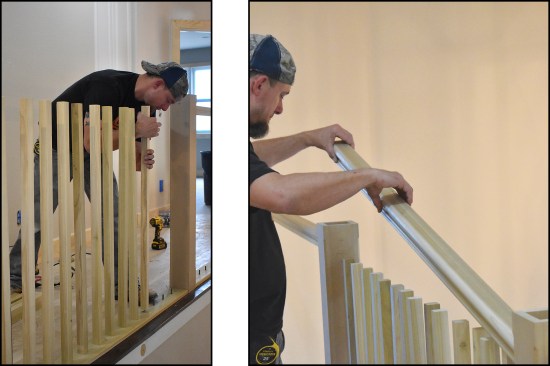
After twisting the balusters down onto the dowel screws (left), a worker fit the railing (right).
After plumbing up the first baluster in a run, we held it in place with a poplar fillet cut to the length of our baluster spacing and installed in the rail dado. As we installed the fillets, we occasionally checked the balusters for plumb to make sure they were remaining on the layout.
The balusters were occasionally checked for plumb (left) while poplar fillets were installed to lock the balusters in place (right).
We waited until the end to add the post caps and a small molding under the caps. I’m not sure if this is an approved connection, but I am sure that between the pocket screws and the balusters bolted in place, the rail meets the building code’s 200-pound load requirement for a railing.
To mark and cut the rail sections for the open stairs, I simply set a section of rail on top of the steps and marked angles. Basically, if the cuts and length are right sitting on the treads, they will fit just as well when raised up 32 inches.
From start to finish, the restoration project took more than two months. If you asked the clients, they wouldn’t have chosen the disruption in their lives, but I think they would agree that the result was worth the wear and tear.
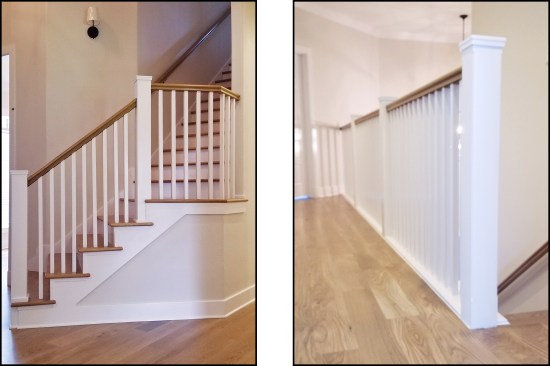
The posts and balusters were painted, while the rails were stained to match the stair treads (left, right).
Photos courtesy Craftsman Builders


