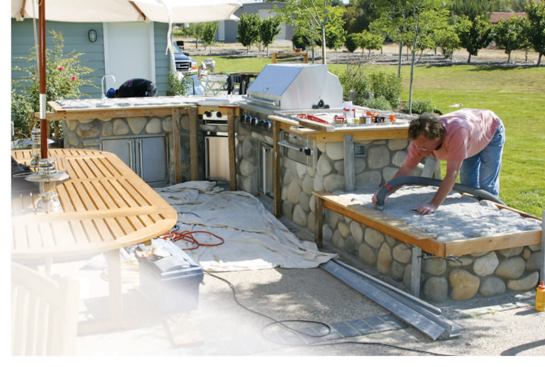
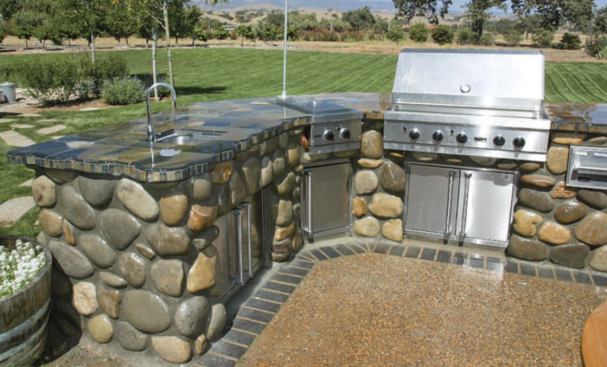
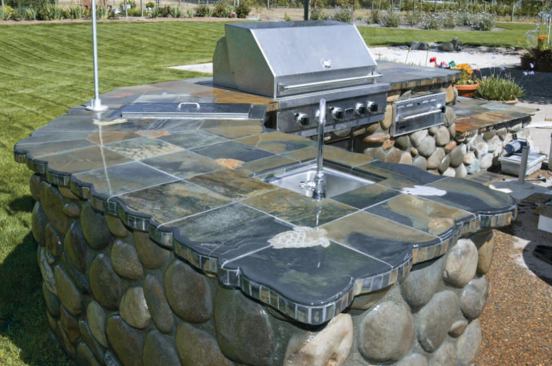
After a steady diet of floor and wall installations, countertops are a relief to work on, because they don’t require kneepads and everything is within easy reach. The work becomes downright enjoyable, though, when it happens to be the top for a beautiful backyard grill. Friends who run a nearby vineyard and winery wanted something special; my wife and I wanted some of their world-renowned pinot noir; and so a deal was struck, tiles were selected, and I began to set up the top.


A reinforced mortar-bed substrate is key to success
Forming the Top
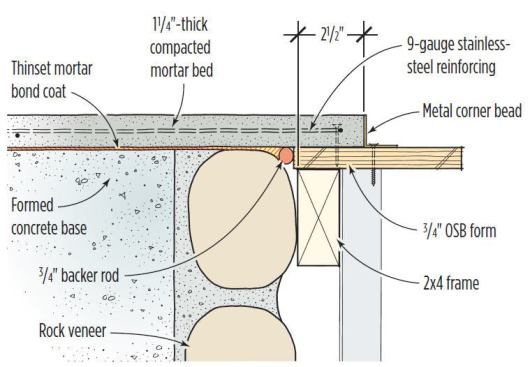
The base was made of formed concrete covered with river rock, and it featured a lower section that would serve as a serving or seating area. I decided to bond a reinforced mortar bed to the base and size it to overhang the base by a few inches; this — in lieu of a toekick — would make the top more comfortable to use. I also wanted the top’s edge to match the undulations of the rock base.
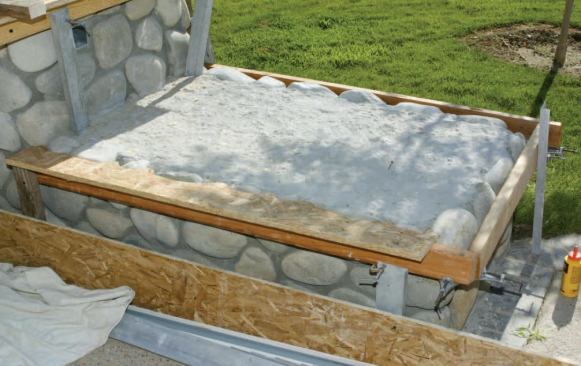
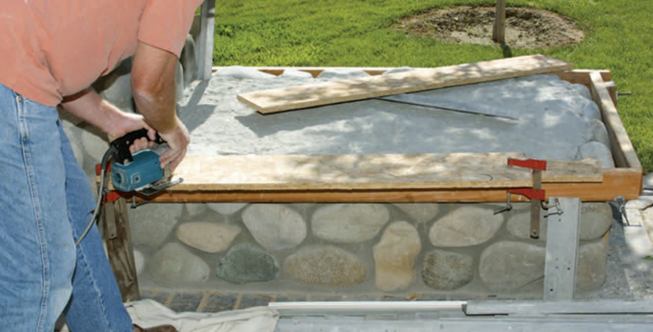
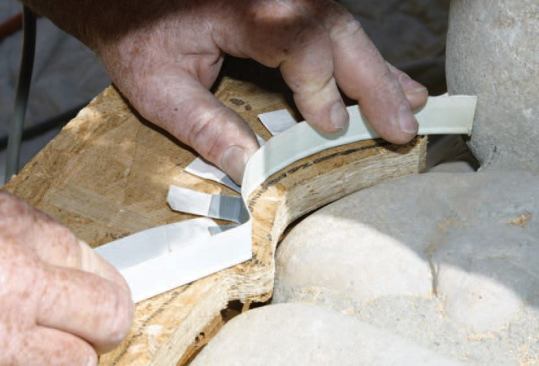
The setup involved establishing a level perimeter with 2x4s, straightedges, and clamps, then using 3/4-inch OSB to form the edge of the top. I first cut the OSB into 8-inch-wide strips, which I aligned against the 2×4 frame to mark for cutting. I relied on my eyes and a marker to get a profile that would complement the rocks immediately below the top, and used a jigsaw to make the cuts. After the first rough cut, I dry-fitted the boards, fine-tuned the shape with the jigsaw, then screwed the OSB strips to the 2x4s. This gave me a ledge flush with the top of the base and close to the rocks beneath. I then drew a line freehand to mark the edge of the top, allowing for about a 2 1/2-inch overhang beyond the face of the rock veneer.
Reinforcing
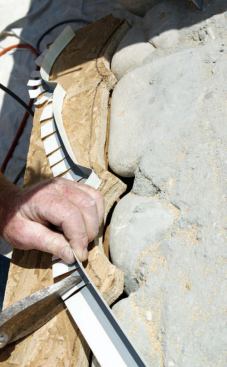
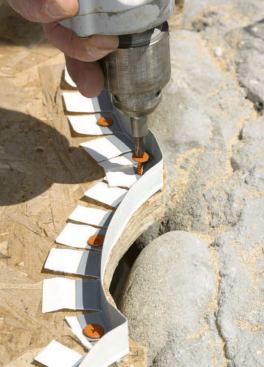
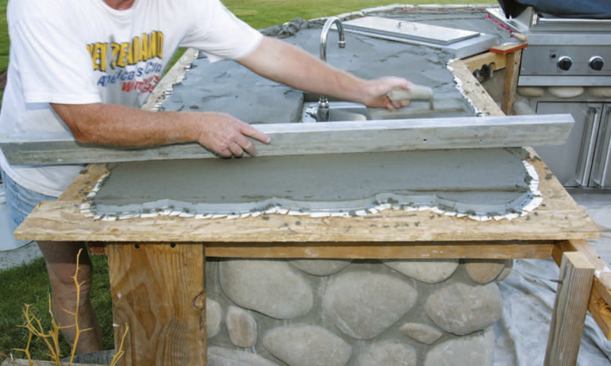
Next, I bent 9-gauge (1/8-inch-diameter) stainless steel rod to reinforce the undulating edge of the mortar bed, placing it about an inch in from the perimeter and following the shape outlined by the marker. Once the perimeter rods were shaped and bound together with stainless steel tie wire, I removed that assembly from the top while I worked on the perimeter screed. For this, I used a paper and metal drywall corner bead, snipping it so it would conform to the curve of the top. After fitting each 8-foot section of bead, I secured the screed with screws.
To prepare for floating the mortar bed, I stuffed the gaps between the OSB ledge and the rocks with 3/4-inch backer rod, then put the perimeter reinforcing back in place. I created a grid of reinforcing rods across the top and wired it to the bent perimeter rods. To prevent the forms and screeds from spreading while I compacted the mortar bed, I also used tie wire to draw the opposing sides together, running it beneath the reinforcing rods.
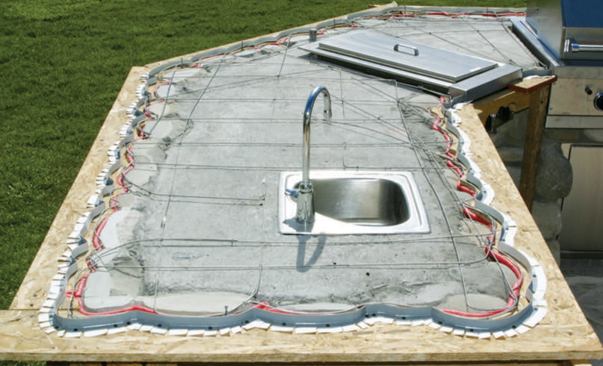
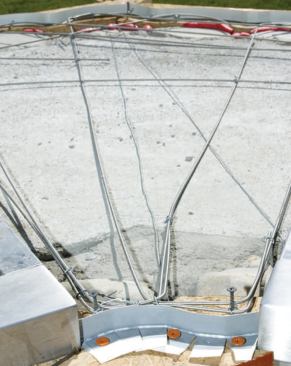

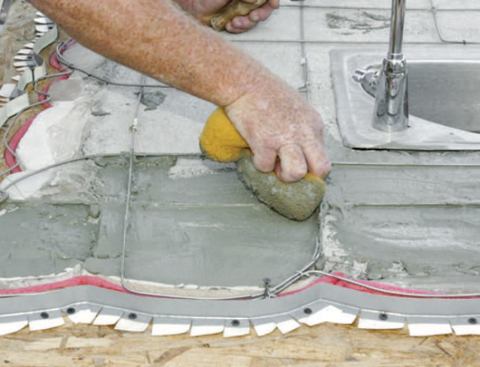
I created a grid of reinforcing rods across the top and wired it…
Careful Cure
Because I wanted the mortar bed to dry slowly instead of baking in the sun all day, I used shade and water to keep the concrete and rock base cool until the sun went down. At that point, I used a trowel and damp sponge to spread a 1/8-inch-thick layer of latex thinset mortar over the concrete base to ensure that the mortar bed would stay bonded to the base. While the surface of the thinset was still moist and tacky, I spread and compacted latex deck mud over the top, then used a straightedge and trowel to remove the excess.
With the straightedge riding on the screed rails, I pushed excess mortar into the low areas, gradually working my way around the top. The grill and other fixtures had been installed to a specific height that would allow for the top to slope gently toward the outside edge. After screeding the mortar bed flat, I used the steel trowel to add mortar as needed to maintain the slope. I followed with a brisk “sanding” with the wood float, leaving a coarse surface to ensure a good bond between the tile and the setting bed.
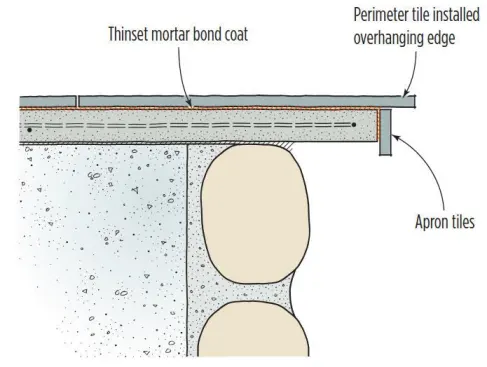
Installing Tile
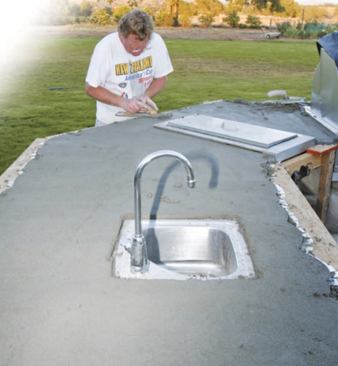
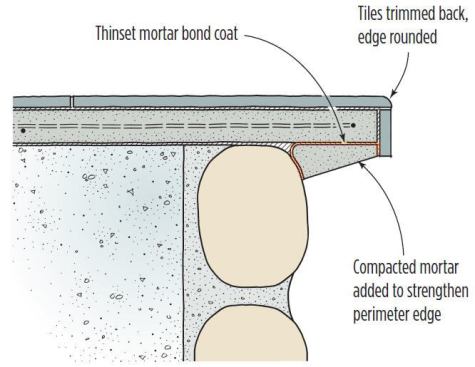
The process I used to set the Chinese slate tiles was a bit unusual. I began by installing the 2-by-3-inch apron tiles, which I cut from 12-inch tile stock and secured with latex thinset mortar. Some of the curves were tight enough to require a few 1×3 tiles. Once the thinset had hardened, I cut and dry-fit the 12-inch tiles, recut those affected by the porcelain inlay tiles, then installed the tiles with the perimeter tiles hanging over the edge. Three days later, when the latex thinset had hardened, I used a wet-cutting blade mounted in a wet angle grinder to trim back the tiles and shape a smooth-flowing rounded edge. I then used a series of diamond polishing discs (up to 1,500 grit) to give the edge a comfortable, easy-to-clean honed finish. I did this before grouting, to prevent scratching.
Final Touches
To strengthen the perimeter of the top, simplify maintenance, and give the countertop a more pleasing appearance, I gave the underside of the edge a 3/32-inch bond coat of latex thinset mortar followed by an application of densely packed mortar, which I let set up before screeding with a margin trowel. Following that, I packed the joints with grout, and damped-cured the top in shade for about a week.
After the grout had cured and dried, the joints between the tiles and the sink were filled with silicone; the joints between the tiles and the grill were left open to allow the unit to expand and contract without binding. The wine is all gone, of course, but after six years of regular use the slate countertop with the curly edge is still working great.
JLC contributing editor Michael Byrne is a tile-setter and consultant in Los Olivos, Calif.


