Kyle Diamond
My remodeling company enjoys working on many unique and historic homes in the Eastern Hudson Valley region of New York. Last month, I described work related to replacing an existing 13-by-18-foot screened porch with a larger, 15-by-22-foot sunroom on a French cottage–style home. In this article, I’ll focus on the installation of the sunroom’s radiant stone-tile floor system, which was comprised mainly of products from Mapei. The floor was installed over electric radiant heating in a house that would not be used continuously through the winter, and the goal of the electric radiant was only to help temper the room, while primary heating was supplied by a mini-split heat pump. The clients liked the idea of the electric radiant quickly heating the floor surface—a more immediate, and therefore more comfortable, heat.
MANUFACTURER’S TRAINING
Although we’d been using Mapei’s products for about a decade, it wasn’t until a few years ago that we found out about its MTI (Mapei Technical Institute) training seminars. Classes include hands-on workshops for surface preparation, repair, and installation, as well as instruction in the industry’s newest techniques. My lead carpenter and I drove to the company’s Swedesboro, N.J., facility for a day and a half of training. The cost was $350 per person, but it was offset by a credit that Mapei gave us on the purchase of its products, which paid off on the first job we completed after the training. Making contact with Mapei’s reps might have been the most valuable part: I can now contact them with questions, and they get right back to me—something that was a little more hit-and-miss beforehand. This training was not required to qualify for the company’s product warranty, but it did drill into our heads the Mapei mantra: “Read the instructions on the bag.”
TILE SUBSTRATE
The floor on this project was installed over an insulated slab-on-grade foundation that tied in with the home’s existing slab foundation. After waiting 28-plus days for the new slab to cure, we began work on the radiant tile floor by cleaning the new slab’s surface— first running a shop vac over it, then wiping it down with sponges and clean water.
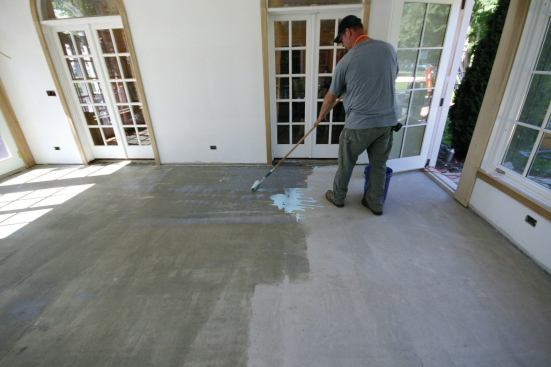
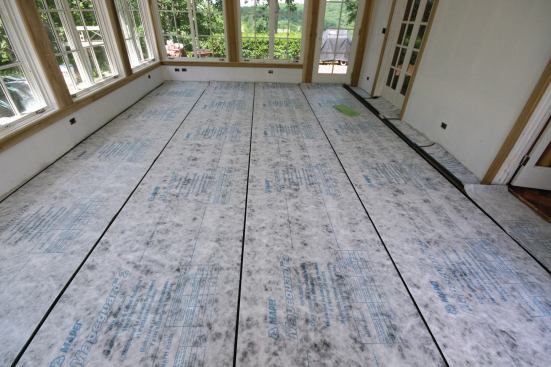
Next, we applied Mapei’s Primer L acrylic latex primer. We diluted the Primer L to a 3-to-1 ratio of water to primer, then mixed it using a low-speed mixer with a Jiffy mixing paddle in a five-gallon bucket. Using a 3/8-inch nap roller, we applied the mixture to the slab, rolling it on as uniformly as possible to prevent ponding. It took a couple of hours to mix and spread. On this floor, we needed to apply only one coat, though we have had jobs where we’ve needed to install two coats over mortar-setting beds that were pretty porous. The primer took three to four hours to dry. Note that the maximum open time between coats or before applying a leveler is 18 hours.
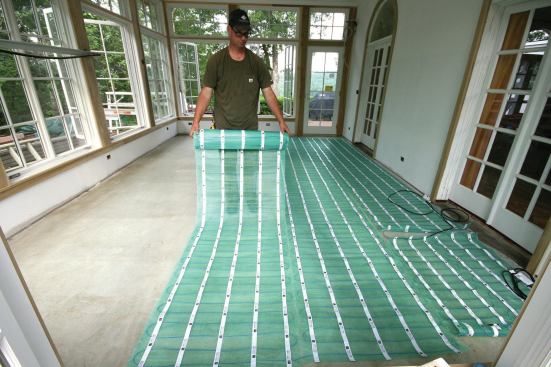
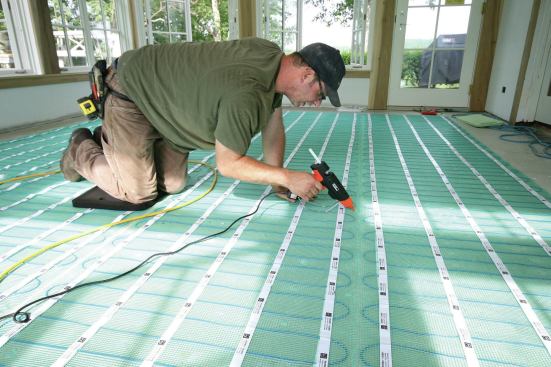
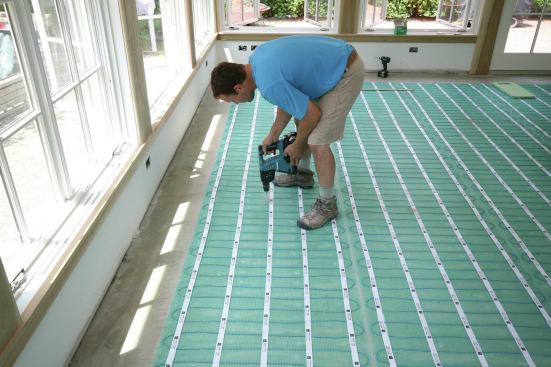
Radiant mat installation. Usually when we install electric radiant in tile floors, it’s for smaller bathroom projects. For the radiant mat on this large floor, we chose TempZone Flex Rolls manufactured by Warmly Yours. It consists of a heating cable secured within a green mesh fabric—the heating element is distributed in serpentine loops spaced at 3 inches on-center to deliver heat evenly throughout the flooring area.
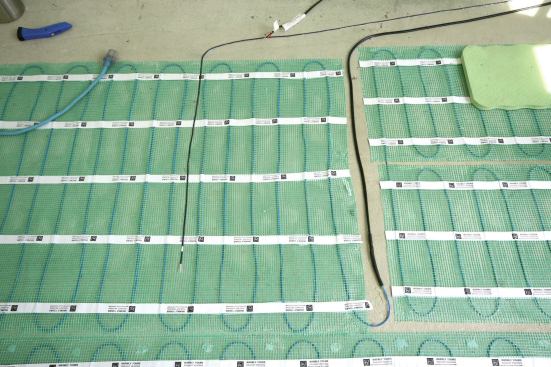
Technicians at Warmly Yours helped us with the mat’s layout and power requirements. Their design called for a 3-foot-wide by 70-foot-long mat, along with two 18-inch-wide by 8-foot-long mats, which we placed according the installation diagram they provided. As we unrolled the mats, we needed to cut the larger, 70-foot-long roll in order to make three 180-degree U-turns required by the layout. We made a straight cut through the mesh, being careful not to damage the heating element, then rotated the mat 180 degrees and started a new row in the opposite direction, keeping the cable face-down toward the floor.
The mats were wired in parallel, with two hot legs plus a ground, and were run to a SmartStat dual-voltage programmable thermostat. An in-floor sensor probe was also run to the thermostat—the radiant floor could be controlled either by the temperature of the floor or by ambient air temperature.
After completing the wiring rough-in, we tacked the mat rows into place with a glue gun, 12 inches on-center along the edges and 36 inches in the field, to help hold them in place while we did the rough-and-tumble work of installing the self-leveling compound.
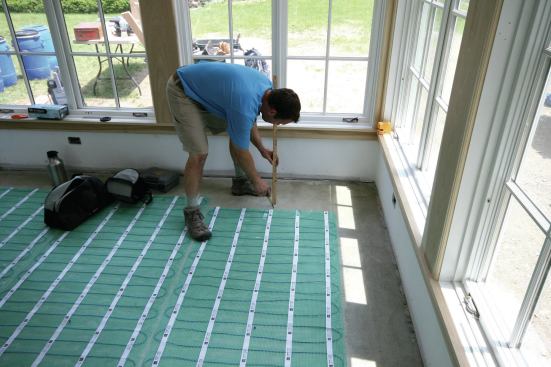
Self-leveling underlayment. To make it easier to pour a level topping, we drilled Tapcon screws into the slab roughly 48 inches on-center to serve as benchmark elevation heights. Using a story-pole stick with a laser level that we placed on the window sill, we tweaked the screw heights to level. While it requires a bit of concentrated effort, installing these screws is well worth it, especially for large rooms or on floors that are significantly out of level. Even though so-called “self-leveling” compounds do even out a bit, you run the risk of ending up with floors that are not quite level or that have subtle rolling mounds, usually where the supply buckets are dumped. The gridwork of leveling screws also helps guide where to dump supply buckets during the pour, making it easier to evenly distribute the material.
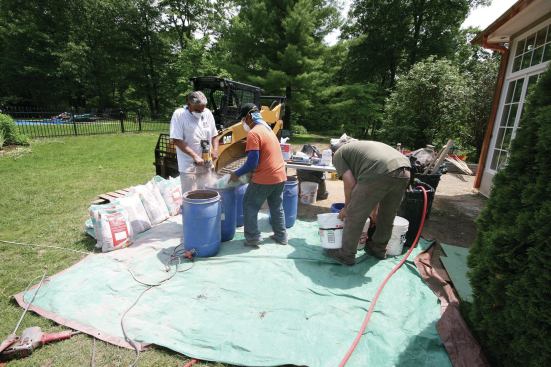
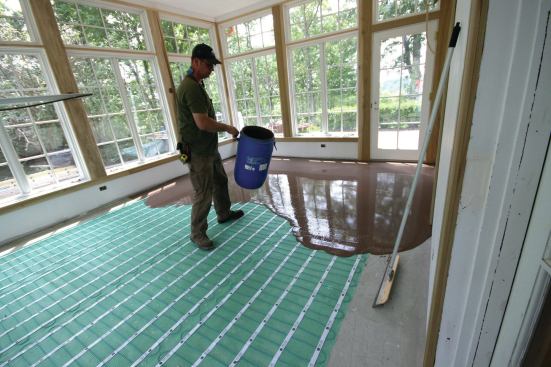
Once the mats were wired and tacked in place and the leveling screws had been installed, it was time for the fun part: pouring the underlayment. We set up a mixing station outside, where we blended Mapei’s Ultraplan Easy self-leveling underlayment with water. We mixed two bags per batch in 15-gallon barrels, first adding the prescribed amount of water, which we carefully measured out in a five-gallon bucket to meet the manufacturer’s recommended water ratio per bag. Using a high-speed mixer (at about 1,200 rpm) with an “egg-beater” paddle, we blended the materials for about 90 to 120 seconds, being careful not to overmix, until we had a homogeneous, lump-free consistency. With a double batch of mixed material in them, the barrels weighed about 125 pounds and took two guys to carry inside and distribute.
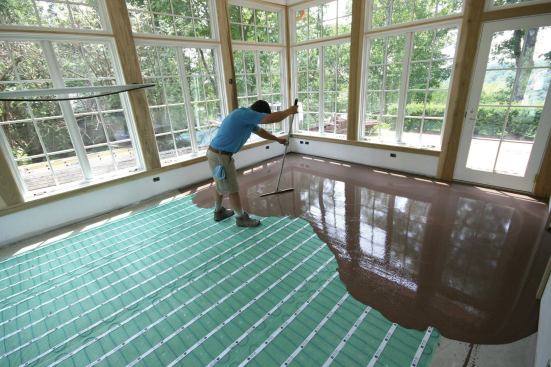
We leveled the underlayment using a float-like tool from Kraft Tool’s Self-Leveling Kit. When you’re installing the self-leveler, it’s important to keep things moving—the material hardens quickly in a couple of hours, throwing off a lot of heat and moisture in the process. It took me by surprise when I went to check on its progress: The sunroom had quickly turned into a sauna, and I had to hastily open all the windows and doors to prevent a build-up of heat and moisture that could have played havoc on the woodwork and windows in the room.
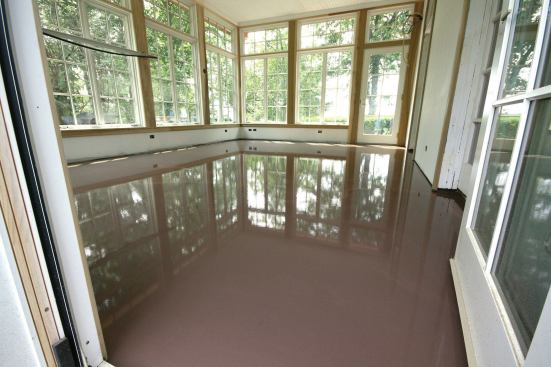
In the end, we mixed a total of 13 double-batch barrels (using 25 to 26 bags of Mapei’s Ultraplan Easy). This provided an average 1/2-inch underlayment thickness and took four of us—one floater/leveler, one bucket runner, and two guys at the mixing station—a half day to install. We allowed it to cure overnight before starting in on the next steps—waiting two weeks before turning on the radiant heat system, per Mapei’s specifications.
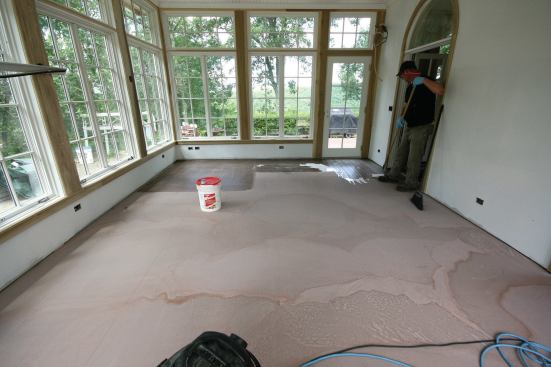
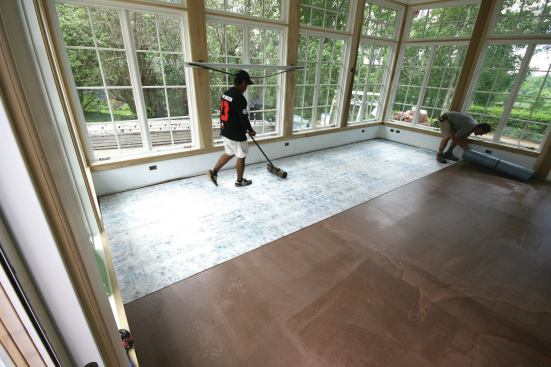
Crack-isolation membrane. The next morning we applied Mapei’s SM Primer to the cured self-leveler with a roller. This latex primer is for use under the crack-isolation membrane to increase the peel-and-stick’s bond to the underlayment. After we rolled it out, it took about 15 minutes to dry.
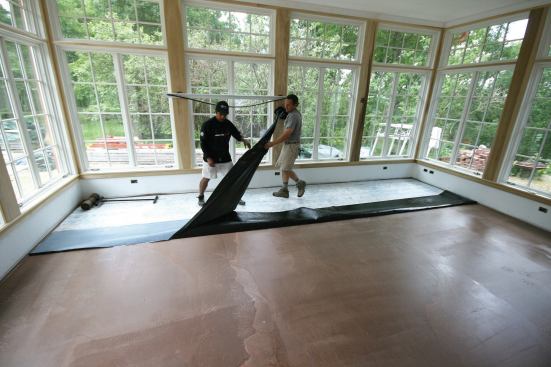
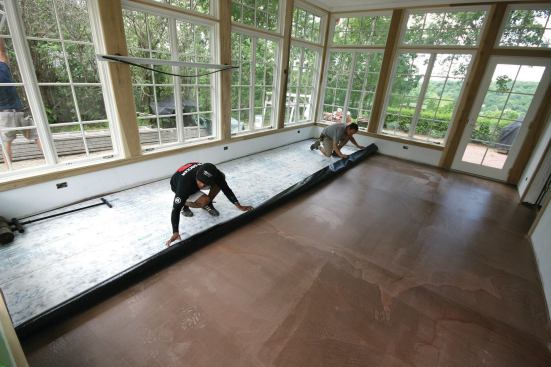
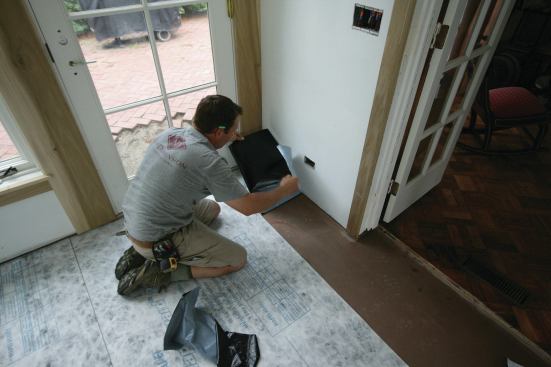
We had been using Mapei’s Aqua Defense liquid–applied membrane, but made the switch to its Mapeguard 2 crack-isolation membrane a couple of years ago. This version is a lightweight, fabric-reinforced 40-mil peel-and-stick that helps prevent existing or future in-plane ?oor cracks from transmitting through tile, natural stone, or grout. Compared with Aqua Defense, Mapeguard 2 allows for more in-plane movement (3/8 inch as opposed to 1/8 inch for the Aqua Defense). This is cheap insurance, especially when dealing with in-floor radiant heating. We pre-fit the 40-inch-wide membrane, cutting it into lengths and laying them out on the floor.
Starting at the easier side of room (opposite the doorways), we installed the membrane. It has a split-release backing, similar to Grace Ice & Water Shield, and it was a two-person job to lay out, release the backing, and roll flat. The membrane is not super sticky, so you can work it a bit to remove small creases and bumps, if need be. We rolled the membrane flat with a 75-pound roller to ensure full contact with the floor. Around the door opening, we had to piece in the membrane, using a smaller roller in the tight spots to burnish the membrane to the floor. Installing the membrane took two guys a half a day to complete.
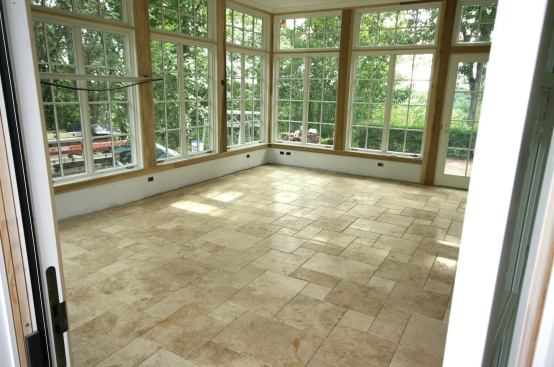
Finish installation
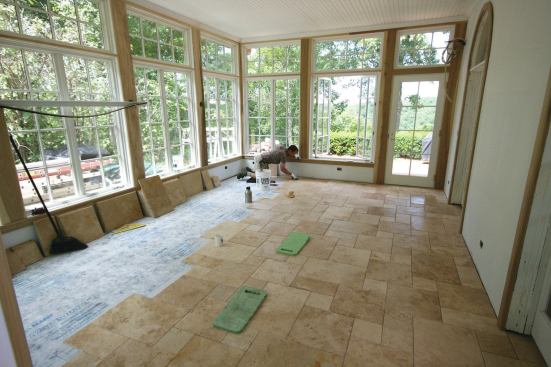
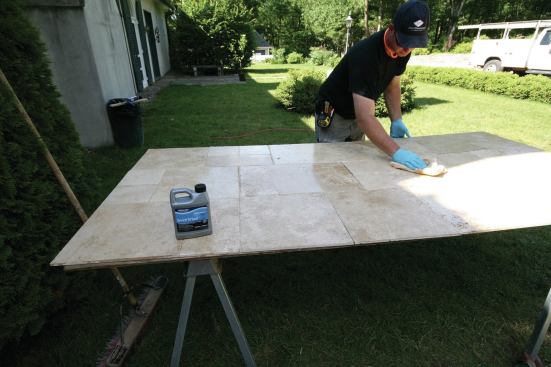
The clients chose ½-inch-thick limestone tile that came in four sizes (8×8, 8×16, 16×16, and 16×24) for layout in a modular pattern. When it arrived on site, it was fairly dusty—the stone was polished but not glazed—and cleaning it was laborious. We used sponges, rags, and water to get as much dust off the stone as we could, then we pre-sealed it. We used Enrich ‘N’ Seal by AquaMix, which immediately darkened the stone, making it look wet—a nice change from the dull, factory-polished finish.
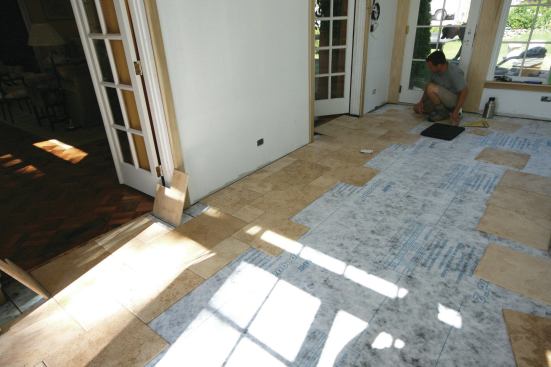
We dry-fit the stone around the door openings, then cut and pieced together the tile to conform with the manufacturer’s recommended modular pattern. It took three laborer-days to clean and seal the tile, and another day for the dry-fit.
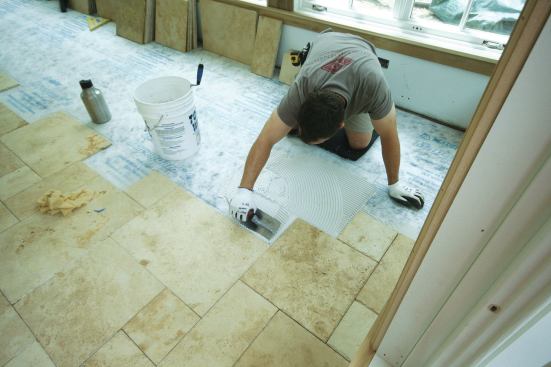
We started setting the stone at the doorways, working toward the “easier” side of the room, using Mapei’s Granirapid System tile mortar. We mixed two gallons of Granirapid liquid into a clean five-gallon bucket with Granirapid white powder, gradually adding the contents of the Granirapid’s 46-pound bag, while slowly mixing. Using a low-speed mixing drill (at about 300 rpm) with an angled cross-blade mixer, we blended it thoroughly until the mixture became a smooth, lump-free paste. We were careful not to overmix or let the mixture stand too long; it needs to be applied fairly quickly.
We used a 1/4-by-3/8-inch notched trowel to spread the mortar, applying only as much mortar as could be tiled before the product skinned over. We placed the tiles firmly into the wet mortar, pushing each one back and forth perpendicular to the trowel lines in order to collapse the mortar ridges and achieve maximum coverage. Also, to ensure proper contact between mortar, tile, and substrate, we periodically lifted a few tiles to check for acceptable coverage. We then removed excess mortar from the joint to two-thirds the tile depth to allow for grout. As a final step, we grouted the tile with Mapei’s Ultracolor grout, then sealed the stone again with Enrich ‘N’ Seal.
All in all, it took two guys one week to set, grout, and seal the stone tile.


