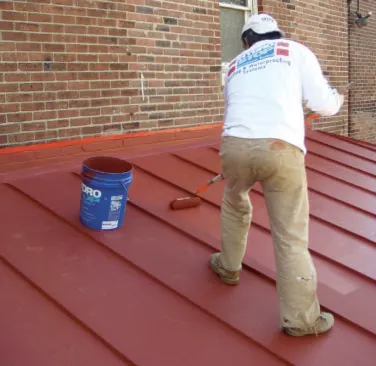
Back in 2009, my remodeling company took on the renovation of a 105-year-old three-story brick structure, vacant for the past 10 years, here in Louisville, Ky. The job included an extensive interior gut and energy rehab along with a new, one-story addition at the back. The original standing-seam terne metal roof (terne is a lead/tin alloy) was intact but in need of attention. We wanted to both restore the original roof and match its appearance on the roof of the addition. As with most remodeling jobs, the budget was a driving concern. But we also wanted to make an example of this home, to show how builders can conserve existing materials when possible.
Instead of Reroofing, Waterproofing
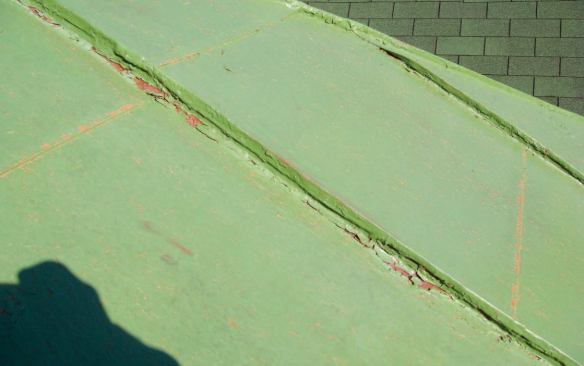
While it may have been more expedient to tear off and replace the old roof, it would also have been costly and unnecessarily wasteful. Instead, we decided to revive the old, corroded metal with GAF’s Hydrostop PremiumCoat, an acrylic elastomeric liquid membrane that’s applied over a reinforcing polyester fabric (gaf.com). The product is specifically designed for roofing; it’s self-flashing and relatively easy to work with. Rather than do everything ourselves, however, we opted to work with a certified installer in order to secure the 10-year warranty. If certified maintenance is performed every decade, the warranty can be extended more or less indefinitely.
Hydrostop can also be used to waterproof metal, masonry, and plywood. This meant that not only could we restore the old metal roof, but by applying “dummy” standing seams to the plywood substrate on the new roof of the addition, we could use the liquid membrane to create a convincing imitation of the old roof.
An added benefit – though not required by any code or regulation – was that the new coating would encapsulate the terne’s high lead content, preventing it from future leaching.
Hydrostop fully cures in about seven days but dries to the touch on the day of application. It comes in 16 standard colors, with custom colors available at extra cost. Once cured, it can also be painted.
The installed cost for coating the existing metal roof came to $8.10 per square foot, which was roughly half the cost of standing-seam copper roofing and close to the cost of new 26-gauge Galvalume – but only if you don’t factor in the cost to remove and dispose of the old roofing. All things considered, Hydrostop was our least expensive option.
Prepping the Existing Metal Roof
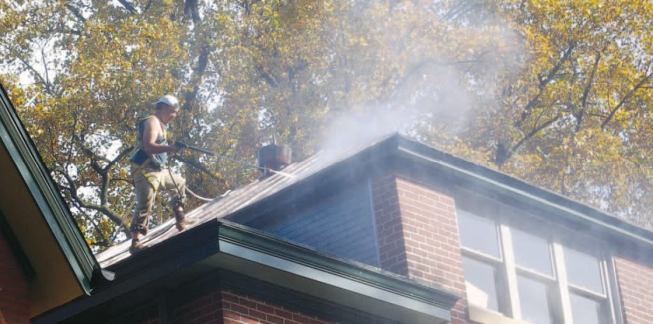
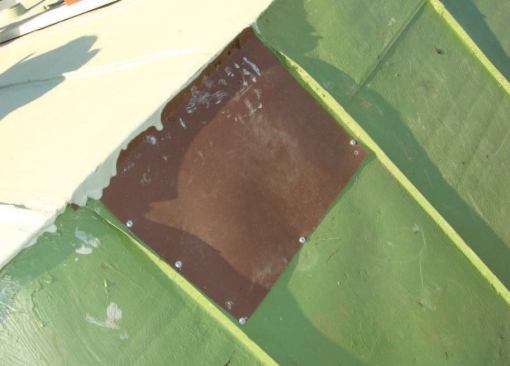
Some years earlier, a coat of rust-red paint – which was now peeling – had been applied to slow corrosion. To prepare the metal for the new coating, the installers first cleaned it with a pressure washer and a wire brush to remove loose paint and other particles that might interfere with a good bond. Past “repairs” included layers of roofing tar applied over chimney and roof vent flashings, but this was not a great concern because Hydrostop effectively bonds to dried asphalt and old asphalt roofing. As long as the material in question is firmly secured to the roof and adjacent surfaces, it can be successfully coated.
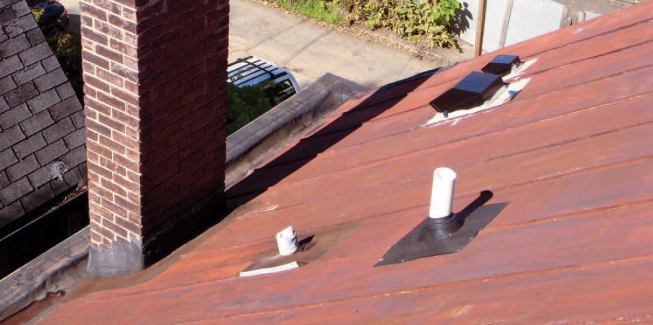
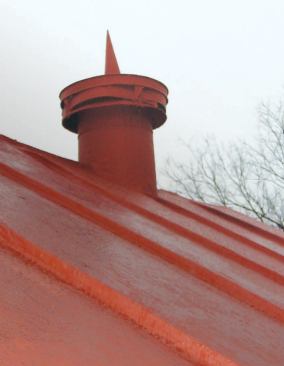
After allowing the roof to fully dry, the installers applied a rusty-metal primer. Its green color helped to highlight any inadequately treated areas; these were recleaned and primed before proceeding. We removed a couple of abandoned plumbing vents along with two of three ridge-top attic vents that were rendered obsolete in the remodel. (The remaining vent – which serves a bathroom fan – was simply coated along with the roofing.)
We screwed a piece of painted aluminum flashing over the old vent holes. The paint on the aluminum and the primer on the roof will prevent any corrosive reaction between the two metals. Under the thick finished application, these patches are nearly invisible. The same holds true for the new vent flashings, which we fastened to the surface of the primed metal roofing and embedded in the subsequent coating layers. One of the beauties of Hydrostop is its repairability – we could have easily added these vents at a later time while still maintaining the monolithic character of the coating.
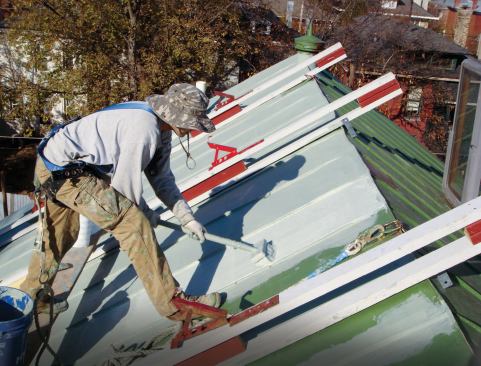
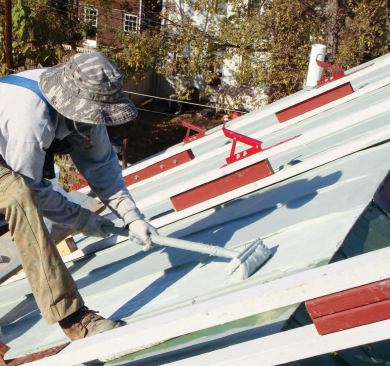
Five-Coat Application
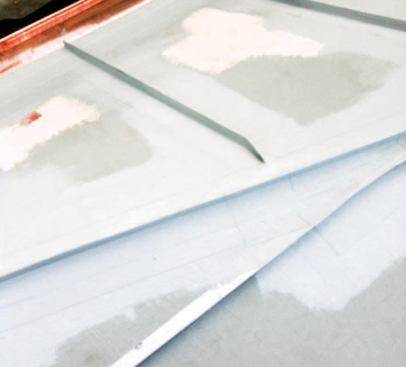
A white bedding coat followed the green primer; again, the contrast between the colors helped us get thorough coverage. The bedding coat secures the polyester reinforcing fabric to the metal substrate. The fabric comes in various widths and can be cut to any length needed. Generally, it’s applied from the bottom of the roof up, in water-shedding order. However, since the finished application provides a complete, waterproof seal, that rule can be violated without risking leaks.
Complicated profiles require careful detailing, so the new and existing roof vent flashing and standing seams are treated first. The bedding coat is brushed over the primer, then the fabric is pressed onto the substrate, with care taken to eliminate trapped air bubbles. Once it’s bedded down, the fabric is thoroughly saturated with another coat. The bedding coat is the heaviest applied and takes the longest to dry – it’s not walkable for at least 12 hours. Drying time varies with weather conditions.
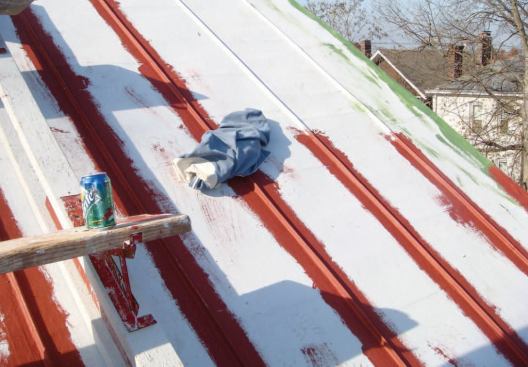
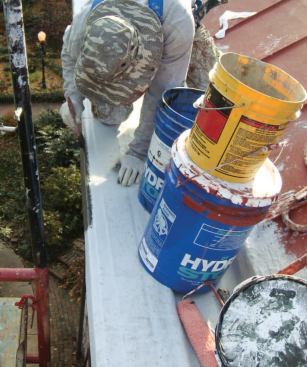
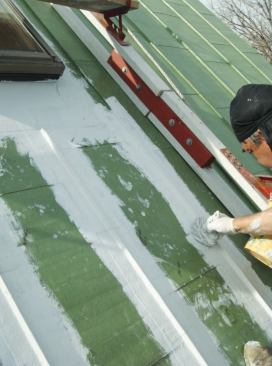
The red finish coat was applied to the seams.
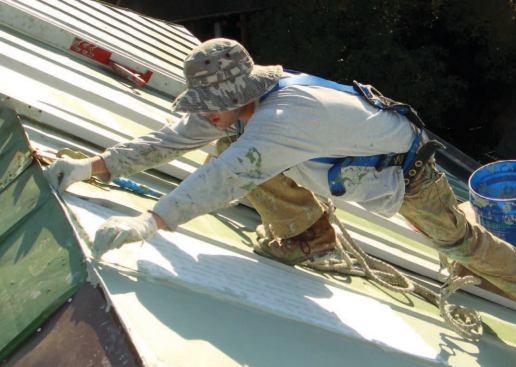
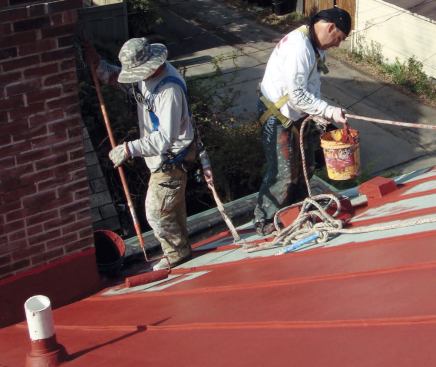
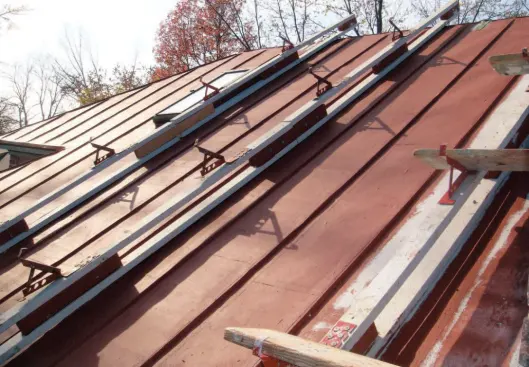
Two applications of top coat completed the installation. The top coats provided the final roof color, “Tinner’s Red” in this case. In flat roof installations where foot traffic is anticipated, at least one additional coat – called “TrafficCoat,” a more wear-resistant formulation – is applied. To work on this roof, the installer showed up with a rather ingenious custom-made system of 2×4 runners, nail-on brackets, and planks. By nesting the bottom end of the runners in the roof’s box gutters and hooking their tops over the ridge, he made them easy to reposition as needed. Hydrostop applied to the underside of the runners helped protect the new roof coatings from scratches.
In a past treatment, the box gutters had been covered with an EPDM membrane that lapped up onto the metal roofing. With the use of CleanAct primer – available as part of the Hydrostop system – EPDM can also be coated with Hydrostop, which allowed us to restore and integrate the gutters once the main roof was completed.
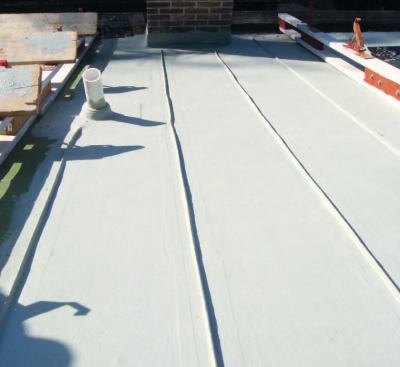
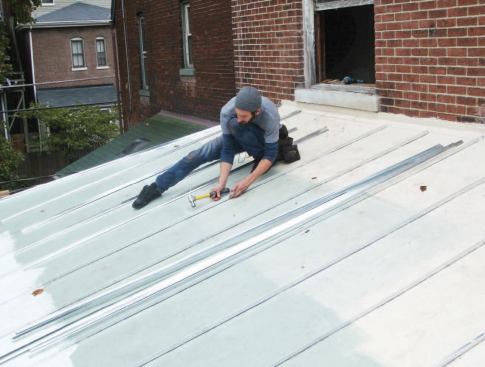
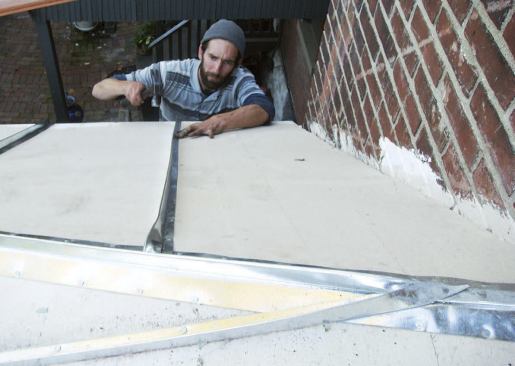
New Roof: Mock Standing Seam
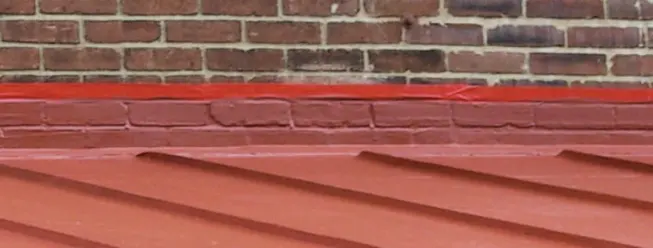
We had the false standing seams for the addition’s roof – intended to help it blend with the older building – fabricated at a local sheet-metal shop. After applying the white base coat to the roof sheathing, the installers nailed the faux seams to the plywood on equal centers, imitating the original metal roof pattern. The sequence of fabric application and additional coats was identical to that used on the main roof. Since the addition was one story, its shed roof abutted the main building’s brick sidewall. Usually in a case like this you would have to fabricate a reglet flashing and cut it into the brick. But because Hydrostop is self-flashing and bonds to masonry, we could simply apply the membrane directly to the face of the brick. The installers protected the brick above the installation line with masking tape, providing a neat finished appearance.
As a final touch, we installed copper gutter at the eaves. These extra expenses – the false seams and the copper gutter – brought the total cost of the addition roof to about $9.80 per square foot. That’s still a pretty good price for creating such a close match to the original roof.


