This past fall was a wet one in coastal Maine. Our go-to roofing contractor was battling his schedule, and we needed to put an EPDM roof on our flat-roofed studio project in order to start the siding phase. We chose to do the work ourselves, rather than find another roofer, for a few reasons: The project is on an island, which scares off a lot of contractors; the roof had out-of-the-ordinary details for southern Maine; we needed only two days of clear weather; and I have experience working with EPDM.
I first learned about installing EPDM from an article in JLC many years ago. A couple of years later, I relied on that article to do a small, simple EPDM roof. Since then, I have completed about 10 more projects.
This project did have a few firsts for me: a parapet wall on all four sides, through-wall scuppers to drain the roof, and self-adhering EPDM. I wanted to try the self-adhering version because we could eliminate the time-consuming step of applying contact adhesive and we could install it in colder temperatures (down to 20°F). It was going to be mid-to-late November by the time we were ready, and the lead time on the kit of parts was about seven days.
As this was a flat roof, we would need to install tapered sheets of rigid foam insulation to provide the necessary pitch to drain water toward the scuppers. We are in climate zone 6, so there would also have to be adequate R-value above the structural roof sheathing to avoid moisture accumulation on the underside of the 5/8-inch plywood. The rafters were 11 7/8-inch I-joists filled with dense-pack cellulose (R-41.5), so following the recommendation from 2015 IRC Table 806.5 of roughly a 50/50 split of cavity to above-sheathing R-values, we needed 6 to 7 inches of polyisocyanurate insulation (PIR).
This 1,000-square-foot building is essentially two conditioned boxes connected by a breezeway roof and deck. We fully sheathed and waterproofed each box before we framed the breezeway roof system. We also delayed framing the parapet walls to simplify waterproofing and air control. This allowed for continuity of the air control layer: Henry Blueskin VP100 on the walls and Henry Blueskin RF200 Ice and Water Barrier on the roof. It is essential to have an air control layer between the roof sheathing and the tapered insulation system to keep air leaks from transporting water vapor into the PIR layers.
I figured out the parapet wall height based on the thickness of PIR at the scuppers, plus the 1/4-inch-per-foot slope of the tapered foam, and the desired height of wall above the high point of foam. The crew added the parapet framing, sheathing, and RF200 a couple of weeks prior to the roofing material delivery. We left a small strip of sheathing out at the breezeway to drain rainwater, and the crew was diligent about pushing ponded water through the gap with a floor squeegee.
I sent PDFs of the construction drawings to a local building supply company, which has a commercial division that quickly worked up a quote with PIR sheet types and counts, along with a layout showing how to build up the layers of PIR (that was great, because I was not looking forward to muddling through that). The same supply company offers self-adhering EPDM from Firestone, and again, its commercial division provides great technical support. Firestone’s website also provides detailed construction drawings and links to well-produced YouTube videos. I chose a thicker offering (60 mil) and used my previous experience to put together the accompanying kit of parts. Here is my complete parts list:
- 1 roll 9″x50′ GenFlex (GF) Peel & Stick EPDM Flashing
- 2 rolls 6″x100′ GF EPDM Peel & Stick RPS Strip
- 1 gallon GF EPDM Splice Adhesive
- 1 gallon GF EPDM Primer
- 1 tube GF Waterstop Mastic
- 6 tubes Firestone FullForce Lap caulk
- 1 GF Peel & Stick EPDM Pipe Boot
- 1,000 count GF 3″ round insulation plates
- 1,000 count GF 2″ round insulation plates
- 2 pad holders with 4 scrubbing pads
- 2 disposable 4″ paint trays
- Nitrile gloves
- Rags
- Paint stirrer with cordless drill
- Heavy-duty scissors
- Chalk or construction crayon
On delivery day, we prepped the site so that the boom truck could get as close to the building as possible, and we cleaned the roof. Self-adhering 10-foot-by-100-foot rolls of 60 mil weigh around 500 pounds, so the boom truck was indispensable; placing the shrink-wrapped bunks of PIR onto the roof with it was a bonus. While we were waiting for clear weather, I laid out the locations of the ridge and valleys for the tapered foam system. This also allowed me to locate the openings for the two through-wall scuppers, cut them out with a hole saw, and apply liquid flashing (Henry AirBloc LF).
The crew builds the roof up with tapered sheets of foam, constructing valleys that lead to scupper locations in the downslope parapet wall.
Building Up the Roof
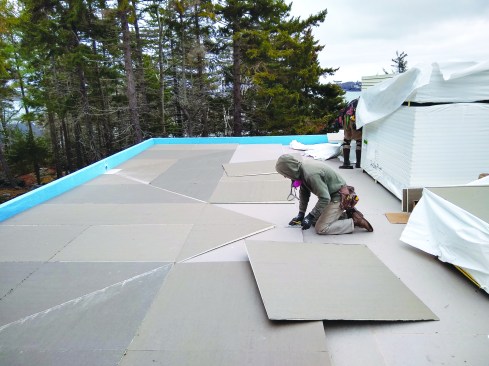
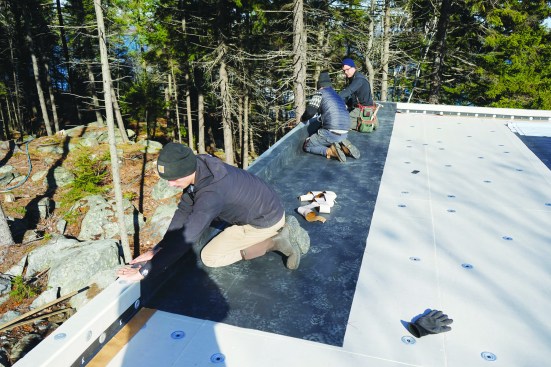
A couple of days later, when the forecast called for 2 1/2 days of colder but precipitation-free weather, we started work. We used wet vacs to suck up ponded water and swept up pine needles and other debris. While the Henry RF200 was drying, we patched and air-sealed the temporary drain and discussed insulation details with the crew. Part of the roof was covered with materials, so we started laying down the first layer of 2 1/2-inch PIR in the open area, then shuffled the bunks of foam and rolls of EPDM onto that layer. This positioned the materials on the upslope portion, away from the scuppers and the more complicated, downslope side. We completed the first layer of 2 1/2‑inch PIR and added sheets of 2-inch PIR according to the layout map. We then snapped lines for the ridge and valleys.
The foam buildup is fastened down with long FastenMaster screws.
We used 1/4-inch-per-foot tapered foam, which comes in 4-by-4‑foot sheets. The thinner sheets range from 1/2 inch to 1 1/2 inches thick and the thicker from 1 1/2 inches to 2 1/2 inches, so to build up the taper after 2 1/2 inches, we installed another layer of 2-inch foam and started again with the thinner tapered sheets. We staggered the joints of each layer to avoid convective currents from warm sheathing to cold EPDM. I chose not to fasten each layer to avoid using a lot of screws and to avoid penetrating the air control layer more than absolutely necessary, but I was prepared to adhere the layers with gun foam adhesive and temporary ballast, if needed.
The roof is about 46 feet by 22 feet, with scuppers placed at the quarter points on one of the long sides, which we designated as the downslope side. We created the slope in the roof using the tapered sheets of foam. At the same time, we oriented the tapers on the sheets to establish the necessary side-to-side slope to funnel water away from the short sides of the roof toward the scuppers. We also created a built-up ridge in the center of the roof, running perpendicular to the long side where the scuppers are, to direct water away from the center and toward the scuppers.
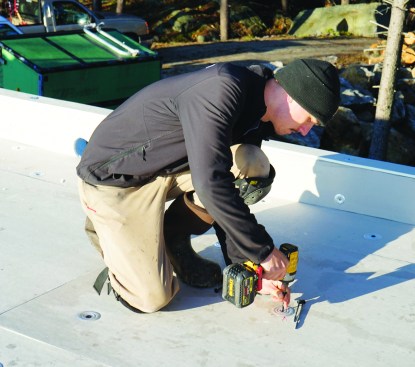
Once this section was built up, we installed a layer of 1/2-inch high-density (HD) PIR cover board. These 4-foot-by-8-foot sheets take the place of the traditional wood-fiber cover board to which EPDM is usually adhered. The self-adhering EPDM sticks well to both varieties of cover board, but the PIR version is more moisture tolerant and has a slightly higher R-value. This HD cover board is flexible enough that it was unnecessary to cut it at the ridge and valleys; we made sure to add enough fasteners to pull it tight to the layers below. To secure the cover board, we used 3-inch metal washers from GenFlex and 5 1/2- to 9-inch FastenMaster HeadLok screws. (Up to that point, the insulation layers had simply been laid in place.)
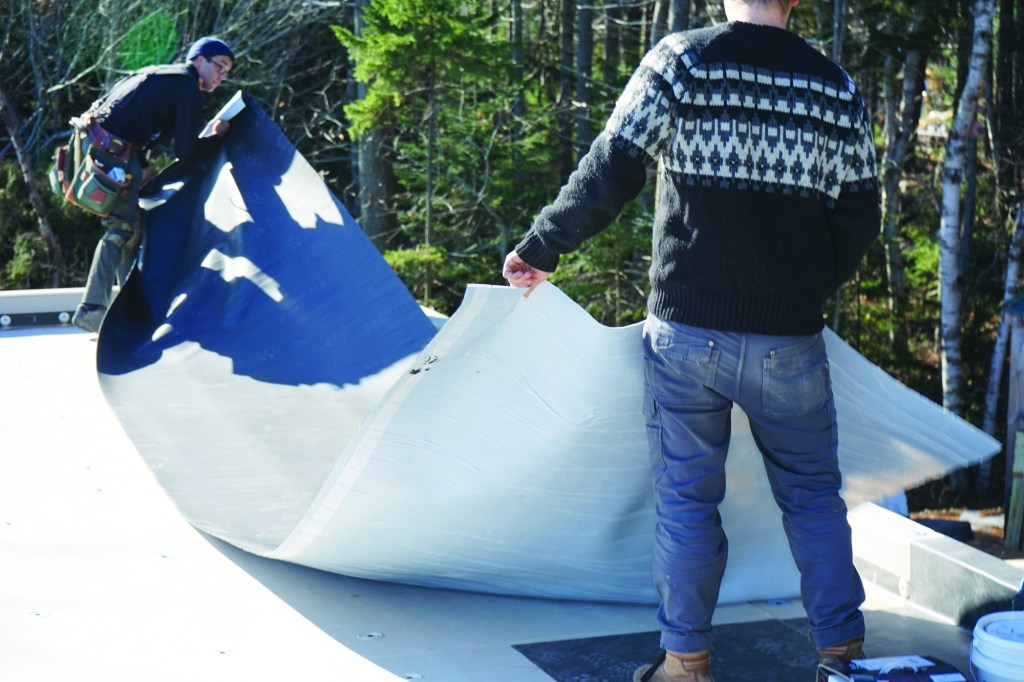
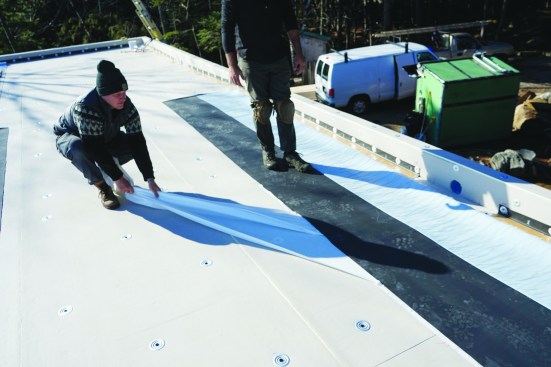
The crew rolls out the EPDM and gives it a half hour to relax.
We did the dance again and shuffled the materials for the last time, to the finished side. Layering in the upslope area of the roof and fastening the cover board went relatively quickly. We then focused on installing more cover board to the sides and top of the parapet, since the EPDM would eventually be wrapped up, over, and down a couple of inches on the outside of the parapet. Two crew members tackled this task by using 2-inch metal washers from GenFlex and 2 1/2-inch R4 screws from GRK. The unused and offcut materials were taken down and stored, and the roof surface swept clean.
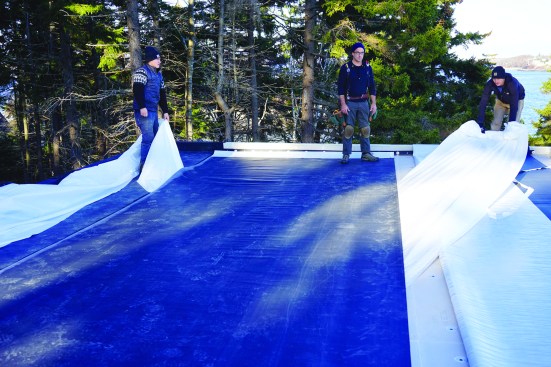
The weather forecast had changed (surprise!) and was calling for a 20% chance of rain overnight with temperatures around freezing. Planning for this, I had bought a monster 40-by-60-foot tarp, which we laid down, ballasted, and battened to the outside face of the parapet. It did indeed rain overnight, and we returned to a tarp covered in ice, slush, and water. If we hadn’t covered the PIR, we would have been forced to remove it all, vac up the water, and wait for it to dry before reinstalling. The heavy-duty waterproof tarp was expensive (around $450) but worth every penny, and we’ll definitely use it again.
Heavy-duty scissors easily cut the membrane.
To simplify the work on the valley portion of the roof, they split one section of EPDM in half.
Installing the EPDM
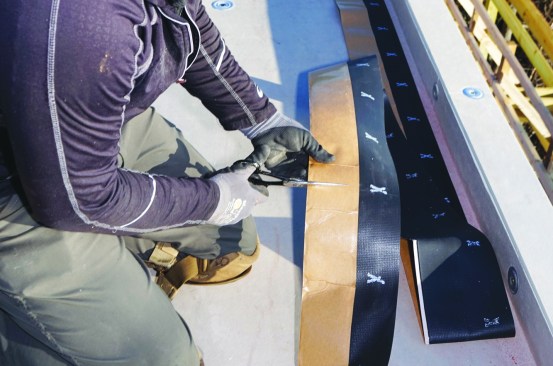
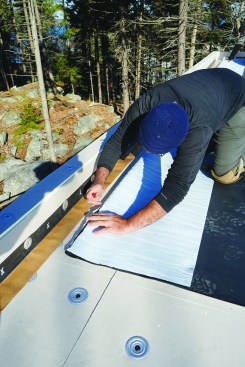
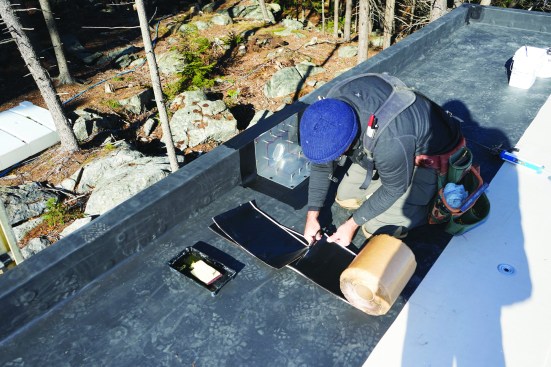
We started the EPDM process by installing a 6-inch reinforced perimeter strip (RPS) from Firestone. It is meant to lessen the fatigue the EPDM will experience at the roof-to-parapet transition. If we were to adhere the membrane directly to the cover board at this horizontal inside corner, it would likely debond over time. We fastened the 3-inch parapet leg of RPS 12 inches on-center with 2-inch metal plates and 2 1/2-inch screws. The 3-inch half on the roof deck had a pressure-sensitive tape covered by selvage paper that we removed just before installing the EPDM.
The reinforced perimeter strip (RPS) is cut to length.
Then it is screwed to the side of the parapet.
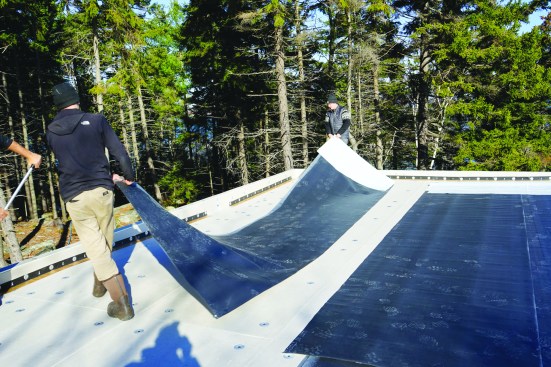
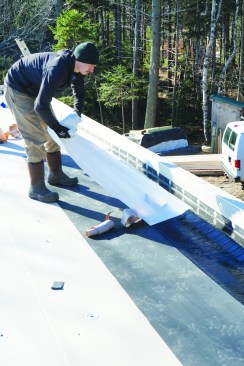
While the last of the RPS was being installed, we rolled out and cut three lengths of EPDM about 2 feet longer than needed. A pair of heavy-duty scissors works well for almost all of the cutting tasks associated with EPDM. After unrolling, it needs to relax for about 30 minutes. We assessed our game plan, made sure we had the necessary materials on hand, and prepped for the first pieces. I wanted to start at the downhill side to properly shingle lap the subsequent runs. This also meant we had to do the more complicated ridge, valley, and scupper portion first. I didn’t know if the EPDM would conform well enough to the undulating surface to avoid wrinkles or stretching, but after watching it relax, I realized it wouldn’t be a problem. Even so, we decided to cut the first sheet in half lengthwise, roughly at the ridge, to simplify things.
The crew slits the backing plastic on the EPDM.
Then the surface of the reinforced perimeter strip (RPS) is primed.
The backing plastic is pulled off the EPDM where it lies on the substrate.
Next, they pull the backing paper off the RPS.
The backing plastic is pulled off the other edge of the membrane.
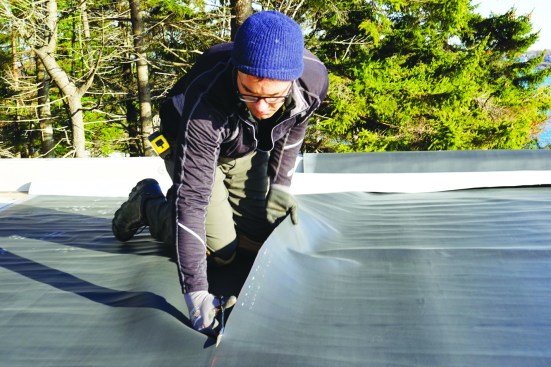
To transition the EPDM over the RPS, it is helpful to carefully slice the backing sheet so you don’t have to remove all of it and risk the sheet adhering to itself or slipping out of position. (Just like traditional contact adhesive, the SA version is stuck if it goes sticky to sticky.) I cut an extra “ZipperKnife” from a ZipWall dust containment kit in half. It works perfectly for this task. We positioned the EPDM where it needed to be, folded it back to just before the RPS at both the long edge and the 10-foot edge, and used the modified ZipperKnife to slice the backer at the folds. This allowed us to adhere the bulk of the sheet and start working the tricky transition areas.
That edge is carefully rolled up onto and over the parapet.
While two of us started the transition, another crew member used a push broom to work any air bubbles out and to apply pressure for a good bond. It is not recommended to use a weighted roller if using PIR cover board. We removed the remaining backing sheet, as well as the selvage paper from the RPS; it is easiest to keep the EPDM folded back onto itself and push it over the RPS and tight into the inside corner. We used our hands to smooth it up and over the wall, and let the remainder lie loose over the outside of the wall as we shifted our focus to the vertical inside parapet corner.
Detailing the parapet corners is a tricky process best learned from Firestone’s YouTube videos. Here, the author cleaned and primed the EPDM before executing his corner fold.
Crew member Zack Payne applied flexible uncured EPDM flashing over a corner joint.
Installation at the vertical inside corner of the parapet is the trickiest part. I won’t try to muddle through an explanation; Firestone’s videos do an excellent job of illustrating this detail. It is key to have splice adhesive on hand to bond the non-adhesive sides of EPDM together. Earlier, while the EPDM was relaxing, we had cut corner patches from 9-inch GenFlex Peel & Stick EPDM Flashing (uncured EPDM). This stretchy, flexible patch, applied over a quick scrub of primer, finishes off the corner detail. We did the other half of this run the same way, but with a little more confidence at the vertical inside corner.

The author rolled a section of EPDM for better adhesion.
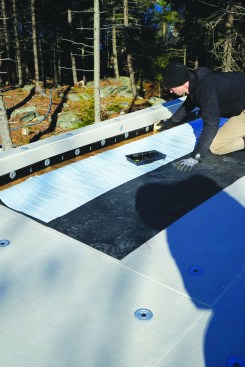
At the ridge splice, we used primer to clean the talc off the face, waited for it to be dry to the touch (about 5 minutes), and then bonded the two sheets together. This is another area where the SA version shines. All it takes is a quick scrub with primer to bond the adhesive side to the face of the membrane; no waiting for primer then splice adhesive to dry (especially handy on a 35°F day). Ensure a high-quality bond of all spliced joints and flashing tape with a good amount of pressure from a small silicone roller.
Crew member Finn Bradenday primed the EPDM at the lap joint.
The second run of EPDM was straightforward with only the two 10-foot ends wrapping up and over the parapet. So while Finn Bradenday and Zack Payne tackled it, I set to detailing the scuppers.

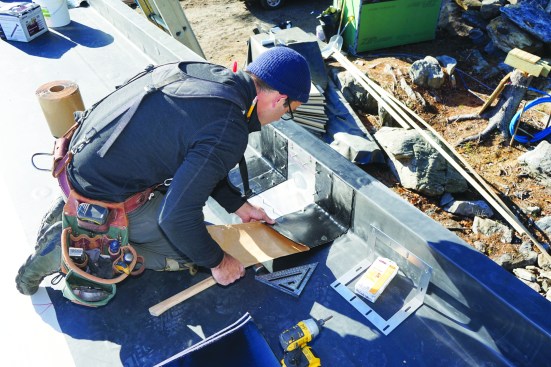
Installing a scupper involves several layers of waterproofing. F…
Detailing the Scuppers
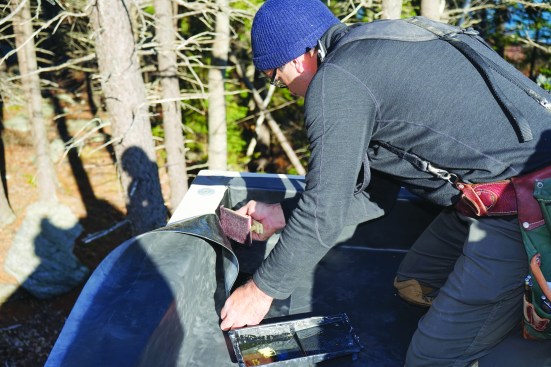
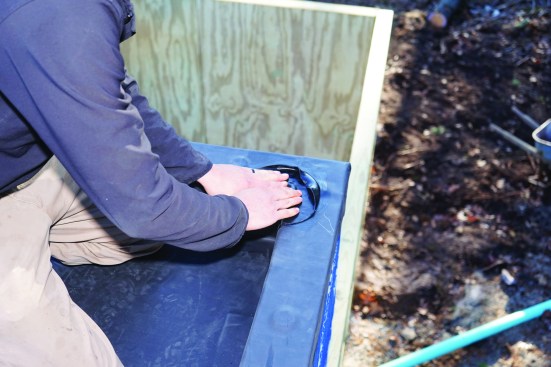
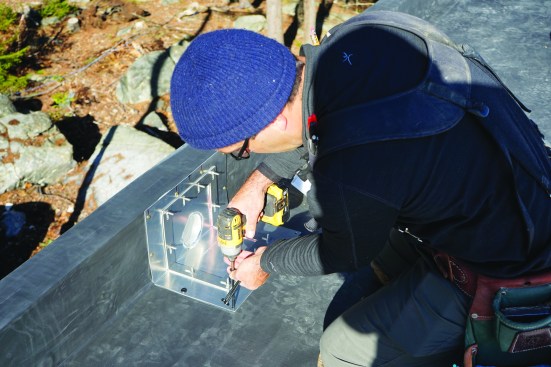
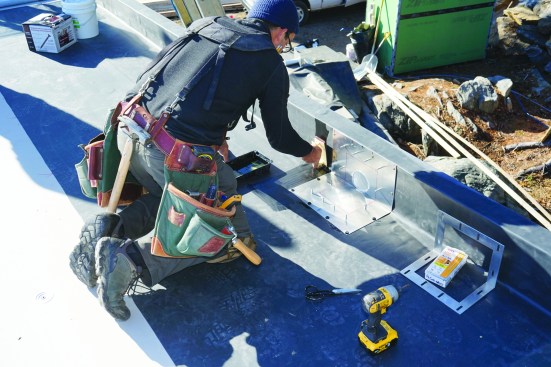
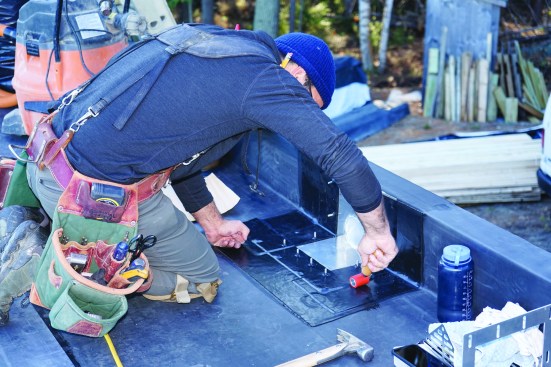
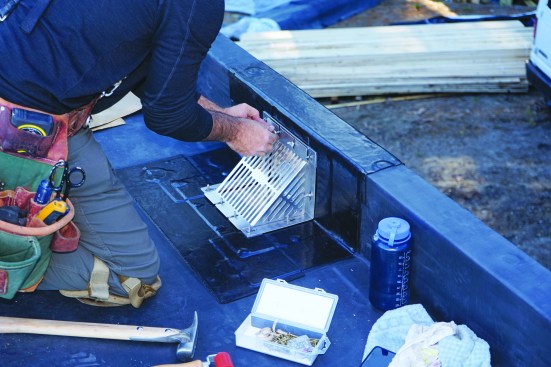
I purchased the aluminum through-wall scuppers from OMG Roofing Products. I began by cutting a hole through the EPDM slightly smaller than the 4-inch drainpipe, hoping that if it ever leaked, maybe this would provide some form of backup to keep water out of the PIR layers. Prior to pushing the drainpipe through, I applied beads of GenFlex EPDM Waterstop, again as a backup.
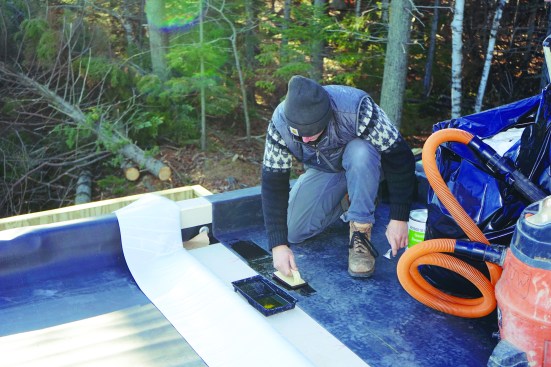
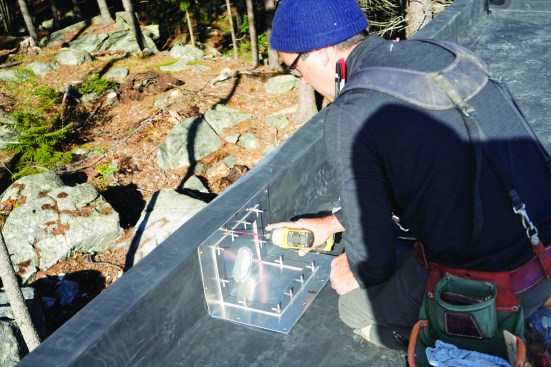
It is a tenacious butyl-blend mastic that works well when using a compression-type seal. I fastened the scupper with appropriate-length screws and then cut four pieces of EPDM flashing tape. I dry fit the 9-inch flashing tape by positioning it over the threaded studs and tapping and perforating it with my hammer, then I pushed it over the studs and traced its outer edge with scissors. The trace lines helped prevent overshooting with the primer and kept things nice and tidy. After the primer dried, we installed the two sides, followed by the top, and then finally, we adhered the roof deck piece to help shingle lap at least some of the tape joints. We then rolled the flashing tape to ensure a good bond. The compression ring was installed with locking hex nuts to “finger tight,” and the grate with wing nuts, again with moderate tightness.
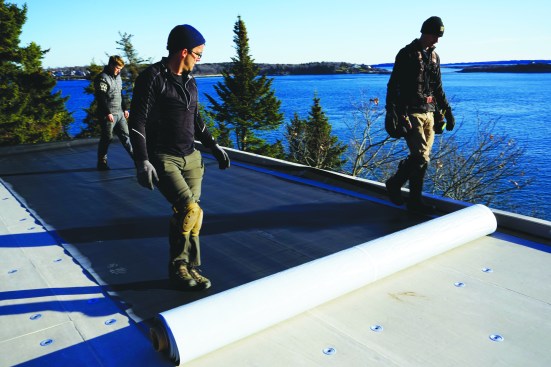
The crew pulled the backing plastic away from a full-width section of EPDM.
Finishing Up
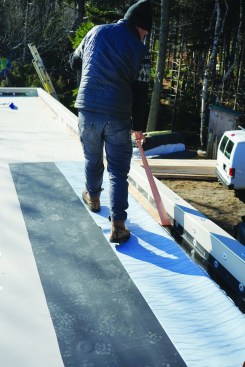
The third and final run of EPDM installed faster as we got more proficient. It helped to have three people installing the long runs. Once a sheet was positioned, we folded 3 or 4 feet onto itself, started removing each half of backing, and then rolled this 3 or 4 feet of membrane back to tack the adhesive side. At this point, two people can start pulling each half of the backing sheet out at a 45-degree angle while a third walks on the membrane to keep an eye on things. There is a little bit of adjustability if it starts to slide off track (not much, though—proper positioning before pulling the backing sheet is key). Again, after the backing is removed, apply pressure with a push broom at a 45-degree angle, and roll the 3- or 4-inch overlaps with a small silicone roller to ensure a good bond. It was tedious using such a small roller for the overlaps, but it was part of the manufacturer’s installation procedure.
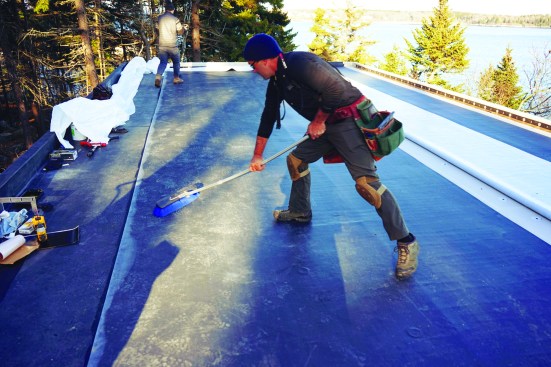
The author used a push broom to press the roofing into place, securing a good bond with the substrate.
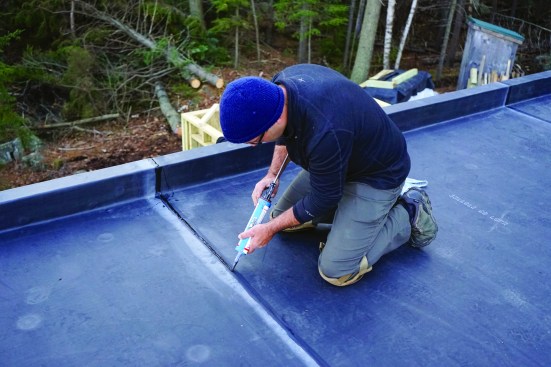
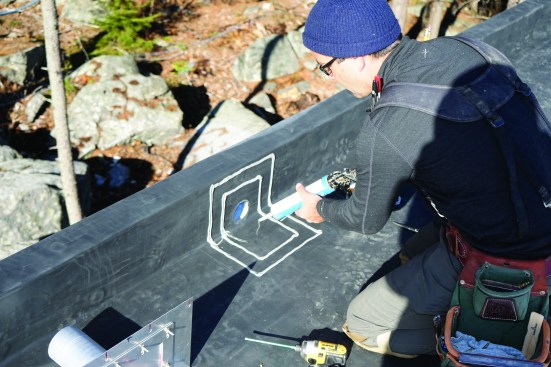
Once all the EPDM was down, the author sealed every seam with lap caulk.
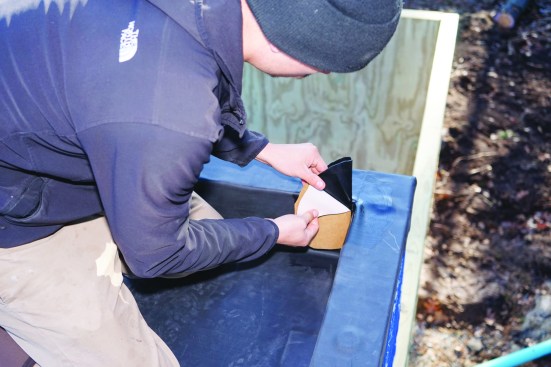
The final step is to apply lap caulk (Firestone Full Force Sealant) at all the field overlap joints (30), flashing tape edges, and inside corner edges. A quick scrub with primer to either side of the overlaps and edges provides a clean bond for generous 3/8-inch-wide-by-1/8-inch-tall beads. Lap caulk should be inspected every four to five years as part of a maintenance schedule, and touched up as needed.
Photos by Ted Cushman and Mark Pollard


