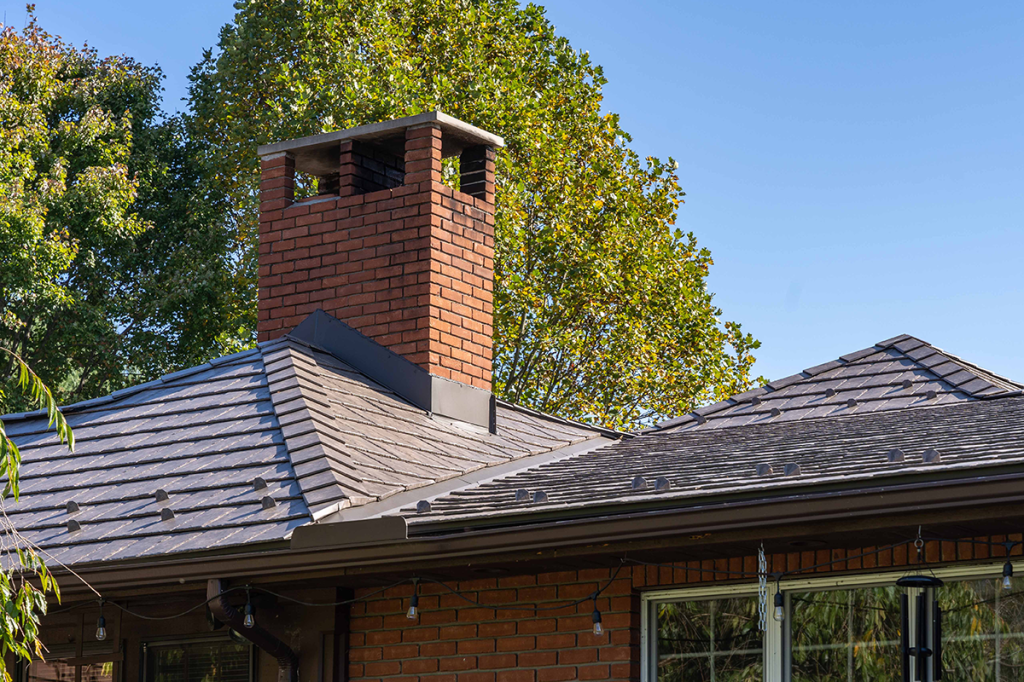
Failed flashing is the number one cause of leaks in a home, and one of the most vulnerable points of moisture entry on a roof is around chimneys and vent pipes. Damaged or improper flashing installation around chimneys or vent pipes makes it easy for moisture to penetrate the roof, which can lead to major problems for the homeowner down the road.
Proper vent pipe and chimney flashing installation is a critical step in preventing water damage. But you can reduce moisture infiltration risk even further by adding weep trims to your flashing system. Doing so helps channel water away from chimney corners and pipes, providing additional protection around vulnerable flashing areas.
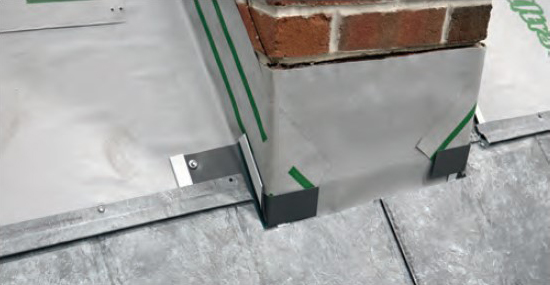
Here’s how to install chimney flashing with a weep trim around a masonry chimney using metal roofing shingles, such as those made by ProVia.
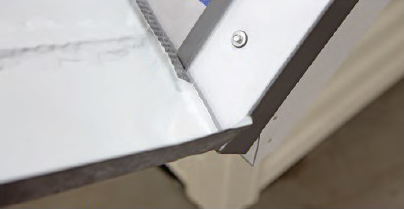
- Cut a 1-inch-deep kerf into the chimney about 6½ inches above the roof deck.
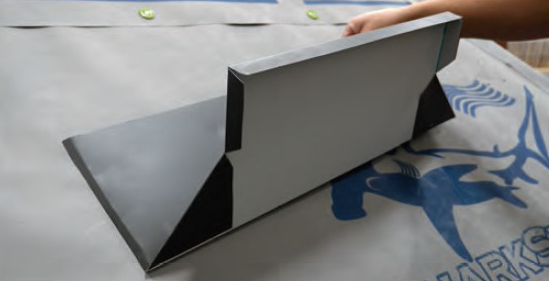
- Install courses of metal roofing panels until there is less than 12 inches left between the chimney and the course of panels below it. Then install a 6-inch x 16-inch weep trim at the bottom corner of the chimney.
- Cut and install the next course of panels over the weep trim flashing.
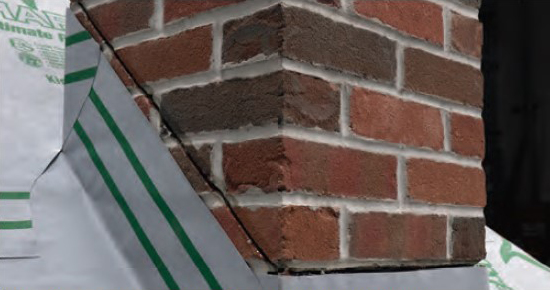
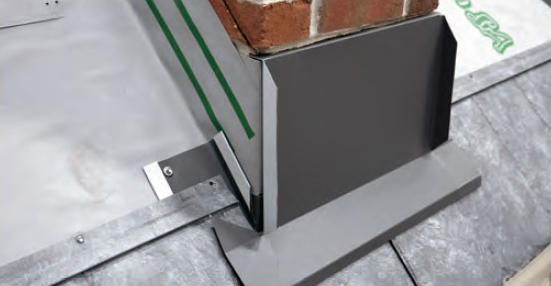
- Field-form an apron flashing to fit into a kerf on the chimney front that will extend from the kerf to the roof deck and at least 4 inches onto the panels, ending with a downturned hem. Position the apron, mark the chimney corner location, and cut the apron flashing 2½ inches wider than the chimney sides. Make a relief cut on the apron, and fold a 1-inch tab forward at the corner of the chimney for locking with the sidewall.
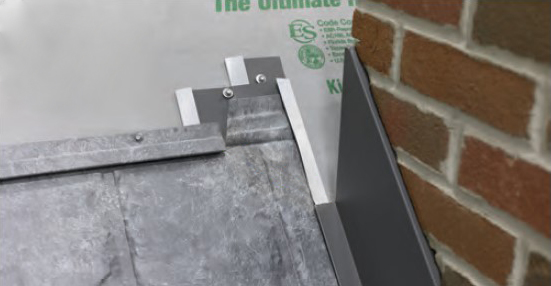
- Fit the sidewall along the sides of the chimney, extending it from the bottom of the apron to at least 3 inches past the top of the chimney. Open the portion of the top lock on the roofing panels that the sidewall overlaps.
- Bend a minimum ¾-inch return at the top of the sidewall leg to fit into the kerf, and position the sidewall against the side of the chimney, making fold lines at the top and bottom corners. Cut the sidewall to allow for 1-inch tabs to wrap around the apron tab and the top corner of the chimney. Then remove the water stop on the portion of the sidewall that overlaps the panel. Fold a ⅝-inch angled downturn at the cut edges of the sidewall water pan with a hand bender.
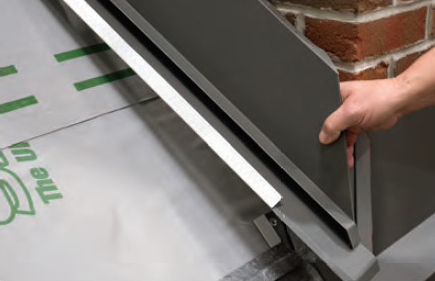
- Fill the kerf with sealant before installing any flashing, then apply a second bead of sealant after flashing installation.
- Install the sidewall using a generous bead of sealant between the water pan and the panel. Make sure to seal all joints for water tightness.
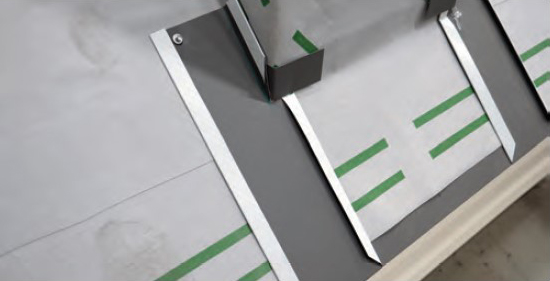
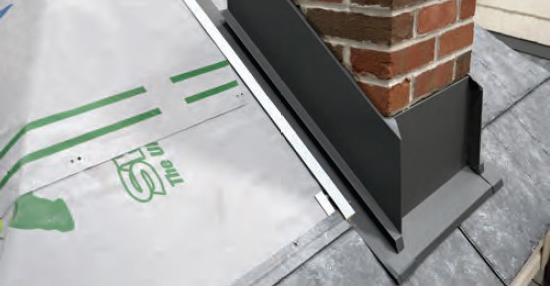
- Cut a 2-inch drain slot into the lock seam of the first panel over the sidewall so the water pan can drain. Install and fit the next courses of panels until the top lock is past the back of the chimney.
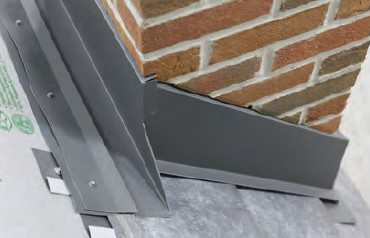
- Field-form a backflash to extend from at least 3 inches beyond the top lock of the last course of panels, down to the chimney, up the back of the chimney, and into the kerf. Cut the backflash 4 inches wider than the corner of the chimney, and form a diverter to guide water around the chimney.
- Open the portion of the top lock on the panels that the backflash overlaps, and install the backflash, using a generous amount of sealant between the flashing and the panels.
- Finally, using #10 x 1-inch hex head screws, install the anchor cleat on the backflash, aligning with the top lock on the last course of roof panels. This will be the lock for the next course of panels installed above the chimney. Apply sealant where the anchor cleat meets the top lock.

Important Note
These guidelines are for a chimney under 30 inches wide. A chimney cricket is recommended for any chimney size, but critically important for any chimney more than 30 inches wide.
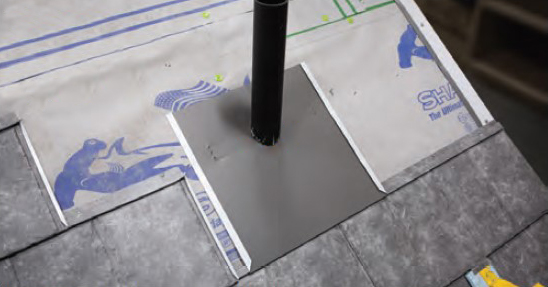
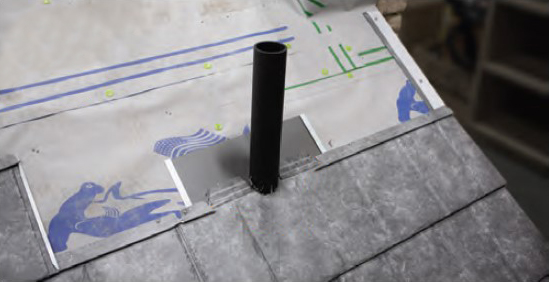
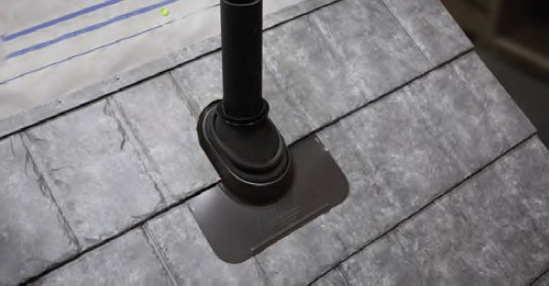
Follow a similar procedure for installing a weep trim with vent pipe flashing, by installing a 20-inch weep trim to fit tightly around the vent pipe while locking onto the top lock of the last course of roof panels below the vent pipe. Be sure to apply sealant around the vent pipe before installing the pipe flashing.

Learn more about the benefits of chimney and vent pipe flashing from ProVia.