Recently my Chicago-based construction company renovated a second-floor apartment in a 19-story building to make it more user-friendly for disabled and elderly residents. It was a pilot project: Like the 198 other apartments in the mid-1970s high-rise, the unit had narrow doorways and a kitchen and bathroom that were virtually unnavigable by wheelchair users. Our goal was to bring the space into compliance with federal Department of Housing and Urban Development (HUD) accessibility standards.
HUD regulations apply not only to all new federally assisted housing projects, but also to any alterations made to a qualifying existing multifamily building, regardless of its age. According to the project’s architect, at least 5 percent of the units in the building will eventually need to meet Uniform Federal Accessibility Standards (UFAS), the guidelines followed by HUD and other agencies, as well as the accessibility requirements contained in our local building code.
Demo and Framing
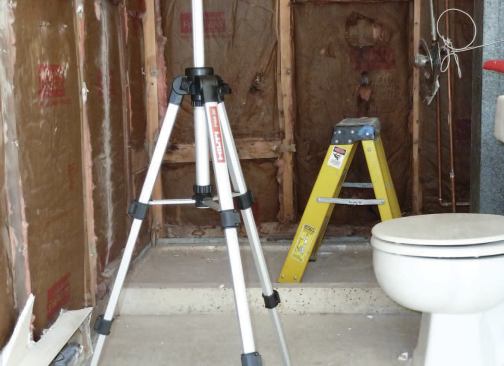
The 19-story building had reinforced-concrete exterior walls and steel-stud partitions. Most of the floors were built with precast Flexicore-panels, but on the second floor – where the apartment was located – the floor deck was reinforced concrete that had been cast in place. The sturdy frame made demolition easy: Since none of the interior apartment walls were load-bearing, they came down in a matter of hours.
Gutting the kitchen and bathroom was straightforward, too, but when we removed a closet that choked off wheelchair access to the entryway, we discovered a 4-inch-diameter cast-iron stack that had been buried in one of its walls. Neither the architect nor the building’s management personnel had been aware of the pipe, which serviced a roof drain some 17 stories above. In fact, it wasn’t even on the original building blueprints, leaving us to assume there had been some on-site changes made to the plans.
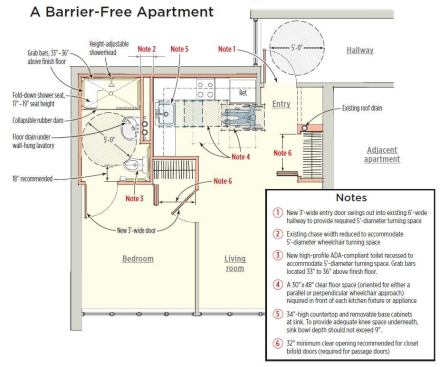
The drain created an obstacle just inside the front door that would interfere with the 5 feet of clear floor space required at the entry. Either the pipe had to go or the door would need to be reversed so that it swung into the hall outside the apartment. After consulting with the architect, we decided to reroute the pipe several feet over and conceal it in the relocated entry closet (see illustration, below).
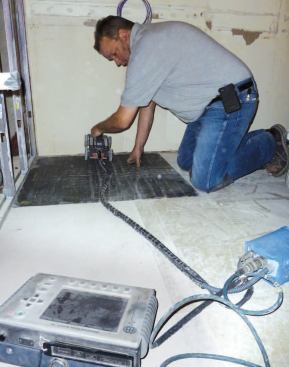
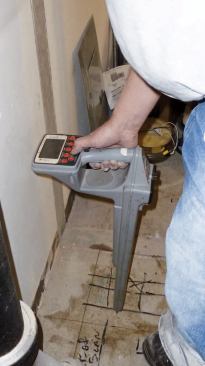
The plan seemed simple enough, but the floor – a suspended concrete slab – was chock-full of rebar, conduit, and other piping. Before drilling into it, we called in a company to locate any obstacles that might be in the path of the new holes we needed to core.
The technician arrived on the scene with an inspection device that uses ground-penetrating radar to determine the exact position of objects within poured concrete. After placing a grid-embossed mat on the floor, he ran a wheeled scanner over the grid on both X and Y axes. The scanner relayed the coordinates of each item embedded in the slab to a connected computer, which then plotted it using the grid as a point of reference. Within minutes we had a road map of sorts, telling us what was where in the floor.
The nominal expense (under $500 to scan four separate locations) was money well-spent, as the technician identified a series of electrical conduits in the path of the proposed hole for the roof drain. Since drilling through the slab in that location was out of the question, we decided to opt for the outswinging entry door after all. The hallway servicing the apartment was 6 feet wide, so we’d easily be able to meet minimum clearance standards.
During his inspection, the technician had also found a number of obstacles in the slab where we planned to locate the new shower drain. But in this case, we were able to simply move the drain over a few inches to avoid any problems.
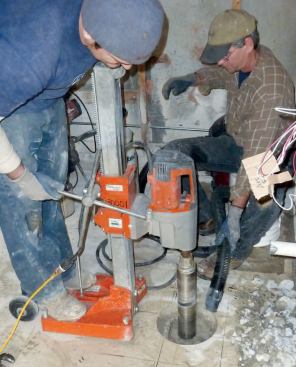
With the locating process complete, the plumbers could safely core holes for new DWV and water supply lines. These would drop below the slab and be tied into the existing plumbing lines between the suspended ceiling on the first floor and the underside of the second-floor slab. Access to the lower level was eased by the fact that it was empty office space rather than occupied apartments.
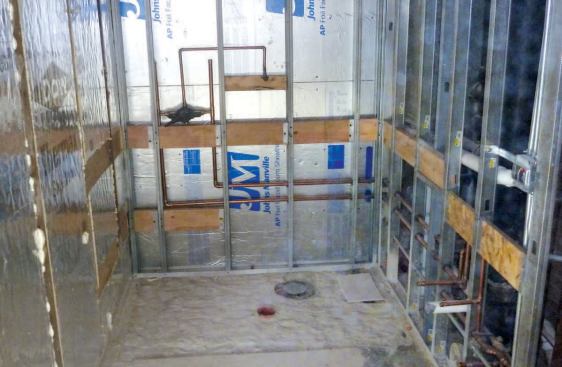
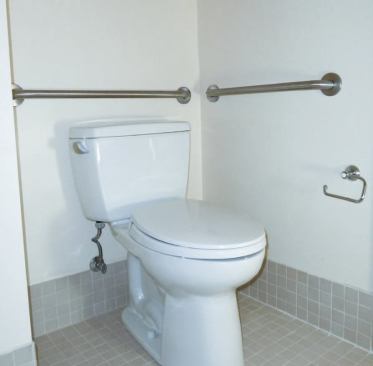
Blocking. We framed the new partitions with steel studs, then installed all the necessary wood blocking for grab bars, fixtures, cabinets, and countertop supports as we went. This is a critical step in any accessible retrofit, as missed or incorrectly positioned blocking would mean having to open finished walls down the road.
Positioning grab bars – which need to be able to support at least 250 pounds – can be particularly tricky, so we installed an almost continuous horizontal row of blocking in both the shower and the toilet areas. We also installed plenty of additional blocking for the folding shower seat, and for the wall-hung lavatory sink and some of the kitchen cabinets and counters, which gave us needed flexibility in their left/right positioning.
Electrical. According to UFAS guidelines, switches, outlets, and similar controls should be located no higher than 48 inches above the floor (54 inches if side access in a wheelchair is possible) and no lower than 15 inches above the floor. Since a number of new boxes needed to be roughed in and a handful of conduits relocated anyway, the electricians installed all the new switch boxes 44 inches above the floor, 4 inches lower than is typical. They also lowered most of the existing switch boxes to 44 inches above the floor. Though not required, reducing the height of the switches by just a few inches makes them a lot easier for someone in a wheelchair to reach.
The electricians also roughed in a pair of new boxes for smoke detectors in the living room and bedroom, which were later tied into the building’s fire alarm system. In addition to an audible signal, the smoke detectors are equipped with flashing strobe lights, so that people who are deaf or hard of hearing have a visual warning when there’s an alarm.
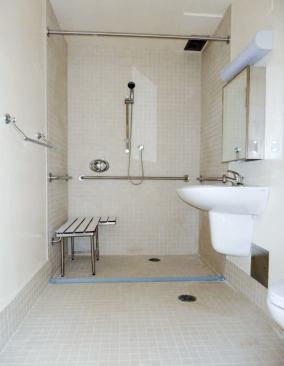
Roll-in Shower
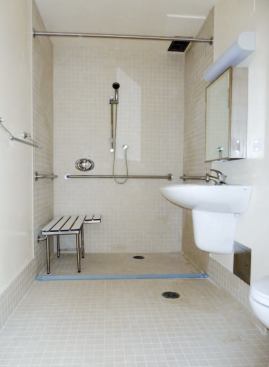
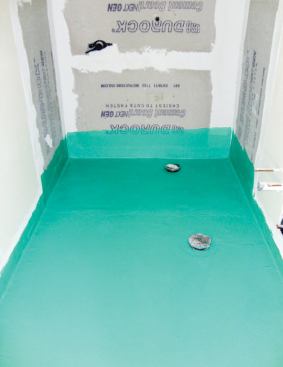
One of the more labor-intensive parts of the project was creating a barrier-free shower in the bathroom. The original terrazzo shower base presented a 3-inch hurdle for someone in a wheelchair. Since UFAS guidelines dictate no more than a 1/2-inch-high curb, plans called for the removal of the shower base and, in its place, the installation of a wider roll-in tile shower.
We had to chip away about one inch of concrete from the 8-inch-thick floor in the shower area to completely eliminate the curb and provide the proper slope for the relocated shower drain. To do this, we first scored the slab in a roughly 3-inch-square grid pattern with an electric cutoff saw set to a depth of 1 inch. Then we broke out the pieces using a rotary hammer in chipping mode. To shape the 36-inch-by-65-inch shower floor and pitch it to the new drain, we screeded a couple of thin coats of unmodified thinset mortar over the roughened concrete.
We rolled three coats of Laticrete 9235 liquid waterproofing membrane (800/243-4788, www.laticrete.com) onto the entire bath floor. When we waterproofed the shower walls, we rolled the waterproofing membrane an extra few inches beyond the shower area. Then we installed the ceramic tile.
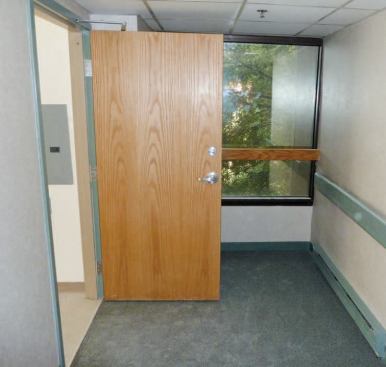
Access
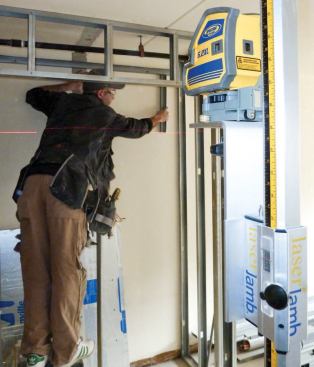
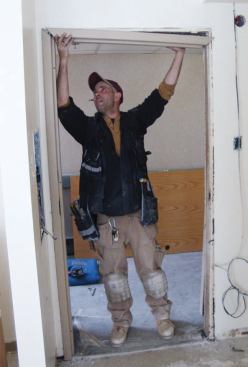
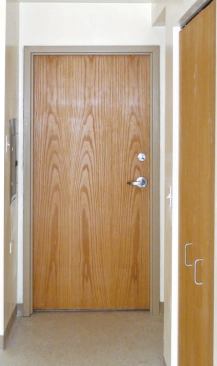
While most wheelchairs are only 26 inches wide, accessibility guidelines typically call for at least a 32-inch clear opening at doorways. To meet this requirement, we replaced the entry, bedroom, and bathroom doors with 36-inch-wide units. The standard off-the-shelf 3/0 doors were fitted with metal jambs – typical in this type of construction. We installed levers rather than knob sets to make the doors easier to operate.
We finished the floors in the kitchen, living room, and bedroom with vinyl composition tile, which is easier than carpet to roll over. Although there’s an eased bullnose transition between the vinyl-tile bedroom floor and the ceramic-tile bathroom floor, the difference between floor heights is less than 1/8 inch (the UFAS allows door thresholds – like shower curbs – to be up to 1/2 inch high).
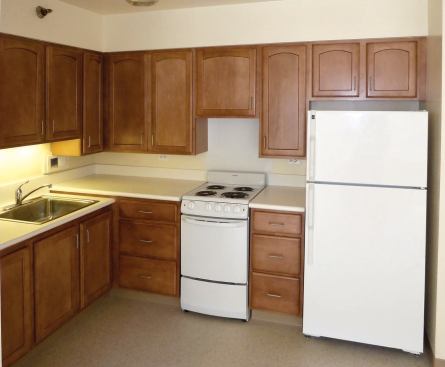
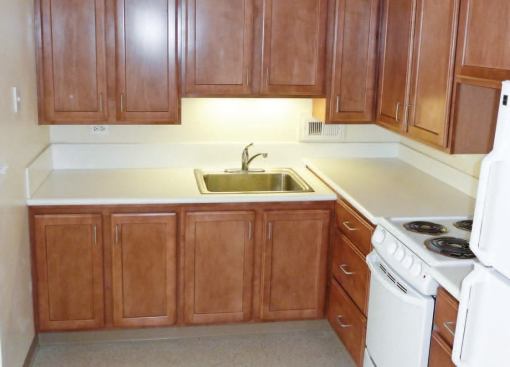
Kitchen
We installed stock lower and upper cabinets, locating the bottoms of the tallest upper cabinets 47 inches above the floor rather than the more typical 54 inches, for easier access. The doors and drawers have U-shaped wire pulls, which are easier to grasp than round knobs.
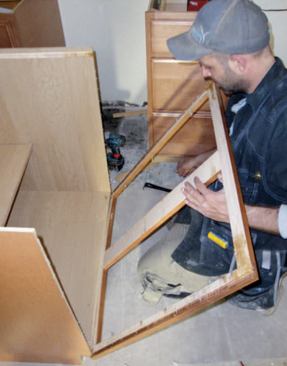
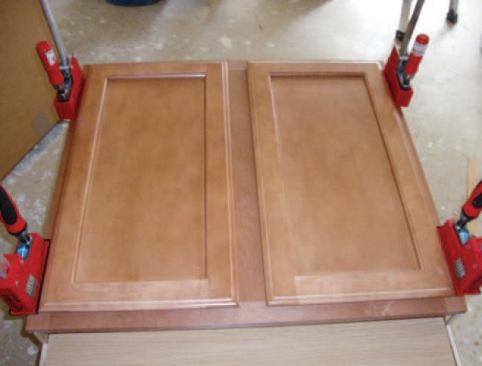
At the sink, plans specified a 34-inch-high countertop, but the cabinet manufacturer’s only 32 1/2-inch-tall UFAS-compliant cabinets had nonstandard 9-inch-high toekicks. To lower the countertop height here while keeping the toekicks and bottom rails at the same level as the rest of the cabinets, we modified two 34 1/2-inch-tall stock base units by removing their face frames and cutting 2 inches off the top of the boxes. Then we applied matching – but shorter – vanity face-frame and door assemblies supplied by the manufacturer.
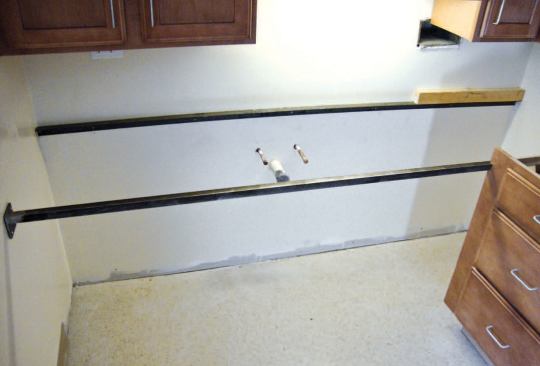
When we were cutting the boxes, we also dramatically shortened the back on the sink base so that it would clear the P-trap and shutoff valves. Now both cabinets can be removed to provide wheelchair access to the sink without disconnecting the plumbing.
We installed a pair of horizontal steel supports for the countertop to bear on so that it too would be unaffected if the cabinets were removed. A length of 1 1/2-inch-by-1 1/2-inch-by-1/8-inch angle iron bolted to the wall carries the rear of the counter, and a custom-fabricated length of 1-inch-by-1-inch bar stock with mounting flanges welded to either end carries the front. The steel bar nests behind the bullnose edge of the 1 1/2-inch-thick solid-surface countertop. We fastened the mounting flanges to blocking buried in the walls with 2-inch-long #8 sheet-metal screws.
Bath
In the shower, we installed a height-adjustable glide-bar showerhead and a Grohe antiscald thermostatic shower valve equipped with a volume control. Located right next to the fold-down shower seat, the valve is easy to use in either a standing or a seated position. Since the walk-in shower no longer has a curb, we installed a WaterStopper, a 1 3/8-inch-high self-adhesive collapsible rubber dam (800/727-9907, www.best-bath.com) to help with water management, plus we added an extra floor drain equipped with a trap primer underneath the lavatory.
We also installed a Toto Drake high-rise toilet (888/295-8134, www.totousa.com) and a matching wall-hung sink. The latter is a two-piece affair consisting of the bowl itself and a shroud that covers the piping below, which satisfies UFAS requirements for knee space and scald protection. On previous projects, we’ve installed preformed insulation specifically designed for scald protection, but I think the two-piece sink offers a cleaner look and does a better job of satisfying HUD requirements.
Cost
A project like this isn’t for the faint-hearted. With a budget of only about $40,000, any profits that we expected when we bid the job dwindled with each glitch that interrupted our schedule. We may be more efficient – and profitable – if we work on multiple-unit rehabs in the same building. But with so much risk and so little reward, that’s a big “if.”
Greg Burnet owns Manor Services, a design-build firm specializing in finish carpentry and millwork in the Chicago area.


