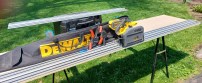
Back in December, Mark Martinez, the original inventor of the Stiletto TiBone hammer, called me up to introduce his newest invention: the Martinez Tools M1 Titanium handle hammer. I have been using a Stiletto TiBone since 2002, and so was eager to try a new hammer design that allegedly overcomes some of the design issues with the TiBone.
The first time I saw a Stiletto hammer was in Las Vegas at JLC LIVE 2000 or 2001. At the time, I was using a Dalluge 24oz with a wooden ax handle; the thought of spending $200 on a hammer seemed to be a waste of money to me. But in 2002, my mom and mother-in-law convinced me to buy the TiBone. Turns out, they understood what aging and repetitive stress can do to the body.
Backstory With the TiBone
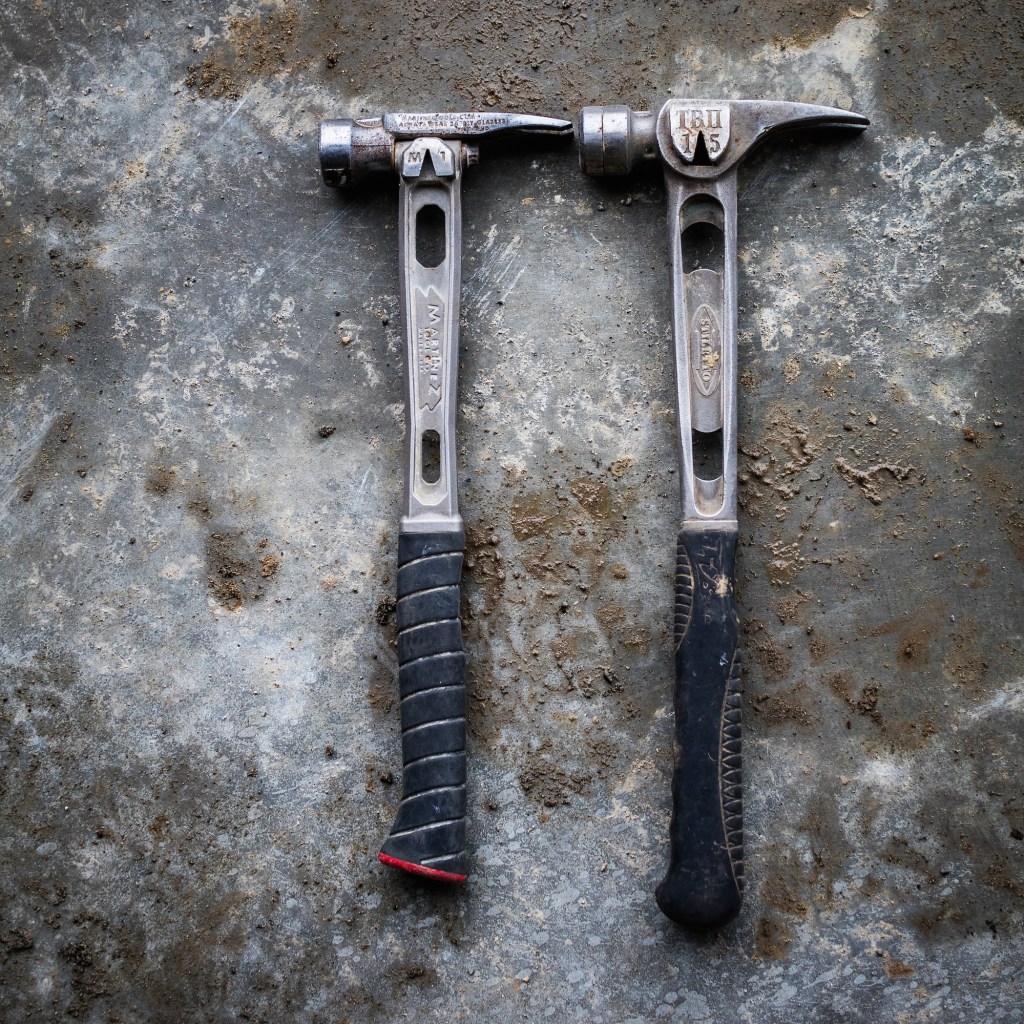
Let me start with some backstory on the TiBone, because the M1 can’t be fully appreciated without this context. The TiBone is an all-titanium hammer with a replaceable steel face. I have been recommending the TiBone for years, despite some of its flaws. Stiletto’s warranty states very clearly that its titanium hammers should not be used to strike hardened-steel like cat’s paws—presumably because it will smooth a milled face. I have always ignored this because I personally don’t care if the milled face of my hammer becomes smooth over time.
Another issue common to the TiBone is that the face will twist and the nail slot will stop lining up, which is exactly what’s happened to all but one of the hammers on my crew over the years. As a frame of reference, I’d say we’ve had 10 of these hammers over the years on the crew. And because of hitting my cat’s paw, the magnet fell out. While I love the nail slot, I don’t care that the face has twisted or that the magnet fell out.
Another issue is that the grip will wear out eventually. When this happens, I send my hammer in to Stiletto and they replace it with a hammer that has similar wear, but a new grip. That has always been good enough for me.
Then Why Did I Recommend It? The pros of the TiBone have always outweighed the cons for me. For example, I have always loved the lighter weight. Although it is only 9 ounces lighter than my old Dalluge, that adds up both as a per-swing weight and when hanging from my nail bags. Fact is, I’m carrying less weight (in my nail bags) with a lighter hammer—and that makes a difference with respect to comfort and fatigue throughout my workday.
The six months before I bought the first TiBone, I went through three wood handles in my Dalluge. I have never broken a TiBone face or handle. I have used my hammer for concrete forming and stripping as well as framing and siding. The metal handle and side nail puller more than make up for the complaints mentioned above.
An additional “pro” is that I’ve learned to swing faster, not harder. It is difficult to quantify what this means, but anyone who has used a TiBone will understand. This isn’t just a lighter hammer; it drives like a heavier hammer, but without the extra energy or wear and tear on my arm. The first test with comparing any metal hammer with the TiBone is to strike concrete with it. With the TiBone, you won’t feel any vibration in your arm.
The Martinez M1 15oz Hammer
Tim Uhler
The M1 features a replaceable head, held on by a 3/8-in. bolt. The bolt spreads two wings that spread as it's tightening, locking the head onto the handle. 15 oz. smooth and milled faced heads are available, and a smaller finish head will be available soon.
The M1 has a titanium handle and a replaceable steel head. After using the M1 for the past several months, I have to say that it addresses each of the “cons” I listed above about the TiBone. To stay well-balanced, the hammer is slightly shorter than the TiBone—which took some getting used to at first, but, once I did, I found I actually preferred it. And what’s the advantage of the M1’s steel head? Well, it can easily be replaced for about $50. You could actually buy the hammer with a milled face and buy a smooth face if you need one and not have to buy two hammers. The one-piece steel head also means the nail slot will always work. The nail slot is large enough for a duplex nail head—something that didn’t matter much to me, but is an example of the amount of thought that went into the hammer’s development.
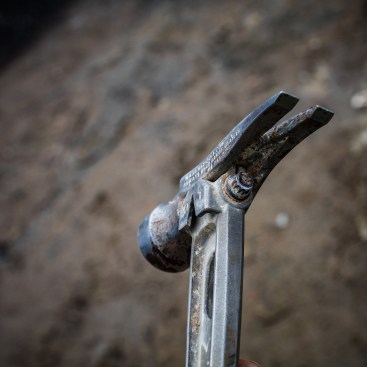
One interesting change over every other hammer I’ve ever used is that the face is slightly angled— meant to create a more solid strike on the nail head. The concept is based on how a hammer lands on the nail as it’s swung. Because the hammer is swung in an arc, the head hits the nail at a slight angle. So in theory, having the face slightly angled is meant to translate into a more even strike on the nail in order to compensate for the arc. I can’t say that I have noticed this improves the strike, but again, it shows me that a lot of attention went into designing the tool—which says a lot to me.
Another advantage the M1 has is that the grip is replaceable. For $30 and literally 30 seconds, you can change out the grip. I found on my Stiletto I got about 5 years before the grip was getting really spongy feeling. My coworker gets about 3 and then the end starts to tear (I think maybe he over-grips?).
On the subject of grip, Mark told me that the company who makes the grip makes grips for Taylor Made Golf and Harley Davidson, and that the silicone compounds are proprietary. This intrigued me, but I thought—so what? It’s a comfortable rubber grip; good enough for me. For the first month using the M1, I held on to this opinion, but after using the hammer in rain and snow and with a variety of gloves, I’ve found that the grip has a slight tacky quality to it that is really comfortable. Mark explained to me that this prevents over gripping, which can lead to problems with soft tissue like tendons and ligaments. Since I turn 40 at the end of this year, I am keen to take care of my body.
I’ve gotten concrete on the grip while we were pouring footings and just wiped it off after we poured (before the concrete had set). I love this grip and while I planned to cut off the curved grip and put on the straight grip he sent me, I like the tackiness too much, so I’ll wait until it wears out before making the switch.

Tim Uhler
The M1 handle features a side nail puller, like the TiBone. Because it is attached to the handle, it is independent of the replaceable heads and so is always there no matter the head configuration you use.
The M1 has the side nail puller that I love so much. For the month before this review was posted, we were building footings and stem wall foundations and stripping them. The side nail puller is great for pulling duplex nails (or any) without breaking the handle. It also means I don’t have to carry a pry bar as I work my way around the foundation.
I used this hammer to drive 16d duplex nails into 1 ⅛” MDO panels. These are very dense and usually I swing harder, but I found that I didn’t really have to swing as hard with this hammer as the heavier 19oz Martinez wood handle hammer that I tested.
Now the steel heads are painted black on the current generation M1, which means that mine is one of kind. How hipster is that!?!
Verdict. I absolutely recommend the M1 over the TiBone. It did take about a month to get used to it being a little shorter, but after that month and going back to the TiBone, the TiBone felt too long. This just tells me the length of either is fine—you can get used to whichever you’re using. But I did prefer the shorter hammer in the end.
The reasons I prefer the M1 come down to the way the head is attached, the grip, and that I don’t have to buy a new hammer if the head either breaks or is too worn or the grip wears out.
Now $225 (plus $10 shipping) isn’t cheap for a hammer. It’s true that in my case we use guns so much that we typically (for a two-man crew) only go through 40 pounds of sinkers a year. But we use hammers for a lot more than driving nails. My technique for pulling nails relies on using the metal handle of my hammer.
I prefer to use a lighter hammer because it is better for my elbow and shoulder and less weight in my bags, and with the metal handle, I don’t have downtime due to broken handles. I use this hammer for most everything.
The downside to the lighter hammer is that it doesn’t persuade materials to move very well. We always have a sledge rolled out and since we reviewed the Fiskar’s 3lb maul, we keep at least one of those out at all times. They are great for tapping a glulam into place or wall to the line.