
Our industry prides itself on quality, both in materials and workmanship. I doubt if any tradesman wakes up in the morning and says to himself, “Today I think I’ll include some defects in my work.” So why do we accept uncontrolled cracks in concrete slabs as unavoidable? It’s a result that no one wants and no one wants to explain, especially to an angry client.
We even have a cliche we use to excuse the phenomenon: “Concrete does two things — it gets hard, and it cracks.” But I disagree with that claim. In fact, as a commercial construction superintendent, I have poured 15,000-square-foot slabs containing 260 cubic yards of concrete without a single crack. And I do nothing different than what thousands of other commercial contractors do every day.
Residential concrete doesn’t usually need to meet the same quality requirements as most commercial concrete, but nevertheless, you can eliminate uncontrolled cracking in your slabs using the techniques and principles I will describe. If you’re pouring your own slabs, this information is essential. If you are a general contractor or builder, you can use this information to more effectively supervise and assist your subcontractor. True, the concrete work may legally be within the subcontractor’s scope of work, but it’s your project, and there’s precious little to be done if the slab comes out poorly. Better to take care of problems before they happen. If I had to summarize the secret to good concrete work in one word, it would be “consistency.” For a successful outcome, you must exercise the same level of care at every stage of the process — design, preparing the subgrade, placing, finishing, and curing.
Prepping the Base
If the subgrade settles after you’ve poured the slab, you increase the likelihood of a crack. It seems obvious, but this is the cause of far too many problems. Several things can contribute to subgrade settlement, but the two prime offenders are soils with different bearing capacity across the area of the slab and improper compaction of the subgrade.
Always make sure the soil is free of topsoil and organic matter. If you have any doubt about the bearing capacity of the soil you’re building on, check with the local building department or other area builders. If you’re still not sure, get the soil tested. The few hundred dollars you’ll pay for soil analysis and a compaction test is nothing compared to going back and fixing a failed foundation.
As the subgrade elevation is being established, make sure that the soil is uniformly and properly compacted (see “Soil Compaction Basics,” 3/94). Compaction will be expressed as a percentage at optimal moisture content (usually 95% or greater), and it’s worth verifying. If you decide not to do a compaction test, at least run the plate tamper or jumping jack until there is very little impression left with each successive pass. It is imperative that soil be compacted in lifts, ideally about 6 inches at a time and never more than 10 inches. If you attempt to compact greater depths, the surface will look good but the soil underneath will remain uncompacted and will settle eventually.
Also, check for uniform bearing capacity of the subgrade. Has the excavator tossed a few buckets of sand into one corner because he excavated just a little too deep the first time around? Will one corner of the slab rest on rock while the remainder is over sand? Better to correct that now by replacing questionable fill with suitable soils that will behave like the rest of the subgrade when properly compacted. What constitutes a suitable soil will vary with local conditions. If you are in doubt, get a professional opinion.
Optimal moisture content happens in a narrowly defined range, so while you may need to add water to dry soils for compaction, take care not to add too much. Sometimes, due to unpredictable weather conditions and routine difficulties with grading and drainage, residential sites get too wet before compaction can take place. What constitutes too wet will vary with soil types, but it doesn’t have to be muddy to be too wet. If you see evidence of pumping action in the soil or near-liquefaction of the soil in the vicinity of compaction equipment, you must stop and correct this condition. Your choices are limited at this point: Either wait for the soil to dry out or over-excavate and replace it.
Flat on the bottom. It’s helpful to picture your slab upside down. If it’s almost as smooth on the bottom as it is on the top, the battle is half won. If it looks like a crater on the moon, then your crack has already begun. Soil must be graded to the same level across the full width of the slab.
A properly prepared subgrade should be uniformly compacted across the full area of the slab, leveled to within 1/2 inch. Your subgrade should be level within 1/2 inch (that’s a 12.5% variation in your slab thickness on a 4-inch slab). Where subgrade elevation is inconsistent, then the slab will vary in thickness. This variation will cause it to cure unevenly, which will stress the concrete, increasing the likelihood of a crack.
Laying Out Contraction Joints
The shape of the slab can greatly affect cracking. An inside corner, for example, is a pressure point and, as far as the concrete is concerned, a great place to crack. Try to divide your slab into symmetrical squares using contraction joints (also called control joints) rather than creating irregular shapes with lots of re-entrant corners. Contraction joints can be hand-tooled right after the bleed water leaves the surface, cut with a saw right after finishing, or formed in the wet concrete using one of the proprietary plastic or metal joint materials. No matter how you make them, all contraction joints work the same way. By creating an intentionally weakened point in the slab, stress from the inevitable shrinkage (as a result of drying or temperature changes) is relieved in a predictable, controlled manner.
A contraction joint should be one-fourth the depth of the slab, or 1 inch in a 4-inch slab. Any less, and it may not function as designed; any more, and you will unnecessarily weaken the slab, risking vertical displacement of the concrete if the subgrade should move.
When laying out a slab, keep in mind that squares are better than rectangles. If you must use a rectangle, make sure the long side is not more than 1 1/2 times the short side. Where it isn’t possible to avoid closely spaced re-entrant corners, additional steel reinforcing may help control cracks.
When laying out contraction joints on a typical 4-inch residential slab, 8- to 12-foot spacing is reasonable. Under ideal conditions, spacing up to about 15 feet between joints may be possible.
Expansion Joints
If the slab is contained by walls, you must provide expansion joints (also known as isolation joints) around the inside perimeter of the foundation to allow the slab to move independently of the wall. The same thing holds true for structural columns — if they are inside the area of the slab, they should be surrounded with expansion joints.
Residential expansion joints are often made with 1/2-inch-thick fiberboard strips. The material can be flush with the surface of the slab if appearance is no concern. For a more finished look, run the length of fiberboard on a table saw to score it 1/2 inch below the top edge (which will be at the surface elevation) so you can easily remove the top 1/2 inch after the pour. Then use a caulk to seal the slab edge.
Remember that the slab must be isolated from the footing, too. Either sand or 15# felt between the slab and footing works well as a bond breaker.
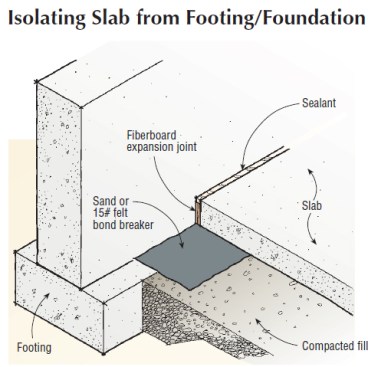
Breaking the bond between the footing and the slab with felt paper or sand will help prevent cracking as the slab moves.
Placing the Steel
Proper placement of reinforcement is critical. At the very least, reinforcing mesh, pipes, and cables should be suspended so that none lie on the bottom of the poured slab. Wire mesh should be in the middle of the slab if it is to do its job properly. Pipe or conduit laid directly on the ground will dramatically weaken the slab; it has the same effect as scoring a ceramic tile before snapping it. However, that same conduit suspended with 1 inch of concrete underneath will have no effect.
Make use of steel or plastic rebar chairs to get the rebar in the right place. Do not use brick, because it will pull moisture out of the surrounding concrete too quickly and create a stress point.
When It’s Time for Concrete
Measure the exact volume of concrete required, then add 10% as a buffer. If you underestimate and have to call for a short load, not only do you waste time, but you may get cracks. Make sure the concrete supplier will have the trucks needed to supply your project without having to wait for an hour between loads. Excessive delay can result in a hot load. If the mix comes out of the chute hot, then send it back.
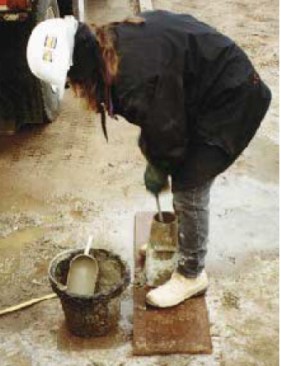
Although few residential contractors use them, slump tests ensure that the concrete coming out of the truck is not too wet.
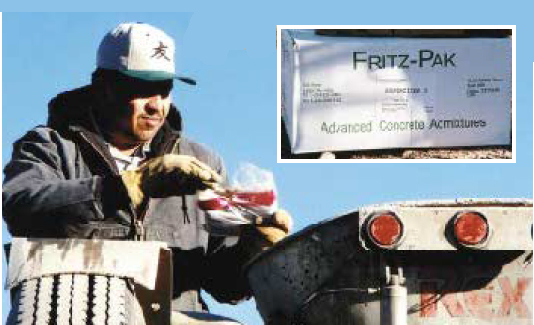
If better flow is needed, add a superplasticizer.
Slump. Proper water content is one of the most important elements of good quality concrete; adding water to concrete to make it flow has a measurable negative result. A slab mix should not have a slump greater than 3 to 4 inches. If smoother flow is required, add superplasticizer, which gives the effect of a 6- to 8-inch slump without weakening the mix.
Placing and Screeding
Concrete is actually a delicate material until it has fully cured. How you treat it during placement is crucial to your success. To avoid segregating the aggregate from the cement paste, never drop concrete more than 6 feet, use the proper concrete tools (not steel rakes), and don’t drag or vibrate the concrete into place. If the soil is particularly dry or you’re working in hot, windy weather, you should wet the subgrade, but not enough to create mud or leave standing water. In cold weather, do not place concrete on frozen ground.
Make sure you have sufficient manpower on site to maintain continuity in placing the concrete. If placing a slab takes too long, the first concrete placed will begin to set up well before the last concrete placed. This makes it difficult to finish the slab in one continuous process.
Finishing
Make sure concrete is screeded and bull-floated as it’s placed, but don’t allow finishing to begin until the bleed water has disappeared. If bleed water is worked into the concrete while finishing, the surface will be weakened. For the same reason, don’t allow finishers to add water in an attempt to ease finishing.
A well-organized, well-timed, uninterrupted work flow is essential. Hand-trowelling the perimeter along walls and around obstacles as concrete is being placed is a good way to start.
All bleed water should have left the surface before any handfinishing or power-trowelling begins.
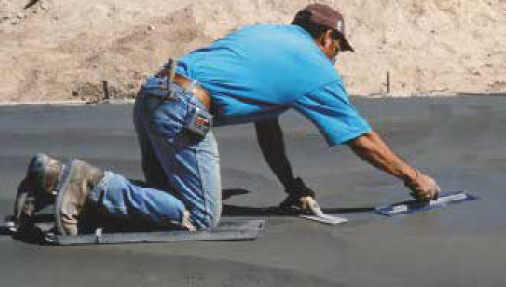
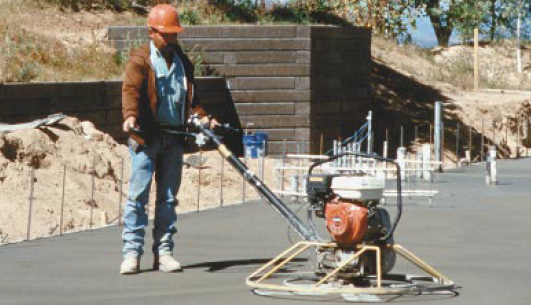
Even with a power trowel on the job, some hand-finishing is necessary around obstructions.
Have the power trowel fueled up and ready to go before you need it. If you exercise a little patience before power trowelling is begun, you can avoid displacing the softer concrete and causing potential low spots in the finished slab (Figure 9).
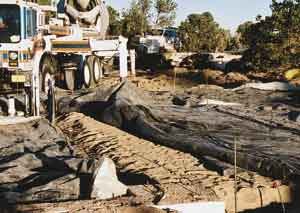
If there is any chance of freezing, blankets are used to protect the subgrade before placing the slab.

The fresh concrete is then covered for at least three days.
Curing
Don’t forget to take care during the curing stage. Initially, the temperature will rise quickly, peak, and then start to drop. This process is stressful on a new slab and can cause failures. Wet curing keeps the slab from drying out too fast during this process. Cover a fresh slab with a layer of burlap immediately after finishing, and keep it wet with a lawn sprinkler for at least three days (ideally seven days). Or, cover the slab with a layer of plastic. Wet curing will ensure an even and controlled cure. In cold weather, make sure that fresh concrete is protected from freezing.


