Carpenters laid out and cut the stone for this patterned floor
by Patricia McDaniel
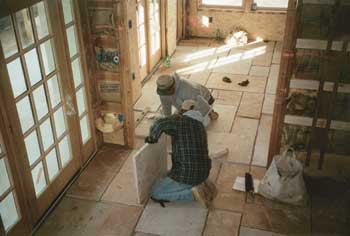
Figure 1. The Arizona sandstone the author used came in large, irregular slabs of varying thickness. |
The project architect created the layout, a 6×6-foot repeating square containing 11 rectangular pieces (Figure 2). Because so much cutting was involved — and because the soft sandstone cuts fairly easily — we decided to use our own crew to cut and dry-fit the pieces, then bring the mason in to set and grout the stone.
Figure 2. A repeating grid of 11 rectangles made a pleasing floor layout. |
Jigsaw Puzzle
Arizona sandstone is sold by the ton, in pallets of about 1 1/2 tons. The stone yard told us to expect 110 square feet of coverage per ton. Since we were cutting the irregular slabs into rectangles, we thought we’d need to add in about 20% for waste, for a total of about 5 tons of stone for a 460-square-foot area. In fact, waste was quite a bit higher than expected, and we ended up needing 8 tons. Fortunately, we’ll be able to use much of the sizable scrap pile elsewhere on the project. With the help of CAD, we superimposed the stone layout on the floor plan. There were ten different sizes of stone, ranging from 24×36 inches to 12×18 inches. Using colored pencils, we marked and counted the number of each size, then made full-size templates for each from scrap OSB (Figure 3).
Figure 3. OSB templates assisted in getting the best yield from the stone slabs. |


