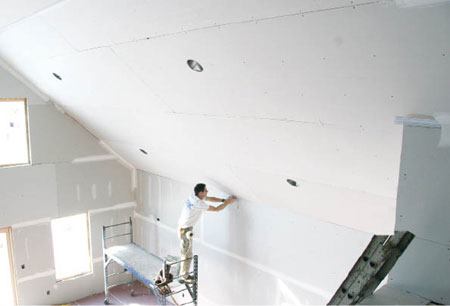
I once had a customer who had a cathedral ceiling in her bedroom, with a large oval window in one of the gable-end walls. Long after the drywall was hung, taped, and painted, she complained that when the sun was setting, she could see a shadow along a butted end seam on the ceiling. (Of course, the seam was invisible any other time of the day or night.) Ever since, I’ve been very careful about where I put butt joints.
These days, many of the homes I hang drywall in are even trickier than that house, with open floor plans, high ceilings, and lots of windows. They also tend to feature special lighting effects — including downlights, spotlighting, and sconces — and glossy paint finishes rather than flat paints and textured surfaces or wallpaper. With all of this light shining across reflective walls and ceilings at low angles, particular attention must be paid to the drywall finish.
Finish Levels
Think of installed drywall as a kind of patchwork, with tape and compound used to strengthen the seams and blend all of the gypsum-board sheets together. Sanding the compounded areas smooth creates different textures on the surface of the drywall: very smooth areas that have been coated with compound; uncoated — but sanded — areas on the drywall surface (often the fibers of the paper are slightly raised after sanding); and the remaining, untouched paper-surface areas (the paper surface is not as smooth as the sanded joint compound). In addition there are sometimes slight bumps or recesses at the seams — especially at butt joints — and slight craters or excess compound over the fasteners. Under most circumstances, none of these differences show up under a paint finish, but occasionally they are as glaringly obvious as my client’s drywall seam.
A good drywall contractor can’t always avoid butt joints, but he can plan them so they don’t fall in an obvious location. Likewise, gypsum board can be finished to a uniform texture and porosity; the trick is to know where and when this higher level of finish is needed.
To avoid confusion and help architects, contractors, and decorators arrive at the proper level of finish, the major trade associations involved in the manufacture, installation, and finishing of gypsum board have developed an industry-wide rating system for finished drywall. Under this system, a Level 0 finish is merely installed drywall, with no taping or finishing. A Level 1 finish — often called “fire taping” — has tape embedded in joint compound at joints and angles. In a Level 2 finish, corner beads and fasteners also get a coat of compound; this finish is often specified in garages and when surfaces will be covered with paneling or similar materials. Level 3 finishes are appropriate when heavy textures or heavy-grade wall coverings are going to be applied. Level 4 finishes are most common, but in fact they’re recommended only with flat paints, light textures, or lightweight wall coverings. The best finish is Level 5, a smooth and uniform surface ready for the highest gloss paint and toughest lighting conditions.
From Level 4 to Level 5
One way to upgrade to a Level 5 finish is to skim-coat a Level 4 finish with watered-down joint compound. The skim coat smooths the texture of the paper and reduces differences in surface porosity, creating a more uniform paint substrate. The compound can be applied either by trowel or with a short-nap paint roller, then immediately removed with a wide knife before it has a chance to dry. I add 20 cents per square foot to the cost of a Level 4 finish for this upgrade.
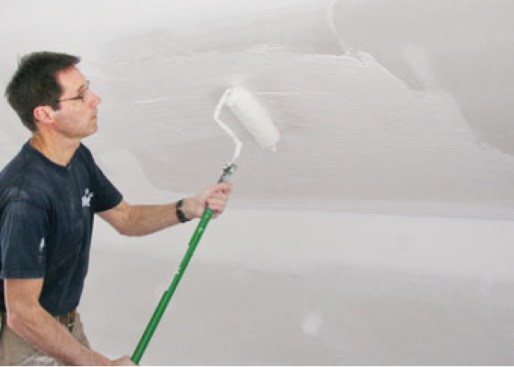
He applies it to the drywall with a 1/2-inch nap paint roller
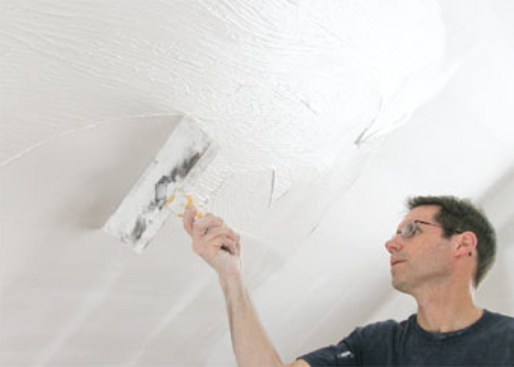
He removes excess compound with a wide knife before it has a chance to dry, then lightly sands the entire surface before priming.
Alternatively, many drywall suppliers and paint companies now offer spray-applied primer-surfacers that are applied in a thick coat over a sanded Level 4 finish. When properly used, these primers offer both a Level 5 finish and a primed, ready-for-paint surface. While a product like Sheetrock Tuff-Hide (800/874-4968, usg.com) is more expensive than a conventional primer (between $50 to $75 for 5 gallons), the total cost of a spray-applied Level 5 finish is about 28 cents per square foot, compared with about 35 cents per square foot for a hand-applied Level 5 finish and one coat of primer.
Spec’ing the Job
Specifying different finish levels for various parts of the house in a drywall bid or contract document encourages competitive bidding. It also makes it more likely that the customer will be satisfied when the work is done.
For example, a few years ago I finished the drywall in a house that had a large great room with a cathedral ceiling, 10-foot high walls, and lots of natural light. The same Level 4 drywall finish was specified everywhere, but as it turned out most of the lower walls in the great room were covered with bookshelves, paintings, and a large flat-screen TV. If this had been spelled out in the contract or if the contractor had communicated these details to me, I could have simply given these areas a two-coat Level 3 finish and focused my efforts on the ceiling, where joint photographing would be really noticeable without a Level 5 finish. The GC and his client would have gotten a better job for the same amount of money.
Now — even though I know I’ve lost some jobs because of it — I try not to offer simple per-square-foot pricing for hanging and taping drywall. When a specific finish level isn’t specified by an architect, contractor, or decorator in a bid sheet, I find out how the rooms will be lit, by both natural light from windows and artificial light from ceiling and wall fixtures. I also want to know what kind of finish will be applied over the drywall. Finally, I try to educate the contractors with whom I work about the different levels of finish for drywall; I give them copies of the pamphlet “Recommended Levels of Gypsum Board Finishing” (form GA-214-07, available at gypsum.org).
All photos by Linda Ferguson


