Much of my work these days is repairing or replacing windows, doors, and porches on homes that were built fairly recently, some even within the last 15 to 20 years. In most cases, the damage was caused by poor workmanship, such as reversed or nonexistent flashing. It’s frustrating because these features would have lasted a lot longer if the contractor had paid more attention to details; on the other hand, these problems create a good business opportunity for me.
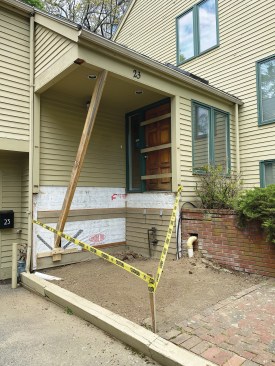
To satisfy the zoning permit, the new porch and stairs had to fit the existing footprint.
The porch described in this article offers a good example. Built at the same time as the house in the 1980s, it seemed to be in reasonable condition until one took a closer look. The cracked and peeling paint finish on the fir decking concealed the beginnings of rot, the wobbly railing needed replacement, and when I dug around the bottom of the corner support post to evaluate the footing, I found a couple of inches of rot and no hardware to connect the post to the footing. In addition, the homeowner wanted to replace an extremely heavy access door to the area under the porch with a lighter one that would be easier for him to operate.
Demo
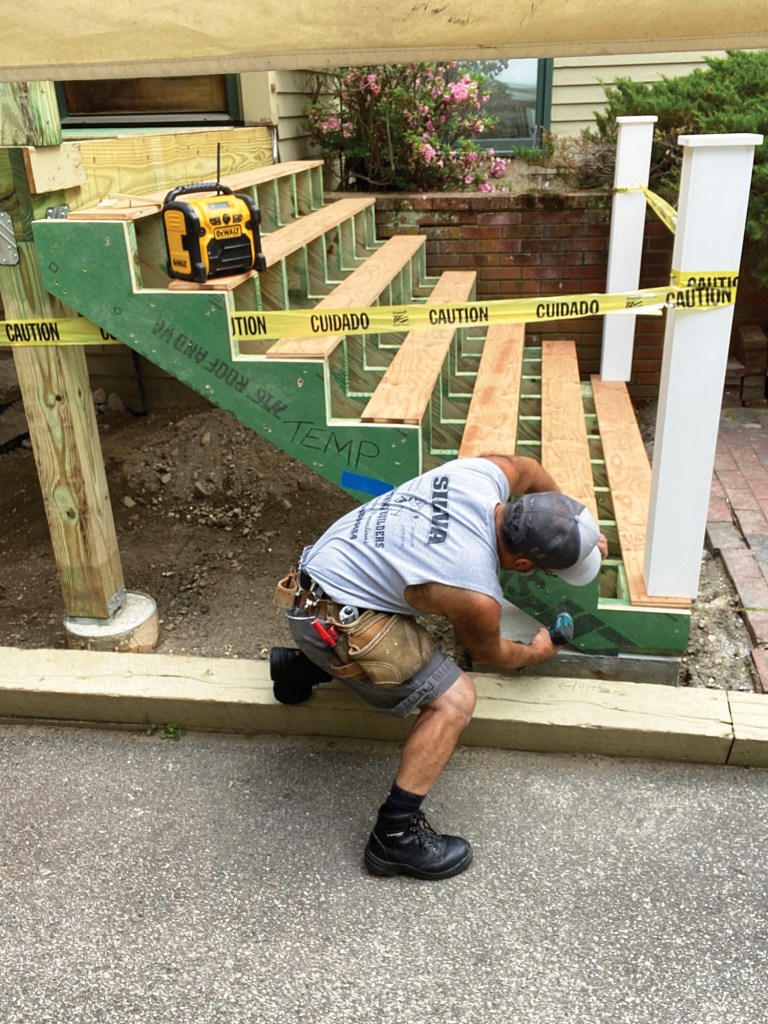
After temporarily supporting the porch roof with diagonal bracing, I began dismantling the existing porch, starting with the stairs. The stringers were over-notched and starting to rot, but to comply with the building permit, I needed to duplicate the stair’s rise and run, so I kept the best one as a reference for the new stringers.
The undersized 8-inch-diameter pier supporting the corner post needed to be replaced with a 12-inch-diameter pier. While digging around the pier to pull it out of the ground, I discovered that it was resting on a big spread footing that must have been placed when the house foundation was poured. While there was no way to remove it without a machine, it was buried below frost level, and my inspector approved my plan to pin the new pier to the existing footing with rebar dowels drilled and epoxied into the footing.
The concrete landing slab at the foot of the stairs was also massive, but cracked and buckled; it too needed replacement. Breaking it up was difficult, but necessary; I wanted the new stringers to be supported with a reliable foundation.
Rebuilding the Porch
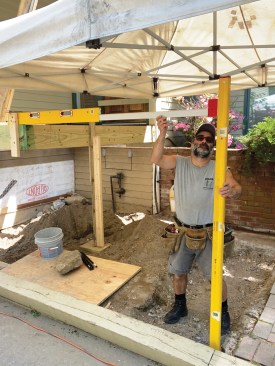
Per the building permit, the new porch had to exactly match the footprint of the existing one. After marking the locations of the new landing and footing but before pouring any concrete, I installed a new ledger for the porch framing. To prevent moisture damage at this critical location, I cut away the existing housewrap and replaced it with Vycor Plus self-adhering membrane.
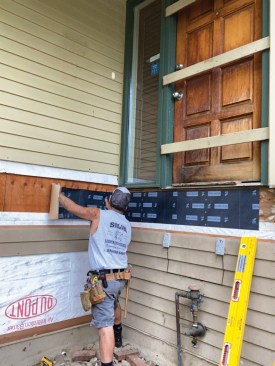
Prior to installing the new ledger, the author covered the wall sheathing with a peel-and-stick flashing membrane.
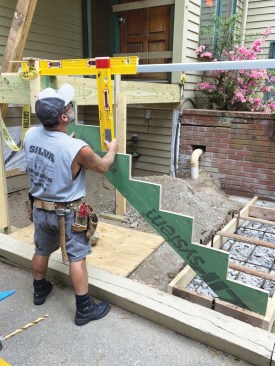
To provide for drainage, the author screwed PVC shims to the back of the ledger prior to installation.
The author used the new porch – which he had framed on temporary supports – as the benchmark for determining the landing slab’s location and elevation.
After calculating the stair's rise and run, the author made a plywood template for the stair stringers and used it to confirm the location of the landing slab.
Before installing the new ledger over the membrane, I screwed 1/2-inch-thick PVC shims to the back of the ledger 16 inches on-center to match the locations of the lag screws I would use to fasten it to the house framing. For drainage, I also installed shims between the doubled rim joist and end joist, which had been temporarily propped up into position as I rebuilt the porch framing and installed the floor joists.
Landing. I had to remove a couple of courses of the brick walkway to build a form for pouring the new landing. For good drainage, I built the formwork over a base of stone and broken-up concrete from the existing slab, and to reinforce the slab, I wired together a rebar grid. In addition, I drilled short rebar dowels into the concrete footing supporting a brick planter next to the stairs.

The form for the landing slab was filled with about 15 80-pound bags of concrete that the author mixed on site.
Prior to filling the form with about 15 80-pound bags of concrete mix that I mixed up on site, I used a stringer template (more on this below), which I had cut for the new stairs, to fine-tune the position of the landing. This allowed me to pinpoint the landing’s elevation so that all the risers would be exactly equal, with the outside edge of the landing slab perfectly aligned with the front edge of the stringers.
While I had the mixer on site, I slid a cardboard tube form over the lengths of rebar that I had doweled to the footing, cut the form to length so that the pier would extend slightly above grade, and filled the form with concrete. I used the corner of the temporarily supported deck framing to establish the location of the corner post.
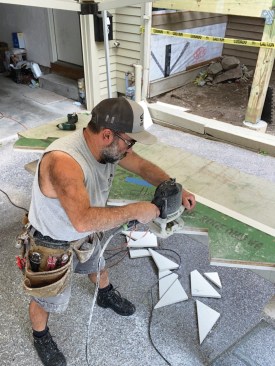
Pattern-Routed Stringers
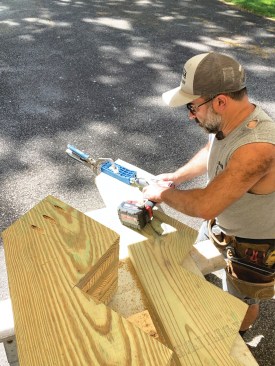
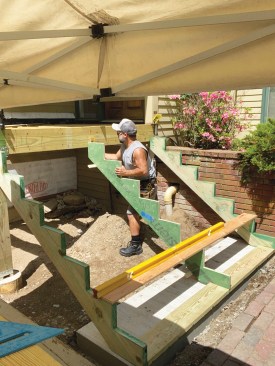
Usually, I cut out the sawtooth shape of open stringers using a track saw. On this job, however, I made a template out of scrap 7/16-inch Zip System sheathing, then used it to pattern-rout the nine identical stringers needed for the 8-foot-wide staircase. My hope was that cutting the stringers production style instead of individually would result in uniform sizing that would eliminate the shimming of treads and risers that would be otherwise necessary.
First, I ripped the sheathing to match the width of the 2×12 pressure treated stringer stock. Using a track saw, I carefully cut the treads and risers following the layout I had preserved from the original staircase. After finishing up the corners with a handsaw, I smoothed out the cuts with a sander so that the sheathing could be used to guide the bearing of the router bit. This is the template that I used to fine-tune the position of the landing.

The author pattern-routed the stringers using the template that he had cut from a double layer of 7/16-inch Zip sheathing.
Then he used a Kreg jig to make pocket holes for the mounting screws needed to fasten the stringers to the deck frame.
Because the long, narrow Zip System stringer template was a little floppy, I doubled up the sheathing to reinforce it. This had the added benefit of allowing me to fine-tune my pattern-routing technique, as I traced the second length of sheathing to the template, cut slightly off the line with the track saw, screwed the two lengths of sheathing together, then trimmed the second piece to the first with the router.
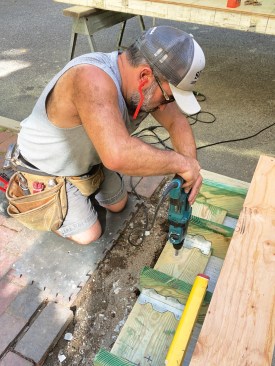
I used the same approach when cutting out the pressure treated stringers. First, I traced the cuts onto the 2-by stock, then cut within about 1/8 inch of the line with the track saw. Next, I screwed the template to the stringer and finished the cuts with the router. This was tedious going, as wet, 1 1/2-inch-thick pressure treated stock doesn’t cut easily with a router, so I worked slowly and made a careful second pass with the router to clean up the edges. When I was done routing, I unscrewed the template and used a handsaw to carefully square up the rounded corners left by the router bearing.
Without a doubt, this method proved to be slower than cutting the stringers out with a saw, but I was pleased with the result: perfectly identical stringers. To keep them that way—since pressure treated stock has a bad habit of moving around once it’s been cut and notched—I screwed each stringer to the previous one as I completed it before moving on to the next. Then, before leaving for the day, I gave all the cuts a couple of coats of copper naphthenate preservative.

To keep the stringers from warping until he was ready to install them, the author screwed them together.
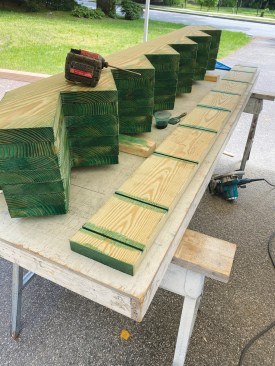
To prevent rot, he applied preservative to the cuts and notches on the stringers and the landing plate.
Assembly
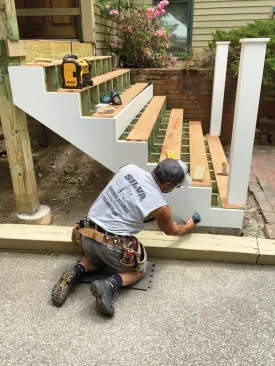
The stringers connect to the landing via a 2×8 pressure treated plate cut to match the width of the stairs, less 3 inches to account for the end stringers. For better drainage and rot protection, I incised the bottom of the plate with 1/4-inch-wide by 1/4-inch-deep notches, which I then saturated with preservative.
The author installed the end stringers first, then used the template to fine-tune the position of the remaining ones.
The plate was fastened to the slab with wedge anchors, while metal angles were used to fasten the stringers to the plate.
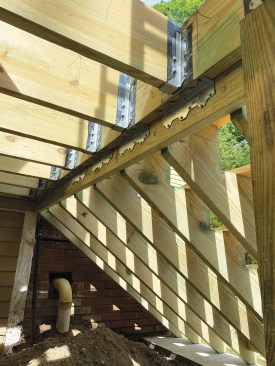
Metal angles were also used to attach the dropped header needed for the stringers to the framing.
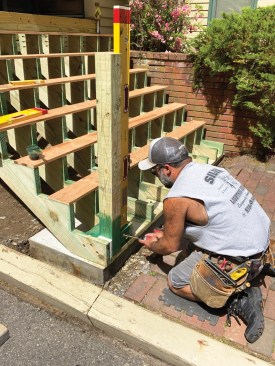
When installing the guard post at the landing, the author used structural screws and plenty of blocking to reinforce the connection.
With the plate placed on the slab, I screwed structural screws through the sides of the two end stringers into the ends of the plate; the remaining seven stringers were notched to fit over the plate. To fasten the stringers to the deck framing, I drove structural screws through pocket holes into the rim joist. I also fastened a dropped header to the rim joist with metal angles and drove screws through the header into the stringers. After installing the stringers, I anchored the plate to the slab with wedge bolts.
To provide a solid connection between the landing newel post and the framing, I used plenty of structural screws and 2×4 and 4×4 blocking that I’d notched for drainage. After cutting the pieces to fit, I saturated all the cuts and end grain prior to assembly to improve their resistance to rot.
The author used the template that he had made to fabricate the stringers to pattern-rout the PVC stringer trim.
This resulted in a very accurate fit.
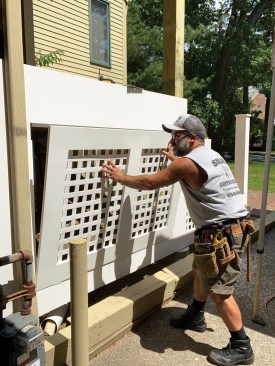
The author also fabricated the post sleeves, stair risers, access door, and other porch trim from PVC stock.
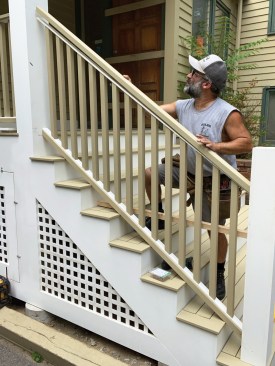
Along with the 1×4 decking, the railings, balusters, and stair treads were all fabricated from vertical-grain fir that the author prefinished on all four sides with a solid stain.
To match the appearance of the original porch, the homeowner specced clear vertical-grain fir for the railing, decking, and treads, which I prefinished on all four sides with a solid stain. I emphasized that this choice would require regular maintenance but was able to talk him into PVC post sleeves and stair risers. I also covered the stringers with PVC trim, using my template to accurately lay out and cut the stringer trim.
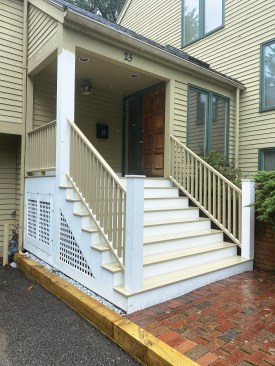
The new porch fits perfectly within the space once occupied by the original and should look good for years to come.
Finally, I used PVC trim and lattice to enclose the porch base. Held in place with double-wing flush clips, the new PVC access door is light and easy to open and close. ❖
Photos by Emanuel Silva.


