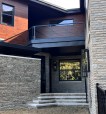
I was recently called by one of the largest builders in the Midwest to a town home development where mildew growth was appearing in wall corners and near some baseboards along exterior walls. The affected 28 units had been built only about two years ago.
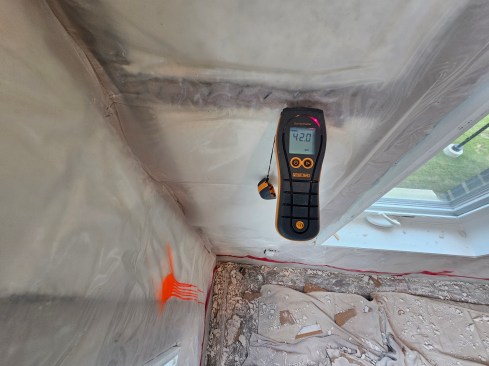
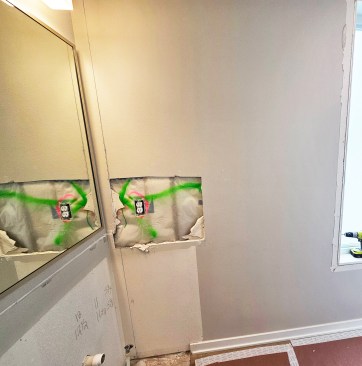
In my initial walk-through with the builder, I scanned the interior drywall surfaces with a Tramex moisture meter, which registered a moisture content (MC) of more than 80% in some places—well above the level where wood starts to decay. Based on these initial findings, we made some exploratory cuts through the drywall where we found water droplets trapped behind the poly vapor retarder.
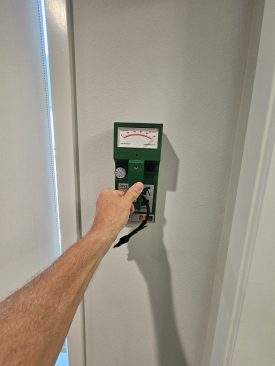
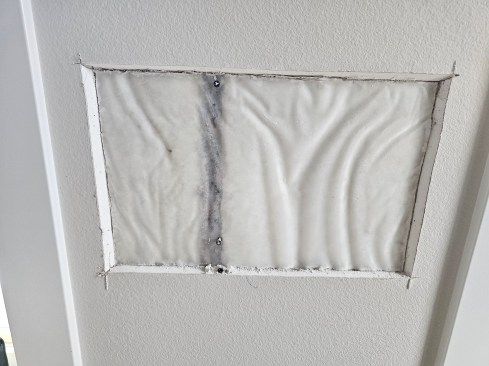
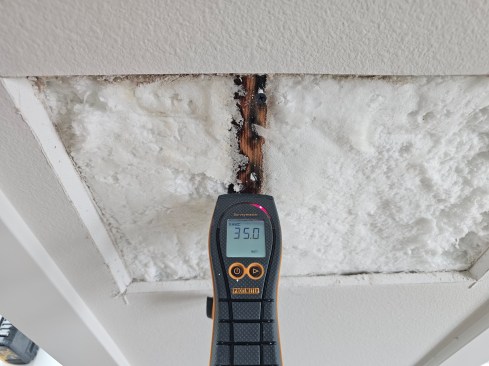
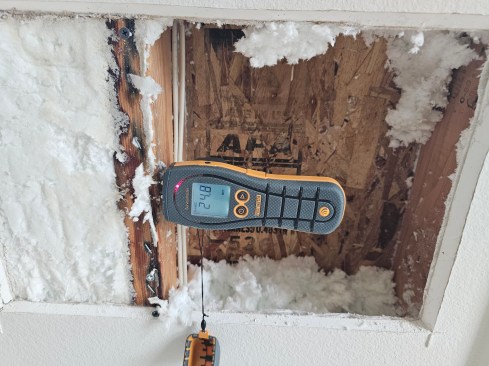
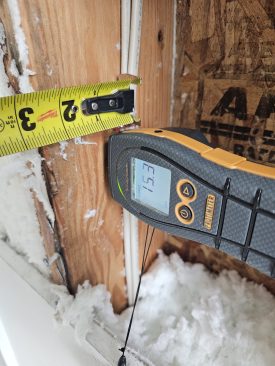
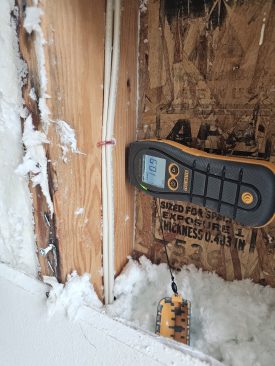
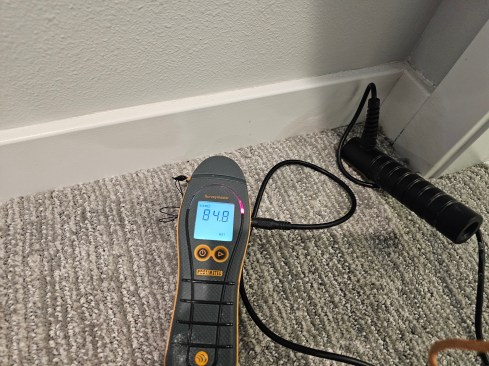
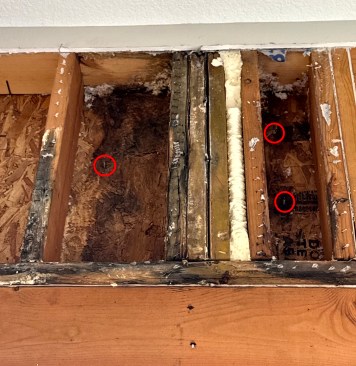
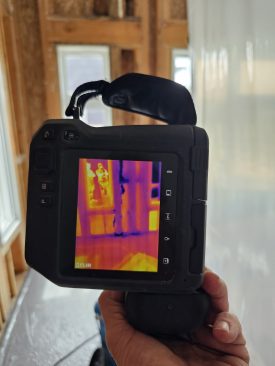
All 28 units the author inspected were less than two years old, …
Extensive Problems
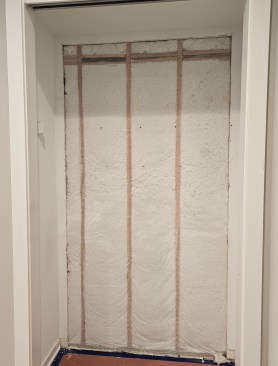
Most of the town homes in this development had a combination of brick veneer and metal cladding on the exterior, though some also had manufactured stone. The brick cladding was installed with a generous 1 ½-inch air space between the brick and the OSB sheathing, which had been covered with a Tyvek weather-resistive barrier (WRB). The 2×6 exterior walls had been insulated with blown-in fiberglass, which had been installed behind netting before the vapor retarder was installed.
Further testing with a pin-type moisture meter showed elevated moisture levels on the interior edges of the studs directly behind the vapor retarder. These readings decreased as I measured across the width of the studs, with the highest readings (24% to 42% MC) at the interior edges, and the lowest readings (17% MC or less) just behind the exterior sheathing.
The highest moisture readings (in the 70% to 85% MC range) tended to be at the base of the walls where the water droplets had drained down the poly and soaked the bottom wall plates and floor sheathing.
We found similar results in every unit along the exterior walls except in a few places, such as inside closets, where the vapor retarder had been omitted. In these wall sections there were no signs of elevated moisture; readings were below 16% MC. Anything below 19% is typically considered “normal” for framing. Dry rot in wood begins at 20% MC; active decay sets in at sustained moisture levels of 30% or higher.
It was increasingly clear that we had an extensive problem on our hands and had to take radical action: The builder called in an insurance restoration company to remove all the drywall along the exterior walls. This meant moving bathroom vanities, as well, to open the walls and begin the drying process with dehumidifiers and HEPA filters. These were occupied units, so all the occupants had to move out. For homes less than two years old this was nothing short of
a disaster.
Poly Traps Condensation
I immediately recognized the cause of the water droplets on the vapor retarder as trapped condensation. With brick on the exterior, we have a material that absorbs and holds water (hence the term “reservoir cladding” often gets applied to brick and stone). As this cladding dries, the humidity in the area behind the brick rises. Air leaks as well as solar vapor drive (when the sun dries a wall, the water vapor retreats from the warmer exterior towards the cooler interior) push water vapor through the permeable housewrap and into wall cavities where it condenses on the poly surface that’s up against the cool (air-conditioned) interior drywall.
Building codes typically require a Class I vapor retarder (rated at 0.1 perms or less; poly and foil are the most common materials) on the interior face of the exterior walls in climate zones 5 and above. The Chapter 7 provisions of the International Residential Code allow builders in climate zones 5 and above to use a Class III vapor retarder (above 1.0 perm; latex paint is typical) on the interior if they use continuous exterior insulation (which did not apply for this development) or have a vented rainscreen. Technically, the space behind brick can qualify as a vented rainscreen but often doesn’t. The key word is “vented.” These walls were built with weeps at the bottom but without any openings at the top, which would have allowed air to rise by convection and dry the space behind the brick.
Additional Problems
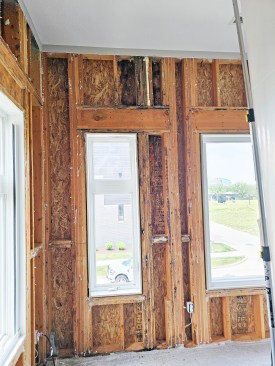
Once all the drywall was removed, we found some wall areas with extensive deterioration of the OSB and framing. The worst areas were caused by brick-tie anchoring screws installed in the sheathing only. When we conducted water tests by hosing down the exterior in select areas, we observed water coming through the fastener penetrations, soaking the sheathing around the fasteners, and draining down and soaking the bottom wall plates where additional damage was evident.
Brick ties must always be located over solid framing, and the fasteners (corrosion-resistant screws or nails at least 2 ½ inches long) must be driven into framing members, not just
wall sheathing.
When we removed brick in areas on the exterior to inspect, we also found areas where mortar had spilled onto brick ties. The globs of mortar pressing against the housewrap allowed water to seep through. For this reason, I always recommend installing two WRB layers under brick, just as you would for stucco. Typically, these two layers would be a layer of black paper over a drainable WRB. The black paper acts as a sacrificial layer; water will seep through it where the mortar is directly in contact with it, but the water will drain down the gap created by the drainable WRB instead of soaking the sheathing.
Looking through weep holes, we also identified areas where the Mortairvent (a nylon matrix installed in the air space behind brick veneer that protects the weep holes in the brick from getting clogged with mortar droppings) was installed incorrectly. This allowed mortar to clog the weep holes and prevent water from draining out of the wall as it should.
Remedies
On my recommendation, the builder has opted to remove the fiberglass to facilitate drying the walls. After spraying the wall cavities with a mildewcide to inhibit fungal growth, he will replace the fiberglass with 3 inches of closed-cell spray foam, which is an impermeable insulation and doesn’t require an interior vapor retarder.
Spray foam is a relatively expensive alternative, but in the face of the failures in this townhome development, it is the best solution as it will help mitigate some of the air leaks through penetrations that are contributing to the moisture problems in
this development.
In addition, the metal cladding above some windows will have to be removed to assess and isolate leaks, which we identified during water tests. And brick will have to be removed to correct leaks through misplaced brick tie fasteners.
Going forward, I am recommending the builder comply with the building code by installing a “smart” vapor retarder, such as Certainteed’s MemBrain, over his blown-in fiberglass. MemBrain is rated as a Class II vapor retarder under dry conditions (when its permeance is between 0.1 and 1.0 perms). It is made of a polyamide (nylon), and its permeability changes based on ambient humidity. When relative humidity rises above 60%, it opens to over 10 perms, functioning as a Class III vapor retarder and allowing moisture to escape.
I am also recommending he install two layers of WRB and install vents (using the same vent covers used for weep holes at the base of the walls) in the brick head joints at the top of the walls. This will facilitate airflow behind the brick and create a true vented rainscreen. He will also have to instruct his production managers to pay closer attention to the masons to ensure the placement of brick ties over the framing and proper installation of the Mortairvent to avoid clogging the weep holes.