Fix the leaks before they start with careful framing and the pro…
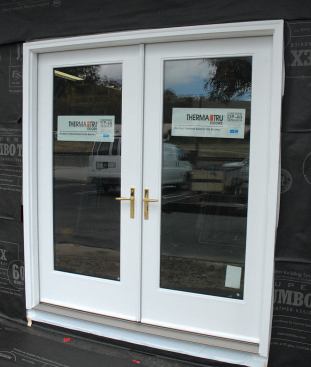
In California, contractors have been heard to grumble that there are only two types of French doors: the kind that leak and the kind that are going to leak. When they have the first kind, they call my company, TLS Laboratories in Laguna Niguel. We’ve investigated plenty of leaking French doors over the years, and in our experience it’s usually the installation that’s faulty, rather than the door itself.
A hinged exterior French door is something like a very large jigsaw puzzle with a small number of pieces. If the pieces are assembled correctly, the pair of sash should fully compress the weatherstripping against the jambs and one another. If the fit isn’t quite right, the weatherstripping won’t compress and water will seep in around the sash. If a door is going to leak, it most often leaks here.
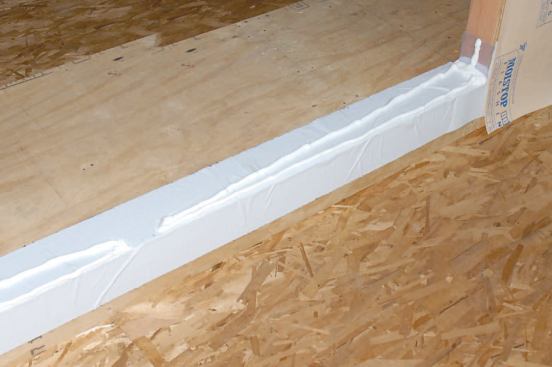
The next most common leakage area is the sill — not over it, but underneath it, usually as the result of insufficient sealant. Pans and proper flashings also help (I’ll talk about them later), but two fat beads of sealant running 6 inches down each trimmer and all the way across the pan — one toward the front edge of the door and another toward the rear edge — will stop a lot of water.
Check the Opening
We’ve developed some effective strategies for installing leak-free French doors based on what we’ve learned. The first step is the most important: Start with a rough opening that is correctly sized and level, square, and plumb.
For shims and fasteners to function properly, rough openings should be 3/4 inch to 1 inch wider than the net frame size of the door, and 1/2 inch taller.
Level and square are easy enough to understand, but the concept of plumb requires a little explanation. It’s critical that both walls flanking the rough opening are equally plumb and in the same geometric plane. If they aren’t, the opening will be twisted — or cross-legged — and it will be impossible to install the door so that the sash sufficiently compress the weatherstripping.
For instance, a wall that is out of plumb by 1/8 inch on one side of the opening needs to be out of plumb by the same 1/8 inch on the other side to keep the opening in plane. If the opening is perfectly plumb on one side and slightly off on the other, then the installed door will be cross-legged. Doors that are cross-legged by more than 1/8 inch will have poor weatherstripping compression and will probably leak.
Some carpenters swear they can check for a cross-legged opening by closing one eye and trying to line up the trimmers. I don’t think this method is accurate enough to be reliable; it’s difficult enough to check with even the most accurate spirit level. I prefer to check rough openings and installed doors with a laser level or a pair of crisscrossed strings — or sometimes both.
Laser level. A three-beam laser level placed at floor level next to a trimmer or door jamb and aimed straight up can show exactly how far out of plumb that side of the opening is. If the difference between the left and right sides of the opening is 1/8 inch or less, the opening is close enough to being within plane. But if one side of the opening is 1/8 inch out from plumb and the other side is 1/16 inch in from plumb in the opposite direction, the combined 3/16-inch difference is too great and the framing must be corrected.
It’s always best if the measurements at both sides of the rough opening are the same, and the rough opening is exactly in plane. Houses can settle, so a door that starts out perfectly has a better chance of staying leak-free for a longer time.
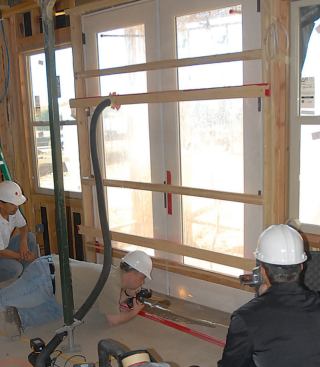
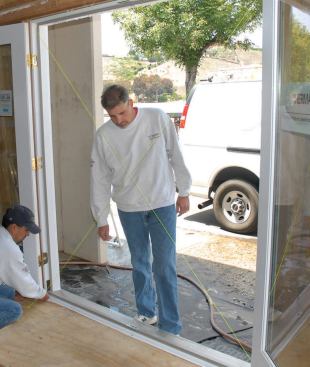
String test. A pair of crisscrossed strings won’t tell you how far out of plumb the opening is, but they’re an extremely simple and cheap alternative to a laser level for checking cross-leggedness. I use staples or tape to fix the strings at the corners of the opening so they cross diagonally near the center. If the opening is in plane, the strings will gently touch each other at the crossing point. If the strings don’t touch, the opening is cross-legged by the dimension of the gap between them.
If there is no gap, I make sure to flip positions so that one string passes behind the other string instead of in front of it, and then I check again. If once again there is no gap, the opening is okay. But if there is a gap, I leave the strings in place and adjust the framing until the strings touch lightly in the center. It doesn’t take long to quickly double-check the door opening with the string test, even if you use a laser during framing.
Installing the Flashings and Sill Pan
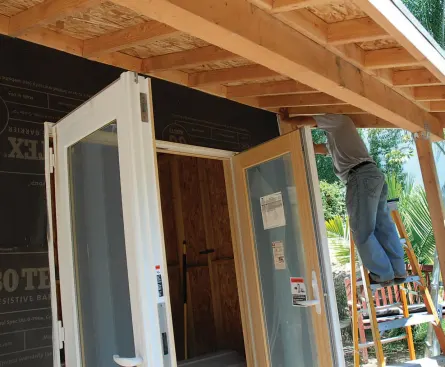
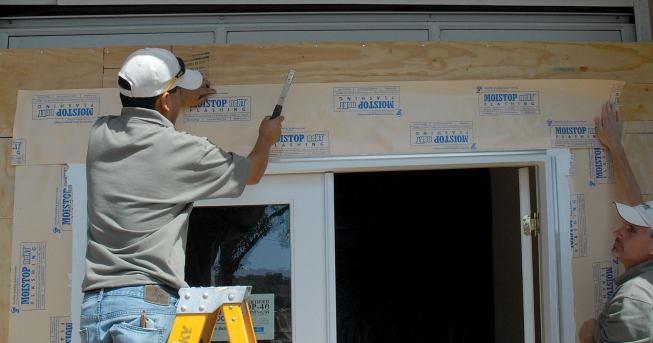
In California it’s common practice to install flashings and millwork first and then the housewrap. If you install the wrap first, be sure to correctly cut out the opening: Instead of an X, make a level cut at the head and short diagonal cuts at the corners so that the top flap can be folded up and held in place with tape while the door is installed.
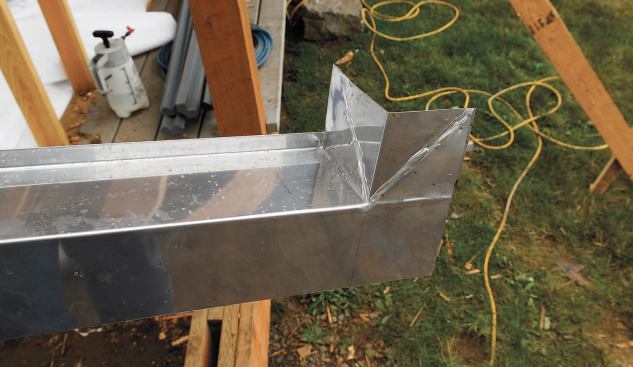
Pan systems. I would never install any door without a metal, plastic, or flexible-membrane door pan. As long as the pan is properly assembled and fits correctly, I don’t think it really matters much which kind is used.
Metal pans are sturdy and strong but can get damaged before the door is installed. We often see pans where the inside vertical lip has been flattened by the door installer or the flooring contractor. Plastic pans are a little more durable, but they have to be glued together to achieve a good fit, with the adhesive that comes with the pan system. Some installers lose track of the little glue tube supplied with the pan and either omit the glue altogether or try to replace it with silicone. Unfortunately, silicone won’t work, guaranteeing that the pan will leak.
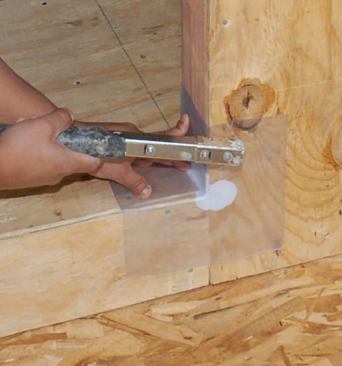
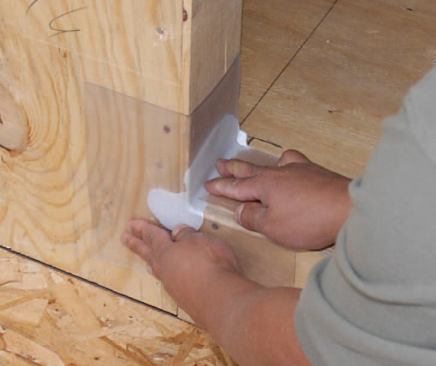
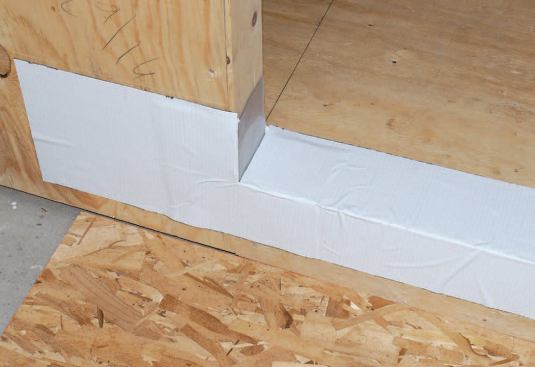
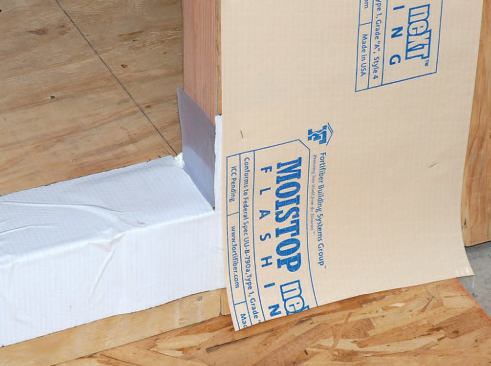
I prefer membrane pans, which install quickly, always fit, and are cheaper than the other types of pans. I make membrane pans using a good self-adhering flashing and compatible premanufactured flashing corners, such as RainBuster 415 self-adhered flashing and RainBuster 425 inside and outside corners (800/473-1617, topindustrial.com). Fortifiber’s FortiFlash with GS100 corners also works well (800/ 773-4777, fortifiber.com). And I always use a compatible high-quality polyurethane sealant, such as RainBuster 900 or Fortifiber’s Moistop, when installing the pan.
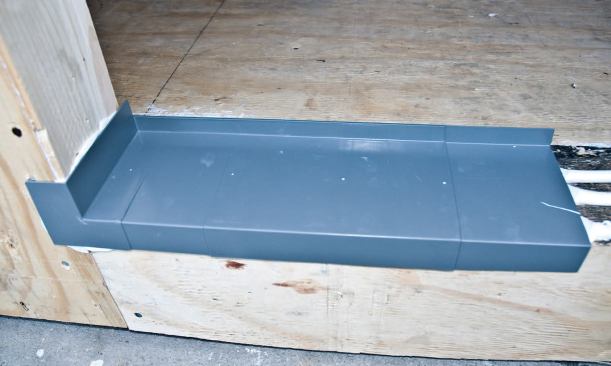
I use polyurethane sealants — not silicone — with metal and plastic pans as well. The pans should fit snugly to each trimmer and be completely sealed to the subfloor with plenty of sealant. And if a deck is going to be installed on the exterior, the door pan will need to be counterflashed with the deck flashing before the door is set.
Vertical side flashings should be installed after the door pan is in place, even if the unit has nailing fins. Nail-on flashings are okay here, but peel-and-stick is even better. In either case, minimum flashing width should be 9 inches.
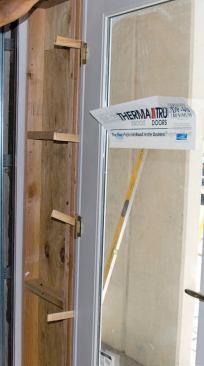
If the door has a nailing fin, I wait until after the door is installed to apply the top flashing. If it has a brick mold or flat casing, I go ahead and finish flashing the top of the opening, then add a metal drip cap after the door is installed.
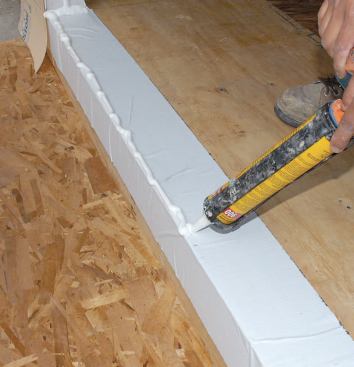

In the drainage method, the sealant is applied in elongated tria…
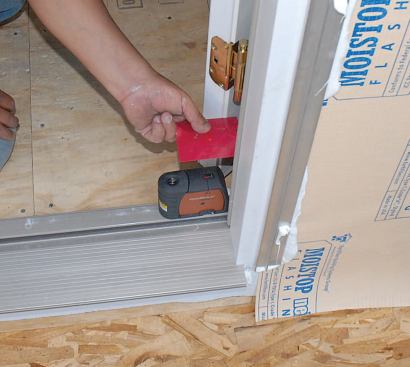
Sealing the Sill
There are two approaches to applying sealant between the door and the pan. The barrier method assumes that hardly any water will get behind the flashing and sealant, and the little that does will naturally evaporate before causing any damage. The drainage method assumes that water will eventually get behind the flashing (probably due to door failure) and will need a way out.
In my experience, the barrier method is a good choice when you’re using outswinging doors, because their sills are by design more water-resistant. Whenever unprotected doors will be exposed to sustained high winds and lots of rain, I recommend outswinging doors with sill sealant applied using the barrier method.
The barrier method can work with inswinging doors, too, as long as they’re protected by a wide overhang or have limited exposure to wind and rain. But for inswinging doors in moderate-exposure locations or on the second floor of a home, I always recommend the drainage method. In this system, water that manages to penetrate past the sill drops into the pan and eventually makes its way back outside. Our tests show that the approach works quite well.
Regardless of which method is used, there should be squeeze-out all across the front of the door sill (except at the central gap, in the case of the drainage method), as well as in the rear of the pan, when the door is set in place. Too much sealant is always better than not enough.
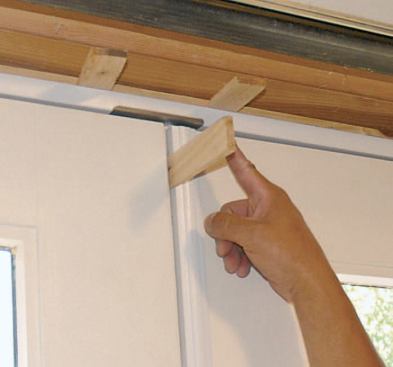
Shims are critical for door performance. They're needed behind e…
Installing the Door
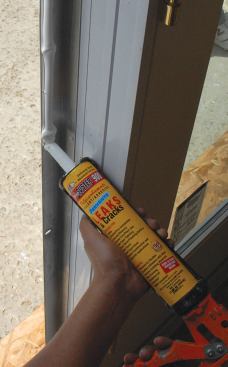
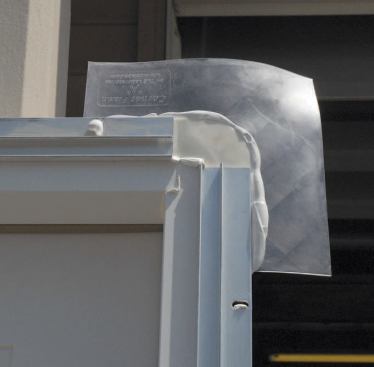
Before installing a door that has brick mold or flat casing, I run a bead of sealant along the inside corner of the union between the casing and jamb, pressing the sealant into place with my finger. This helps prevent water from penetrating this vulnerable joint, and the inside location is ideal because the sealant won’t be exposed to UV light or other outside elements. I also apply 1/2-inch-diameter beads of sealant to the backs of the nailing fins or casings, toward the outside edge. With a finned unit, I bed flexible flashing corners into sealant at the two upper corners before installing the unit, giving these joints a little extra protection.
When the unit is tilted into the opening, sill first, the doors should be closed and locked. After completely pressing the unit into the opening, I make sure there is plenty of sealant squeeze-out around the top, bottom, and sides of the door. If there isn’t, I tilt the door back out and add more sealant.
Once I’ve checked the door for level, square, and plumb (a laser level is quicker, easier, and more precise than a spirit level for this), I begin installing shims around the perimeter. To prevent these shims from overcompressing the sash, I first put a couple of shims between the sash in the center of the door. Shims are needed behind all the hinges and across the top of the unit to prevent the heavy glazed doors from twisting the jambs as they swing.
Next, I fasten the unit to the trimmers with 2 1/2- to 3-inch-long exterior screws driven through the hinges, jamb, and shims, one per hinge. I also drive a long screw through the strike plate and shimmed head jamb.
Now it’s time for another string test. After opening and closing the doors to verify that they operate properly, I leave them open, grab some mason’s string, and — following the same procedure described earlier — double-check the unit for cross-legging. Again, the strings should gently touch in the center where they cross. If they don’t, I withdraw some screws and adjust the jambs until the gap in the middle is eliminated.
Nailing fins. Instead of nails, I use 1 1/2-inch exterior deck screws to fasten door units with nailing fins to the wall. Screws are less likely to damage the doors and are reversible. I place them every 9 to 18 inches across the top and both sides. For extra weather protection, I tool a flat bead of sealant on top of the fins. If the nailing fins are the pivoting style, the sealant should be on top of the pivot joints, which are the source of many leaks we’ve investigated. The top flashing laps over the top nail fin, followed by the housewrap.
Casing. If the door has brick mold or flat casing, I use 2 1/2-inch to 3-inch galvanized nails to fasten it to the wall. A metal drip cap set in wet sealant should be installed over the casing, followed by the peel-and-stick flashing. The vertical leg of the drip cap should extend up the wall at least 4 inches, and any screws driven through the metal should also travel through the sealant. After folding the housewrap back down over the drip cap, I seal up the seams with tape.
Once the operating hardware and any accessories that came with the door unit — such as weather-resistant foam pads — have been installed, I perform a final round of door opening and closing to be sure everything operates smoothly. Most doors come with adjustable hinges for fine-tuning the fit, but be sure to check the manufacturer’s instructions; not all hinges operate the same way, and it’s easy to strip their threads.


