Ted Cushman
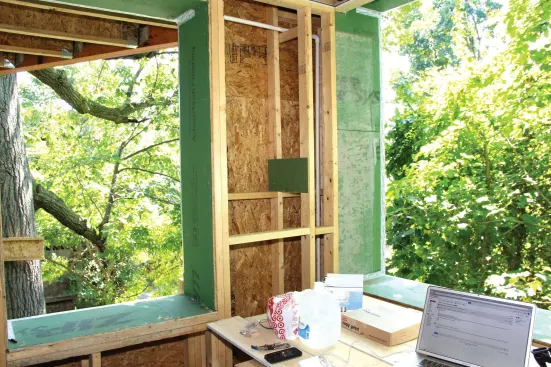
Placetailor's deep wall system is simple: a 16-inch-thick double…
As a specialist in meeting the stringent Passive House energy-efficiency and air-tightness spec, Boston design/build company Placetailor aims for extremely high-level performance. But as a developer, the company often has its own money on the line, so it can’t afford to invest in labor or materials whose cost won’t be earned back.
In that business environment, Placetailor must come up with designs that work effectively but are simple and cheap to build. And since many of the company’s key personnel are both architects and hands-on builders, it’s common to see designs evolve on the fly during the construction process. “We won’t change a facade or a floor plan without consulting everybody and getting buy-in all around,” says development director and company co-founder Declan Keefe. “But if the project managers want to modify an assembly for practical reasons, they might just do it.”
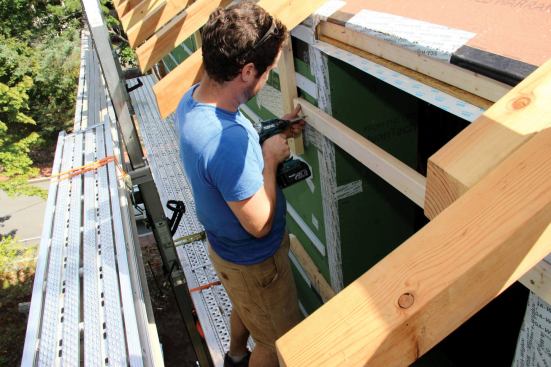
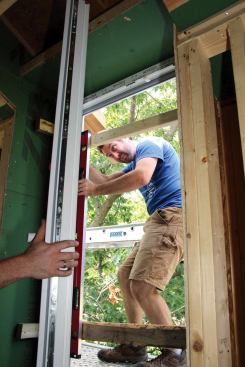
The project shown here is a two-family townhouse in the Fort Hill neighborhood of Roxbury. Placetailor’s deep wall system is simple: a 16-inch-thick double stud wall framed with 2×4 studs, connected with gussets at mid-stud height. With dense-blown cellulose insulation, the wall is calculated at R58. The window openings are boxed out with bucks made from Zip System panels, and the wall sheathing, taped at the seams, forms the building’s air control layer. The builders expect to hit the Passive House air-tightness standard of 0.6 ACH50.
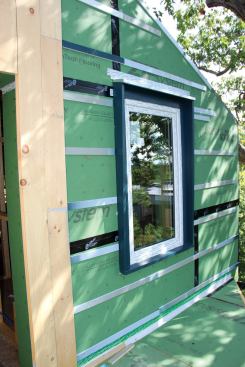
The home’s rainscreen siding detail is also simple but robust. The Zip System sheathing and joint tape form the weather-resistive barrier. To hold the vertical ship-lap board siding off the wall and create a space for drainage and air-drying, Placetailor uses strapping made from corrugated plastic signboard, bought for a few dollars a sheet at an office supply store and ripped into strips.
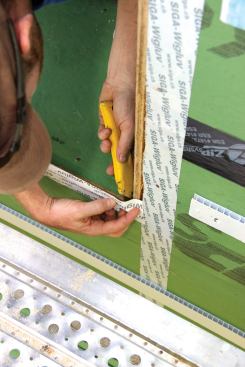
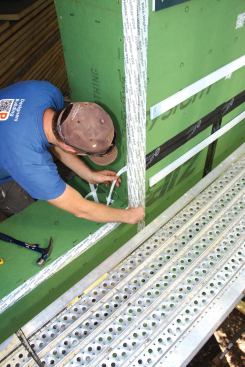
Taping the Seams
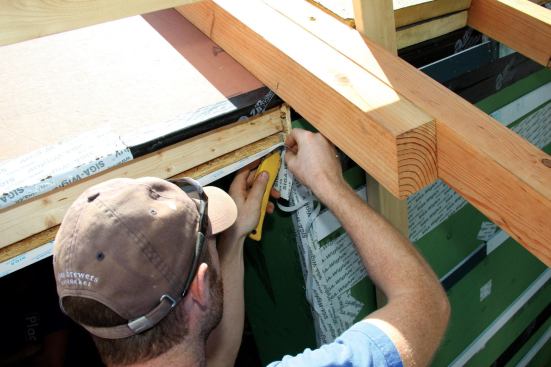
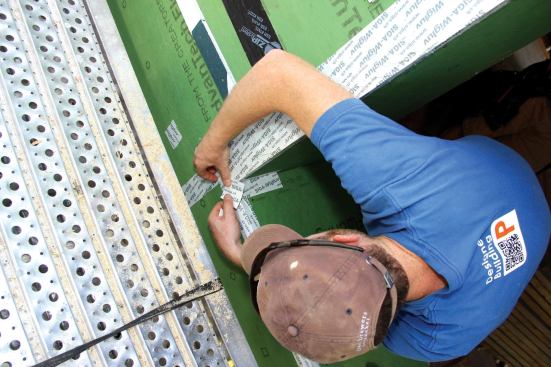
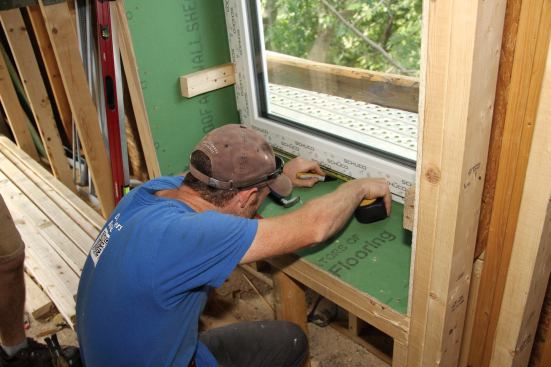
Because the air control layer of the building is at the exterior skin, including the windows, all of the seams in the window buck and window opening are taped using Siga Wigluv tape. The outboard window faces are taped to the OSB—tape is applied first to the sill, then to side jamb joints and the head jamb. Strips of tape are also applied in the window buck at joints and in corners. Finally, a small patch of tape is applied over the complicated corner intersections of the sill with the jambs and the wall sheathing. Everything inboard of the window plane, including the inner part of the window bucks, is left untaped so that the wall can dry to the inside.
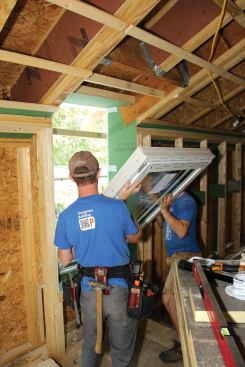
Blocked in Place
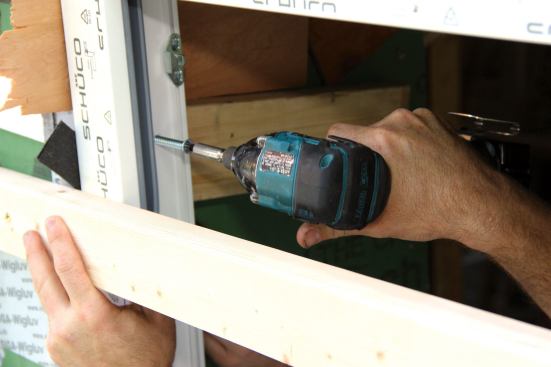
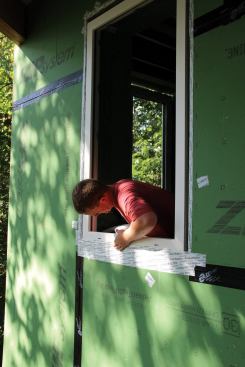
Before the windows are set (Placetailor is using European-made, triple-glazed Schuco tilt-and-turns), temporary 2×3 rails are fastened across the window opening to serve as positive stops that hold the window flush with the wall sheathing. Inside the house, each window is lifted into the opening and positioned tightly against the 2×3 rails, where it is secured with two temporary blocks screwed top and bottom to the window buck side jambs.
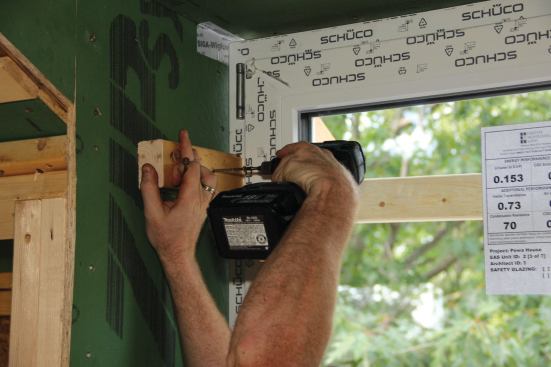
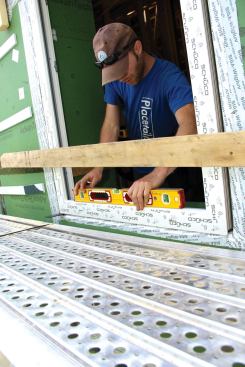
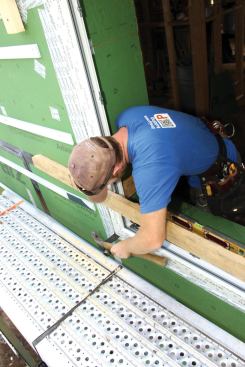
Fastening
The temporary 2×3 rails and blocks hold the window in plane while the crew fine-tunes the window’s placement. First, the window is roughly centered at the head jamb with shims, then it’s precisely centered at the sill by measuring off the window buck. The crew fine-tunes the hinge jamb using pry-bars and shims and makes a final check for plumb. They repeat the process at the sill, first checking for level, then fine-tuning with shims.
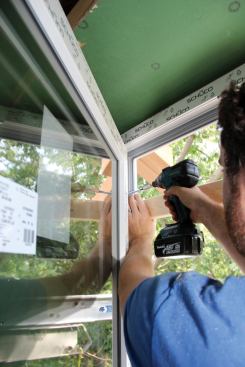
Schuco windows are held in place by self-tapping lag screws supplied with the units and driven through holes predrilled in the frame. This window gets eight screws: three through each side jamb, and two through the top rail.
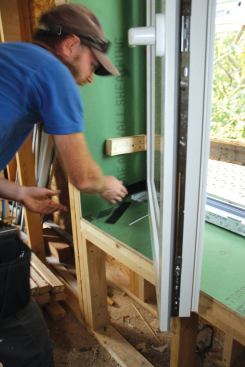
The bolted connection is quick and simple to make and has the advantage of holding the window in position front to back as well as from side to side (the positive thread connection means the windows couldn’t rack—even without the shims). Also, the bolts don’t get in the way of air-sealing and insulating: The crew will first inject foam sealant into the gap, then trim the foam on the inside and tape the window face to the inside buck before drywalling the opening.
According to Placetailor, the Schuco windows selected were cost-competitive with double-glazed double-hung units from a mainstream U.S. manufacturer. The designers varied the window glazing characteristics to fine-tune the performance of the envelope. Windows on the south face of the building have high solar heat gain coefficients, while east-, west-, and north-facing windows were chosen for low emissivity to minimize heat loss instead of maximizing solar gain.
Exterior Trim
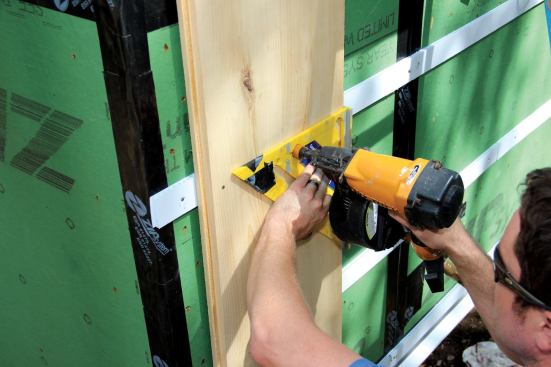
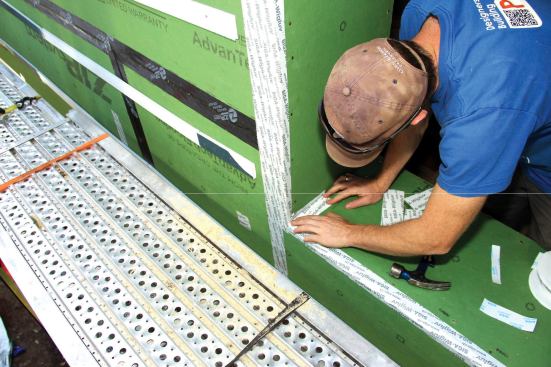
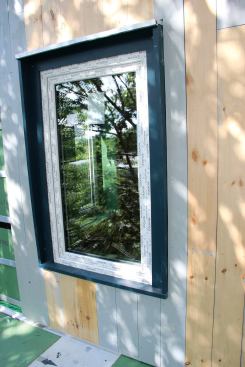
Setting the windows flush to the exterior sheathing makes it simple to integrate them into the weather-resistive barrier and drainage plane by taping the exterior face of the window frame to the Zip sheathing with Siga Wigluv tape. Placetailor trims the window out with a simple custom trim package. Where the vertical ship-lap board siding butts against the trim, the joints are left uncaulked to promote drying.
Windows that are set this way may allow some conductive heat loss across the framed corners at the outside window edge—in fact, modeling has shown less conductive heat flow around a window when it’s set in the wall center. But installing the window to the outside of the opening is closer to traditional practice and makes for simple, economical exterior trim details. Plus, the wide interior sill makes for an attractive amenity.
Photojournalist and carpenter Ted Cushman, a former JLC editor and a frequent contributor to the magazine, edits JLC’sCoastal Connection newsletter. [email protected]


