Metal railings surrounding masonry patios can create a problem we’ve seen often enough that we now take steps to prevent it.
The standard installation method for metal posts in any masonry patio where we work in Virginia is to drill an oversized hole about 6 inches deep into the masonry, then set the railing in place and pour a small amount of patching cement around the post to anchor it in the masonry.
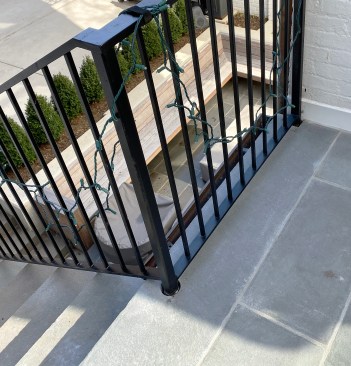
This usually works for a while in a stone patio on a slab-on-grade substrate or on a masonry landscaping wall. After 15 or 20 years, the steel (often called iron or wrought iron when made into decorative rails) starts to rust and expand, and the cement material used to anchor the steel also seems to have a limited lifespan—measured in years, not decades—so these anchor points require rework or heavy maintenance before too long. The expansion can also create cracks in the masonry.
But another problem happens much sooner when a metal rail is installed on a masonry patio over living space. These deck areas have a waterproofing layer in the assembly to keep rain out, and experienced readers may quickly see the potential problem: The watertight layer must stay intact to keep water out, but drilling large, deep holes for the railing pierces the waterproofing and often allows water to leak in.
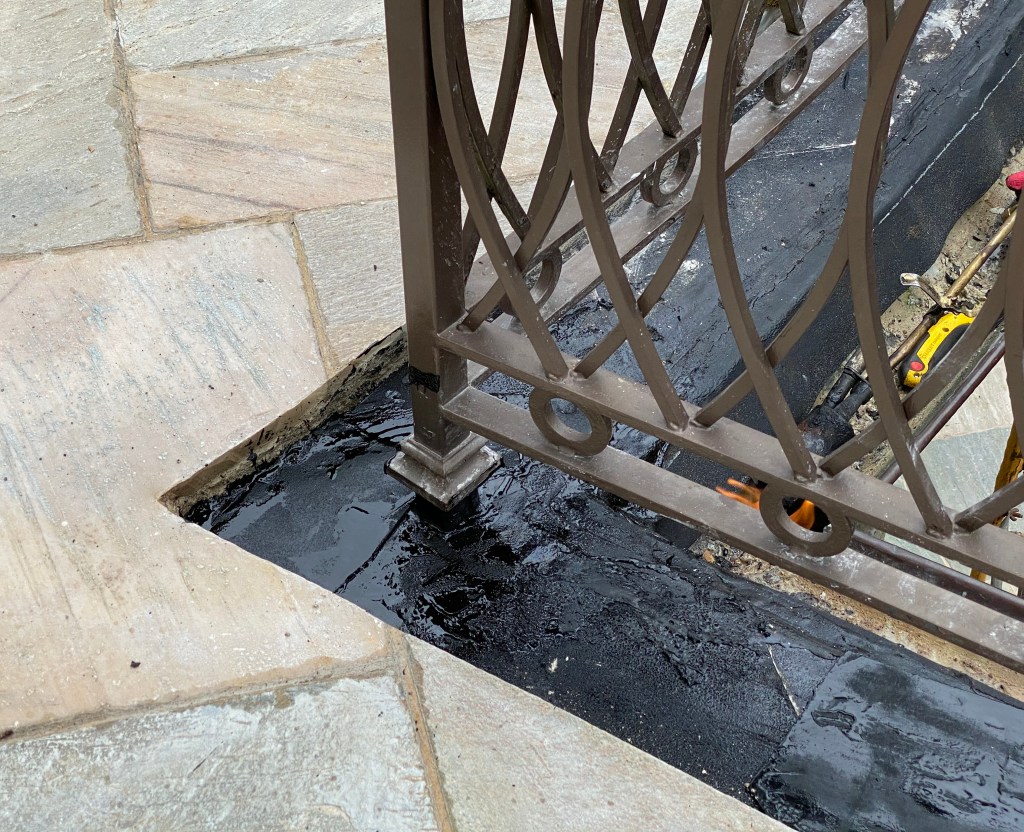
We’ve probably fixed a couple dozen leaks caused by rail posts in waterproofed surfaces. Water movement through the multilayer systems can be complicated and difficult to find. The house shown in the photos at right is one example of what we’ve encountered. When scoping out that job, we found efflorescence—a clear sign of moisture moving through the masonry below the rail posts.
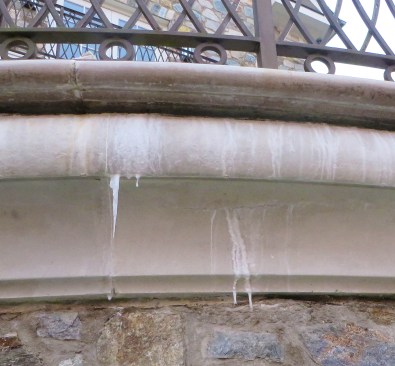
Efflorescence—white mineral deposits leaching out of stone and concrete—is a clear sign of moisture moving through masonry, and its presence is helpful for identifying where a waterproofing layer has failed.
When I ask steel-railing folks about these problems, few respond with a solution. Rail folks are usually welders or artists who don’t dwell on the nuances between a stone patio on grade and one with layers and layers of waterproofing. In our experience, managing water on these patios is up to us, the general contractors. We have learned that the best approach is to grab hold of the process, eliminate the hole drilling altogether, and use entirely different methods for installing the rail posts.
Preinstalled Posts
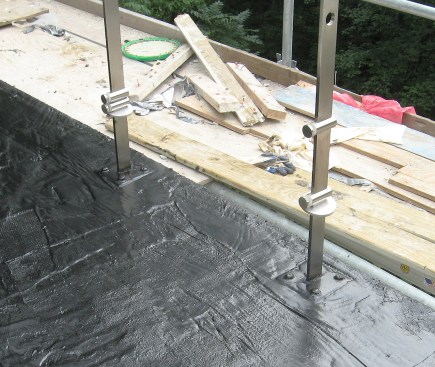
Railings don’t have to be installed into holes drilled at the end of construction. Glass-panel railings, for example, aren’t usually installed with drilled holes. On most of the ones we’ve built, the posts are permanently installed in their final locations many weeks before the completion of the patio deck. This allows some lead time for the glass panels to be fabricated to fit their intended locations and spacing exactly.
The first couple of these were a learning curve, but now we know to bring the rail folks in early, long before the waterproofing and masonry crews. When they set the posts early, we can run the patio waterproofing right over the post bases and create a durable, complete seal around each post, with no post-waterproofing drilling to mess it all up.
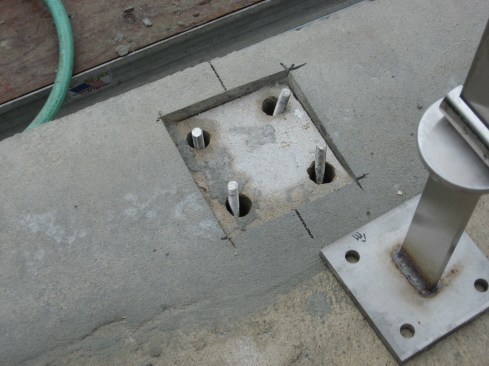
Typically, when the posts are installed on top of the patio, they have large square bases welded to them, with four holes used to anchor the post to the substrate.
Doug Horgan
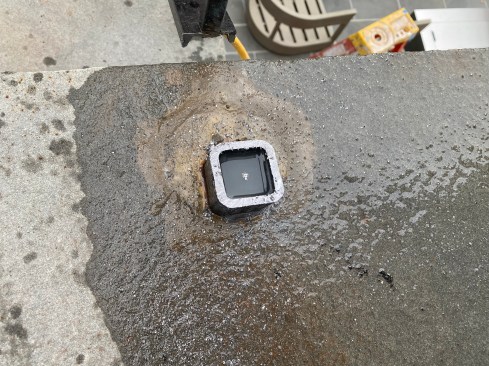
Preinstalled posts. The bases of these posts for glass railings needed to be bolted to the masonry deck.
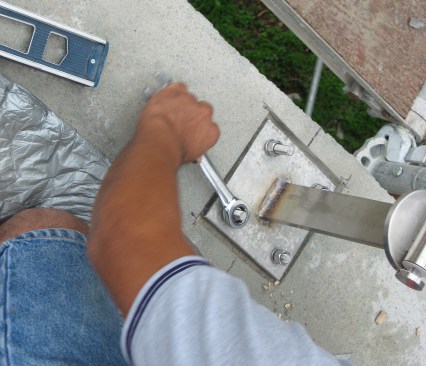
After the bases were installed, the deck was waterproofed.

The deck was then finished with stone and round escutcheon plates.
We’ve also used a similar technique with mounting plates that allow for fasteners driven horizontally into the side of the building.
Preset Sleeves
The second method we’ve been using is to work with the rail subs to get preset hardware in place that the waterproofing folks can seal and that the railings are mounted to later.
The first one like this that we did required sleeves that the future railing would drop into. We had a welder attach the sleeves to the steel structure before we poured the concrete terrace slab. We knew the cut limestone walking surface, setting bed, and water drainage layer would add about 2 inches, so the sleeves were set that much higher than the top of slab.
Once the slab-top waterproofing and the finishes were installed, the railing contractor dropped the steel posts into the sleeves and filled the gap with the same leaky cement they use elsewhere—but in this case, the water went where we directed it, instead of dripping into a room below.
Splines
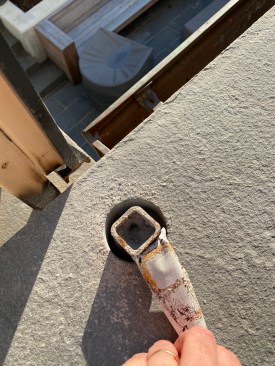
On a subsequent job, which involved repairing the damage our own railing subcontractor had done by drilling through the waterproofing, we landed on a third method: using short steel splines that fit into the hollow steel posts.

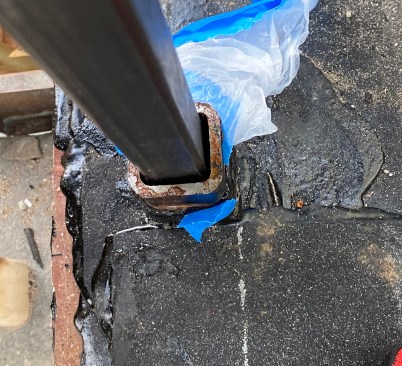
A railing subcontractor drilled through the waterproofing layer…
We first cut off the posts as high as we could, removed the railings, and lifted the patio stone off. Then the roofers waterproofed the remaining stub posts, and we used steel splines to marry the posts back to the bases. For these splines, we had to find steel bar stock that matched the dimensions of the inside of the posts. The two posts were made with different thicknesses of steel, so we needed two different bars and additional material for shims. We test-fit the railings, repaired the waterproofing, and reset the stone, then had a welder come put the steel back together.
This method can be used in new construction by installing the splines before applying waterproofing. After installing a finished surface, we can drop the railing posts onto the splines to secure the posts to the deck.


