One of the nicer elements to adorn Victorian and Queen Anne-style houses is the eyebrow dormer. But while it’s graceful in appearance, the compound curves make for some tricky framing and finishing details. If you’re attempting it for the first time, be sure to budget in a little head-scratching time. Here are a few tips I picked up while framing my first eyebrow, an 8-foot-wide, 2-foot-high dormer on a custom Queen Anne.
Laying Out the Curves
For help in layout, I turned to Audels Carpenters & Builders Guide, which is usually very helpful, though not in this case. The section on eyebrow framing states that owing to the popularity of “this style of window, …some idea of its construction should be known to all carpenters.” I had “some” idea, so I plowed ahead with not much more to guide me. I established the curve of the window frame by connecting three intersecting curves of the same radius. I did the layout on the deck until I had a pleasing shape, then made a plywood router template for cutting the curved pieces.
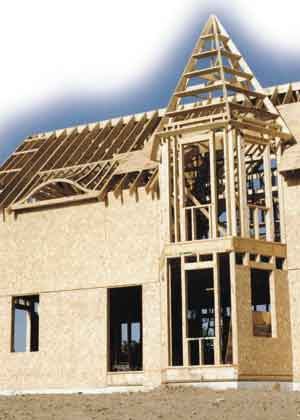
For the window frame, which supports the dormer rafters, I made a sandwich of 2-by stock and 3/4-inch plywood. I framed the opening in the roof as I would for any dormer, with double trimmers on the side and a double header on top. I made the opening about twice as high as the window frame itself, measured plumb. This worked well with the 12/12 pitch of the main roof, though for shallower roofs I would have gone higher with the opening.
Hockey Stick Rafters
I attached the window frame between the trimmers, bracing it as needed. Then, working from the center of the window, I established what seemed to be the right pitch for the eyebrow — 4/12, in this case. Using strings and straightedges, I found the point where the 4/12 pitch intersected the main roof. Holding a 2×12 in place, I marked the two pitches and the point of intersection. Working freehand, I rounded the point of intersection, coming up with a rafter shape that somewhat resembled a hockey stick. I laid out four rafters on each side of the center one — that seemed like plenty for an 8-foot dormer. The other rafters were laid out the same way, except that the 4/12 pitch intersects the 12/12 at a lower point with each successive rafter. As the eye travels down the curve of the eyebrow, the difference between its pitch and that of the common rafter becomes smaller. It is this change in pitch that gives the eyebrow dormer its compound curve, and makes it seem to rise naturally out of the main roof. Because the curved rafters were cut from a 2×12, they ended up with a depth of 3 to 4 inches. I finished the rafters on one side and used those as templates for the other side.
The window frame is a sandwich of 2-by stock and 3/4-inch plywood, both cut with a router and template. The curved rafters were cut from clean 2x12s.
Sheathing and Roofing
With any compound curve, two layers of 1/4-inch sheathing works better than one layer of 1/2-inch. I ripped the plywood into 16-inch strips, which was easier than trying to get a full sheet to take the curve. I staggered the joints between layers and used screws to make sure the plywood stayed down nicely and formed a smooth curve.
Once the dormer was sheathed, I covered it with Grace’s Ice & Water Shield. I also protected the area where the base of the window frame meets the roof plane. The sheathing overhangs the edge of the eyebrow by several inches. This creates a nice shadow effect, and also offers weather protection. I snipped and bent drip-edge around the overhang. Traditional Queen Annes are often roofed with either slate or wood shingles, which offer great flexibility in making the roofing courses follow the lines of the dormer. On this roof, we used three-tab fiberglass shingles, which locks you into straighter lines. I found that being consistent with the shingle lines on the adjacent flat-plane roof meant that the curved courses weren’t parallel with the edge of the eyebrow dormer roof. But this was barely noticeable from the ground and assured the best protection.
The eyebrow sits halfway down a sloping roof plane that continues over a porch, adding nice architectural punctuation to an otherwise unbroken expanse of roofing.
Finishing
The outside of the eyebrow is trimmed with a cedar trim board that overhangs the window frame by 1 1/4 inches — also routed with a template to follow the exact curve of the frame. Across the bottom is a painted pressure-treated sill, drip-kerfed and angled to shed water. The sash (a temporary piece of Plexiglass, until a custom IGU is made) rests against the inside of the trim board and sill. Glazing tape ensures a weathertight seal. Inside. Since the curved rafters of the eyebrow are only 3 to 4 inches deep, I used foil-faced foam board for its higher R-value, cutting it to fit snugly between the rafters. While drywall works fine on the flatter sections of the dormer ceiling, expanded wire mesh and plaster are the best way to finish the curves.
Jack Galt is a carpenter in northern Vermont.


