They say the shortest distance between two points is a straight line. That seems easy enough, but things get a bit more complex when the straight line is 78 feet long and there are 11 points along the line that have to be lined up perfectly. That was the challenge that Shoreline Builders, of Scituate, Mass., faced recently when building a new, custom, high-performance residence on Cape Cod. The home was to have a 1,100-square-foot covered porch that measured 78 feet along one side and wrapped around one corner of the house, and many of the standard construction details required an exceptionally high level of precision.
The porch and its roof framing system had to be supported by 20 footings total—16 perimeter footings plus four inside footings to support the wider porch section at the end of the house; the long side of the porch had 11 footings. Because the roof was to be a prefabricated truss system that was ordered about the same time as the footing installation, there was little margin for error or for misalignment of the footings. In addition, the project was located in one of Cape Cod’s high-wind zones, so the alignment of all the support and framing components was a critical structural detail specified by the engineer to resist the uplift potential of the large porch roof.
Precast Footings
In reviewing the project with the site contractor, George Botelho, we considered a couple of options for the porch footings: the typical poured-in-place tube footings vs. precast concrete footings. Poured concrete footings pose a number of challenges. The first factor is that they are difficult to install with precise alignment, which was critical to this project. And backfilling tube footings almost inevitably causes the tubes to move a little (and sometimes a lot), which results in a ragged layout. Another consideration when using site-poured tube footings is that they have to be inspected prior to filling, which can often mean a day or more between the placement of the forms and getting them filled. If the soil is at all moist, the tube material can absorb moisture and deform before they can be filled. For these reasons, Botelho suggested that we go with precast footings.
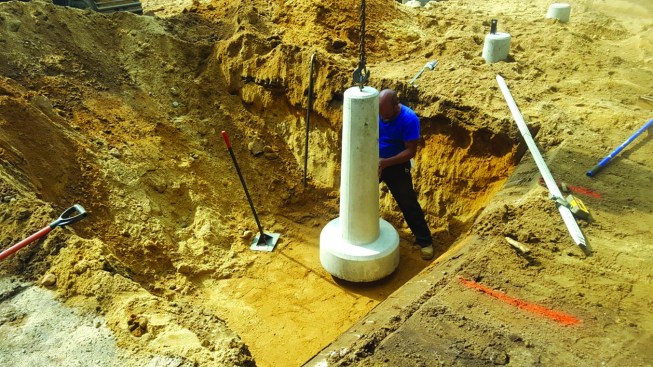
When Botelho started using precast footings a few years back, they were typically made with square tops. But setting a straight line of footings presented a big enough challenge in itself; trying to align the square edges was an additional task that could be eliminated if the footings were cylindrical. So Botelho asked the precast manufacturer to start casting the footings in the round. In the casting process, the manufacturer embedded a fitting in the top of the footing that could accept a threaded eyebolt for lifting and placing the footings. Eventually, these threaded fittings would be the attachment points for the post-base connectors, a critical link in the framing sequence.
The perimeter of the porch required 11 footings along the long section and five additional footings where the porch returned around the corner of the house. Each footing was 5 feet tall and 1 foot in diameter at the top and tapered slightly down to a wide supporting base that was about 30 inches wide and a foot high. When the footings were delivered on site, we were ready to begin installation.
Setting The Footings At The Same Height
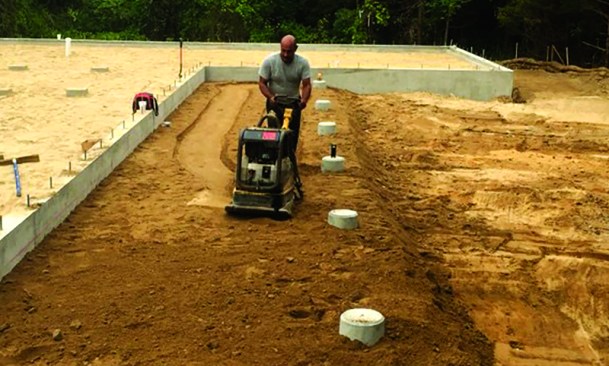
The site crew dug the hole for each precast footing individually, compacting the base of the hole and using a laser level to set the elevation.
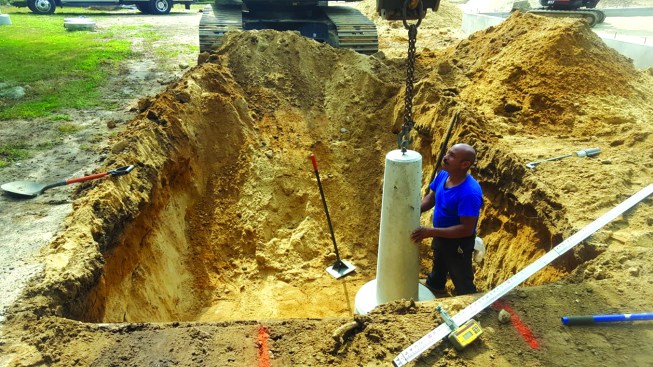
Each footing has an integral fitting for an eyebolt that was used to lift and place the footing. After the footings were placed, the crew used the fittings to attach the post connectors.
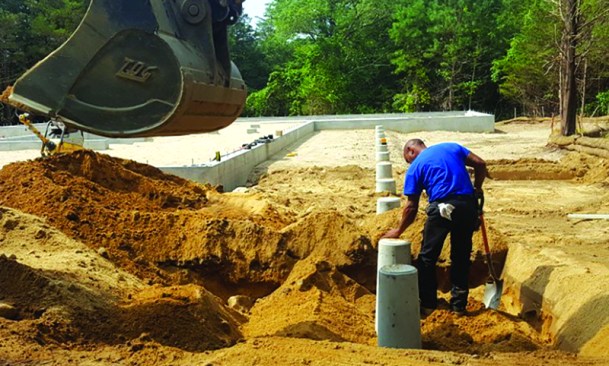
To set the footings, we had to maintain two critical parameters: The 11 footings all had to be set at exactly the same elevation, and they all had to be in a perfectly straight line. With the extremely sandy Cape Cod soil, it made sense to excavate each footing separately. The frost depth for this location was 4 feet, so we excavated to exactly that depth below rough grade. Because the precast footings are 5 feet tall, that left 12 inches of vertical play for the drainage layer under the porch that we would install later.
Botelho’s crew compacted the base soil in each excavation by hand, setting the depth of each hole with a laser and a measuring stick, which gave the holes the vertical accuracy that we needed. The crew used an excavator equipped with a chain for the actual placement of the footings. A hook on the end of the chain grabbed an eyebolt threaded into the fitting on the top of the footing. The excavator easily lifted the footings into place, setting each one on the compacted, undisturbed soil of the hole excavation.
Getting The Footings In A Straight Line
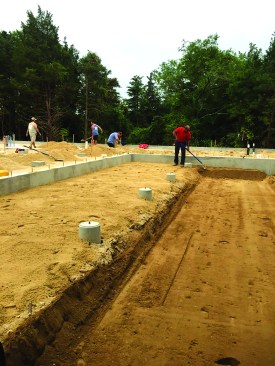
Making sure that the footings were in line with each other was as critical as their all being at the same height. We did a quick check of the foundation wall along the edge of the house adjacent to the porch to confirm that it was perfectly straight. We also verified that the outside corner—where the porch returned along the end of the house—was a true 90 degrees. Having the foundation as a reliable reference helped immensely, as it allowed the crew to pull accurate measurements from the face of the foundation wall to place the footings in a straight line.
As the crew placed each footing, they measured off the foundation as well as off the center point of the previous footing. The footings were 8 feet on-center. The crew set up a 100-foot string parallel to the foundation and a second laser as a secondary check of the footing alignment. The string provided a true sight line to work from and the laser provided a continuous line along the tops of the footings.
After setting each footing, the site crew backfilled about 2 feet and compacted the fill, which helped to lock the footings in place. After the initial compaction, they quickly checked that the footings were still in perfect alignment. The crew completed the backfilling in two more lifts, compacting each layer and checking after each compaction to make sure the footings stayed in perfect position.
Backfilling in lifts and compacting between each layer locks the footings in place.
As the crew compacted the final grade, they sloped it away gradually from the foundation.
Perimeter Drainage
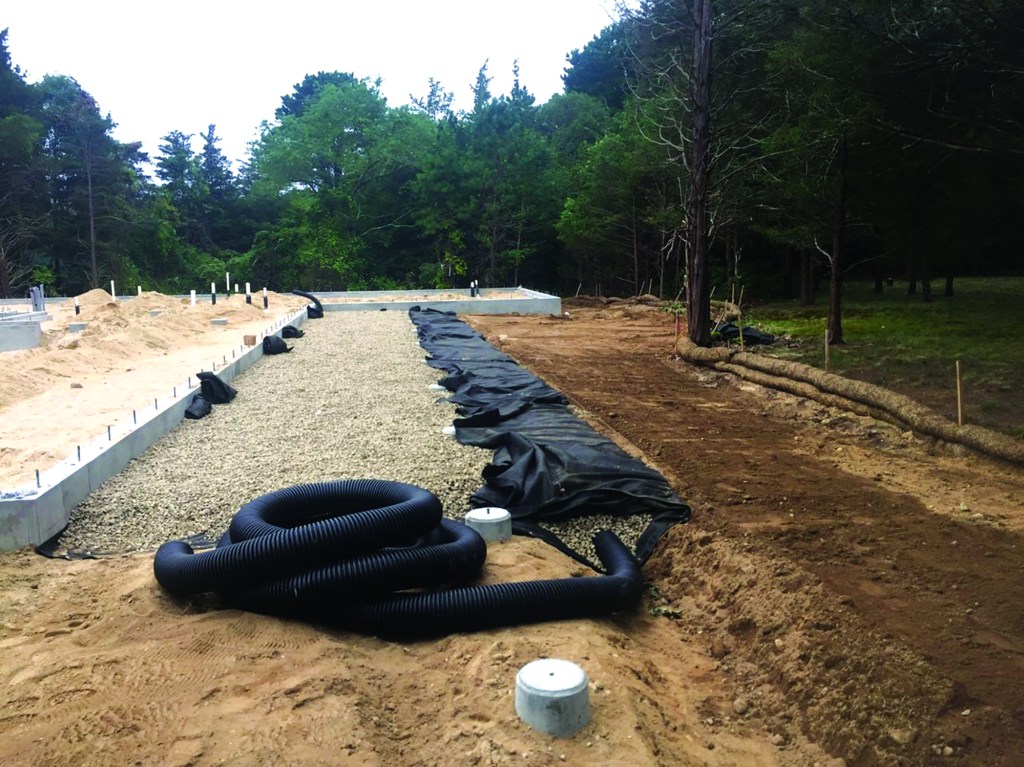
Because this home has no roof gutters, it would rely on a perimeter ground-gutter system (see “A Primer on Water Management,” Jun/17). The ground gutter is designed to carry groundwater and roof runoff to an area of reclamation on the other side of the site. The porch was to be open to the weather, so we had to tie the area below the porch into the ground-gutter system. After the site crew finished backfilling around the footings, they compacted the top layer of soil, sloping the grade away from the foundation slightly toward the outer edge of the porch.
The grade drops just beyond the footings, for the ground gutter.
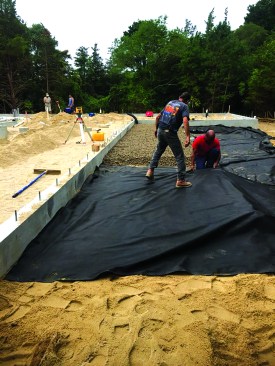
Filter fabric covers the grade.
Just beyond the line of the footings, the grade dropped sharply about 18 inches to form one side of the ground gutter. The crew covered the sloped ground with heavy-duty filter fabric and then added an 8- to 10-inch layer of crushed stone on top of the fabric. The crushed stone would drain any water that filtered through the porch floor above. The filter fabric continued beyond the footings to line the ground gutter, and it was intentionally left long so that it could roll back over the stone to fully encapsulate the drain pipe and the stone around it. We centered the drain pipe side-to-side in the ground gutter so that it sat directly below the “drip line” of the porch roof above.

Then it wraps back over the crushed stone and drainage pipe.
Precision Pays Off
Before the porch framing could begin, we quickly checked the footings again to make sure that they were all still perfectly in line. When all was said and done, Botelho and his site crew had placed all of the footings within 1/8 inch on-center of each other, a level of accuracy and consistency that would have been difficult or nearly impossible to duplicate with poured-in-place footings.
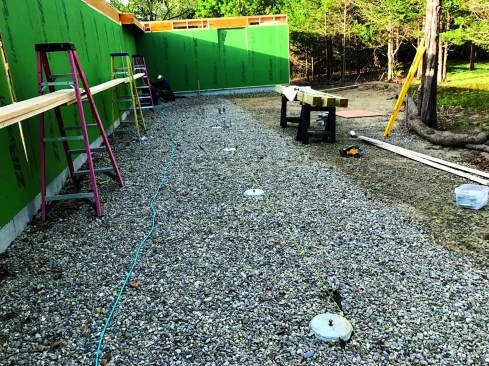
Crushed stone filled the area under the porch up to the tops of the footings.
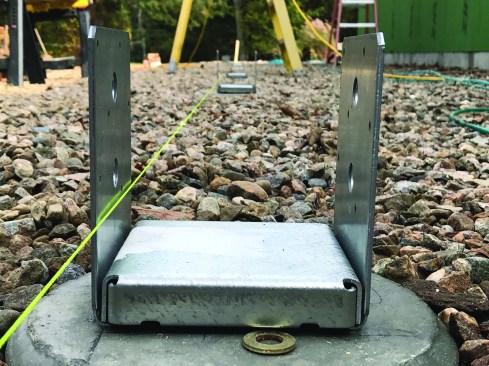
The crew checked the alignment of the footings at every step, and a taut string confirmed that both the height and the placement of all 11 footings along the 78-foot length of the porch were within 1/8 inch.
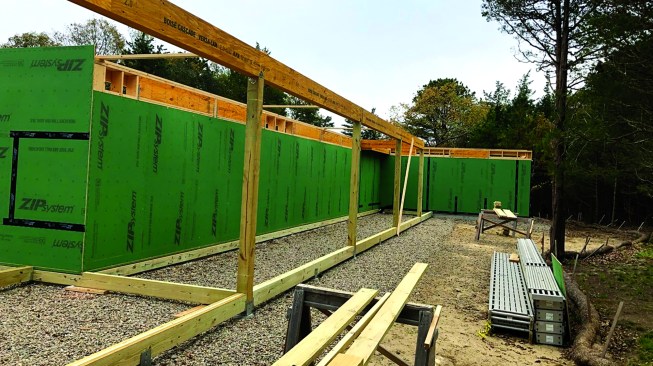
The high degree of accuracy meant that the treated beams supporting the porch were installed without a hitch.
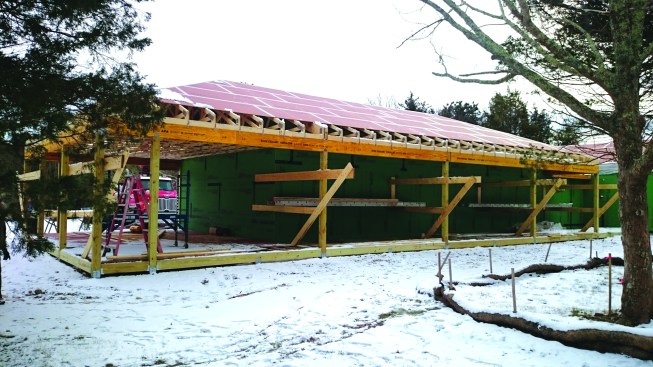
The precision was critical for engineering the roof frame to withstand severe uplift in this high-wind area.
When the framers arrived, they were pleasantly surprised to find such an accurate layout. The precision of the footing placement allowed them to quickly install the treated frame, columns, and beams for the porch. And this precision continued throughout the frame; from the straight and level lines of the footings, the crew efficiently placed the grade beams, posts, roof beams, and roof trusses in perfect alignment.


