Here’s a technique we use on occasion to create an open floor plan in an existing ranch-style home, where the ceiling joists typically rest on a center bearing wall. Instead of installing temporary ceiling support and demolishing the bearing wall, we strip the wall of drywall and then move to the attic.
First, we spike together all the overlapping ceiling joists with plenty of 12-penny nails, then lay a 2×6 baseplate on the flat across the top of the ceiling joists, directly above the top plate of the bearing wall. We fasten the plate with #12 structural screws into the top of each joist, shimming as needed to ensure good contact with each joist. This helps to maintain the existing ceiling plane and prevent drywall screw pops.
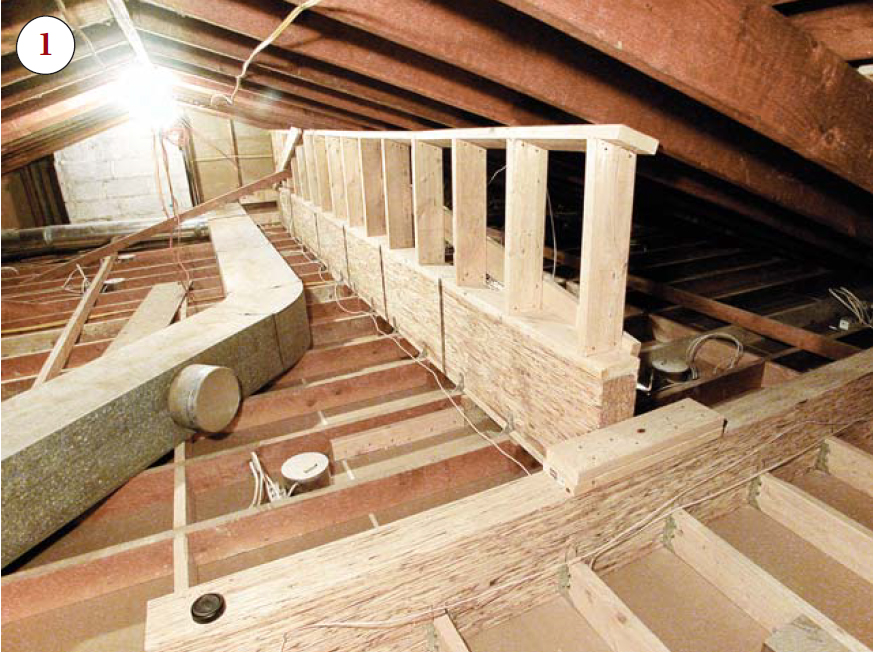
Next, we make an opening in the gable end, then slide an engineered wood beam along the baseplate (1). (The beam shown here is a 6×16-inch Parallam, though the size changes depending on the spans involved.) By this time we’ve already installed posts or other continuous structural bearing for both ends of the beam, extending down to the foundation or a new footing.
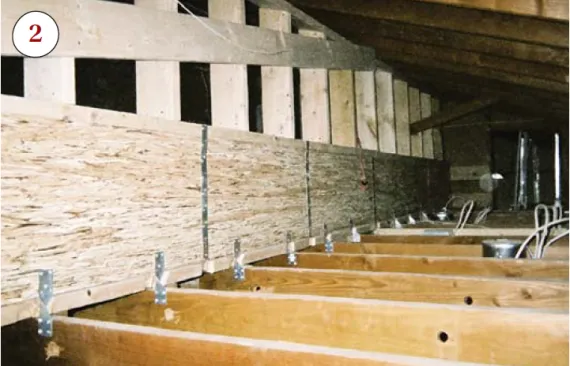
Once the beam’s in place, we lag-screw it to the baseplate from below, then use conventional rafter ties and perforated steel straps to secure the ceiling joists to the beam (2). At this point we can tear out the first-floor bearing wall; typically, all that’s left is to patch the gap in the drywall left by the old plate.
The first time we used this method, we ran it by a structural engineer to make sure we were on the right track. Now, as long as we’re dealing with the ordinary attic loads found in ranches, we size the engineered beam and metal connectors from the manufacturers’ design guides.


