It is important to accurately plumb the first truss and to brace it substantially, since additional trusses rely on the first one for stability and alignment.
All bracing must be of 2x material.
Option 1: Start with the gable-end truss. Many builders start by sheathing the gable-end truss on the ground and lifting that first. Unfortunately, the gable-end truss is difficult to brace back to the deck without the braces interfering with the second truss. On a one-story building, the gable-end truss can be braced to stakes driven in the ground.
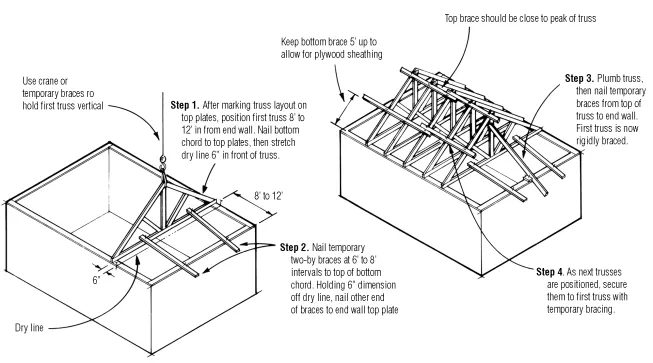
Option 2: Start several trusses in. Alternatively, start the first truss 8- to 12-ft. in from the gable end and brace it to the deck. Then work away from the braced end, filling in the open 8- to 12-ft. section last, after permanently bracing the rest of the trusses.
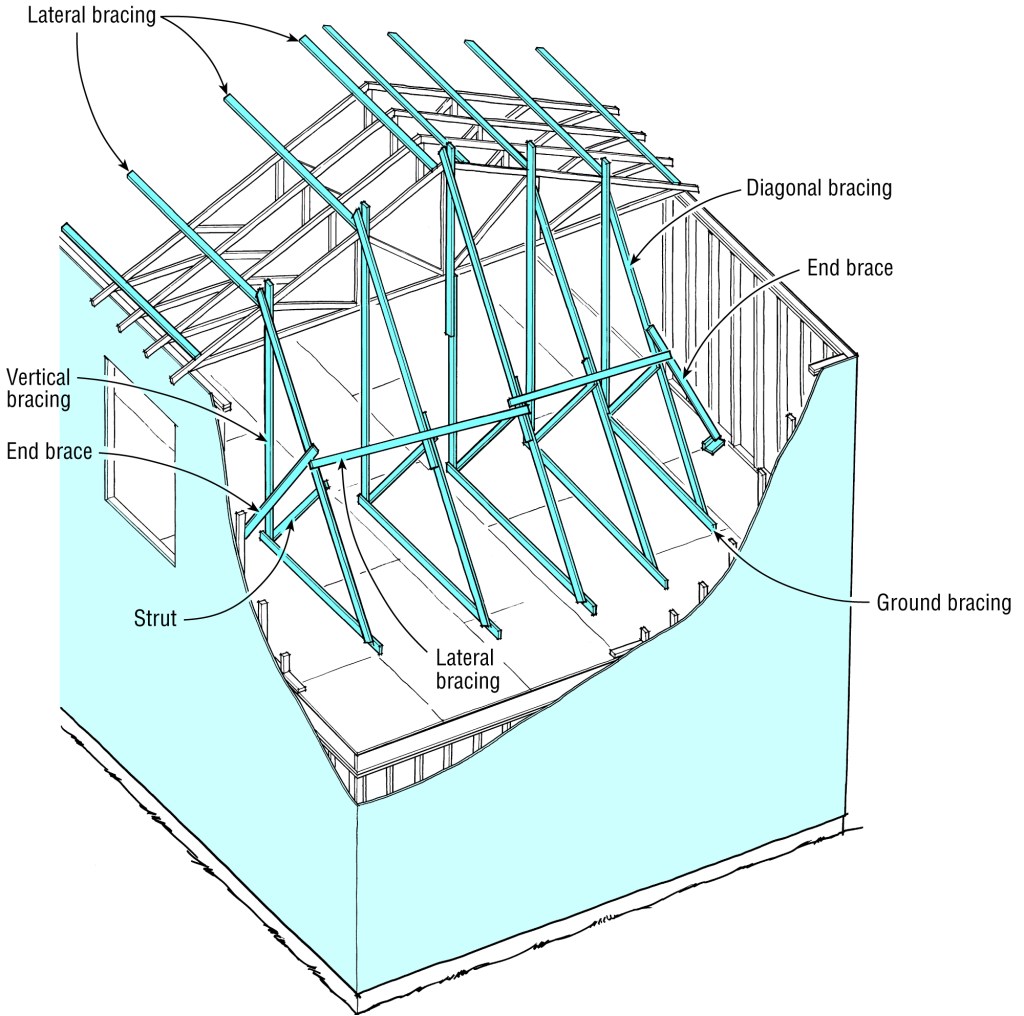
This can be done by bracing from the floor deck, as shown below.
Or you can brace the trusses to an end wall (see sequence below). Note: before relying on the end wall, it may be necessary to first brace the end wall to the floor deck to keep the top plate rigid.
Builders have developed a variety of field techniques to brace the first truss. This approach requires that the end wall first be braced to keep the top plate rigid.
For more on framing with roof trusses, visit the JLC Field Guide.


