As the Millennium Falcon is being chased by Imperial cruisers in Star Wars Episode IV: A New Hope, Han Solo declares, “We’ll be safe enough when we make the jump to hyperspace.”
In This Series
Deep Energy Retrofit
Part 1: Air Sealing
Part 2: Doors and Windows
Part 3: Insulation
“You’re kidding, they’re right there … gaining!” Luke Skywalker protests.
Waiting for the ship computer to come up with coordinates, Solo explains to a frantic Skywalker, “Traveling through hyperspace ain’t like dusting crops, boy! Without precise calculations we could fly right through a star or bounce too close to a supernova and that’d end your trip real quick, wouldn’t it?”
Insulation has certainly jumped through hyperspace since I started in this business. Standard procedure in the 1990s—staple up some kraft-faced fluffy stuff and slap up drywall—is no longer in the playbook.
Here on Long Island where I work (climate zone 4A), we have hot, humid summers and cold, humid winters. Cooling degree days last nearly nine months with just over three months of heating degree days (measured as days above or below 65°F average temperature). Even at the most eastern point of the island, the lowest temperature rarely dips below 0°F. In the dead of winter, it’s a polar bear’s summer vacation. Humidity is always high, with a morning average of 70% and an afternoon average of 55%.
In this climate, overinsulating may yield no return on investment and possibly inhibit drying of building components. Allowing a wall assembly to remain vapor open in both directions is ideal here, though not always possible. When I see a client holding up swatches of vinyl wallpaper, large slabs of wall tile, or drawings of built-ins on exterior walls—“They’re right there … gaining!”—I know it’s time for a targeted strategy. This is where the possibility of flying right through a star or bouncing too close to a supernova requires precise calculations.
Under-Slab Insulation
Let’s begin at the bottom, below the slab. A sizable portion of heat is lost through an uninsulated slab. Until I removed and insulated below and around the slab on my 1950s cottage, I had consistent complaints from visitors that my house was cold; despite the warm interior air temperature, the radiant cooling effect of the floor induced an uncomfortable chill. On the 1977 hilltop renovation we’ve been following in this energy-retrofit series, three separate slabs needed to be vapor isolated and insulated.
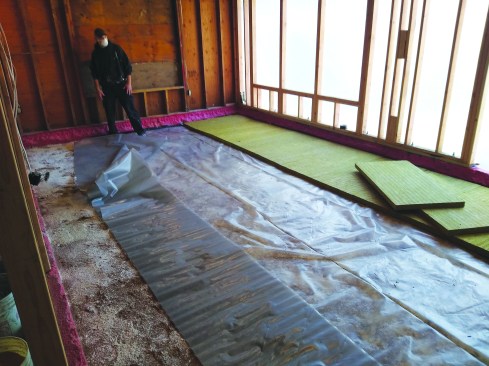
The author generously dusted the compacted earth with diatomaceous earth to protect against insects, laid down a 10‑mil vapor barrier, and topped it with 2-inch (R-8) Rockwool Comfortboard 110. A woven vapor barrier was installed over the Comfortboard.
In the main basement, about 800 square feet of concrete was removed and the ground compacted. A thin dusting of diatomaceous earth was cheap protection against termites that could chomp on the vapor barriers and insulation, followed by a 10-mil vapor barrier taped onto the walls, and the overlaps taped with Stego Tape. The thermal control includes 2-inch extruded polystyrene foam (all seams taped) topped by Insul-Tarp, an under-slab thermal and moisture-control blanket that has an insulation layer sandwiched between two layers of a woven Class A vapor barrier rated at .002 perms. We taped all the seams and the wall connections for a final R-value of around R-15. Once the slab was complete, we connected the under-slab barrier to the walls with closed-cell spray foam insulation at R-16.
In the mudroom and gym, we used a different strategy. This part of the home is 6 inches above grade and had tremendous termite and carpenter-ant damage. We generously dusted the compacted earth with diatomaceous earth to protect a 10-mil vapor barrier, taped at all edges and seams, and then laid down 2-inch Rockwool Comfortboard 110 at R-8. This ensures termites won’t eat the insulation, and the added compressive strength (1,566 psf at 25% compression) is insurance for heavy gym equipment. The final layer is a 15-mil woven vapor barrier, all seams taped.
In the crawlspace, we painted the concrete walls and rat slab with Drylok Extreme (a liquid-applied, Class A vapor barrier that blocks up to 15 psi of water pressure). One layer of 2-inch Comfortboard 80 at R-8 was topped with CleanSpace, a 20-mil puncture-proof vapor barrier by Basement Systems. All seams were taped, and the barrier was taped onto the walls. Closed-cell spray foam at R-16 locks the vapor barrier to the walls, connecting the wall insulation to the floor insulation.
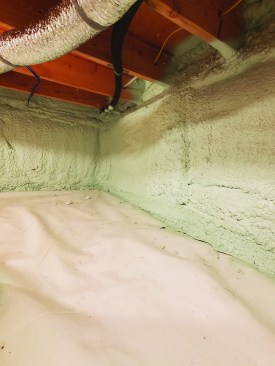
In the crawlspace, one layer of 2-inch Comfortboard 80 was topped with CleanSpace, a 20-mil puncture-proof vapor barrier. Closed-cell spray foam (R-16) locks the vapor barrier to the walls, connecting the wall insulation to the floor insulation.
Why two vapor barriers? R-values change with temperature and humidity (R-values of insulation are measured in controlled environments; the parameters are often listed in product literature). Rockwool is quite stable; extruded polystyrene , less so. A sub-insulation vapor barrier is cheap insurance to keep the insulation performing as optimally as possible. The mason on this project expressed that I was wasting time and money with the primary 10-mil vapor barrier, considering how dry the sandy soil seemed. The next morning, though, he was amazed that puddles had formed under the plastic vapor barrier.
A vapor barrier and thermal break under a slab are fundamental parts of keeping the building envelope cohesive. After the first heating season, the client mentioned how evenly heated and comfortable those areas felt.
Interior Wall Insulation
My team spent considerable resources air-sealing prior to the insulation contractor arriving (see “Deep Energy Retrofit: Air Sealing,” Mar/23). A standard insulation quote includes fire-caulking and basic air-sealing; however, we have a higher degree of impeccability than most insulation crews, and without the pressure of a big crew descending on the jobsite, we can closely inspect the project before everything is obscured. This allows the building inspector to easily inspect without removing batts; sometimes, the timing allows this to work out.
When possible, I work with the architect to upgrade header sizes or swap in engineered material, allowing an interior pocket for insulation. For this, we used Comfortboard 80 in 1 1/2-inch R-6 or 2-inch R-8. For the wall cavities, we used Rockwool Comfortbatt R-15 for 2×4 framing and R-23 for some areas that were upgraded to 2×6 framing. In the interior wall and floor assemblies, we used Rockwool Safe’n’Sound for sound deadening.
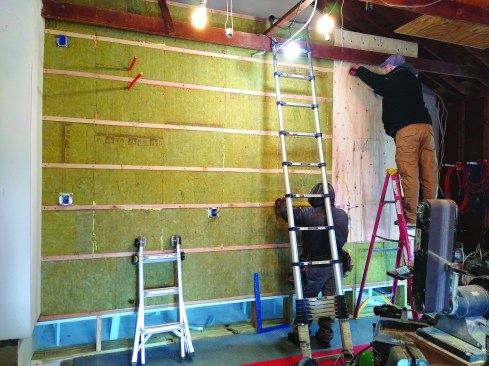
Walls shared with the garage received one thermal break with horizontal strapping and one layer of Rockwool Comfortboard 80.
I am careful to strategize where I use spray foam. I always consider, “Can this assembly dry?” as I proceed. Having encountered rot and mold consistently throughout my career, I aim for assemblies that are able to release vapor in at least one direction.
Roof Insulation
We moved insulation to the roof plane in the three attics, allowing mechanicals and ducting to remain inside the building envelope. We first created a 1-inch air gap below the roof sheathing using strips of plywood as spacers and 1-inch XPS foam between the rafters, sealing any gaps with canned foam. In the two attics above the second floor, I opted for 12 inches of open-cell foam, for a combined R-value of around R-50. Open-cell foam has one-quarter the density of closed-cell spray foam and is vapor open; in my climate, open cell needs to be used with caution. Leaving the air gap above this assembly permits some moisture to migrate through the open-cell foam into the vented space above. Moist air rises, so I expect the highest humidity level at the highest points. I designed this strategy around a dedicated dehumidification system that monitors and dehumidifies the air in the uppermost attics. ERV ventilation is always pulling and refreshing the attic air, as well.
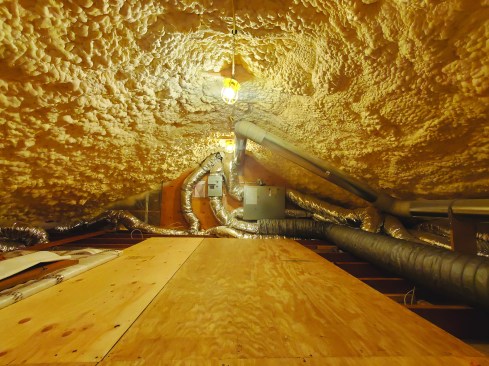
The author moved insulation from the attic floor to the roof plane, allowing mechanicals and ducting to remain inside the building envelope. First, a 1-inch air gap below the roof sheathing was created using strips of plywood as spacers and 1-inch XPS foam between the rafters topped with 12 inches of open-cell foam, for a combined R-value of around 50.
I preferred to use open-cell foam in this application because it remains flexible and (arguably) is less toxic and better for the environment, as it uses a water blowing agent (instead of hydrofluorocarbon, or HFC). In the last few years, I have changed my strategy to using closed-cell insulation only where material movement is minimal, when vapor permeance isn’t an issue, or when I have no other option to meet code requirements. In several instances, I’ve seen closed-cell foam separate from expanding and contracting framing components or delaminate because of water intrusion. I have also consulted with clients who have chemical sensitivities and suffer around closed-cell foam; even minimal off-gassing seemed to cause health issues. There is nuance to this topic, so I take it case by case.
In the attic above the mudroom and gym, we had less clearance; we again created a 1-inch air gap below the roof sheathing with 1-inch extruded polystyrene foam between the rafters, then applied 7 inches of closed-cell foam for a combined R-value of around R-55. The foam was carried down the walls to create a cohesive insulation barrier. Within one year, we found two areas had delaminated from the framing, leaving voids. During routine maintenance, we check the attic insulation and repair any voids with canned foam.
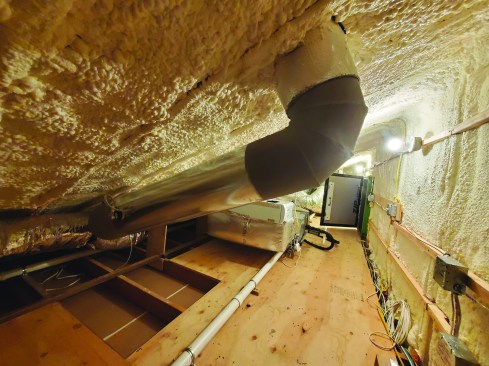
In the attic above the mudroom and gym, the author created a 1-inch air gap below the roof sheathing with 1-inch extruded polystyrene foam between the rafters, then applied 7 inches of closed-cell spray foam, for a combined R-value of around R-55. The stray foam was carried down the walls to create a cohesive insulation barrier.
We insulated the kitchen and rear-hall cathedral ceilings with Comfortbatt combined with the exterior Comfortboard insulation for a total of R-52. Allowing vapor to migrate through the assembly and into the vented over-roof above was the safest strategy for the high humidity potential of an active kitchen. This approach completely sound-isolated those areas; even heavy rain can’t be heard on the interior.
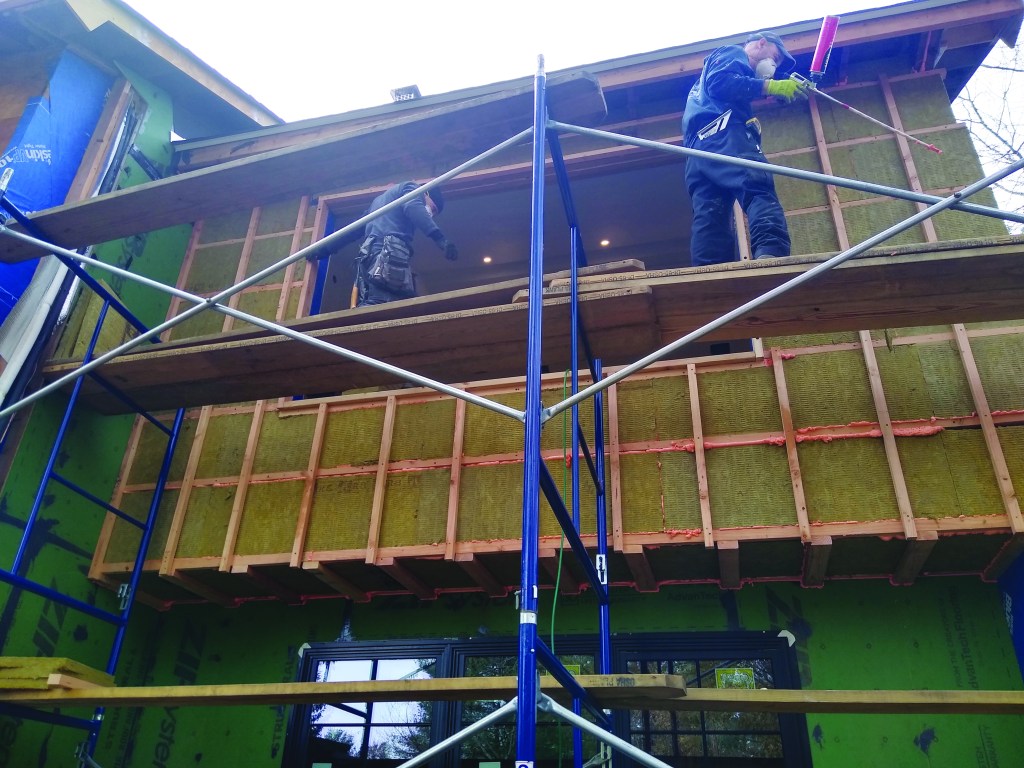
Exterior Insulation
Much of the house was wrapped with two layers of Comfortboard 80. The original house settled, leaving walls as much as 3 inches out of plumb. We chose to install horizontal, then vertical strapping to straighten out the final sheathing and to break the thermal bridging potential of the structural framing. The front of the house receives the least amount of sunlight; there, we used 2-inch-thick strapping, allowing for two layers of 2-inch Comfortboard (R-8). The rest of the house received two layers of 1 1/2-inch Comfortboard (R-6). In the areas that were extended or reframed, we used Zip System R-Sheathing at R-3.
A grid of horizontal strapping followed by vertical strapping was filled with Comfortboard 80. Canned spray foam was used to fill any small voids, reducing convection and slowing vapor movement within the assembly.
Some areas—namely, the second-floor primary bath and hallway joining a laundry and two baths in a line—needed to remain vapor-open to the exterior. In the primary bath, we thickened the framing on the interior using 2x6s, increasing the R-value to R-23. The exterior WRB, Henry Blueskin VP100, has a perm rating of 33, allowing vapor to migrate through the wall assembly. For the hall laundry and baths, we did not have the interior space to increase wall thickness, so we covered the Henry Blueskin VP100 with 2-inch Comfortboard (R-8) then 2×3 framing and no sheathing, for a total of R-23.
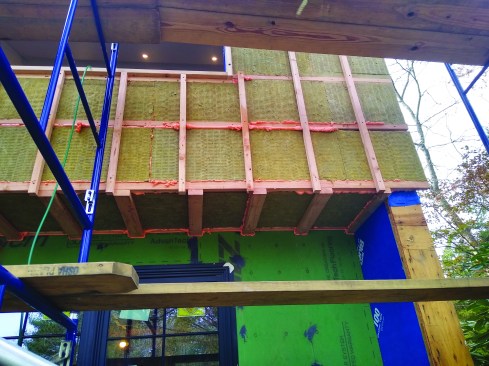
On the cathedral areas, we added 2-inch strapping perpendicular to the rafters and filled the voids with 2-inch Comfortboard 80 (R-8). This left miniscule thermally bridged spots.
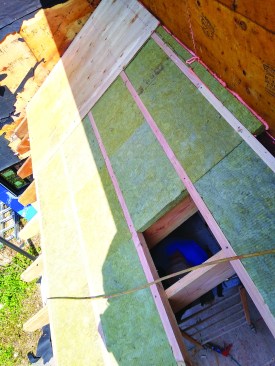
On the cathedral areas of the roof-ceiling assembly, the author added 2-inch strapping set perpendicular to the rafters and filled the voids with Rockwool 2-inch (R-8) Comfortboard 80.
On the rear of the house, the foundation was extended for the kitchen. We took advantage of the equipment on site to excavate areas that required waterproofing. The foundation was coated with Tremco Tuff-N-Dri, and Warm-N-Dri boards were adhered into the wet membrane. This added a drainage plane and an R-5 thermal break below grade.
Precise Calculations
While we don’t use fancy modeling software or overly complicated math, we do spend time strategizing what approach will yield the most reliable, effective, and long-lasting outcome. We read white papers and data sheets provided by product manufacturers and keep updated with new ideas in building science. The tweaks we make are rarely interfered with by building department officials, as long as we meet or exceed the code requirements.
Insulation contractors are never left alone on my jobsites. I explain myself as clearly as possible. I mark areas to be spray-foamed in brightly colored spray paint and mask off or protect critical areas in advance. Tipping the insulators prior to the work has increased care and compliance dramatically, and I point out or fix any over-compressed or missing insulation. The ideal is to have full insulation contact with the back of your wallboard.
If your head hurts, I understand; to most pros and homeowners, all this may seem extreme, so why bother? It isn’t this or that hole, or that bit of over-compressed or missing insulation that will ruin a project. It is cumulative shortcomings that make for a mediocre outcome. My secret to impeccable outcomes is simple: Make everything is just a little bit better than standard practice. Improve each task by 15% (I know, this is hard to quantify, but let’s play with 15%), then the final product is noticeably better than standard-issue. All these extra steps cost time and money and may seem erroneous, slow, and expensive; working with a client who is well informed and has the same intention as I do is critical.
Shortly after moving in, my client received an energy audit from his power supplier. His energy usage was the lowest of comparable homes in the area.
We know what happened to Luke Skywalker and his rag-tag cohorts. They managed to jump to hyperspace and eventually beat the Imperial empire. It wasn’t easy, or direct, or without loss, and the Empire does strike back. But they worked with what they had and prevailed. May the deep energy retrofit be with you.


