
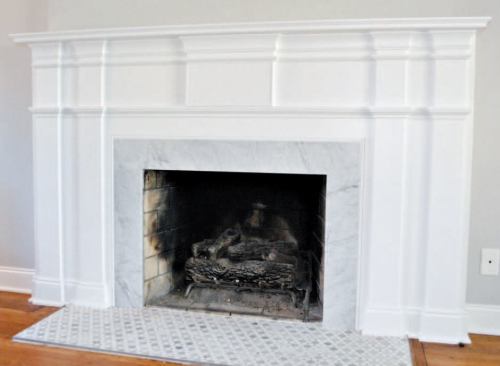
I recently had the opportunity to design and build a colonial-style mantel. The homeowner had removed the earlier woodwork and glass doors and had a tile hearth and marble slip installed. I spent some time looking through my collection of books on the period, and had my supplier fashion router bits for two of the profiles I wanted to use; I got the rest from a stock multi-cutter that I already owned.
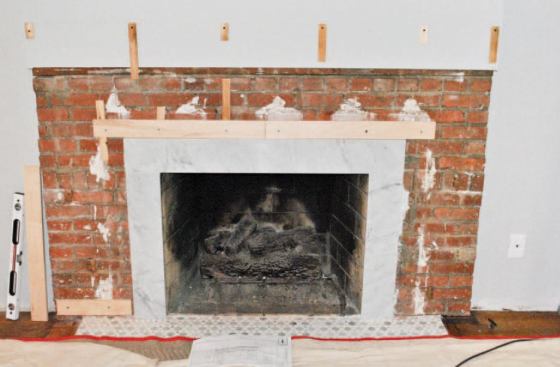
I started installation by attaching plywood backing to the brick…
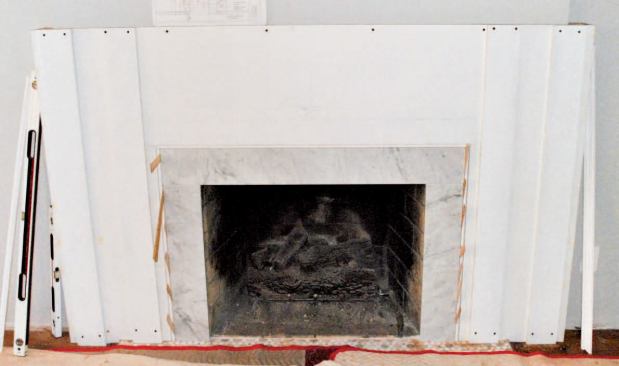
After making all the pieces in the shop, I started installation by attaching plywood backing to the brick with masonry screws, using a plumb laser and shims to get everything in the same plane (see slide show). Next I installed the foundation layer – five separate pieces of 3/4-inch MDF, with mitered L-shaped returns on the vertical end pieces for scribing to the walls. I used Dominos to join the pieces, placing the seams where they would be covered by pilasters.
I attached the MDF to the backing with short square-drive screws and used longer screws to hit the studs across the top. I then installed the four pilasters and a quirk-and-bead around the marble slip, shown shimmed into place while the glue was setting.
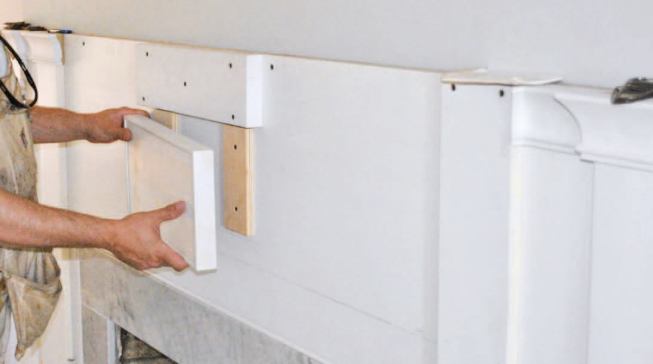
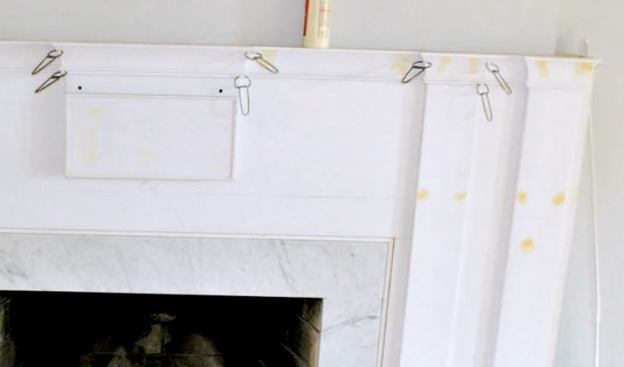
The center bump-out is two separate pieces and sits a little proud of the pilasters; the bottom piece is wrapped with 1/4-inch MDF and hangs from the two pieces of plywood backing. Coping was impossible for the detailed molding profiles, so I mitered inside corners. I started with the large cove molding at the top, then used gauge blocks cut to the width of the reveals to make sure the moldings below ran parallel. A bit of glue and 18-gauge brads hold the pieces in place.
To install the mantel shelf, I drove 2-1/2-inch square-drive screws into the foundation layer, then plugged the countersunk holes. The mantel took about four days to install and paint.
Brian Cinski is a finish carpentry contractor in the Pittsburgh area.


