Every mantel I’ve ever built has begun with a picture supplied by the client. I’ve built mantels from internet pictures, magazine pictures, even pictures on my own website, but I had never picked out a design for myself until recently, when I built a new rental home. I gave myself three guidelines: The mantel had to be different from anything I’d built before; it had to be historically inspired; and it needed to have interesting details without being overly ornate. I looked through books on historical homes but couldn’t find anything that completely satisfied my criteria. Then, while leafing through a Kuiken Brothers molding catalog one day, I found a mantel design in its Federal collection that fit my needs perfectly.
Adapting the Design
An inspiring picture is a good start, but every mantel has to be proportioned to the space where it’s being built. In this project, I wasn’t restricted by anything on the fireplace wall, such as windows or built-ins that could affect the size and proportions of the mantel.
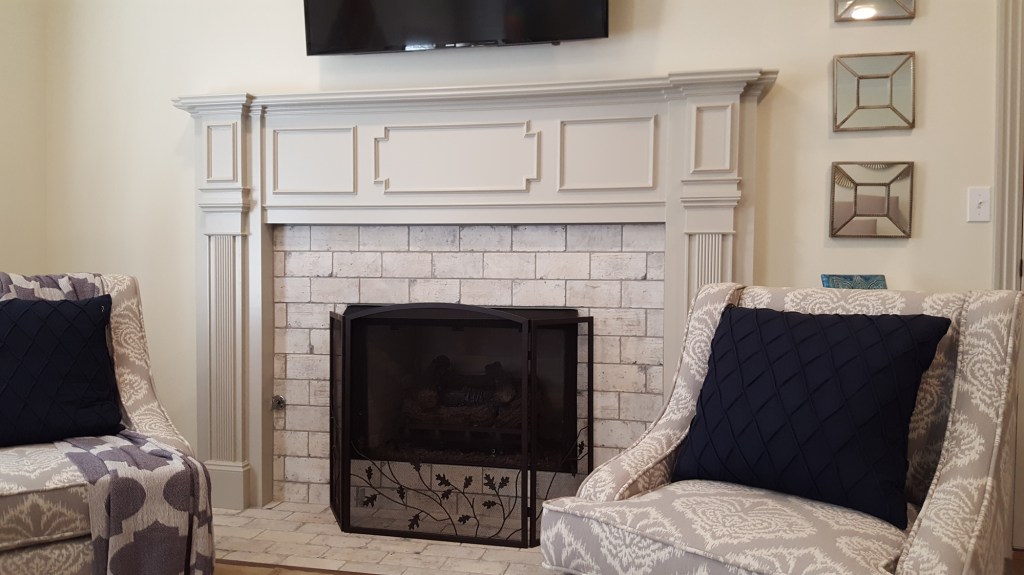
The design of a mantel starts with the size of the firebox (which can vary from project to project) and the amount of non-combustible clearance that the code requires around the firebox. In my area, that clearance is 12 inches above and to the sides of the firebox. I opted to cover that surface with tile that looks like brick; being fairly thin, the tile wouldn’t affect the depth of the pilasters (the vertical parts of the mantel made to mimic columns) on each side of the firebox. Had I used full-thickness brick veneer or stone, the pilasters would have needed to be proportionately deeper to look right.
The width of the pilasters can vary, too; I typically make them between 8 and 12 inches wide, which for most mantel heights is neither too spindly nor too beefy. Because this room had 9-foot ceilings, I opted for wide, 12-inch pilasters.
Next, I consider the dimensions of the mantel shelf. On many of the historic mantels I’ve seen, the shelf is barely deep enough for a pair of candle sticks, but I prefer the shelf to be at least 5 inches deep, and most of my clients want shelves that are 7 to 8 inches deep. I set the overall depth of this mantel shelf at 6 inches—which would allow room for displaying objects and still look proportionate to the rest of the mantel—with a depth of 7 1/2 inches where the shelf stepped out over the pilasters.
The height of the mantel shelf depends on the size of the room, the height of the ceilings, and what the client plans to put in the space above the mantel. I generally aim for 60 to 66 inches for finished mantel shelf height. Taking into account the 9-foot ceilings and a large TV that would be installed over the mantel, I set the height for this mantel shelf at 62 inches.

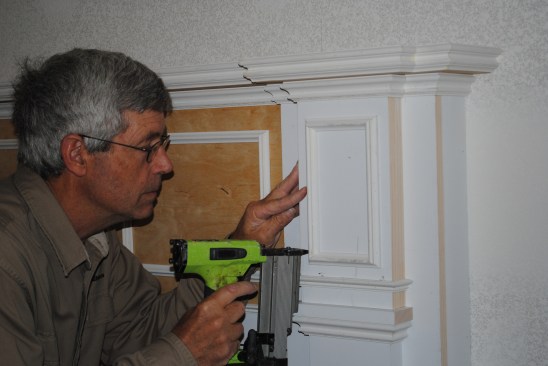
The pilasters that flank both sides of the firebox are designed …
Building the Pilasters
I used primed finger-jointed poplar for all the finish material in this mantel because it stays flat and straight. The moldings all came from Kuiken Brothers.
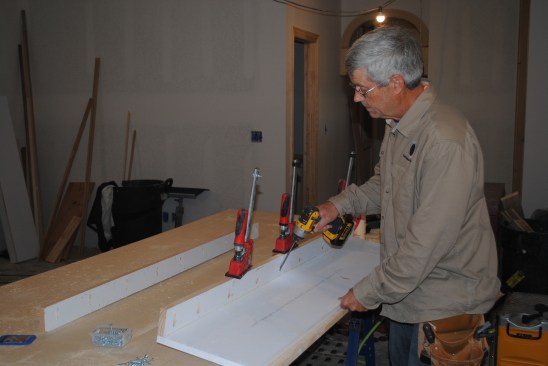
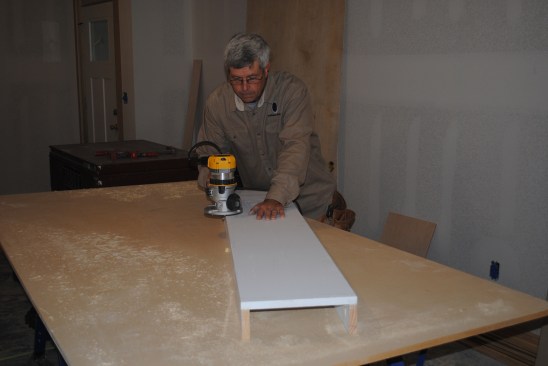
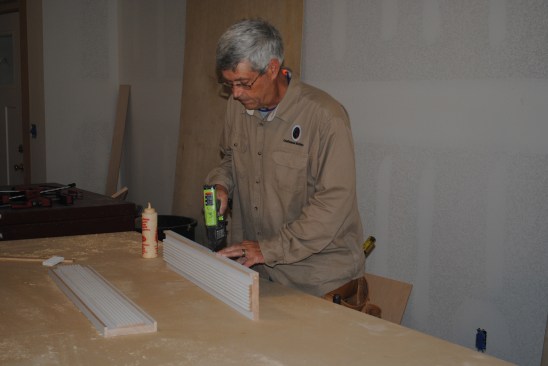
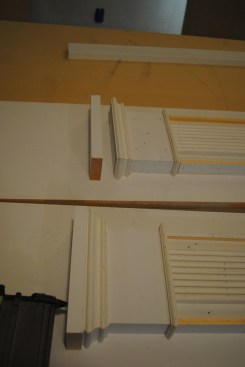
When I build a mantel, I break it down into parts or components. The challenge is building the parts in the right sequence. I usually start with the pilasters, which I build out to look like columns and to give the mantel its depth. A wide piece that is “U”-shaped in section forms a foundation for each pilaster. To make the foundation pieces shown here, I ripped 2 1/2-inch strips and then ran them on edge through a thickness planer to make them uniform. I glued and pocket-screwed the strips to 1×12 boards and flush-trimmed the edges with a router.
After making the pilaster foundations, I added the reeded detail that lends the pilasters a “fluted” look. Reeded trim is fairly thin in section, so I mounted it on a 5-inch-wide piece of flat stock. To add a sense of depth and another level of detail, I glued and nailed 1 1/8-by-3/8-inch strips to the edges of the flat stock. I centered the reeded assemblies on the pilasters 7 inches from the bottom and tacked them in place, then flipped the pilasters over and drove screws through the back of the pilasters and into the reeded assemblies.
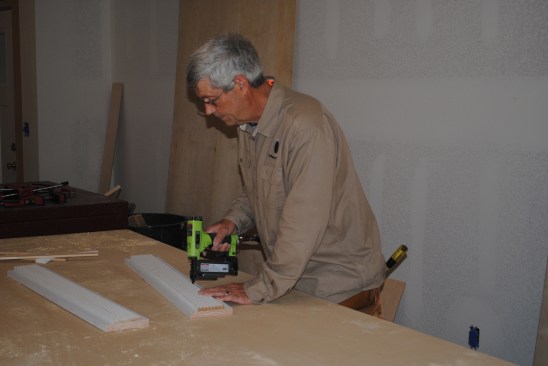
Below the reeded piece, I made a 7-inch-tall two-step base—essentially the base of the column. I capped the bottom of the reeded trim with a rectangular block of 1-by stock, and then wrapped the cap with mitered panel-mold trim. To complete the base, I made another U-shaped assembly, 2 inches deep and butt-jointed together. After attaching nailing blocks to each pilaster, I glued and nailed the bases in place.
Above the reeded detail, I installed a 5-inch-tall three-step capital detail. The foundation for this detail was a U-shaped assembly, as with the base, that attached at the top of the reeded section. The capital assembly was shallower than the base, though, and I wanted it to look more like molding, so I mitered the edges. A thin molding wrapped around the bottom of the assembly for the first step. At the top of the capital, panel molding wraps around the assembly with a 1-by block over that as the top step. I had also planned a paneled detail at the top of the pilasters and above the capitals that would tie in with the panels over the firebox, but I opted to install that detail after I’d installed the pilasters.
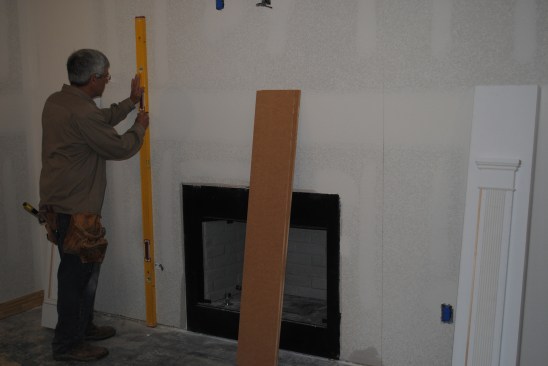


To position the pilasters, the author draws plumb lines beyond t…
Installing the Pilasters
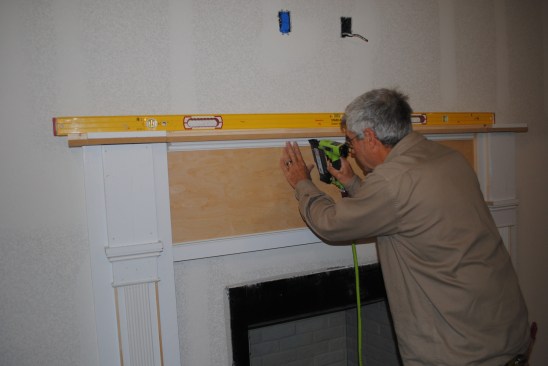
The pilasters attached to the wall with a strip of MDF that I glued and nailed over the drywall. I can never hit more than one stud with these strips, but by the time I’ve nailed the strip into the bottom plate and that one stud, the yellow glue has done the rest.
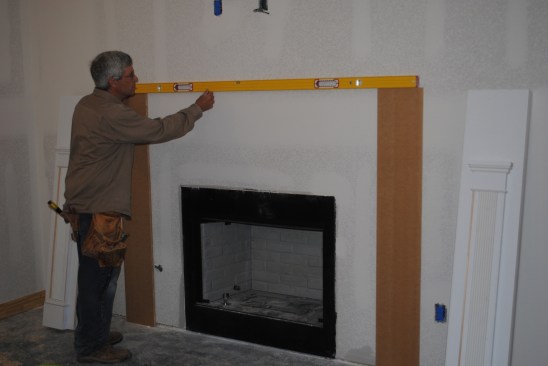
To position the attachment blocks, I measured the code minimum of 12 inches from the edge of the firebox plus 3/4 inch for the thickness of the strips that form the sides of the pilasters. Using a long level, I drew a plumb line for each of the pilaster nailing strips. I set the strips in place, without attaching them to the wall, and leveled the tops of the strips with each other. After securing the strips, I slipped the pilaster assemblies on and attached them by nailing through the sides.
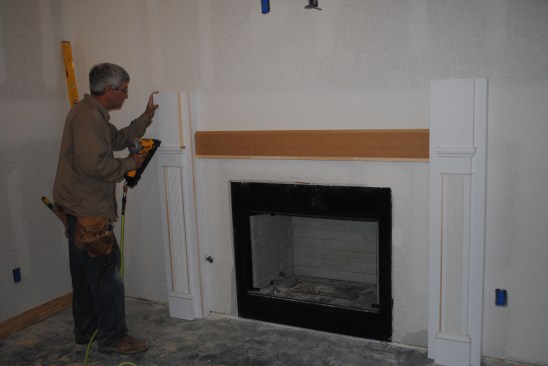
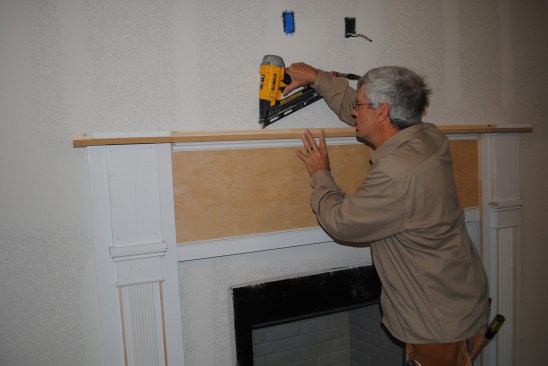
To make the upper panel section of the pilasters, I glued 1-by strips to the backs of wider 1-by material. After sanding the edges, I nailed the upper panels in place, but to ensure that I had the correct size and placement, I waited on installing panel mold for the flat panels until I had finished the horizontal panel section between the pilasters.
I built out the area between the pilasters with three layers of 3/4-inch MDF glued and nailed to the wall. I was concerned about the horizontal panel section being too tall, so I built in an extra step. After adding a strip of pine to finish the bottom edge of the MDF blocking, I installed finger-jointed poplar in two pieces over the MDF build-out—a 1×6 board below with a 1×12 above. Then I skinned over them with 1/4-inch plywood, leaving the bottom 3 inches uncovered to form the extra step. I added a small molding to cover the exposed bottom edge of the plywood.
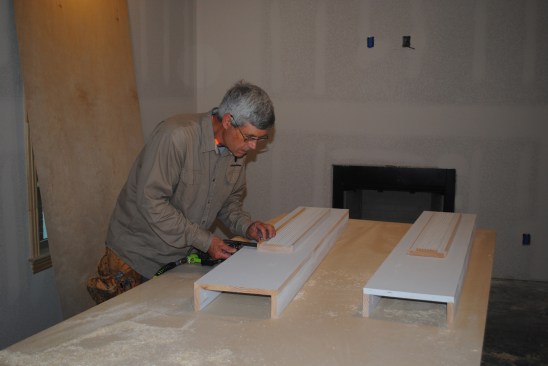
At this point, I could have applied the molding to create the panels, but for my eye, it is easier to get the panel sizes right after the shelf and all the moldings above it are in place.
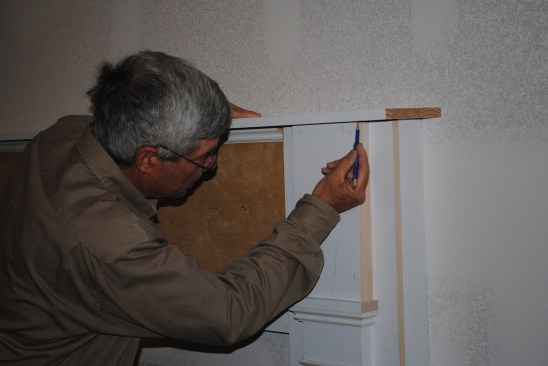


The author scribes the mantel shelf to the pilasters and panels.
The Mantel Shelf
On most mantels I build, the shelf is supported visually by crown molding below. This mantel was a bit different—instead of crown molding, there was a simple panel-mold profile. I made the mantel shelf with a layer of finger-jointed poplar on top of a layer of 3/4-inch-thick MDF. I used a different panel-mold profile to trim the edge of the shelf.
I wanted the shelf to step out around each pilaster. To get the layout right, I tacked the poplar board in place on top of the pilasters and marked precisely where the pilasters stepped out. Then I offset the measurements by a couple of inches to create a little separation between the two layers of molding.
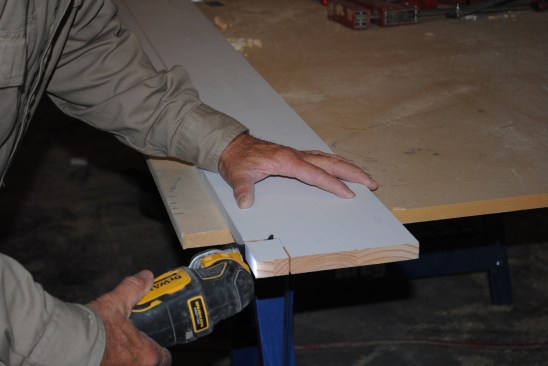
Cutting around the offsets on the table saw took a little planning. First I had to remove the guard from the saw. After setting the blade to the proper width for the main expanse of shelf, I lowered the blade, turned the saw on, and then slowly raised the blade, letting it cut up through the material and making sure my hands were nowhere near the spot the blade would pop through. For these operations, I always make sure I’m using a sharp blade, and whenever possible, I have someone on hand to help me. After making the initial cuts on the table saw, I finished the cuts with an oscillating tool. For the MDF layer, I just made a straight rip and added filler pieces where the shelf stepped out.
To make sure the shelf had no sag to it, I placed a long level on top of it to act as a straightedge when I secured the first piece of panel molding underneath. I then nailed the shelf to the tops of the pilasters and into the MDF backing along the back edge of the shelf.
From there, I needed to do a lot of careful cutting and fitting. I scribed the length of each piece in place, cut it on my miter saw using a stop, and then installed the molding, wrapping it around the facets of the pilasters. I repeated the process for the molding that finished the edge of the mantel shelf. Outside corners are what show off a molding profile, so I made sure that this mantel had plenty of them.
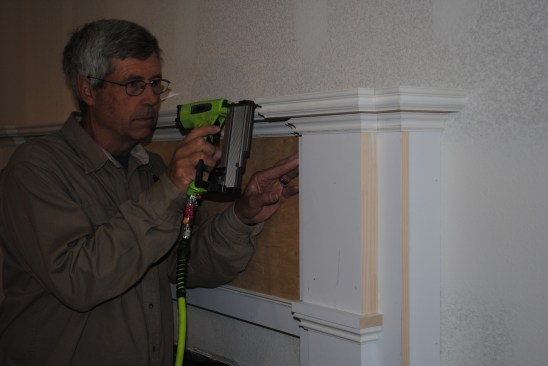
Creating the Panels
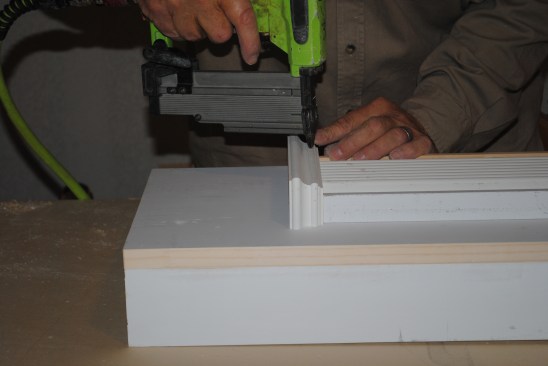
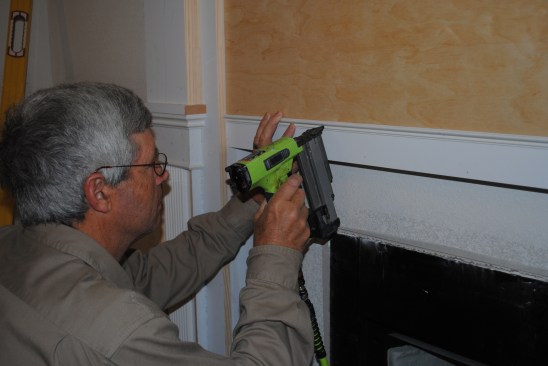
The panels on this mantel were actually outlines that I made from narrow panel molding with a defined bead detail. I glued and nailed the pieces onto the flat sections at the top of each pilaster as well as above the firebox. I knew that once painted, the profile would stand out.
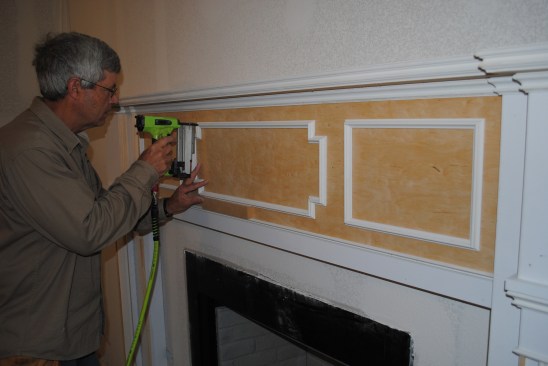
To look right, the panels above the firebox needed to be at least a couple of inches wider than their height. They ended up being
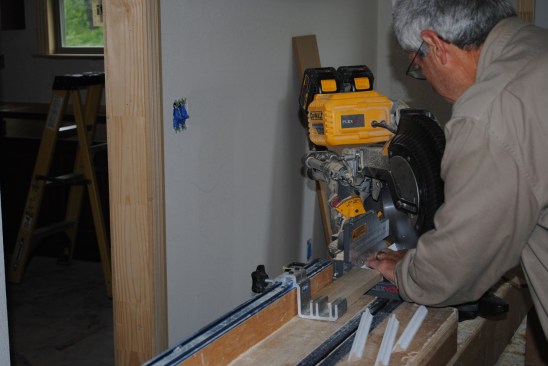
8 inches tall, with the middle panel 25 inches wide and the two smaller side panels 10 1/2 inches wide. I carefully cut each piece for the panels with a miter saw, using the stop on my saw stand.
When I’m cutting small moldings, I always make sure there is a good, sharp blade in the saw, and after each cut, I keep the saw down until the blade has completely stopped spinning. To hold the smallest pieces in place while cutting them, I use a long scrap of 1-by material.
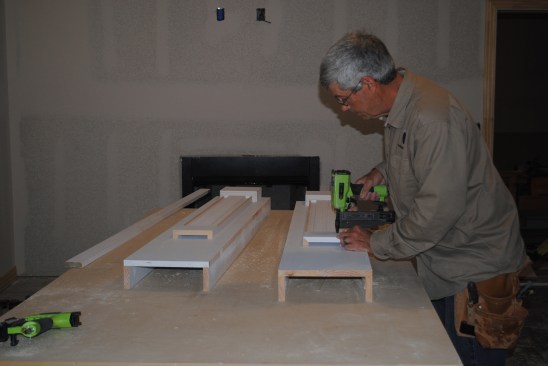
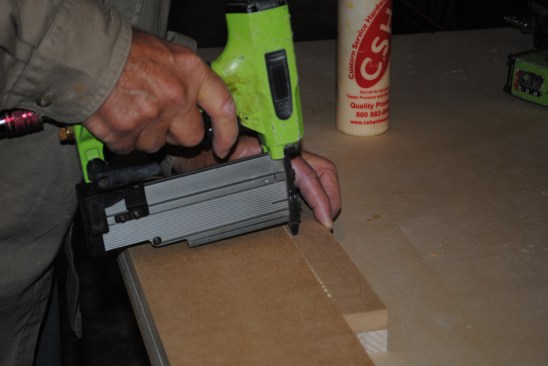
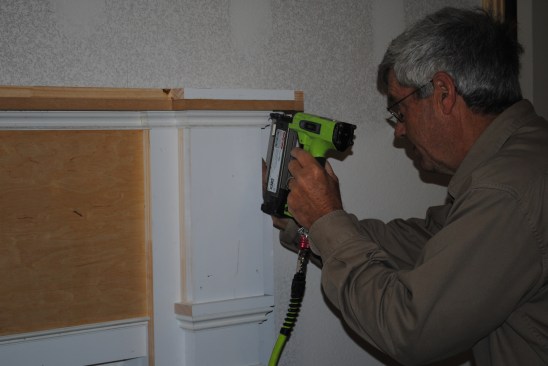
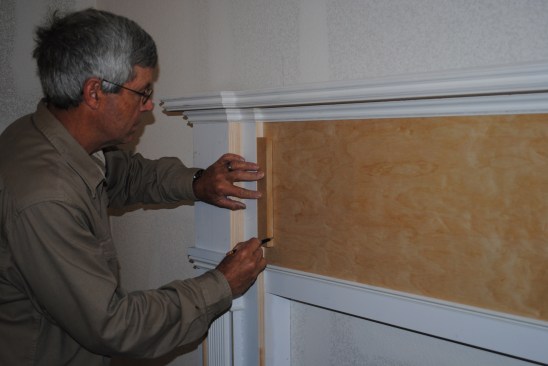
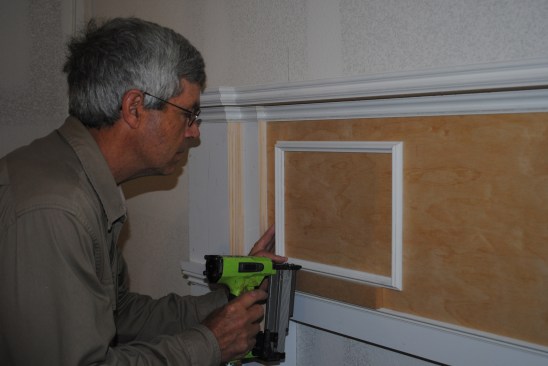
I like to preassemble panels on a flat surface, using a small amount of glue and short headless pins (making sure to keep my fingers clear when pinning the corners together). To install the panels, I used a 1-by spacer block ripped to a width that would center them vertically on the flat panel. I first used the block to scribe vertical layout lines on each side to place the side panels. Then I rested the molding assembly on the block, lined up the edge with the layout line, and nailed the assembly in place.
For the middle panel, I had inverted the corners to add interest. I centered this panel between the side panels, also resting it on the block while nailing it into place.
For the panels at the top of the pilasters, I added a bit more detail. First, I wrapped a small panel mold around each pilaster a couple of inches above the capital, which helped create a better proportion between the height and width for the last panel detail. I used a scrap of 1-by as the spacer block for the bottom of these panels, which left a slightly wider space above the panel.
All that was left to do at that point was to have the painters come in to fill all the nail holes and give the mantel a few coats of paint.
Photos by Gary Striegler.


