Shop-made and commercial jigs ensure accurate results
In my work as a finish carpenter, I’m sometimes called on to hang a new door blank in an existing opening. I described this process in a previous article (“Hanging a New Door in an Old Jamb,”8/99). Here, I’ll discuss the rest of the job — drilling and mortising the latchset.
Face Bore First
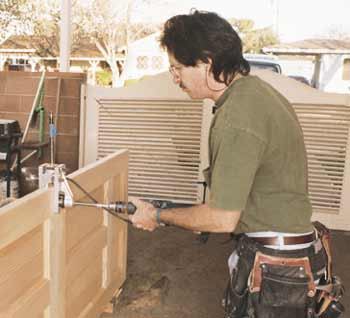
In most cases, the latchset is mounted between 35 and 38 inches from the floor, but on panel doors, the latchset should be centered in the lock rail. Always drill the face bore first, then the edge bore (see Figure 1). This takes the guesswork out of the edge bore — when the bit falls into the hole, you’re done.
Figure 1. A lock boring jig ensures accurate hole placement. The author always drills the face bore first (top), then the edge bore (bottom). |
A hole saw and a spade bit will do the job, but I prefer to use a lock boring jig, such as those made by Porter Cable, Classic Engineering (9825 Bell Ranch Dr., Santa Fe Springs, CA 90670; 866/267-3544), and Templaco Tool Co. (295 Trade St., San Marcos, CA 92078; 800/578-9677; ). A boring jig is fast and accurate, and it will also ensure the proper backset — either 23/8 inches or 23/4 inches, depending on the hardware. If you don’t have a boring jig, lay out the face bore using a square or the paper template that came with the latchset. To prevent tearout, drill the face bore only halfway through the door, until the pilot bit just penetrates the opposite side of the door, and then finish the hole from the other side.
Mortising the Latch
I use a router and templates for all latch and strike mortising. The router is faster than a chisel, and the template ensures that each mortise will be the perfect size and depth. Most residential latches measure 1×21/4 inches, so only one template is necessary. (Schlage makes a deadbolt with a wider 11/8-inch latch face, though it’s rarely used in residential work). Although Templaco manufactures templates along with plastic locators, I like to make my own templates and use a line scored across the center to align the template over the edge bore (Figure 2). Adjustable stops on the bottom of the template keep it centered over the edge of the door.
Figure 2. A shop-made template (above, left) and a router (above, right) are the tools of choice for mortising the latch. The author finishes the job with a corner chisel (left). |
Before turning on the router, place it on the template with the bit inside the edge-bore hole. Cut the outside of the mortise first, then clean out the center. To avoid nicking the template, lift the router straight off the template without twisting or turning. Use a corner chisel to square up the rounded corners left by the router.


