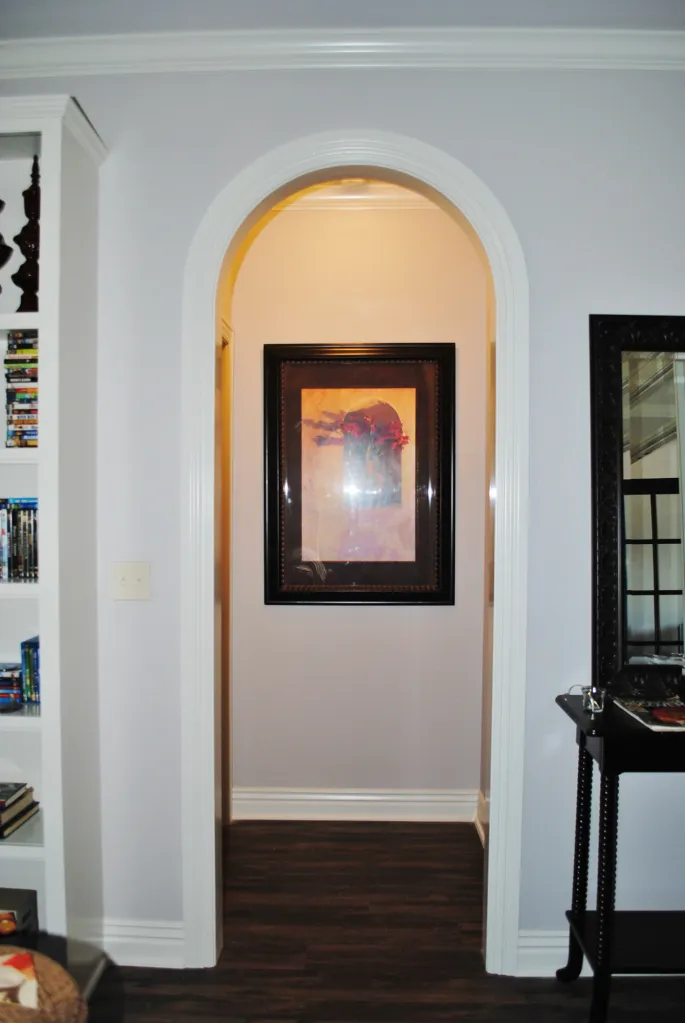
I love the challenge of trimming arched openings. It’s a great way to showcase my finish work, and once prospective clients see that I can trim out an arched opening, no one asks if I know how to hang a door. I’ve seen many house plans online or in magazines that feature circle-top windows, doors with elliptical transoms, or interior archways. To save money, these elements are often finished with drywall returns, but adding arched trim accentuates and complements the look of any opening with an arched top in a house.
I make much of my own trim—both straight and curved—on a Woodmaster planer/molder, but whether you mill your trim or buy it, creating a smooth transition between an arched top and straight side-jamb pieces is critical. A poorly executed installation can ruin the look of what should be the trim highlight in a home.
Tips for Working With Arched Trim
With any arched molding project, there are a few general rules to keep in mind.
The first thing is not to hurry. Arched molding is expensive, so it pays to take your time locating, marking, and making your cuts.
Using sharp, high-quality blades is especially important when working with arched trim. Crisp cuts are a huge help for making seamless transitions between the arch and the straight jambs.
If milling your own molding, make the straight side pieces at the same time you make the arched molding. That way, the profile and thickness will most closely match.
As you fit each joint, always make your final cuts on the straight trim. If you do make a mistake, it’s much easier and less expensive to replace a straight piece of trim than an arched piece.
Finally, don’t panic. If things don’t line up perfectly (they seldom do), a little hand work with sandpaper and a sharp chisel or plane can get things back in line.
Three Types of Arches
There are three basic kinds of arched casing: circle tops, elliptical tops, and eyebrow or segmented tops. On a recent project, I made and installed trim for all three types of openings, each with its own characteristics and layout. Here is a quick look at the three types of arches.
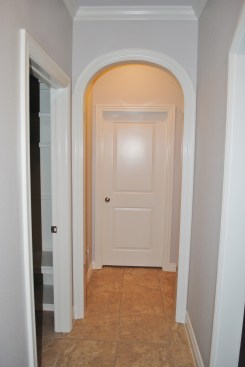
Circle tops. These arches are actually half of a complete circle and are most commonly seen on circle-top windows. Of the three types of arches, circle tops add the most height to an opening. Above a 4-foot-wide opening, for instance, a circle top requires another 2 feet of height; so to accommodate one—unless the ceilings are really tall—openings must be less than 3 feet wide.
The joint between the circle-top arched trim and the straight side pieces is a square cut, parallel to the floor. The arched trim piece must be a perfect half circle—any more than half and the trim will toe in at the joint; any less and the joint will angle out slightly, or the profiles won’t quite line up with the square cut on the legs.
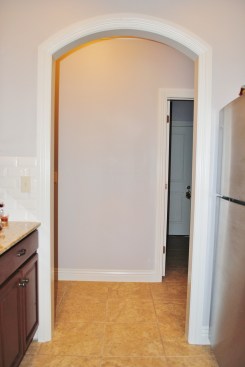
Elliptical tops. Ellipses are probably my favorite arches to work with, but they can also be the most challenging. As with a circle top, the joint between the arched top and the straight sides is a square cut. But with other arches, you can rotate the trim a little to the left or right to find just the right place to cut the joint. With an ellipse, there is only one place to make the joint. Any small shift in position and the arch won’t line up with the jamb. Most elliptical arches can be used with 8-foot ceilings.
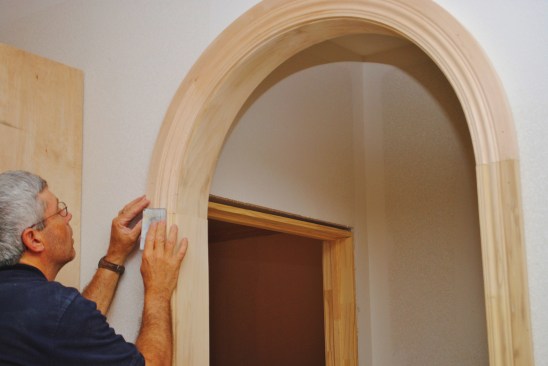
An elliptical arch needs less ceiling height than the circle top arch. Both attach to square cuts on side-jamb trim.
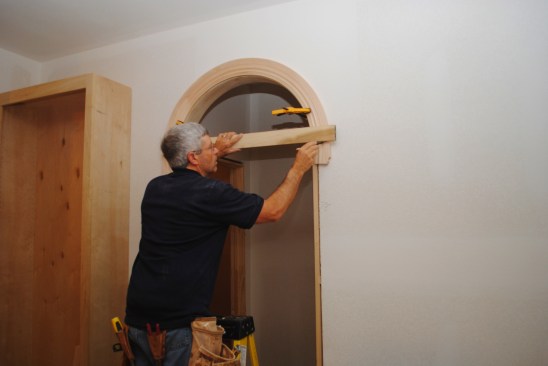
An eyebrow arch is actual a segment of a circle. The arch joins the side jambs with miter cuts.
Eyebrow or segmented tops: These arches are portions, or segments, of a circle, and are probably the easiest to work with. As a general rule, the width of an opening with an eyebrow arch is the radius that the trim is made from. For a 4-foot-wide opening, for instance, the radius of the arch would also be 48 inches. Unlike with the other two types of arches, the joints between the eyebrow top and the straight legs are mitered cuts; most of the miter angles fall between 25 and 35 degrees. As the radius of the trim increases, the degree of the miter cut decreases. Eyebrow openings can be used with almost any ceiling height, because they don’t add as much height as the other types of arches.
Cutting and Fitting Circle-Top Arches
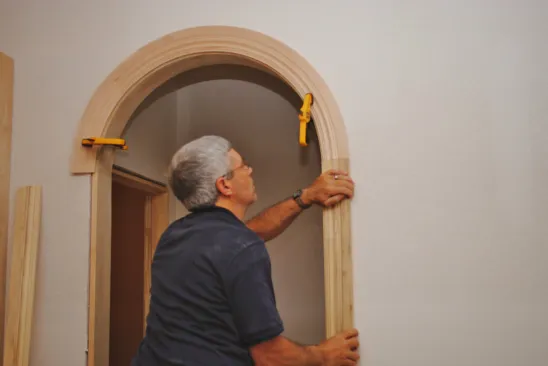
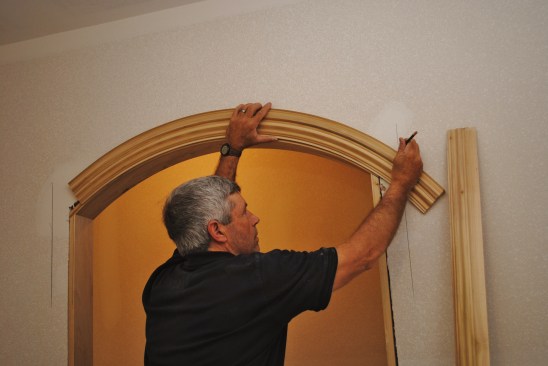
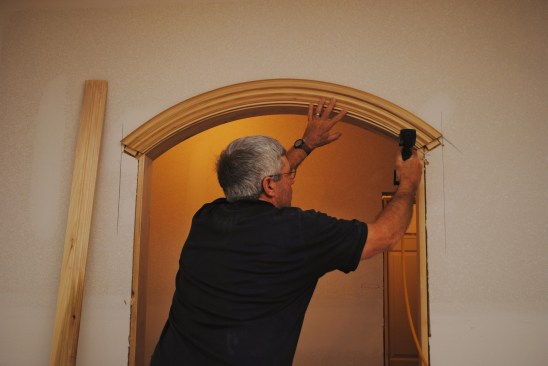
Circle-top arches can be laid out on a work table or on the floor by either tracing the molding or marking the radius with a trammel, but I find it easier just to set the arched piece directly on the jamb (a couple of small finish nails temporarily tacked at the reveal line can help hold the piece in the proper position). After clamping the arched trim in position, I mark the points on the left and right inside edge where the arch will transition to the straight side jambs. Those points usually correspond with the joints in the jambs.
First clamp the arched trim to the jamb making sure the reveal is consistent along the jamb. On both sides mark where the circle starts to turn in. Then line up a straight edge with the marks and draw the cut lines.

To make the cuts on a miter saw, support the free end of the circular trim in back of you.
After cutting the circle arch, clamp it back in place and make the cuts on the side jambs. Those cuts should be square to the trim (parallel to the floor).
I line up a straightedge with the marks and draw a straight line across both sides for the cut. I make the cuts on a miter saw with the other end of the half circle supported in back of me. After cutting both sides, I clamp the half circle in position and fit the straight pieces. If I’ve done everything correctly, the tops of the side jambs should be square cuts.
Cutting and Fitting Elliptical Arches
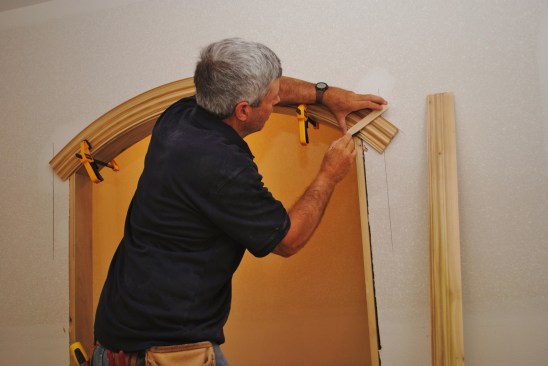
For ellipses, I also have to find the inside points where the curved trim meets the straight leg—just like I did for the circle-top trim—but it’s a little trickier. (For more on laying out ellipses, see “Building an Arched Passageway,” Dec/07). I start by holding the elliptical piece on the jamb and rotating it to the left and right until the reveal comes closest to being even along the jamb. Elliptical arches never seem to line up perfectly with the jambs, but I can adjust the fit when I install the trim. When I find the best position, I clamp the arch to the jamb.
To fit an ellipse first make sure the arched trim is in position for the most even reveal across the arch. With the trim clamped in place, mark where it transitions to the straight sides. These marks should closely correspond to the joints in the jambs.
With a straightedge aligned with the transition marks, draw a line across both sides of the ellipse to guide the cut.
Next, I mark the point on each side where the trim starts to turn in from the jamb edge. Both of these marks should be pretty close to the same distance from the floor, so I double-check the measurements—hopefully, they are within ¼ inch—before I mark the cut lines. When I’m happy with the marks, I line them up along a straightedge and mark the lines for the cuts, similar to what I did with the circle top. After cutting the sides of the ellipse, I make the square cuts on the tops of the side jambs where they meet the arch. I like to do a test fit on a flat work bench. If I need to tweak the edges with a little sanding for a better fit, it’s much easier to do before the piece is installed.
If there are any obvious places where the profile is too wide, sand before you install the piece. Sanding the edge of the profile after the piece is installed is much more difficult.
Cutting and Fitting Eyebrow Arches
For the first two types of arches, the joints were square cuts (parallel to the floor). For eyebrow or segmented arches, these transition joints are miters, the angle of which changes depending on the radius of the trim.
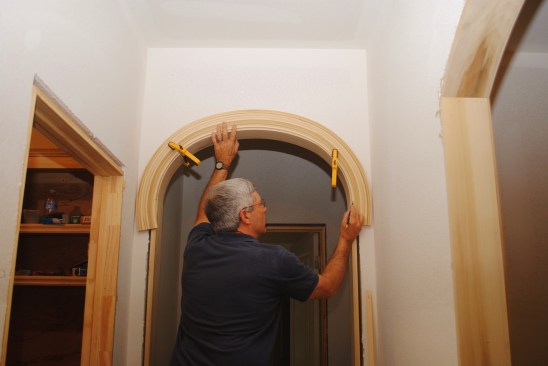
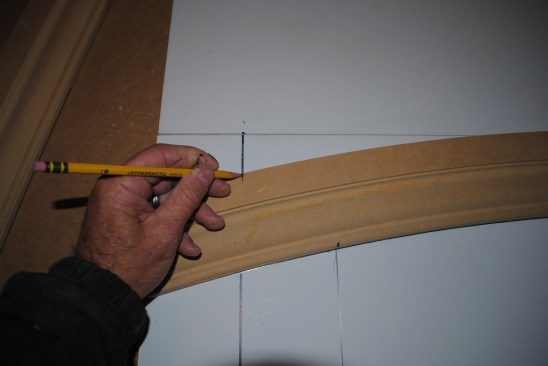
To lay out the miter joint where an eyebrow arch joins the side jambs, first extend the side jamb lines up the wall. Then trace the arch profile extending the lines until they intersect with the side jamb lines.
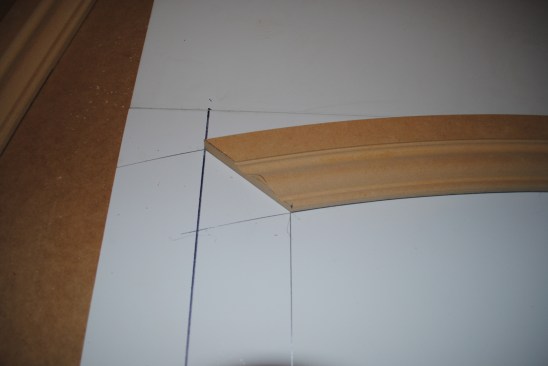
With the arch clamped in place, draw a line between the inside and outside marks for the miter cut on one side.
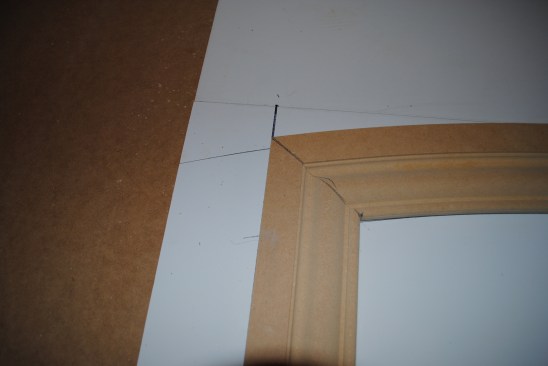
Working one side at a time, cut the miter on the arch and the side jamb mite. Tweak the cuts until the fit is perfect. Then repeat the process on the other side.
If the finished floor hasn’t been installed yet, I have more wiggle room for adjusting the cut, and I fit the pieces directly to the jamb. Holding the trim in position, I trace along both vertical edges of both the right and left jambs. Then, starting on the right side, I hold the arch trim against the jamb at the proper reveal and trace a line along the inside and outside edges where the arch intersects the sides.
With the arched trim clamped in place, I mark the miter line between the inside and outside intersection points and then make the cut on a miter saw. Next, I set the side jamb piece in place, marking and cutting the miter angle on that piece as well.
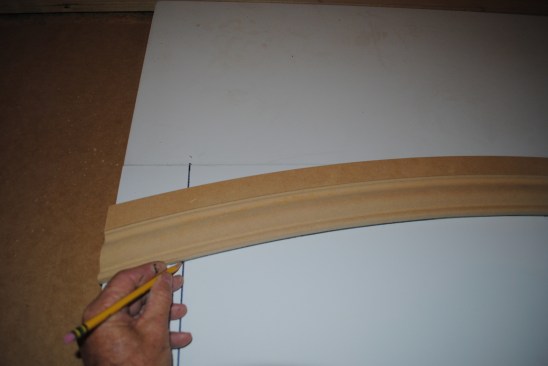
When installing an eyebrow arch with a finished floor below, it's easier to do the layout on a table so you can cut the length of the sides to fit at the end. First trace the arch onto the table or bench.
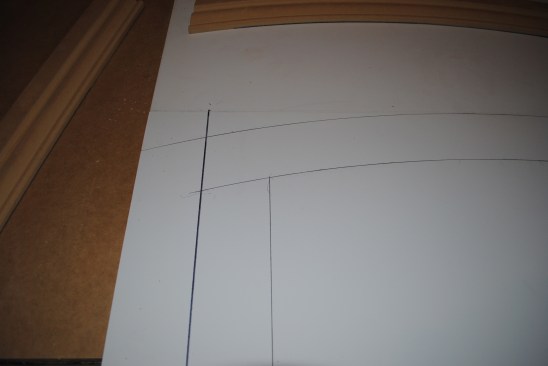
Draw lines on both sides of the jamb legs up to where the lines intersect with the arch.
If my layout is perfect, the joint is tight and the profiles line up. But that rarely happens on the first try, so I adjust the cuts to get a perfect fit. When I’m happy with the right side, I trace the top and bottom edges of the arched trim on the left side. Then I set the right jamb piece aside and rotate the arch about 1/8 inch to the right before cutting and fitting the left side. Moving the piece a little gives me extra room to adjust the miter as I fit the left side of the trim.
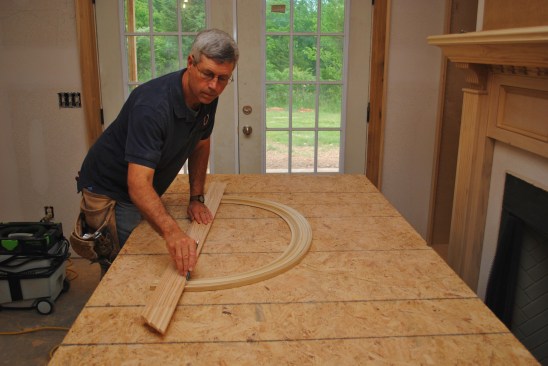
If the finished floor has been installed, I do a full-scale layout on a table or on the floor so the jamb trim can run long while I tweak the miters to fit. To create the layout, I draw the correct radius with a trammel (remembering to add ¼ inch for the reveal), or if I’ve made the molding section, I just trace it on the table. I also trace the jamb legs, set at the width of the opening plus the reveals for both sides. With the arched trim set back in place on the layout, I transfer the intersection marks onto the arch. As before, I draw a straight line between the two marks and make the miter cut. Then I do the same for the jamb legs and make those cuts. When I’m satisfied with the joints, I cut the jambs to length for the finished floor.
Set the arch back on the layout table and transfer the intersecting points onto the arch. A line between the two marks will be the miter cut.
After cutting the miter set the arch back in place.
Working on the table, the side jamb miters can be tweaked until they are perfect. Then they can be cut to length to fit the finished floor.
Assembling the Pieces
For securing the joints, the most basic method is gluing and nailing with headless pins. This is my last choice because the joint is not reinforced, and it doesn’t work well with large profiles.

A good way to connect the arch to the side jambs is with small gussets glued and pinned to the back side of the trim.
The arch is nailed in place with small pockets cut in the drywall for the gussets.
A second method is to remove a small section of drywall from directly behind the joint, then glue and pin a ½-inch-thick plywood gusset to the back of the arched piece at each of the ends. I install the arch first, with the gussets sitting in the spaces I created in the drywall. Then I glue and pin the jamb legs, letting the gusset reinforce the joint. This method works best when I’m fitting the trim on the wall piece by piece, but with adequate glue and enough drying time, it’s possible to preassemble the trim this way.
The side jambs are then glued and pinned to the other side of the gusset.
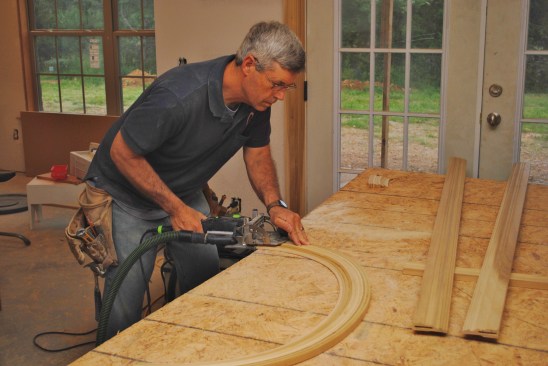
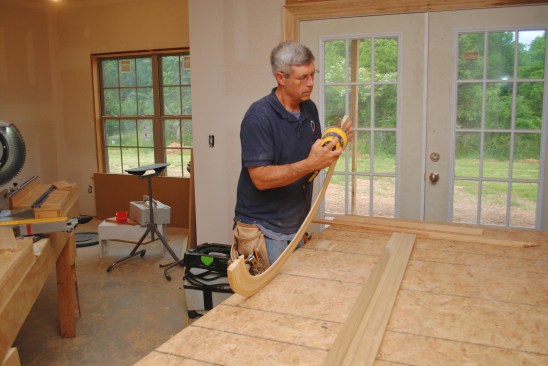
Another great way to join arched trim to the jamb legs is with domino tenons. The stock must be thick enough to accommodate the fasteners.
I sometimes use biscuits or dominoes to reinforce the joints if the trim profile is thick enough to accept the tenons . Biscuits and dominoes are a great way to make preassembled trim; give the glue plenty of time to set up before installing the trim. You can also assemble the pieces on the jambs with biscuits or dominoes if you’re sure to install the jamb legs first.
My favorite joining method is using dovetail keys to hold the joints together. This method works great for preassembling or for fitting in the pieces in place, and it eliminates the need to wait for glue to dry. The only down side is that it takes a specialized machine called the “Hoffman Dovetail Joining machine” that makes matching dovetail cuts in the backs of each piece of trim. A plastic fastener called a “key” fits into those cuts and pulls the joint together instantly. I mate the cuts in the arch and the jamb by indexing them from the outside edge of the trim. The keys come in many different lengths, so by adjusting the depth of cut, I can fit three keys into just about any profile to create a super-strong joint.
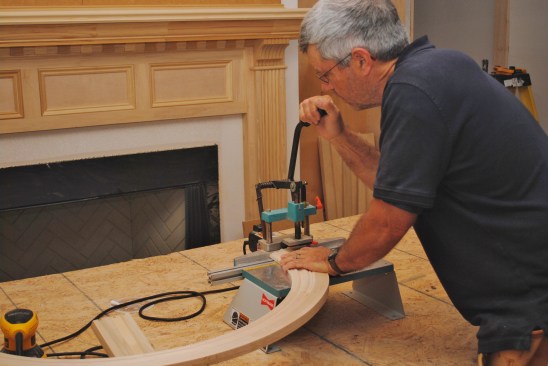
One of the best ways to join the arched trim to the side jambs is with a dovetail machine that cuts small dovetail-shaped slots.
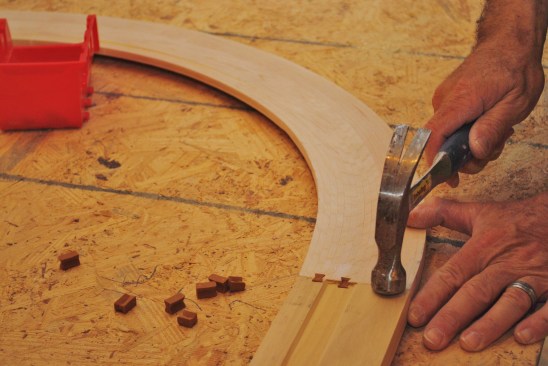
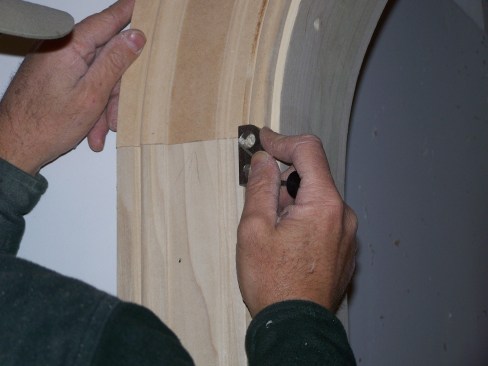
When matching dovetail slots are cut in both trim boards, small "keys" hammer in to draw the pieces together.
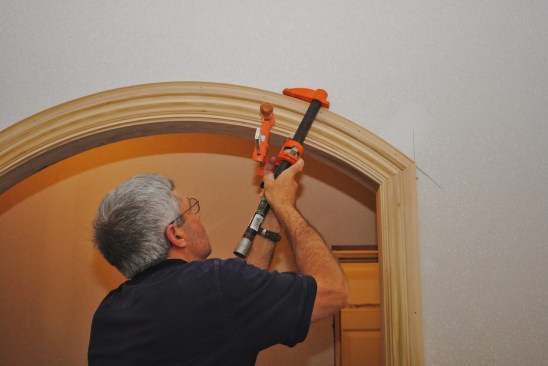
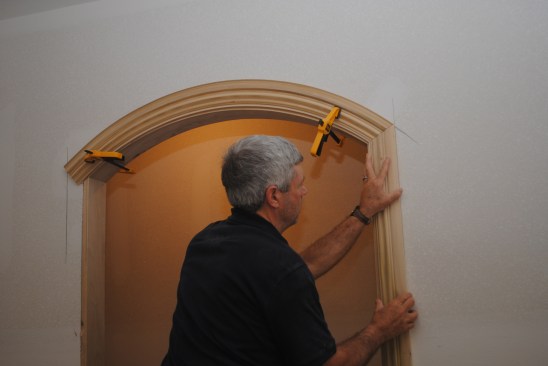
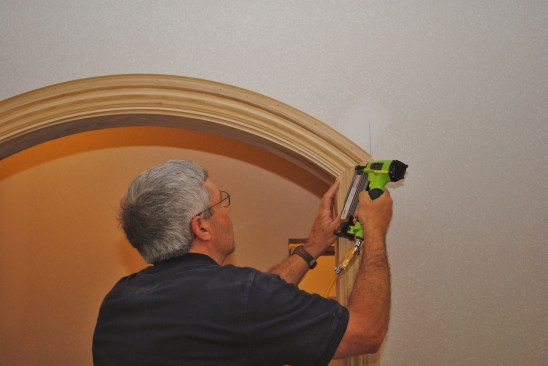
To create an even reveal, a strategically placed clamp draws the jamb into position where it is nailed to the arch to hold it in place.
Finishing Up
Almost every arched trim project requires a little extra effort to achieve the finished quality that I am looking for. First, I usually need to move the jamb slightly for a perfectly even reveal. Sometimes that operation is as simple as using a clamp between the arched trim and the jamb and then shooting a few extra nails through the arch to lock the jamb in place. Other times I need to sand a little off the inside edge of the trim to widen the reveal, and on occasion I’ve even sanded a little off the jamb to decrease the amount of reveal.
Sand paper smooths out the profile transitions between the arch and the side jambs.
For areas that are too much to sand, a sharp 1/4-inch chisel or a mini plane like this one work well on the straight side jambs.
On most arched trim projects, there are places where the profiles don’t align perfectly. In these cases, I blend the two sides together using sandpaper. In extreme cases, I’ve used a sharp ¼-inch chisel or my miniature rabbet plane to shave part of the profile of the straight trim. It’s not unlike blending a splice joint in crown molding or baseboard. Again, the most important advice I can give is not to panic if the joint isn’t perfect on the first try—remember you can make adjustments and there’s no need to rush. Working with curved trim can be really challenging, but the finished project is something to be really proud of.
Photos by Gary Striegler


