One of my favorite quotes from a famous football coach—“Sometimes you gotta play with what the defense gives you”—applies when it comes to building mantels. More often than not, the fireplace has to fit in a tight space, such as between a couple of doors or cabinets, or in a room with a low ceiling.
On this job, the wall where the mantel would be located simply bumped out into the room the depth of the firebox, with limited wall space on either side of the firebox opening for the mantel. It was going to be a tight fit, so I went with a design that featured a pair of paneled pilasters with a simple, fairly narrow entablature above that would leave enough wall space to accommodate a large flat-screen TV mounted above the firebox.
While this mantel was designed for a tight spot, the beauty of the design is that the size and proportions can be adjusted to fit almost any space. I used only three different moldings (except for a simple one that I fabricated myself) to build this mantel, but by changing their style and size, it is possible to use this approach to build a custom mantel to fit almost any client’s taste.
Design and Layout
To meet fire codes, combustible materials must be held back from the sides and top of the firebox opening according to the manufacturer’s specifications. Typically, inspectors in my area require an 8-inch clearance between the firebox and any combustible materials on the sides, and 10 inches of clearance above the firebox. A noncombustible hearth is a requirement for a true wood-burning fireplace, but for the vented gas fireplace on this project, I referred to the setback measurements in the fireplace manufacturer’s installation guide.
When designing the mantel, I used a story pole based on actual measurements taken on site. Since space between the corners of the bump-out and the firebox was limited, I downsized my typical frame-and-panel details. Instead of 2 1/2-inch-wide stiles and rails, I sized them to be 2 inches wide, and instead of a traditional wider panel molding, I chose WindsorOne’s WOBB002 band mold, which is only 3/4 inch wide but creates a dramatic shadow line.
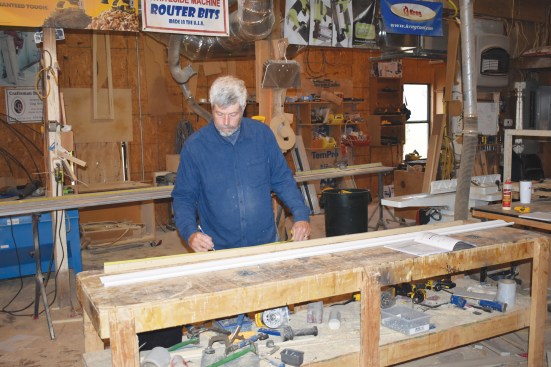
The author marks the height, width, and noncombustible clearance dimensions of the fireplace on a story pole, then lays out the mantel design in full scale. Only three different stock molding profiles were used to build the mantel in this story.
For the horizontal layout, I started in the middle and marked the rough opening for the firebox, then added 8 inches to account for the noncombustible material on each side. That was more than the installation manual called for, but I wanted the metal fireplace to look as authentic as possible, and any real wood-burning fireplace would have at least that much clearance. Next, I marked the width of the frame-and-panel pilasters, which I sized to be a total of 10 inches wide.
To finish the horizontal layout, I did a quick design for the entablature, which projects outside each pilaster. I decided to fabricate the mantel shelf from 1×7 poplar, rounding over the edges to give the shelf edge a bullnose profile. Below the mantel shelf, I built up a detail consisting of WindsorOne’s WOCM005 3/4-by-4 9/16-inch crown and WOBM001 1 3/16-by-7 1/4-inch colonial-style base molding. While the total shelf depth measured 7 inches, only 5 inches would project in front of the pilasters, so I added another 5 inches on each side outside the pilasters to finish the horizontal layout.
The vertical story pole layout was a lot simpler. Starting from the floor, I marked the firebox height and added the required clearance to wood based on the manufacturer’s chart contained in the installation manual. This useful chart indicated how far out from the wall the mantel shelf could project at different heights above the opening. For example, at 10 inches above the opening, a 2-inch-deep projection was allowed; a full 8-inch-deep mantel shelf had to be at least 16 inches above the opening.
To leave room to mount a large TV to the wall over the fireplace, the top of the mantel shelf could be no more than 62 inches above the floor. After marking its 62-inch height on the story pole and the three molding profiles supporting it, I was left with about 3 inches of height for the frieze crossing over the two pilasters.
To check my proportions, I did a second vertical layout of the pilasters. This layout included the base detail and horizontal frame members, or rails, plus the size and location of the necking trim close to the top of each pilaster.
Pilaster Assembly
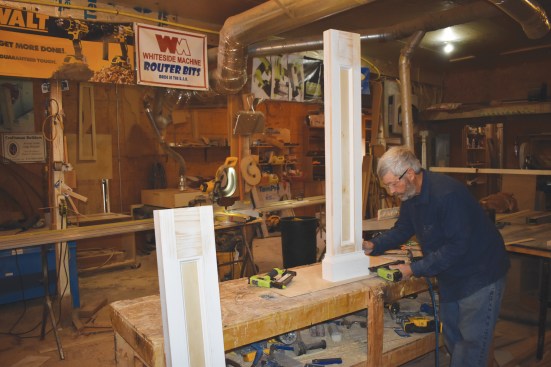
I started by pocket-screwing together the two poplar frames that make up the front of each pilaster, using the vertical and horizontal layouts from my story pole as a guide. To build out the pilasters to a 2-inch depth, I added 1 1/4-inch-wide returns cut from 1-by stock behind each stile. I wanted to make the joint between the stiles and returns virtually seamless, so I first glued the returns to the back of each stile, holding them in place with a few 23-gauge headless pins. Then I drove pocket screws spaced 5 or 6 inches apart to tighten up the joints. During assembly, I let the edges of the stiles overhang each return piece by about 1/16 inch, so after the glue dried, I flush-trimmed and sanded the joints. It takes a little more work, but the result is an almost invisible joint.
The author used pocket screws and glue to join the stiles to the rails when fabricating the frames for the pilasters.
Then he added 1 1/4-inch-wide rippings inset slightly from the frame edge, which he later flush-trimmed with a router.
Next, I stapled 1/4-inch-thick plywood panels to the back of the frame (paint-grade 1/4-inch plywood scrap is almost always available in my shop, but any flat material that takes paint well will work here).
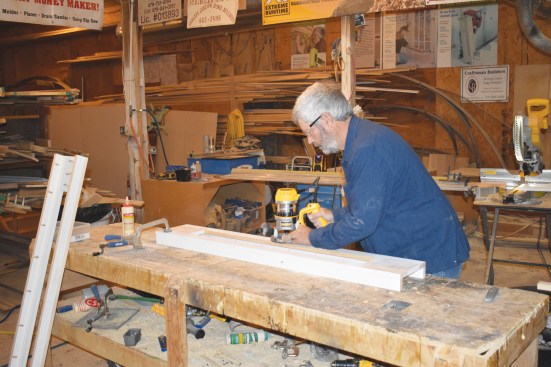
When cutting the WOBB002 band mold to finish the panel detail, getting the mitered corners just right can be tricky. I have found that it works best to put the short pieces at the rails in first, then fit the longer ones at the stiles. For perfect miters, the secret is to take your time and not cut each piece for a fit that ends up being too tight, even if it means several trips to the saw. I fastened the molding in place with the headless pinner.
Finally, I ripped the WOBM001 7 1/4-inch-wide base profile down to 5 inches and wrapped the molding around each pilaster for the base detail.
After fastening the panels to the frame and adding the panel mold, he installed base mold, which he ripped to a 5-inch width.
Entablature and Mantel Shelf
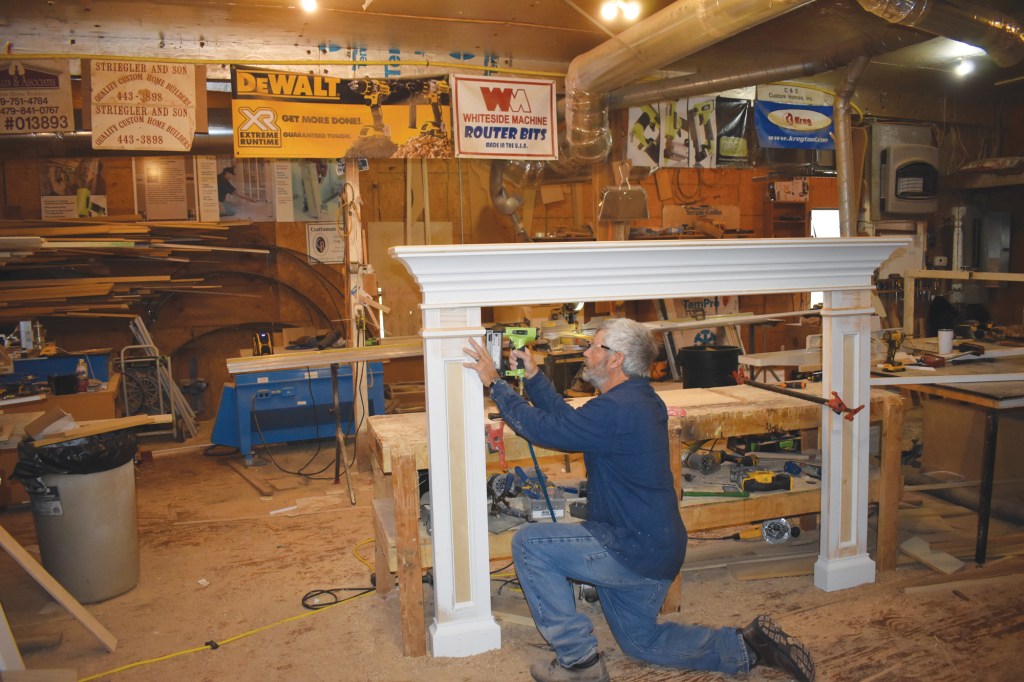
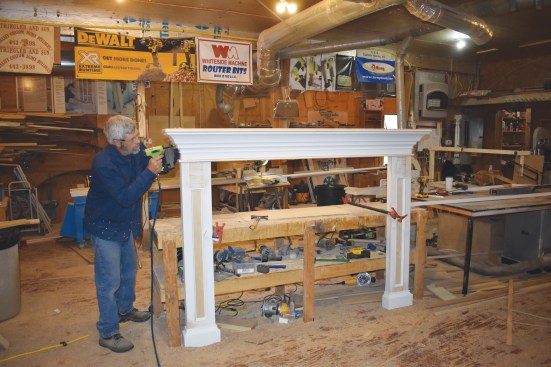
To assemble the unit, I started by clamping both pilasters to my worktable, with the spacing between them based on the measurements recorded on my story pole. Then I joined the pilasters together with a 2 1/2-inch-wide ripping on the flat, sized so that it would be long enough to project 1/4 inch wider than each pilaster. Before pinning the ripping to the pilasters, I eased its front edges and ends with a 1/4-inch-diameter round-over bit.
For the frieze below the mantel-shelf assembly, I used a length of WindsorOne 1×8 trim, orienting it vertically and cutting mitered returns at each end so that it would line up with the front and outside edges of the pilasters—basically set back 1/4 inch from the ripping. I like to use the WindsorOne products for this purpose because they are always straight and flat. To join the 1×8 vertical frieze to the 2 1/2-inch-wide horizontal ripping, I used scrap 1 1/4-by-1 1/4-inch rippings for blocking, then added some vertical blocking to support the top mantel shelf.
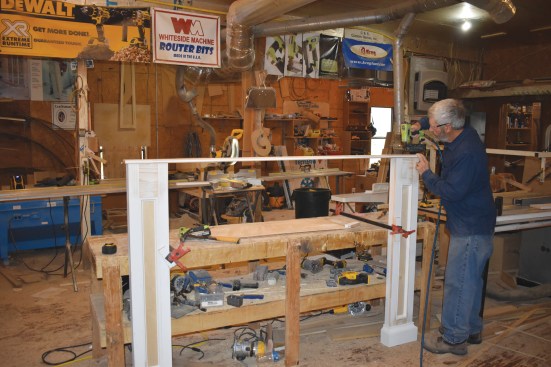
Next, the author clamped the pilasters to his work bench following the firebox dimensions marked on his story pole, and joined them together with a 2 1/2-inch-wide ripping with a bullnose profile.
Then he fastened a vertical 1×8 with mitered returns to the assembly, along with blocking that would later support the mantel shelf.
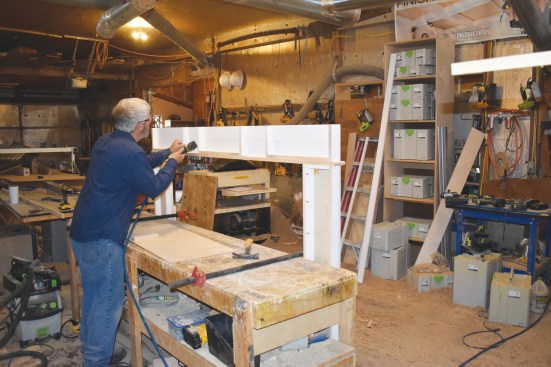
I continued to build up the frieze, wrapping the 1×8 with a layer of WOBM001 base molding ripped to a 5-inch width. I aligned the ripped edge with the top edge of the 1×8, so that the molding profile is upside down.
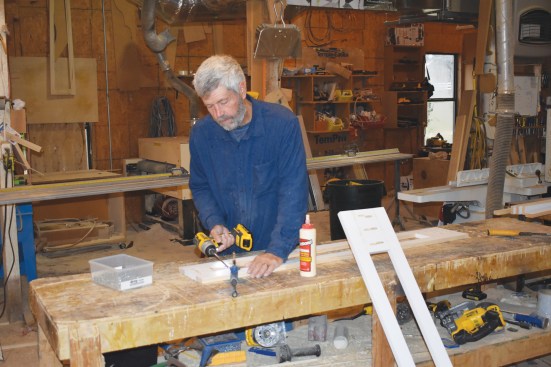
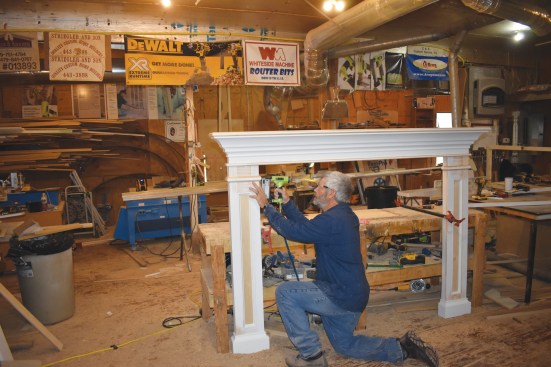
When assembling the mantel shelf and crown molding trim detail, I started by joining the mitered corners of the crown together on a worktable with wood glue and headless pins. Then I took the final measurements for the mantel shelf from the crown detail, sizing the shelf so that it would be 2 inches longer and 1 inch wider, which would create a consistent 1-inch reveal above the crown. I cut the shelf from 5/4×8 stock, then rounded over the edges and ends with a 3/8-inch radius bit before nailing the shelf in place. Then I pinned the crown assembly in place, a sequence that seems to provide a better fit than installing the shelf last.
To build out the frieze, the author wrapped the vertical 1×8 with base trim ripped to a 5-inch width and turned upside down. He then preassembled the crown detail, using its dimensions to size the mantel shelf.
The author cut the mantel shelf from 5/4×8 stock and gave it a bullnose profile prior to installation. Then he pinned the crown molding assembly to the shelf and frieze.
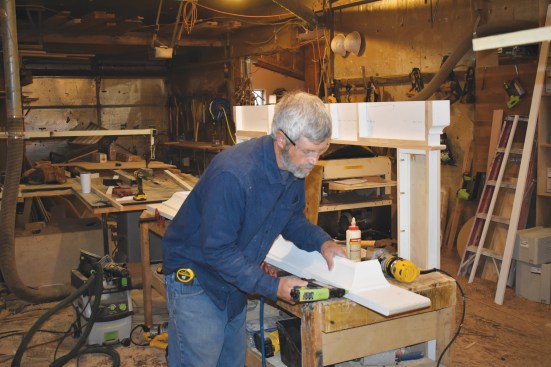
To finish up, I ripped 1 1/2-inch-wide necking trim from 1-by stock, first rounding over both the top and bottom edges. By lowering the 3/8-inch-diameter round-over bit slightly, I was able to make a subtle shoulder cut on the top and bottom edge of the necking as I rounded it over.
The final detail before the author transported the prefabricated mantel from the workshop to the jobsite was to fit the pilasters with 1 1/2-inch-wide necking trim.
Installation
Installing this prefabricated mantel on the jobsite was super easy. First, I made a pair of cleats out of 5/4-inch stock sized to fit inside each pilaster while offering a little room both side-to-side and up-and-down for adjustment. After determining exactly where the mantel needed to be located on the wall, I attached the cleats to the wall framing with construction adhesive and finish nails.
Next, I checked to see if the floor was level. When it isn’t, I start by setting the pilaster on the high side first, holding it up off the floor with an appropriate spacer if the finish material in front of the fireplace has yet to be installed. Then I set a long level on top of the mantel shelf and shim up the low side (if there is one).
To install the mantel, the author fastened mounting cleats to the wall with nails and construction adhesive. After making sure the mantel shelf was level, he then drove 15-gauge finish nails through the pilasters into the cleats.
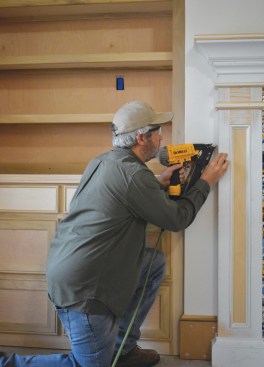
Finally, I simply nailed through each side of the pilasters into each cleat with a 15-gauge finish nailer, before turning the mantel over to the painters for final finishing.


