In this L-shaped bathroom, one corner was very high, dropping a …
In this L-shaped bathroom, one corner was very high, dropping a full inch toward the built-in shower.
Working toward the door, the floor dropped nearly 3/4 inch.
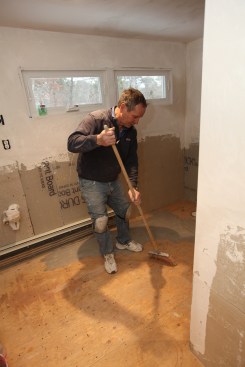
Before the primer can go down, the author sweeps the floor clean…
Before the primer can go down, the author sweeps the floor clean of dirt and debris.
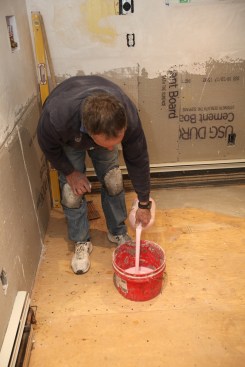
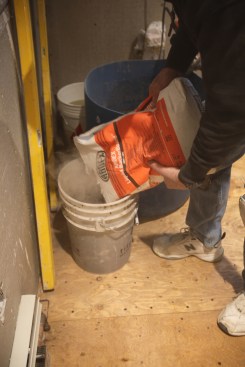
Author pours pre-mixed primer into a bucket.The primer helps wit…
Author pours pre-mixed primer into a bucket.The primer helps with adhesion and helps to seal the underlayment so that it doesn't absorb water out of the leveler.
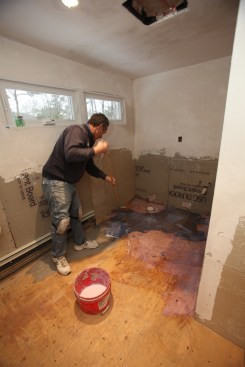
A coarse floor broom is perfect for applying a generous coat of …
A coarse floor broom is perfect for applying a generous coat of primer on the underlayment.
1
of 5
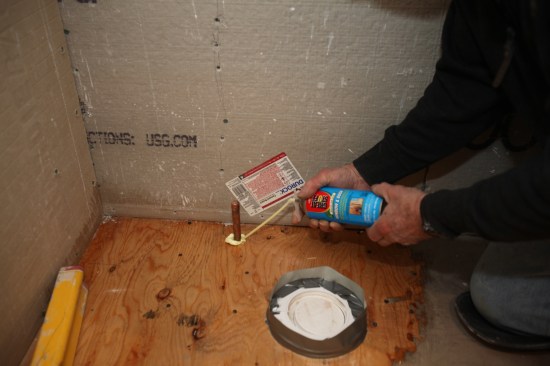
The liquid leveler will seep through any opening, so every gap m…
The liquid leveler will seep through any opening, so every gap must be filled. Here duct tape is applied as a dam around the toilet flange.
Expanding foam seals the gap around the plumbing supply pipe for…
Expanding foam seals the gap around the plumbing supply pipe for the toilet.
The entry threshold was too low, so the author screws a temporar…
The entry threshold was too low, so the author screws a temporary strip into place to contain the leveler when it's being poured.
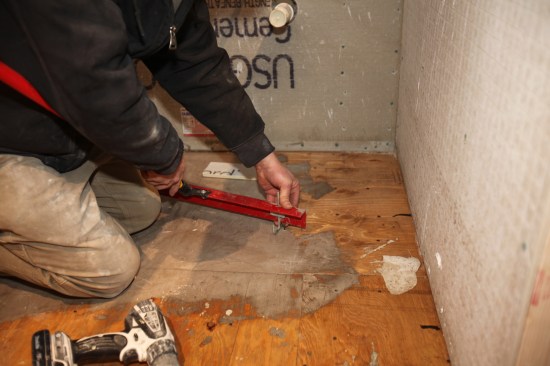
The author drives a screw as a depth gauge for the liquid at its…
The author drives a screw as a depth gauge for the liquid at its deepest point.
The author uses the screw to set the height of the gauge rake fo…
The author uses the screw to set the height of the gauge rake for spreading the liquid leveler.
1
of 5
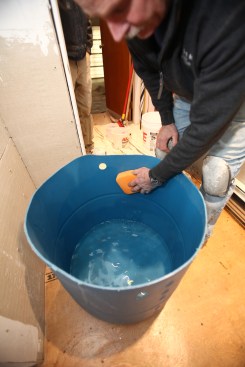
The manufacturer requires that the inside of the mixing bucket b…
The manufacturer requires that the inside of the mixing bucket be rinsed thoroughly to prevent the plastic from absorbing liquid from the mix.
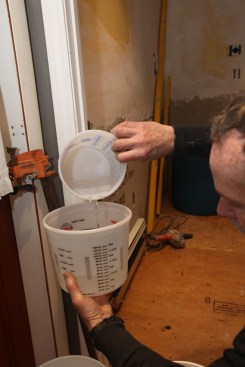
The author carefully measures the amount of water needed for eac…
The author carefully measures the amount of water needed for each batch of leveler.
The author pours the precisely measured water amount into the mi…
The author pours the precisely measured water amount into the mixing bucket.
The author mixes the leveler with a drill and a paddle, while a …
The author mixes the leveler with a drill and a paddle, while a crew member slowly adds the contents of a bag. Instructions require that the leveler be mixed with a mixing paddle for no less than two minutes, and then the mix needs to slake for 5 minutes and then be quickly remixed before being poured.
For smaller batches, a deeper narrower bucket is recommended to …
For smaller batches, a deeper narrower bucket is recommended to achieve a better mix.
1
of 9
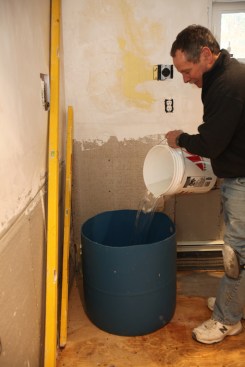
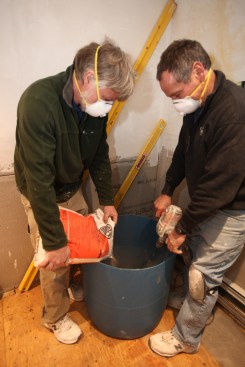
Two crew members dump the initial bucket of mix in the corner wh…
Two crew members dump the initial bucket of mix in the corner where the compound will be the deepest.
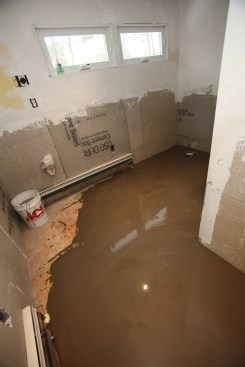
As soon as liquid is poured out, it begins to seek its own level…
As soon as liquid is poured out, it begins to seek its own level.
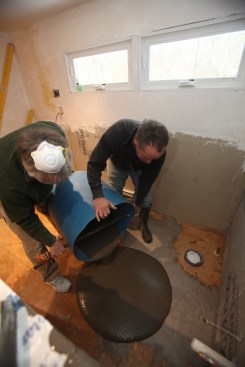
Author wears protective rubber boots as he adds a small batch of…
Author wears protective rubber boots as he adds a small batch of leveler to what was already poured.
The author spreads the first batch with the gauge rake that he s…
The author spreads the first batch with the gauge rake that he set to the deepest point of the leveler.
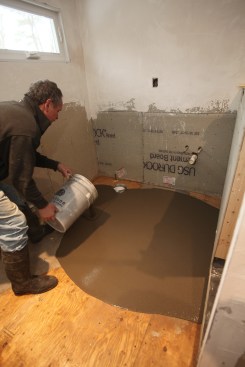
The leveling liquid fills the lowest corner with the head of the…
The leveling liquid fills the lowest corner with the head of the depth screw (visible as a small white dot) flush with the surface of the leveler.
The author uses a broom to smooth the edge of the leveler up to …
The author uses a broom to smooth the edge of the leveler up to the high corner of the room. Note that the leveler is seeping around the corner of the shower.
The author pours another batch to fill the low spot in front to …
The author pours another batch to fill the low spot in front to of the door.
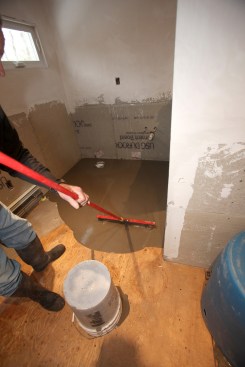
The author uses a squeegee to smooth out the leveler in front of…
The author uses a squeegee to smooth out the leveler in front of the door and to feather the liquid up to the high corner.
To leave the bathroom, the author had to take one step into the …
To leave the bathroom, the author had to take one step into the liquid, but it quickly filled back in around his footprint. The entire pour took only 15 minutes and the self-leveling liquid did the rest, providing a solid, flat, and level substrate for the tile floor. As a side note, the author covered the floor with an uncoupling membrane before installing the large-format floor tile.
Severely out-of-level floors are a fact of life in the New England homes that I work in. For a tile setter, these floors can be a nightmare—especially when the project calls for large-format tile that requires the subfloor to be within 1/8 inch of flat and level in 10 feet (“Working With Large-Format Floor Tile,” Nov/17).
Recently, clients asked me to install large-format tile on the floor of an L-shaped bathroom that they were remodeling and expanding with a new walk-in shower. When I arrived at the project, the carpenters had already installed the plywood underlayment, but I could tell at a glance that the outside corner of the L was very high. A long level confirmed that the floor dipped a whopping 1 inch in about 4 feet in the direction of the toilet and shower, and more than 3/4 inch toward the entry door.
New options. In the past, my options would have been limited. If the deviations were 1/4 inch or less, I could have built up low spots with layers of thinset. In an extreme case such as this project, I would have had to do a full mortar bed, which is messy and time consuming. Instead, I opted to use one of the self-leveling underlayment products now on the market.
Self-leveling concrete products have been around since the late 1970s. The product I used, Ardex Self-Leveling Backerboard, is a polymer-modified, Portland-cement-based product that mixes with water and is then poured onto the low areas of the floor. It has high compressive strength, making it ideal for installation under tile floors, and it can be feathered into the high areas, maintaining strength and adhesion as it approaches zero thickness.
Before I could mix and pour the self-leveling compound, the subfloor had to be primed with Ardex P51, a milky liquid that I applied to the subfloor with a coarse broom. Ardex says that the primer should be allowed to dry a minimum of three hours and a maximum of 24 hours before you mix and apply the self-leveling compound.
Self-leveling underlayment products are not cheap. We used four 50-pound bags for this particular floor at just under $50 per bag. In addition, the primer cost about $70 per gallon jug. This price may seem a bit steep to some, but the time it saved me was invaluable. And in one pretty simple and quick operation (shown in the photos), I was able to form a strong, solid substrate for the tile floor that was level, flat, and perfectly smooth.