Steam showers are a nice luxury. We’ve found that most clients use their steam feature infrequently, but there are some who use it all the time—we have one client who uses theirs for half an hour every day. So when we install steam showers, mostly on bathroom remodels, we keep that heavy-use client in mind.
In this story, I’ll discuss methods and materials my Northern Virginia–based company has found to be effective for trouble-free steam shower installations. In short, if you fully water- and vapor-proof the shower, provide ample space for the steam generator device along with a good safety pan and drain, and find a way to put ventilation in the shower, it will work for the long term.
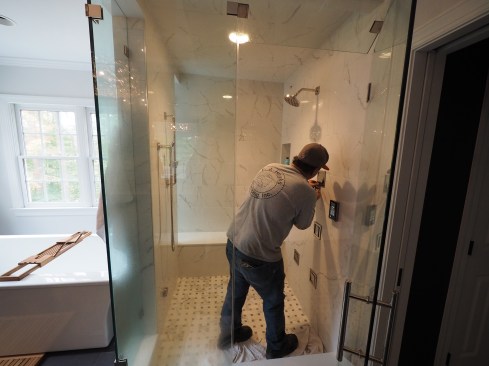
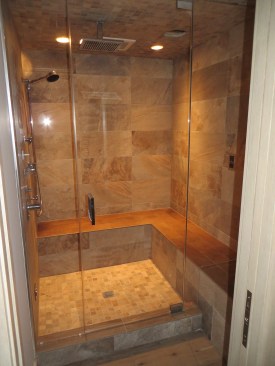
Enclosures for steam showers need to be fully water- and vapor-proofed on all sides. Surfaces, including ceilings, are typically tiled, and large areas of glass (door, side, and top wall panels) are used to let in outside light and increase ambiance.
Shower enclosure. The enclosure should be vapor controlled on all sides, including the ceiling. Typically, it’s tiled on all sides with a tempered-safety-glass door and panels run to the ceiling. Most of the glass doors we install are frameless, sealed at the perimeter with clear weatherstrip pieces.
Tile is fairly water resistant, but not totally. The water stops at the waterproofing, not at the tile and grout. The advent of waterproofing sheet and board materials has made it much easier to achieve a good barrier behind the tile on every side of a steam shower.
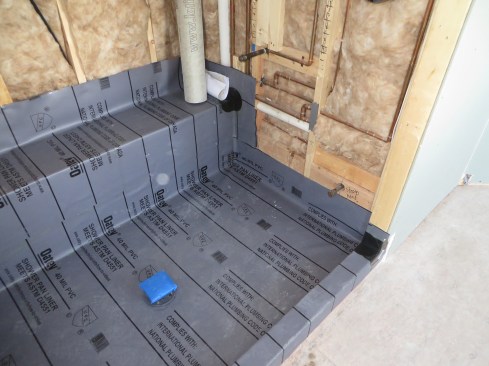
We generally use cement-board backers with a polyethylene sheet waterproofing applied to the shower side. Schluter Kerdi is the brand we most often see, but we’ve also used Laticrete Hydro-Ban Sheet, Noble Wall, Durock Brand membrane, and next week, I’m sure we’ll see a different version. All of these are thick, flexible sheets manufactured with a fabric on each side. Thinset adheres well to the fabric; the waterproofing is applied to a coat of thinset on the substrate, then tile is applied to the waterproofing with thinset. We’ve had very few problems with this type of water-proofing—most tile crews in our area know how to apply it correctly, and we’ve found it’s good enough to work as a steam shower vapor retarder too.
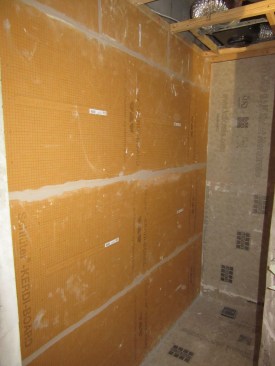
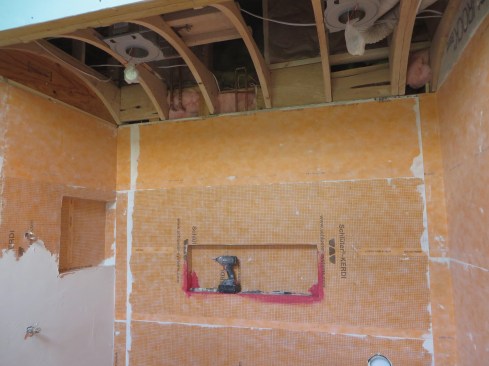
Here, insulated Kerdi Board is installed on an exterior wall, keeping the shower side warmer and providing a more comfortable bathing experience.
A relatively new option is foam backer board, a structural foam board with a coating that tile will adhere to with thinset. The Schluter version, Kerdi-Board, appears to be foam board with Schluter Kerdi applied to it in the factory; there are other brands available too. Foam backer boards installed on exterior walls help keep the shower side warmer, providing a more comfortable bathing experience.
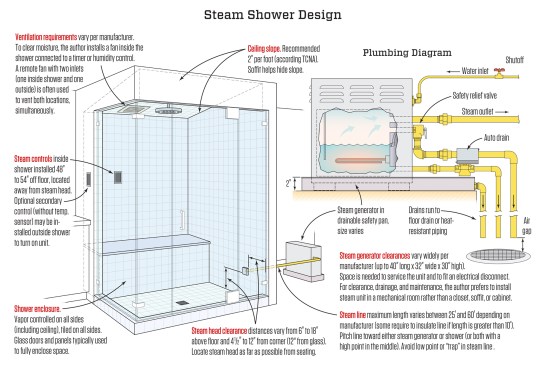
Ceiling slope. Steam shower companies used to recommend that ceilings be sloped so condensation on the ceiling would drip to the walls rather than falling on users’ heads. The slope was called out usually in the 1-inch-per-foot range. However, depending on the shape of the tile joints, drips still fall at this slope.
These days, I see manufacturer slope recommendations anywhere from 2 inches per foot to “we no longer specify a slope.” The Tile Council of North America (and one manufacturer that I know of) recommends a ceiling slope of 2 inches per foot, which is what we recommend, though it’s not clear that a slope is required.
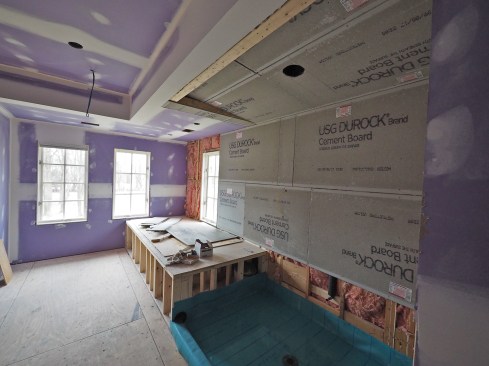
A soffit hides the sloped ceiling on an in-progress installation.
We typically provide a soffit around the shower to help hide the slope. For larger showers, we’ve sloped from two sides to a peak, which allows a much greater slope in a given total amount of run. We’ve also put in an arch ceiling, which seemed to work well, although gaps can occur where the light trims meet the curved ceiling, so they have to be properly sealed.
Curved ceilings are nice design features that allow for steeper sloping …
… although gaps can occur where the light trims meet the curved ceiling, so they have to be properly sealed.
Steam generator. The generator is a smallish box that typically fits in an area roughly 1 foot by 2 feet with between 1 and 2 feet of height, although some manufacturers may require more clearance. Generators require safety pans with drains due to their tendency to leak during their service time. Room is also needed to service the machine and to fit an electrical disconnect (see illustration, below).
Because our local water has a medium to high mineral content, we usually install an auto drain, or “flush kit,” that drains the unit after every use. The auto drain helps clear any mineral sediment and reduce servicing. If a nearby floor drain is unavailable, a high temperature–capable drain line will be needed to expel the discharge water.
Owing to clearance, drainage, and maintenance requirements, a mechanical room is much more suited for the unit’s location than a closet, soffit, or cabinet. If a mechanical room is not an option, we’ve had success installing steam generators in soffits with ample clearance space.
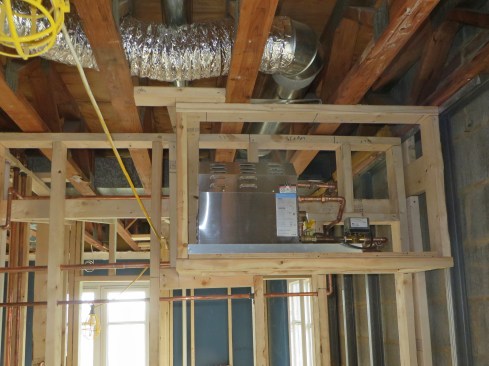
A steam generator is housed in a spacious, roughed-in soffit, providing easy access to maintain the unit.
Steam lines. Most brands we’ve installed allow 50 or 60 feet of pipe from the generator to the shower, which helps with finding a good location for the steam generator. Because condensation will form in the steam line, it can’t have a low spot that traps water, blocking steam. It should slope toward the shower, toward the steam generator, or toward both with a high point in the middle, as long as there’s no low point.
Steam diffuser head. The steam flows through a copper pipe from the generator and enters via a “steam head” fitting that mounts on a wall near the floor. Most heads blast steam downward, but one brand shoots it upward as well. Obviously, the hot steam shouldn’t blow onto people, so the head should be far from any seats in the shower. A lesson we learned was to not be coaxed into installing the steam head directly below the shower faucet, even if it looks cool to have everything in a vertical line. After a few burns—the shower handles were too hot to touch after the steamer was used—the clients who insisted on that installation relinquished the idea and had us relocate the steam head.
The steam unit controller is a thermostat, and the steam head shouldn’t be below the controller either. Steam is too hot for glass doors and should be a foot away from those. In a small shower, you may be limited in where to put the steam head.
The steam head, at the lower right corner of the shower wall, is roughed-in at 12 inches above the finish floor and 12 inches from a future glass wall panel.
Clearing moisture. In our climate, showers without fans stay damp and grow mold like crazy, which clients hate; we’ve solved several mold problems by installing a fan in the shower or adding a timer that makes it easy for the users to run the fan during and after their shower.
However, a fan in a steam shower can introduce problems and some steam generator manufacturers recommend against one. Because steam showers have so much moisture in them and tend to be used longer than a regular shower, they can cause issues with fans and ducts. First, any steel components of the fan or ductwork can rust, drip brown gunk out into the shower, and ultimately fall apart. A few companies, such as Panasonic, now make fans with plastic bodies that help mitigate this. Second, absent a tight damper, moisture will enter ducts at the top of the shower and can condense inside the ducts, leading to biological growth, corrosion, and even drips or puddles of water, in the worst case.
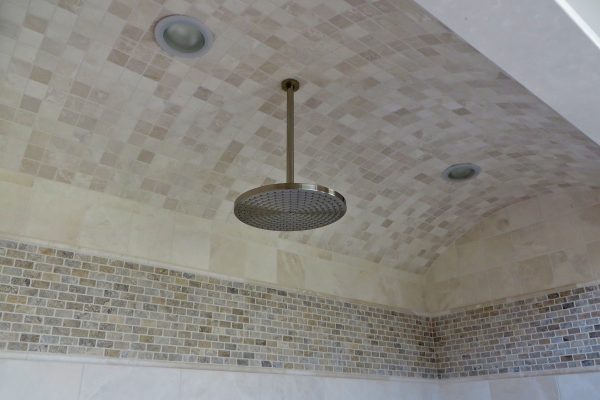
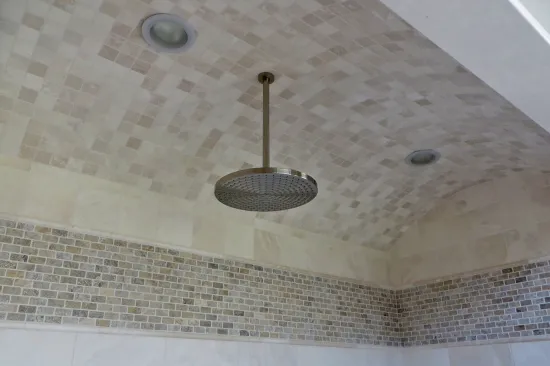
A plastic fan (visible behind the ceiling-mounted rain head) will help clear moisture from this enclosure.
We’ve been able to make fans work by insulating the fan and ductwork and sloping ductwork properly to reduce and handle condensation. Plastic fans, or a remote fan with an aluminum or plastic inlet in the ceiling, help prevent possible corrosion. It takes a bit of care and attention, but we’ve been able to get fans into showers, with definite benefits.
A fan outside the shower is also a good idea. If clients haven’t read the manual where it says to run cold water through the shower at the end of a steam, a cloud of moisture will roll out into the bath. We often use a remote fan with two inlets, one inside and one outside the shower, to handle both locations.
Photos by Doug Horgan; illustration by Tim Healey


