Last year, we got a chance to use WarmBoard on two projects. The first was over a slab-on-grade foundation for an addition on an inner-city row house. Ordinarily, we like to build out additions over crawlspaces for better access to mechanicals, but to save money, our clients opted for a slab-on-grade foundation. The architect’s design called for a radiant floor in the large family room that would span from the existing home into the addition, and the architect spec’d WarmBoard-S over the new slab.
Using WarmBoard allowed us to run the hydronic tubing on top of the slab, instead of embedding the tubing in the concrete and having to heat the slab’s mass. The WarmBoard system includes a nailing substrate that simplified installation of a new engineered-wood finish floor spec’d for that room. The installation went well; so well in fact, the architect spec’d WarmBoard for a second project—a bump-out addition that we did after the completion of the first project.
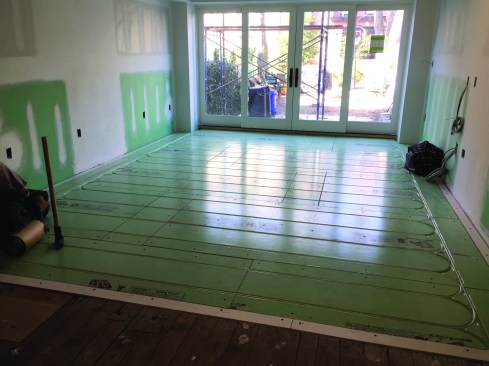
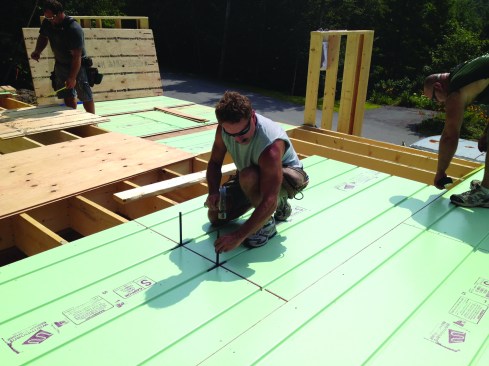
The author installed WarmBoard-S on two different, back-to-back addition projects: first, over concrete …
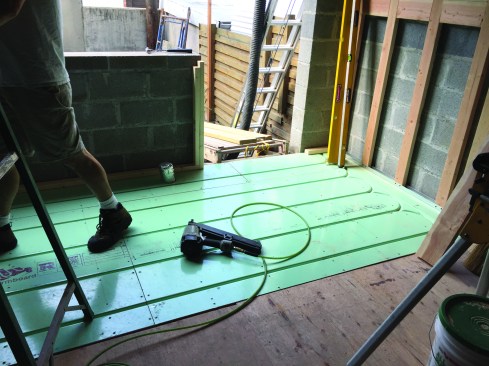
… then over a framed-floor assembly.
In this article, I’ll provide a quick overview on our experiences installing WarmBoard—a product we highly recommend using—over both concrete and a wood-framed floor.
For radiant heating, we’ve had luck over the years installing Uponor’s Joist Trak aluminum heat-transfer panels to the underside of new and existing subflooring (packing the joist bays with insulation and enclosing with drywall, to drive the heat upward). But, with the switch to a reinforced slab with XPS sub-slab insulation, we had to come up with a different system for installing radiant heat.
Two Panel Choices
WarmBoard comes in two thicknesses, 1 1/8-inch Warmboard-S structural plywood panel and 13/16-inch-thick Warmboard-R panel, which is an OSB product. The WarmBoard-S panel is usually installed in new construction or additions (serving a dual function as a structural subfloor and radiant panel), while the thinner WarmBoard-R is used more for remodeling projects.
Warmboard Inc.
WarmBoard comes in two panel types; WarmBoard-S is a 1 1/8-inch-thick structural plywood subfloor that doubles as the radiant panel.
Warmboard Inc.
WarmBoard-R is a thinner, OSB product for use as an overlay to an existing floor.
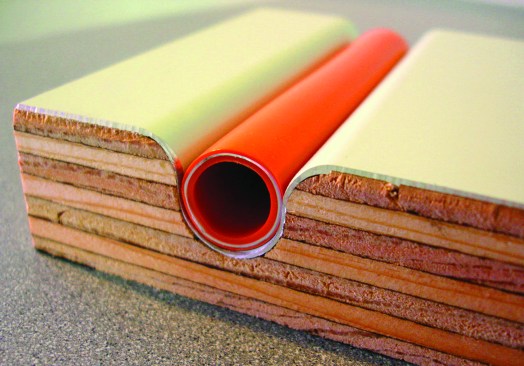
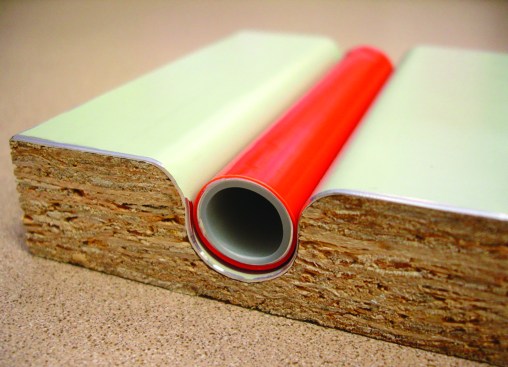
Both WarmBoard products have 12-inch-on-center channels routed into the surface to receive 1/2-inch radiant tubing. And both products come with a 0.025-inch-thick, factory-applied aluminum conductive surface over the panel. WarmBoard’s literature claims this conductive surface is roughly five times more conductive than radiant systems embedded in concrete, and the system reportedly delivers a much faster response and more even temperatures.
Manufacturer-Supplied Design
For both projects shown here, we used WarmBoard-S. Over the framed floor, its thickness is needed as a structural subfloor, but even on the slab project, we wanted the extra thickness to help line up the new floor with the existing one. We also felt it would be a better nailing substrate for our finished floor.
WarmBoard-S comes in 4-by-8-foot panels with tongue-and-groove edges. (The Warmboard-R product comes in smaller, 2-by-8-foot panels.) To facilitate lining up the channel patterns on adjacent panels, WarmBoard-S comes in a few different panel types—straight, left, right, and double. (Warmboard-R only comes in only two panel types: “straight” and “turn.”)
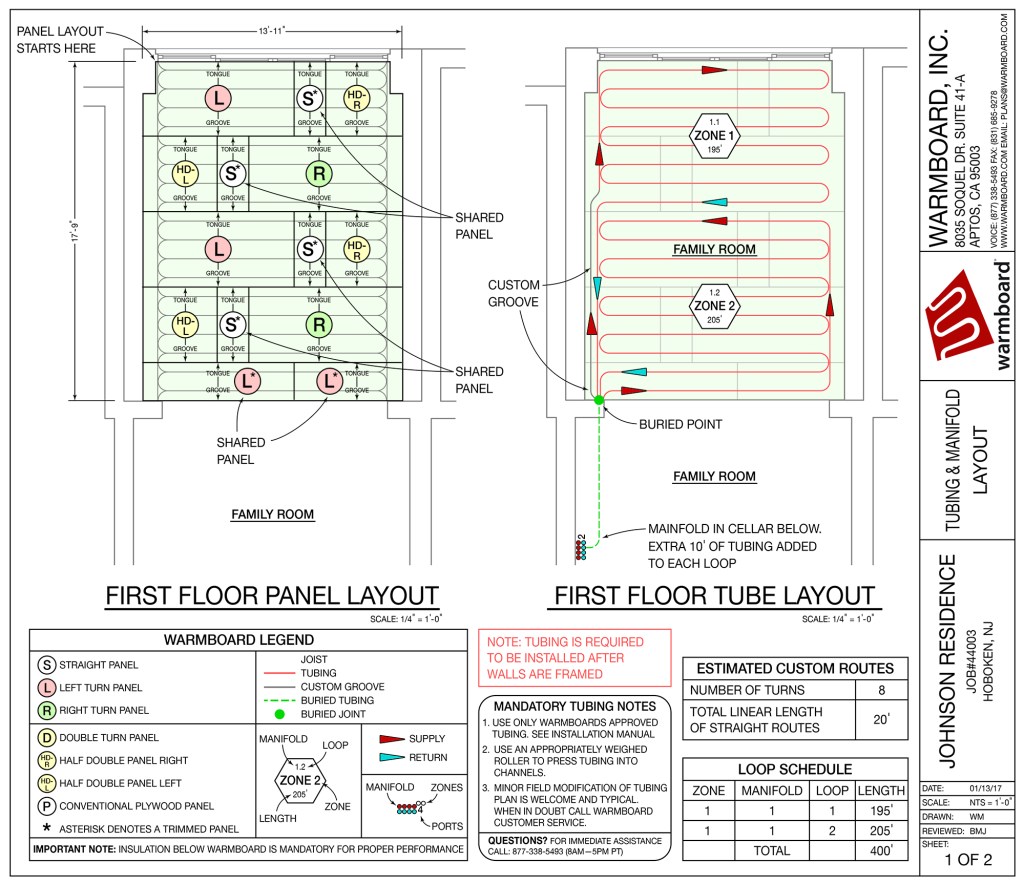
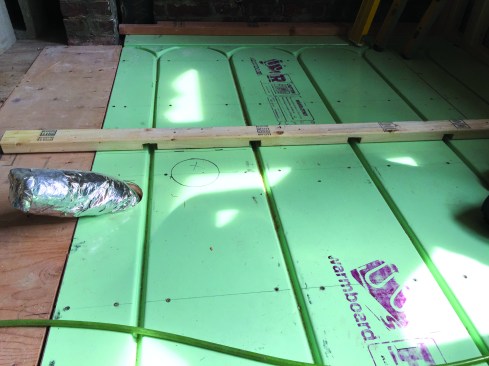
As part of its service, WarmBoard can supply you with a design tailored to your project’s needs. This includes layout plans, one for the panel layout and one for the radiant tubing. We sent the company our project plans, and for around $200, it sent us a WarmBoard layout, detailing all the steps to assembling the system (see layout plan, top left). The cost was credited back to us once we purchased the materials.
Our small, bump-out addition over a wood-framed floor was simple in terms of a layout, and plans were not required. But for the larger slab project, the panel layout plan was an enormous help in puzzling through the panel installation. The layout plan shows the panel sequencing—where to install the left turn, right turn, and straight panels, and which “shared” panels to cut. It also clearly showed where we needed to start so the sequencing would work out.
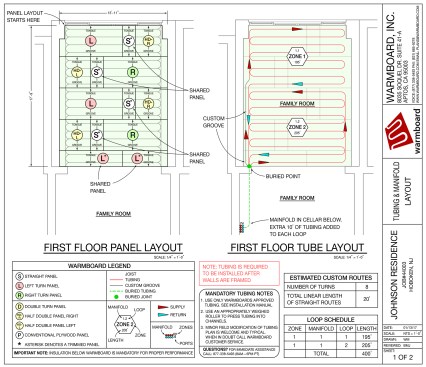
As part of its service, WarmBoard provides panel and tubing layout plans
The “floor tube” layout plan also was a big help on the slab project. This plan specifies the number of zones, and on the slab project, we had two zones—Z-1 required 195 feet of tubing and Z-2 needed 205 feet. (Generally, for estimating the tubing, the maximum length for a zone is about 200 feet.) The tube layout drawing also specified “bury points” (holes where tubing submerges beneath the WarmBoard panels) and the manifold location. For the slab project, we had bury points near the house end of the slab where it planed into the framed first floor of the house over the cellar. The manifold was located in the cellar near the boiler.
While the different panels with standardized channels for tubing make up most of the floor, most projects will require some custom routing to make the layout work. The tube layout shows where this work is needed, and it is definitely the most interesting part of the installation.

An installation kit is shipped with the panels.
Warmboard Inc.
This kit includes the plans and alignment pins to line up the tubing channels.
Warmboard Inc.
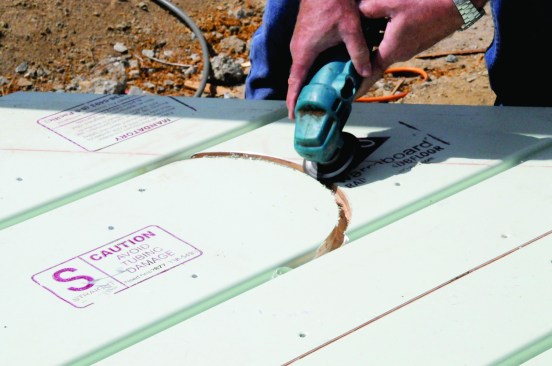
Also included were routing templates to make custom grooves.
For this work, WarmBoard sends an installation kit, which includes wooden templates for routing three different types of grooves—180-degree, straight, and offset. The kit also includes router bits, alignment pins, and other necessary accessories. Cutting is done with a router from the back of the panel with the aluminum side down. It takes a little figuring out the first time through, but it didn’t take an inordinate amount of time for our lead carpenter, Danny DoCouto, to make the necessary modifications. As the shown on the tube layout drawing (see previous page), custom routing was needed on only four panels for the slab project.
Rough-in locations were marked on the panel with a Sharpie, and interior wall plates were dadoed to allow fishing the PEX tubing in later, so tubing could be installed as late in the remodeling process as possible.
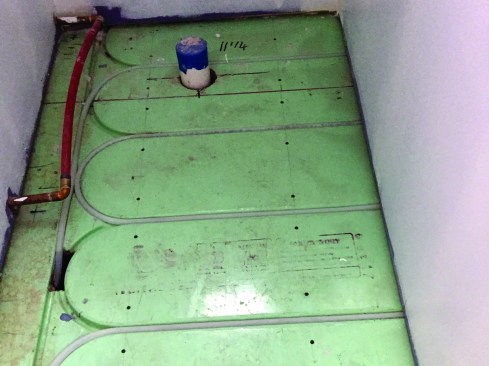
PEX supply and return lines connect to the manifold in the cellar via “bury point” holes in the WarmBoard.
Panel Installation
On the slab project, we first covered the concrete with 6-mil poly, then loose-fit the WarmBoard-S panels, cutting panels to size as needed. As we fastened down the panels, we used nails to gap the panels 1/8 inch on the 4-foot side. We also used the alignment pins from the installation kit to keep the channels in line. We fastened the panels with 2 1/4-by-1/4-inch flat-head Tapcons, spaced 6 inches on-center along panel edges and 12-inches on-center in the field. Over the framed floor, we secured the WarmBoard-S with panel adhesive and 2 3/4-inch screws, using the same fastener spacing.
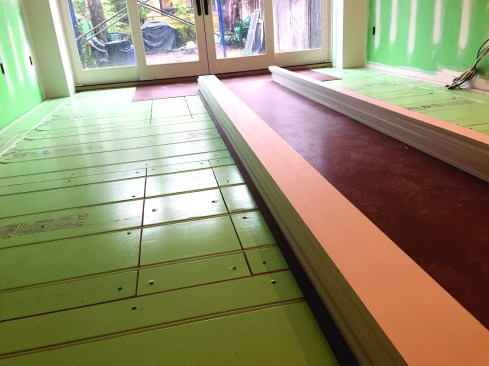
Engineered wood flooring acclimates in preparation for installation.
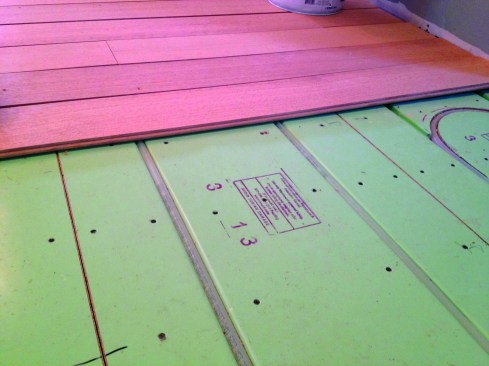
New flooring gets installed directly over panels. No rosin-sized slip-sheet required, and the installer has a clear view of the piping to avoid punctures.
Once all the standard-configuration panels were installed, we routed our custom grooves and secured those panels to the slab. We had to deburr the routed aluminum edges and clean off any adhesive squeeze-out in the channels while it was still fresh.
After mechanical rough-in, we covered the panels with hardboard for protection. We waited as long as possible before installing the tubing to avoid damage during the rest of the renovation. To make this happen, we dadoed the bottom plate for a powder-room wall on the bump-out addition. This way we could fish the tubing in just before we were ready for the finish flooring.
Other photos by Rob Corbo


