Slope
Roofing-association manuals, as well as the code book, specify a minimum slope of 1/4 inch per foot for low-slope roofing. One cool trick is to use a “slope kit,” consisting of sheets of foam that are tapered to provide the necessary slope. You can order the foam in different slopes. If, for instance, you wanted to add 1/4 inch per foot to a dead-flat roof, you would get foam that ranges from 1/2 inch thick to 1 1/2 inches thick over 4 feet. You’d start at the bottom edge with a 1/2-inch-to-1 1/2-inch piece, and then at the up-slope side, place a sheet of 1-inch flat foam and layer another piece of the tapered foam on top of it. You would continue on in a similar fashion up the roof to the high point (see “A Well-Drained Roof” illustration, below).
Roof Edges
When it comes to drainage, open roof edges are preferable to roof drains or scuppers in a parapet wall. Roof drains and scuppers are both prone to clogging and they involve complicated detailing that is hard to do right. Most houses in our area don’t actually need parapets: The main purpose of a parapet is to keep wind from sucking the membrane off the roof of a large building, and in our location, the wind forces aren’t strong enough to make this necessary for residences.
At roof edges, multiple layers of material sometimes create a raised edge or a backward slope. To avoid this, we recommend tapering the framing at the roof edge to add a little slope pitching toward the outside. Just cutting a taper of 3/8 inch to nothing over 8 inches, or 1/2 inch to nothing over a foot, is enough to keep all those outside layers below the level of the main roof.
Metal drip edge at the roof edge is difficult to seal against water intrusion. The metal expands and contracts and puts a stress on any sealant you may apply at lap joints. To effectively waterproof this area, we like to follow a detail supplied by manufacturers that calls for running the membrane all the way to the roof edge and down over the fascia. Then we apply the drip edge on top of the membrane, and seal in the top of the metal with another strip of roofing.
As an alternative in locations prone to sliding snow and ice, you could implement a similar method: Attach a strip of roofing to the edge first, apply drip edge over this edge strip, and then apply the main roof membrane on top of this. This isn’t necessary in our D.C. area, but it could be a better alternative in a colder climate.
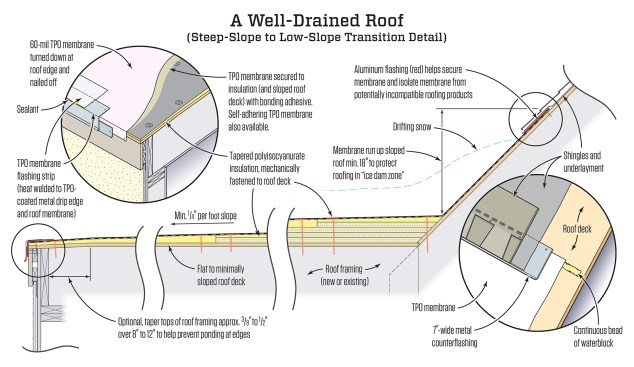
A “slope kit” consisting of tapered foam sheets adds slope to a dead-flat roof. A wide-open roof edge is preferable to scuppers because it is less likely to clog. Tapering the rafters at the edge of the roof helps counter the buildup of layers at the edge. Extending the membrane up the adjoining steep roof protects against drifting snow and ice buildup.
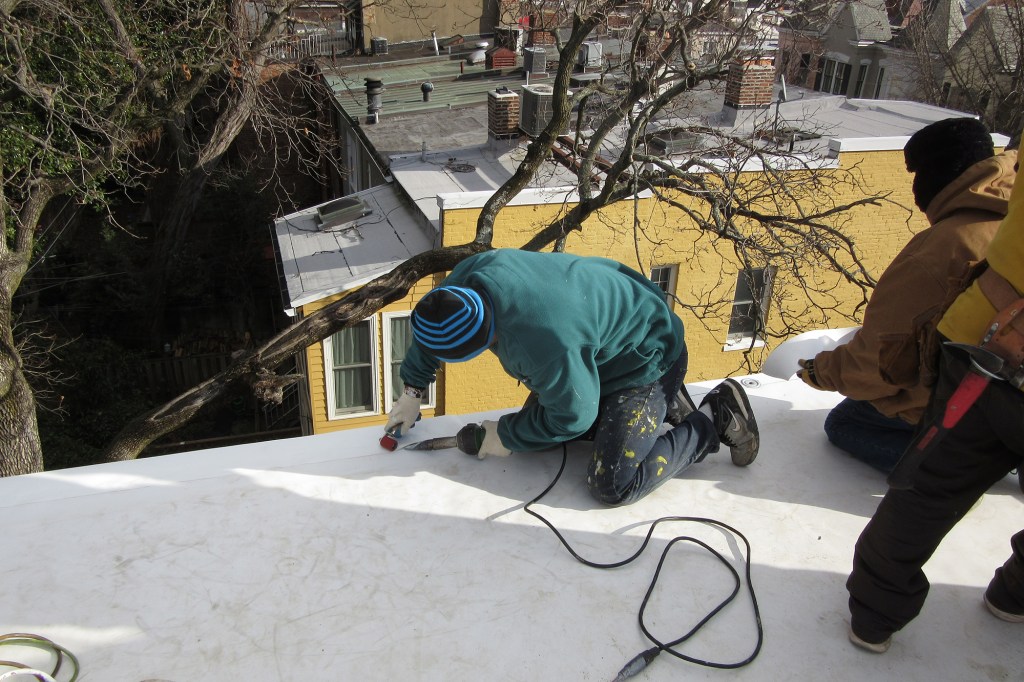
Low slope (“flat”) roofs are challenging to build, and fail more often—and more disastrously—than steep roofs. Most have no redundancy: A tiny leak goes right into the house. A lot of stored water can build up, so a leak can be a very big problem instead of a little stain on a ceiling. The seams have to be watertight, so the work must be done perfectly. High turnover in the trade means inexperienced crew members.
For all these reasons, we’ve had the chance to learn a lot about what can go wrong with low-slope roofs. Some of these lessons have been learned on our own projects, although most were learned by repairing other contractors’ roofs. I’d like to share those trouble spots and explain what we do to prevent the problems we’ve seen.
By “low slope” roofing, we mean any roof that is pitched at less than 4 inches of rise in 12 inches of run, or 4/12 pitch. Regular asphalt shingles and standard skylights will work at pitches of 4/12 or greater, but at lower pitches, you have to use different materials. That includes soldered metal roofing or synthetic membranes. So in this story, I’m going to focus on details for membrane roofing, and in particular, TPO (thermoplastic polyolefin) membranes.
Typical Trouble Spots
I’ve written on this topic for JLC before (see: “Low Slope Roofing: Troubleshooting in Advance,” Jan/16; “Draining Low-Slope Roofs,” Oct/15; and “Steep-Slope to Low-Slope Transitions,” Apr/14). Those stories focused on troubleshooting roof failures; in this story, I’ll focus on solutions that avoid those failures in the first place.
When we encounter trouble on any membrane roof, the problems are always related to joints, edges, and penetrations. Let’s take a look at the details that work in those situations.
Membrane roofing materials are flexible, tough, and durable. Short of a tree branch dropping through them, they can stand up to conditions on a roof. Trouble can occur, however, at joints, seams, penetrations, and intersections. The illustration below shows areas where careful attention is important.
Interactive Graphic: Mouseover the labels
Slope
Roofing-association manuals, as well as the code book, specify a minimum slope of 1/4 inch per foot for low-slope roofing. One cool trick is to use a “slope kit,” consisting of sheets of foam that are tapered to provide the necessary slope. You can order the foam in different slopes. If, for instance, you wanted to add 1/4 inch per foot to a dead-flat roof, you would get foam that ranges from 1/2 inch thick to 1 1/2 inches thick over 4 feet. You’d start at the bottom edge with a 1/2-inch-to-1 1/2-inch piece, and then at the up-slope side, place a sheet of 1-inch flat foam and layer another piece of the tapered foam on top of it. You would continue on in a similar fashion up the roof to the high point (see “A Well-Drained Roof” illustration, below).
Roof Edges
When it comes to drainage, open roof edges are preferable to roof drains or scuppers in a parapet wall. Roof drains and scuppers are both prone to clogging and they involve complicated detailing that is hard to do right. Most houses in our area don’t actually need parapets: The main purpose of a parapet is to keep wind from sucking the membrane off the roof of a large building, and in our location, the wind forces aren’t strong enough to make this necessary for residences.
At roof edges, multiple layers of material sometimes create a raised edge or a backward slope. To avoid this, we recommend tapering the framing at the roof edge to add a little slope pitching toward the outside. Just cutting a taper of 3/8 inch to nothing over 8 inches, or 1/2 inch to nothing over a foot, is enough to keep all those outside layers below the level of the main roof.
Metal drip edge at the roof edge is difficult to seal against water intrusion. The metal expands and contracts and puts a stress on any sealant you may apply at lap joints. To effectively waterproof this area, we like to follow a detail supplied by manufacturers that calls for running the membrane all the way to the roof edge and down over the fascia. Then we apply the drip edge on top of the membrane, and seal in the top of the metal with another strip of roofing.
As an alternative in locations prone to sliding snow and ice, you could implement a similar method: Attach a strip of roofing to the edge first, apply drip edge over this edge strip, and then apply the main roof membrane on top of this. This isn’t necessary in our D.C. area, but it could be a better alternative in a colder climate.


