One of the lessons I learned early as a carpenter was to periodically check squares for square and levels for level. The initial lessons were painful: Once I laid out a library full of built-in bookcases, and then proceeded to cut the sides of the shelf cases on a sliding miter saw that I had adjusted with my out-of-square steel square. The multiple errors were caught only after I had made all the cuts—when I was dry-fitting the cases. My experience with an out-of-level level was less tragic: I had just installed the jambs on some interior door openings with my grandfather’s mahogany level—an instrument I revered and assumed to be perfect. Fortunately, my co-worker used a different level to check the jambs for plumb before casing the openings.
The techniques for checking both squares and levels for accuracy can be done quickly, and I recommend checking your tools regularly when they are shuttled around from jobsite to jobsite.
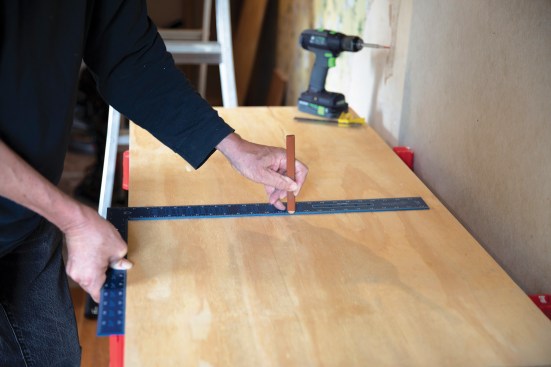
Square check. The procedure for checking a square takes longer to read about than it will to perform, once you get the hang of it; just follow the steps outlined below, where I check both a large framing square and a smaller carpenter’s square.
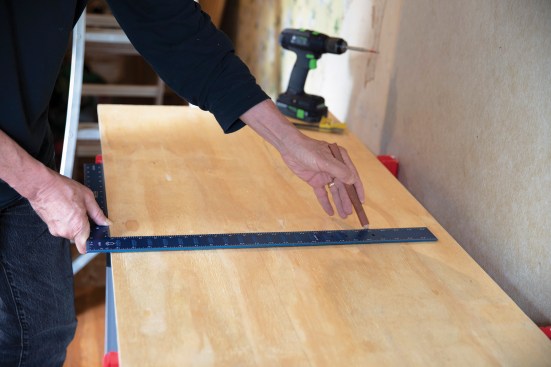
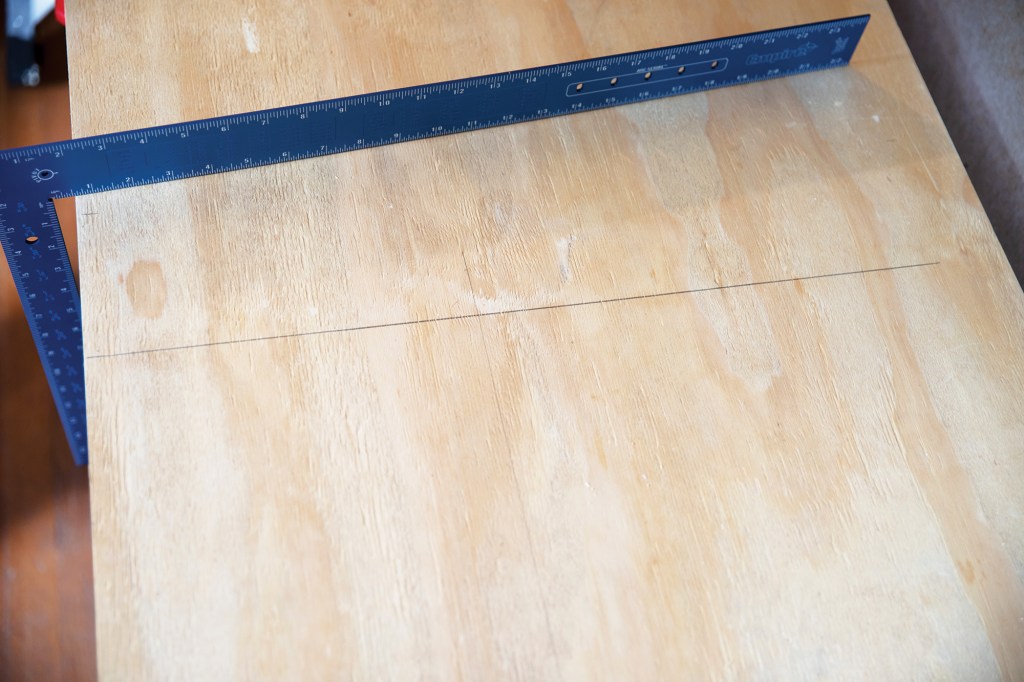
Step 1. Hook the tongue (short leg) of the square along the side of a piece of dead-straight stock. (Alternatively, you can butt the tongue to a straightedge, but clamp the straightedge down so it doesn’t move.) Draw a line along the inside of the blade.
Step 2. Flip the square so the tongue points the opposite direction. Line the base of the blade up with the line you just drew and draw another line along the same side of the blade.
Note: If you can find a straight edge on a store display and draw two tick marks (one at the base of the blade on the display edge and one near the end of the square’s blade on a box on the shelf below), you can perform this check right in the store before you buy a square. I was shocked that a whole rack of the more expensive “red” squares at a big box store were out of square, some by quite a lot. There were a few good ones among the less expensive “blue” squares.
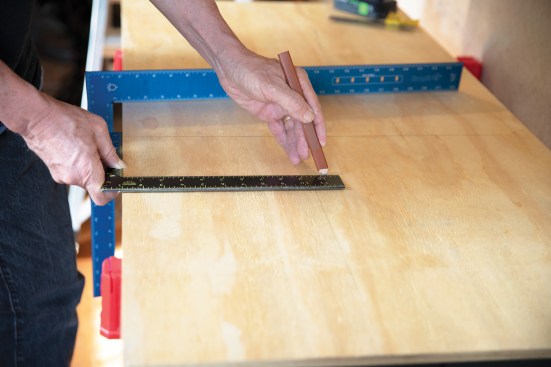
Here the author is checking a smaller square following the steps outlined above (see Steps #1 and #2).
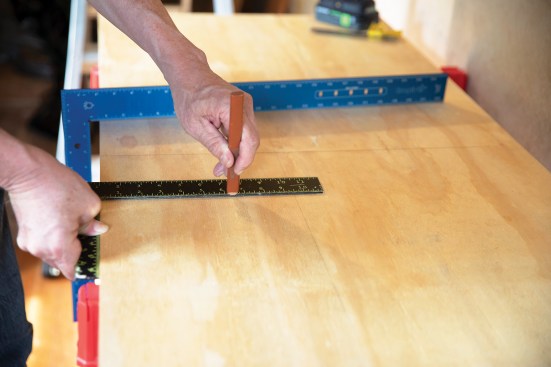
After marking the first line (left photo), the author flips the square over and marks the second line (above).
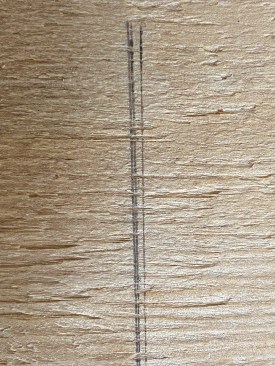
A framing or carpenter's square is not actually square when two lines marked as described above diverge, as shown here.
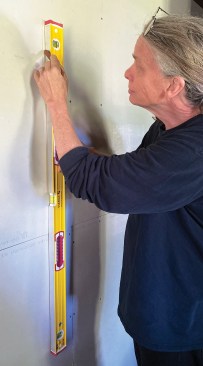
Level check. The procedure for checking a spirit level is also pretty fast, but there a few more steps involved, as you should check for both level and plumb.
Step 1: Hold the level flat against a wall, and adjust the tool until the bubble on the vial is centered between the two lines, reading “level.” Mark the location of the vial on the wall. You can make one mark in the center of the bubble, but I usually make a mark at each line on the vial so I can reposition it easily.
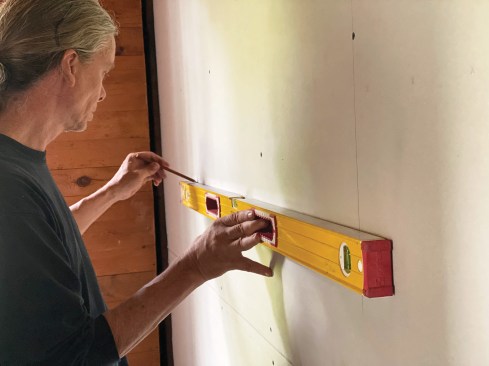
Step 2: Draw a level line along the length of the level on the wall, as shown.
Note: You can just mark the wall at the far ends; you don’t need a continuous line.
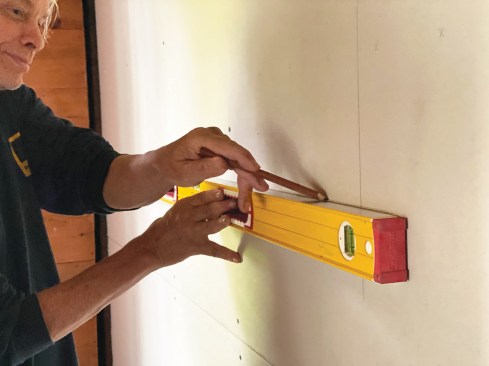
Step 3: Flip the level end for end, keeping the same edge of the level facing up. Line up the vial in the same location using the reference marks, and adjust the level so the vial reads level again. You should see that the level is aligned on the level line. If it’s not, draw a new line (or make new marks) to judge how far off it is.
Plumb check. Next, hold the level plumb and align the tool so that one vial reads plumb, then follow the steps as shown below.
Step 4: Hold the level plumb and align the tool so that one vial reads plumb. Now look at the other vial: Both vials should read true. Draw a plumb line (or make marks on the wall at each end of the tool).
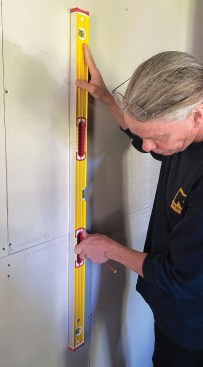
Step 5: Keeping the tool vertical, turn it over so you have the same vial at the top end. The opposite face of the level will be facing out, and you should now be referencing the opposite edge of the tool. Align the tool on your plumb marks and check both vials. They should both read plumb.
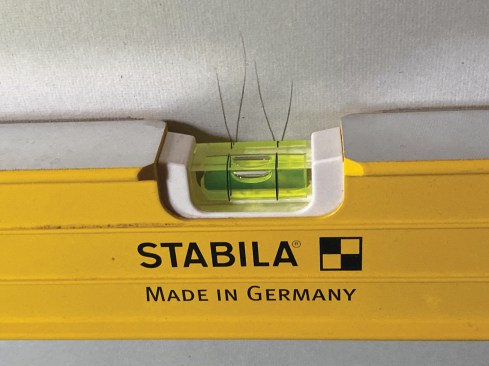
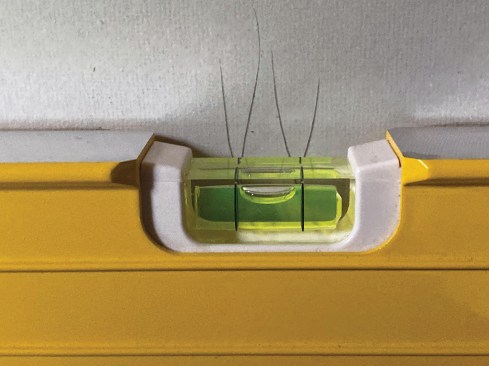
Older levels will have two arced vials within each glass. When doing the test, make sure you are keeping the tool oriented so the same vial is always on top. (You will have to perform the test again to test the second set of vials.) Newer levels like the one shown in these photos have barrel-shaped vials that read level no matter which edge of the tool is facing up. These make life a little simpler, as there are fewer chances for the tool to go out of whack.
When checking a level, make sure to also check that the beam itself is straight. When you hold each edge against a truly flat surface (a solid countertop works well), there should be no daylight visible along its length. Check both edges. Also check the beam faces for flat. Most box beam levels go off when the beam is loaded sideways (like when it’s crushed under other tools in the back of a truck) and the beam bends. There’s nothing that can be done for a bent level. If the vials are off, you can usually send it back to the manufacturer to reset the vials, but doing that only makes sense when the cost to replace the tool is more than the cost of shipping it back.
Photos by Clayton DeKorne.