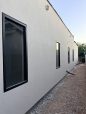
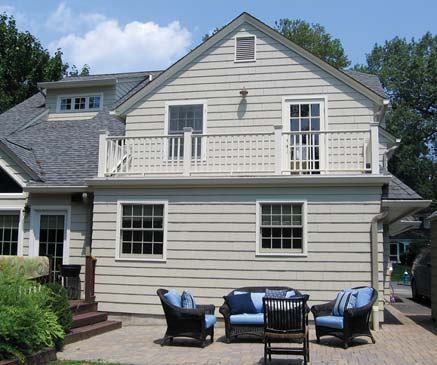
When I was starting out as a remodeler, some 25 years ago, I’d spend nights and weekends working on estimates for big projects I knew our company might not get — and many hours doing accounting and payroll when we did land one of those jobs. Over time, though, I realized I was happier with smaller projects, like kitchen and bath remodels and room additions, so I downsized the company. Running a smaller business means that I spend more time on site and less time in the office. At present, we’re a C corporation with three employees and an annual volume that ranges between $500,000 and $800,000.
Part of our strategy for remaining profitable has been to do as much of the work as we can in-house, including drywall, flooring, tile, and painting, as well as all rough and finish carpentry. This approach has not only helped us stay busy in the current slow market — it has also kept us on track when the market was hot and subs were more difficult to schedule for small jobs.
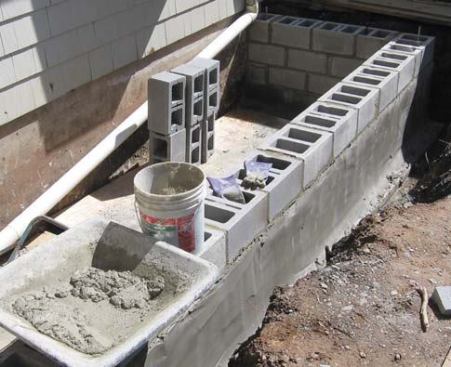
We even do our own masonry work — like the block foundation shown here. We added masonry to our skill set when Danny DoCouto joined the company 11 years ago. DoCouto trained as a union carpenter in all phases of commercial and residential construction, and had considerable masonry and excavating experience. He taught me to lay block, but mainly I act as tender, moving stone and block and mixing mortar. We don’t move as fast as full-time masons, but we make sure the quality of our work equals the quality we would get from any local masonry subcontractor.
Equipment and Tools
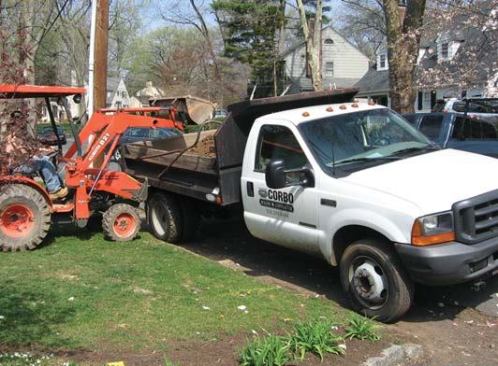
Four years ago, we grew tired of relying on local haulers and invested in a dump truck. At more than $40,000, a new diesel was out of our price range, but our local Hertz rental supply was selling a used Ford F-550 Super Duty 7.0-liter diesel truck with a 10-foot bed and 70,000 miles on it for less than half that price. After renting the truck for a week to try it out, we purchased it using a couple of business credit cards with zero percent financing.
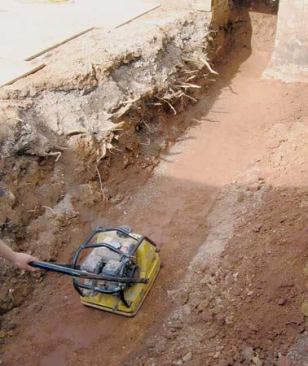
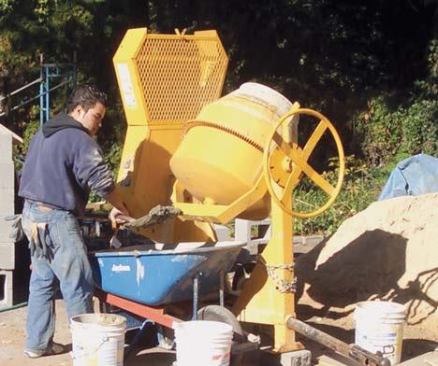
We can now move gravel and fill whenever we need to, and can also tow whatever size machine we need to dig our holes. Sometimes we use the truck instead of a roll-off container, parking it in the driveway and hauling construction debris away to the transfer station when it fills up. For mixing mortar, we use a tow-behind-horsepower Stone electric mixer with a 5-cubic-foot capacity. We were able to buy the mixer at a considerable discount online (about $1,100, including shipping) because it was a discontinued model with a bent wheel. It’s a medium-duty unit, well-suited for the volume of work we do, and portable enough that one man can pick up the end and wheel it around the site. We also bought a second-hand plate compactor from a local rental center, a jitterbug (used for pushing down coarse aggregate), a bull-float, various trowels, and a bunch of form pins.
In addition, we own a Bosch 11248EVS 1/16-inch rotary hammer, which is handy for setting form pins, and a Bosch Brute electric breaker hammer. For layout, we use both an optical transit and a CST/Berger LM800 series laser level. To store our equipment, we rent a 20-foot-by-20-foot locker and a portion of a storage yard that we share with a local landscaping company, at a combined cost of about $360 per month.
Excavating and Layout
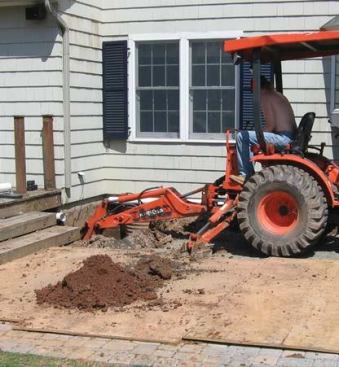
It takes us about a week to block up the foundation for a small addition like the kitchen bump-out shown in this article. We start by taking steps to protect the landscaping as much as possible. On this job, we removed half of the paver patio that occupied our digging area, then covered the remaining half with plywood to protect it from damage. We work in an area with tight setbacks and not a lot of room to maneuver, so we often end up renting equipment that’s just big enough to get the job done. In this case, DoCouto dug the hole with a small Kubota tractor equipped with a backhoe, while I used the dump truck to dispose of the excess dirt at a nearby landscaping yard. For some jobs, we rent a 15-yard roll-off container and stockpile the dirt there (a $450 charge).
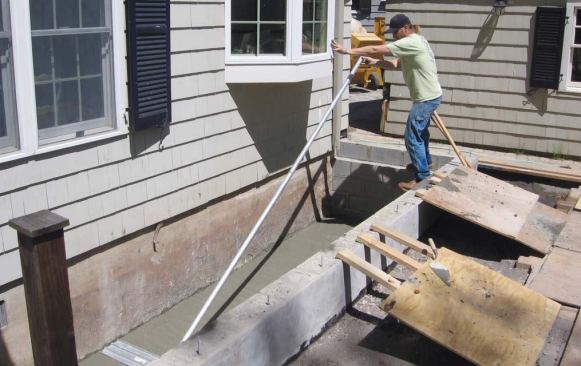
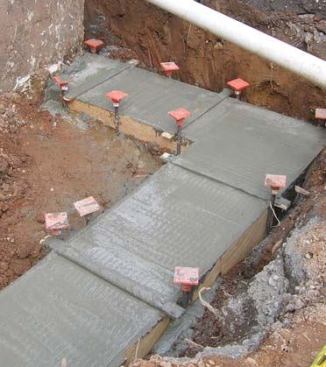
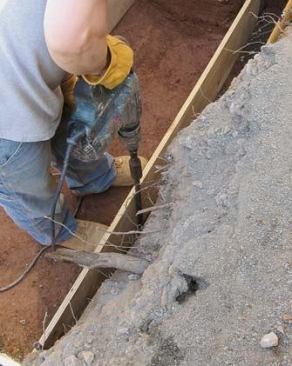
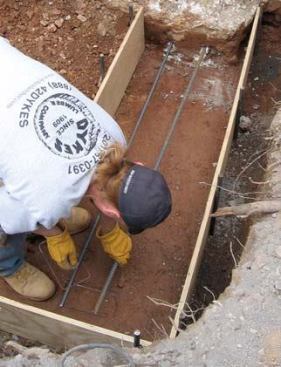
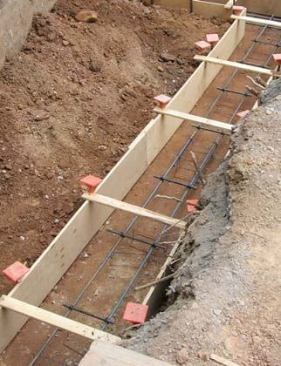
Footings
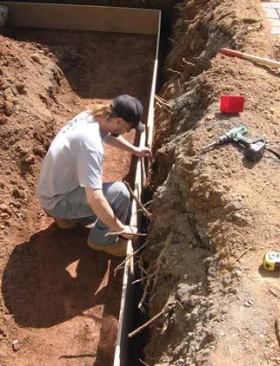
Unless the soil conditions are unusual, we usually form footings that are 12 inches deep and 24 inches wide. For form boards, we use 5/8-inch plywood ripped to width and secure the sides with form pins. We reinforce footings with parallel lengths of rebar, wired together every 20 inches with short lengths of rebar. To pass inspection, we use chairs to carry the rebar and always cap the form pins. It takes about a day to build the footing forms and set the rebar for a small addition and about an hour to place the concrete.
After screeding, we use a jitterbug to give the top of the footing what we call an “alligator back” — a little tooth for the first course of block to key into.
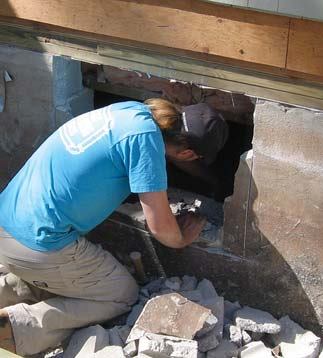
Blockwork starts at the corners, with the blocks laid in a full …
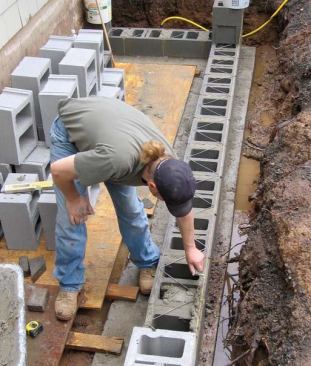
Blockwork
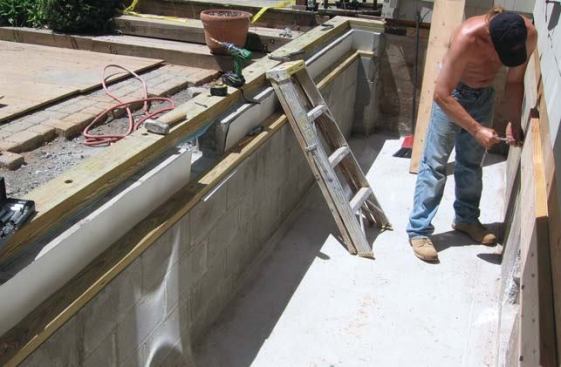
After the concrete has cured at least a day and we’ve stripped the forms, we move the blocks down into the hole, setting them up on sheets of plywood to keep them clean. This job was simple to lay out: We snapped a chalk line on top of the footing parallel to the existing foundation wall to represent the outside edge of the new wall, squared up the outside corners, and started laying block.
Masonry lines strung between the corner blocks keep the courses straight. DoCouto lays block more like a carpenter than a mason: He uses his 2-foot spirit level to level each block, whereas most masons check for level only occasionally. We use a story pole marked off in 8-inch increments to keep each course on track, checking its height against both the footing and our benchmark with the transit or level.
DoCouto uses a lot of mortar while laying up block, filling up the cores, and reinforcing the corners with steel. To provide lateral strength, we add Dur-O-Wal galvanized truss reinforcement to every other course. We also parge the walls as we go, using the same 2 1/2-to-1 sand/Type S mortar mix that we use to lay block. Splashing a little bit of water on the block before applying the mortar helps make the troweled-on mortar stick.
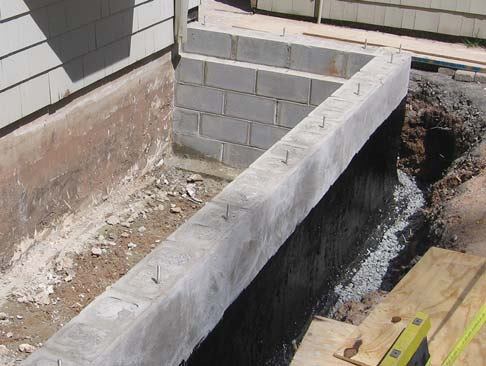
It took a day to lay up and parge the three lower courses of 12-inch block on this job. The following day, we switched to 8-inch block for the last course, to create a shelf for the floor framing that exactly matched the foundation on the rest of the house. We filled the cores of the top course solid with mortar and set 12-inch anchor bolts 24 inches on-center to hold the double 2×6 PT sill. Because floor sheathing would be attached directly to the top of the 3-inch-thick sill, we embedded the bolts with only 2 1/2 inches exposed and recessed the holes for the washers and nuts.
Drainage and waterproofing. Most of the time, we tie a new footing drain into either the home’s existing perimeter foundation drain system or — if we can’t run a drain to daylight — a new sump well. On this job, however, the architect didn’t specify any drainage and the building inspector didn’t require it, which is typical for a crawlspace foundation in our area. Parging plus a thick coating of cold asphalt rolled onto the below-grade portion is usually sufficient dampproofing for crawlspace foundations.
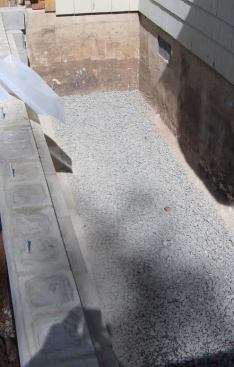
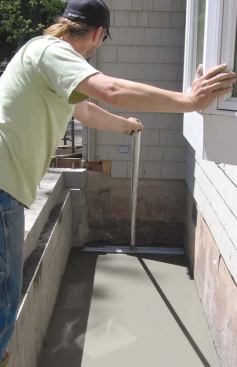
Slab. This foundation was small enough that we could backfill by hand, carefully tamping as we went. We reused the excavated soil, adding a top layer of stone dust for resetting the patio pavers. We filled the hole with a yard and a half of stone and poured another yard and a half of concrete to create a 4-inch-thick “rat slab” floor. The stone and vapor barrier underneath the slab will help prevent moisture from wicking up into it.
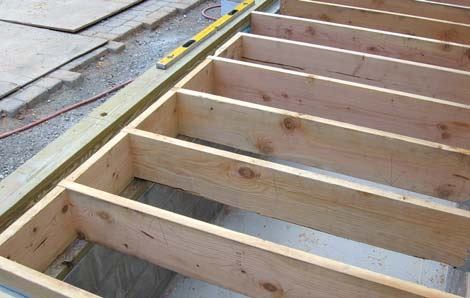
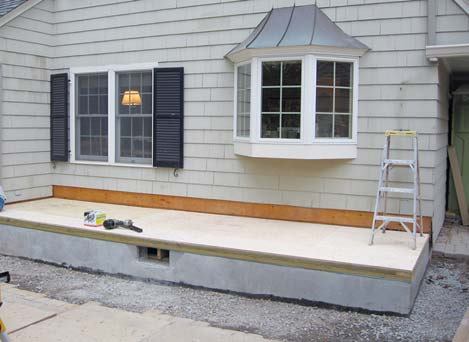
Floor framing. Before framing the floor, we cut an access opening into the existing crawlspace, then used 3/8-inch-diameter bolts to fasten a 2×10 ledger to both the existing double sill and the block wall underneath. The joists are attached to the ledger with hangers. At the other end, they’re nailed to the 2×4 PT sill, which we fastened to the masonry ledge with powder-actuated fasteners. Blocking between the joists over the sill substitutes for a continuous rim joist. To finish up the deck, we glued and nailed down a 3/4-inch T&G plywood subfloor.
Cost
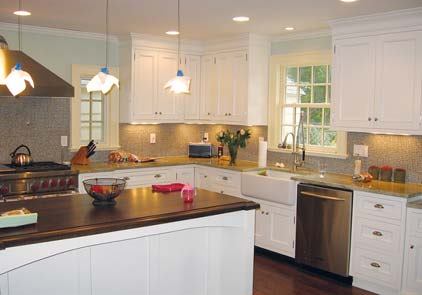
The total project budget for construction of the complete kitchen addition came to about $82,700 after changes, upgrades, and additions (not including cabinets). Construction of the foundation accounted for about 127 man-hours (excavating, 33 hours; footing, 35 hours; blockwork, 49 hours; flatwork, 10 hours), compared with a total of 805 man-hours for the entire project.
Total materials cost for the foundation was about $2,500, including $868 for concrete and $598 for backhoe rental.
In all, the cost to the client for the foundation was approximately $7,500, which is roughly equal to what the cost would have been had we subcontracted the work. Our gross profit margin for the project was 10.1 percent.