Wood Selection
Rot-resistant woods include redwood, red cedar, Alaskan yellow cedar, and Port Orford cedar, all of which may last a century or more without protection. These woods are easy to work with and they take paint well, but they are soft and dent easily.
Depending on the region of the country, other durable woods may be available. These include high-quality cypress, white oak, and locust. These species offer nearly the same rot resistance as redwood but are much stronger.
Moderately rot-resistant woods include eastern white pine, southern longleaf pine, larch, and swamp oak. These woods may last for many years if they are installed properly and are well-protected with exterior finish.
Slightly resistant or nonresistant woods include alder, poplar, cottonwood, hemlock, the spruces, the maples, red oak, and all other pines and true firs. Do not use these species for exterior trim unless it can be guaranteed that no water ever reaches the raw wood.
Cull Out Defects
Regardless of species, avoid any board containing a large percentage of sapwood, as sapwood is less durable than heartwood. Also avoid boards with splits, surface cracks, or loose knots. These defects will always get worse with exposure to the elements, and provide entry for bugs and fungi.
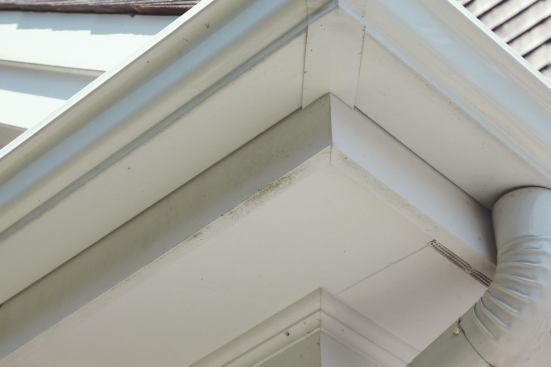
Design Principles of Exterior Woodwork
Exterior joints should be designed to shed water (Durable Exterior Trim, below). Trapped water will cause excessive wood movement and splitting, and eventually will invite rot, bugs, and fungal infestations.
Avoid Miter Joints
Only profiled moldings should be mitered; all other trim boards should have lap joints. Miter joints inevitably open as the wood shrinks, exposing the end grain of both boards to the weather.
While all trim stock should be dry (less than 12% MC
at installation), this is especially important for profiled moldings to keep miters tight. Pre-prime all sides to help keep the wood dry.
Seal and Flash Edges
To keep joints dry, first make them as tight as possible:
- Make sure that adjoining surfaces meet uniformly at all points; no amount of glue or fasteners can compensate for a sloppy joint.
- Seal all joints that are likely to absorb water. Horizontal joints are the most vulnerable. Apply a coat of latex paint or a wax-based sealant such as Thompson’s Water Seal® before the pieces are assembled.
Second, use metal flashing to help water find a path away from horizontal trim pieces.
Canted Surfaces and Drip-Edges
Railings, thresholds, and other flat surfaces can be made to shed water by bowing or sloping top surfaces, and by sawing or routing a drip groove along their undersides. Around posts and columns, build ventilation channels that will allow built-up pieces to dry.
Gable-End Transitions
Just as a fascia is protected by the roof’s drip-edge, other horizontal runs, such as head casing and skirt boards, should be protected by a drip-cap and Z-flashing. This is especially important on transition boards, such as the joint between gable siding and the wall below (below).
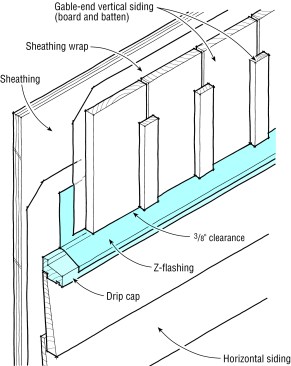
To divert water away from horizontal siding when vertical siding is used on gable ends, install a transition board with a drip-cap and Z-flashing.
PVC and Composite Trim
Several types of composite trim are available the most common are fiber-cement, engineered wood, vinyl and cellular PVC. The first three tend to be used with the same type of siding and are covered in those sections. PVC is used with a variety of siding systems, and is covered here.
PVC is easy to install using the same techniques as wood trim, but a quality result requires special attention to a few key details.
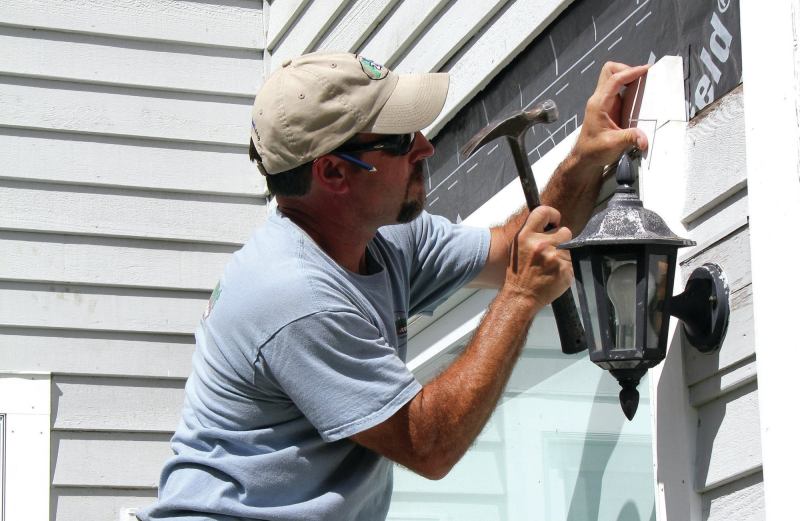
Fastening
Refer to this slideshow for an overview of best practices.
Detailing Joints for Movement
PVC trim expands and contracts with temperature changes, so joints should be assembled to compensate for this. Miter joints are acceptable with this material but need to be held together with fasteners and PVC adhesive. Apply the adhesive to only one surface and then hold or clamp the pieces together for the recommended setting time. Using glue on both surfaces prevents the cells from fusing in a molecular bond.
Use scarf or "weather cut" joints to join long lengths of trim end-to-end. Leave the joint unglued so that the boards can expand and contract without visually opening up.
Sealing Exposed Edges
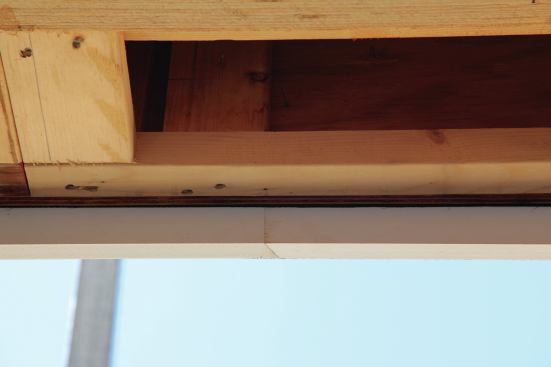
Though PVC is considered impervious to moisture, this is not always true. Cut edges can expose open cells that will hold moisture and lead to mildew and algae growth. To avoid this, seal all cut edges by sanding them with 320-grit sandpaper, then wiping the edges with acetone.
Ripping PVC trim exposes the open interior cells. If left unsealed, these can absorb moisture, allowing mildew and algae to develop, as shown in this photo.
Choosing Paints and Sealants
If the trim will be painted, choose a high-quality self-priming 100% acrylic paint. Always choose a color with a high light reflective value (LRV). The lighter the color, the higher the LRV number and the less light (and heat) it absorbs. The hotter a piece of PVC gets the more it will expand and distort, so to prevent overheating, manufacturers recommend using a paint with an LRV of 55 or greater.
With PVC trim, always use a polymer-based sealant. PVC trim manufacturers all caution against using silicone-based products.