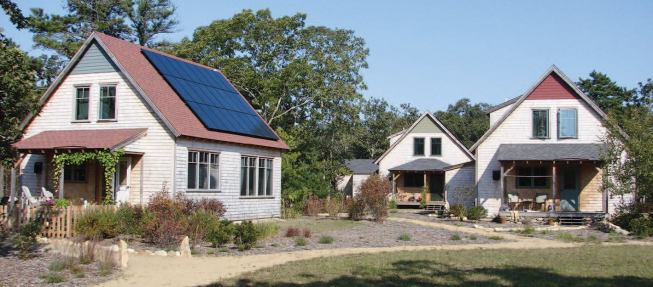
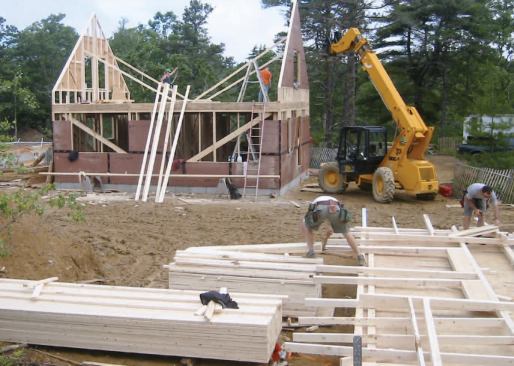
These days, many of us are trying to meet two seemingly conflicting goals: We want to build the finest housing possible, but we also want to make that housing available to people other than the wealthy. In 2007, the company I co-founded many years ago – South Mountain Co., on the island of Martha’s Vineyard, Mass. – was given an opportunity to pursue those goals when we were chosen to design and build a neighborhood of eight two- and three-bedroom Cape Cod–style homes. The property – which was designated affordable housing – was part of a 26-acre purchase by a local conservation organization. The homes would be clustered on four acres, and the rest of the land would be left as protected open space.

The author's company was chosen to build a community of small, z…
A fundamental goal of the project was to make these homes truly affordable, now and in the future; therefore, we would need to design and build them to meet the most stringent requirements for energy efficiency and low maintenance.
I don’t believe it’s possible to build truly great housing that’s cost-competitive with standard American housing, because most of the homes built today don’t offer a high level of craftsmanship, durability, comfort, or performance. Ultimately, the goal is to make “standard American housing” that is significantly better than today’s sorry norm. Until then, a good-quality home is going to have a higher cost per square foot.
Still, there are strategies we can employ to keep long-term costs low. One is to build smaller homes, but it’s equally important to help buyers understand that true long-term affordability comes from minimizing and stabilizing energy and maintenance costs.
Regarding energy, each of these homes combines a super-efficient building envelope and hvac system with a rooftop photovoltaic (PV) array to generate electricity. The completed homes easily earned platinum status from the U.S. Green Building Council’s Leadership in Energy and Environmental Design (LEED) program, the highest rating offered. If the homeowners are willing to live a resource-conscious lifestyle, the homes should achieve net-zero energy performance, which means that the PVs generate at least as much power as the home consumes, averaged over the year. (The homes are being carefully monitored, and we’re testing our assumptions with a little contest. Any household that consumes no energy – or produces more than it uses – in the 12 months from June 2010 to June 2011 will get a prize: a one-year membership in a local community-supported agriculture endeavor or a $400 gift certificate to a local fish market.)
Minimal upkeep is another essential. The fiberglass windows, the robust hardware and fittings, the unpainted cedar siding, and the reclaimed cypress trim should need no treatment or maintenance for 25 years or more. Quality materials cost more up front, but they save in the long run.
We were able to complete the two-bedroom versions for $246,000 – not including the solar electric system – on an island with very high construction costs. We calculate that the high-performance aspects of the houses added roughly 10 percent to the cost. What would these houses cost on the mainland? It’s hard to say, but certainly at least 10 percent less.
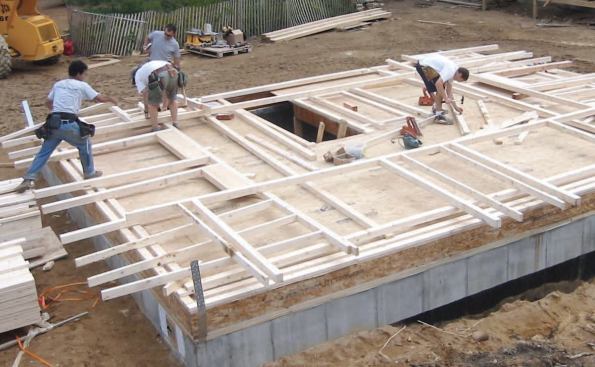
Honing the costs meant investing more time and effort into design than is typical for the small American house. The plans are highly detailed. Our in-house architects, engineer, and builders worked through every component. After years of trial and error building energy- and resource-conscious homes, we have settled on a suite of details that can be produced efficiently. These details may be useful for other builders and designers, so I’ll go through the essentials, starting with the foundation.
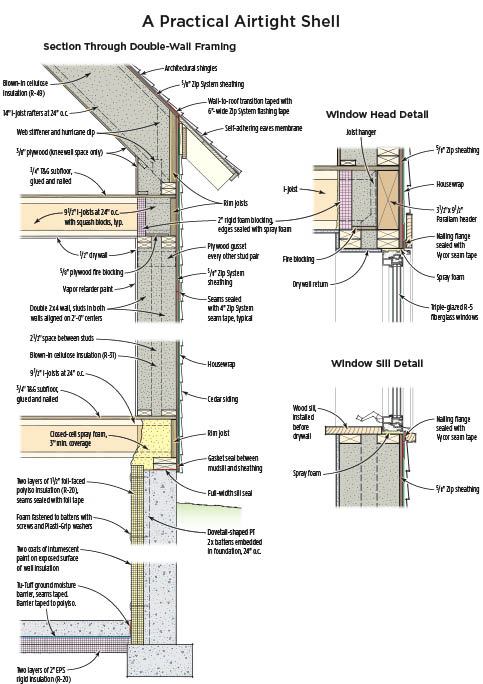
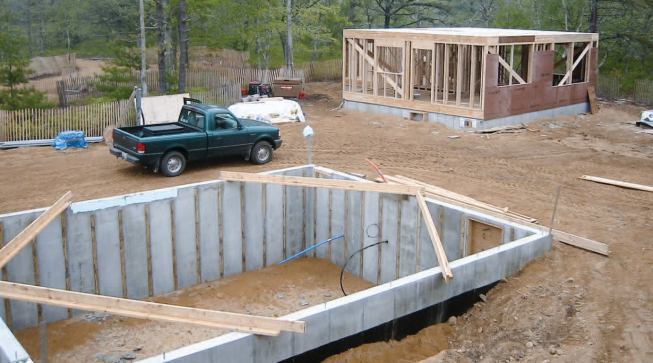
Warm and Dry Basements
Like most homes in our area, these have poured concrete foundations and full basements, but the construction and insulation methods are different. Customarily, fiberglass batts are stuffed between the first-floor joists, and the foundation walls are left bare; this results in poor insulation and air-sealing and creates a damp basement that’s prone to mold and mildew and requires the use of a dehumidifier all summer.
We use 3 inches of foil-faced polyisocyanurate rigid foam on the inside of the foundation walls and 4 inches of extruded polystyrene beneath the slab, creating what one of our crew refers to as “an R-20 bathtub.” (In more recent projects, we’ve used Type 9 expanded polystyrene under the slab, because its global-warming contribution is a fraction of that of extruded polystyrene, due to the blowing agent used during its manufacture.)
To hold the wall insulation in place, we fasten dovetail-shaped 2-by battens to the inside of the foundation forms, spacing them at 2 feet on-center. The beveled edges hold the pressure-treated battens securely in the concrete after the forms are removed. The rigid foam is fastened to the battens with screws and Plasti-Grip washers.
The ground moisture barrier consists of Tu-Tuff plastic sheeting (Sto-Cote Products, 800/435-2621) installed on top of the polystyrene before the slab is placed. The wall insulation is installed before the slab is poured, creating an uninterrupted insulation plane and air barrier in the basement. At the top of the foundation wall, sill seal and gaskets connect the top of the foam to the framed wall’s air barrier.
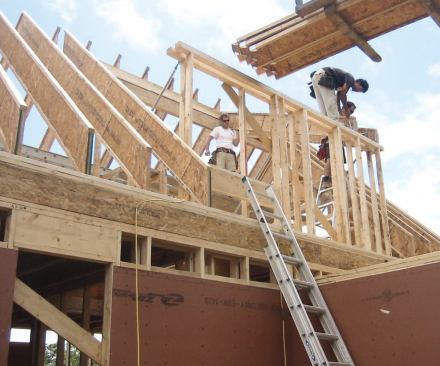
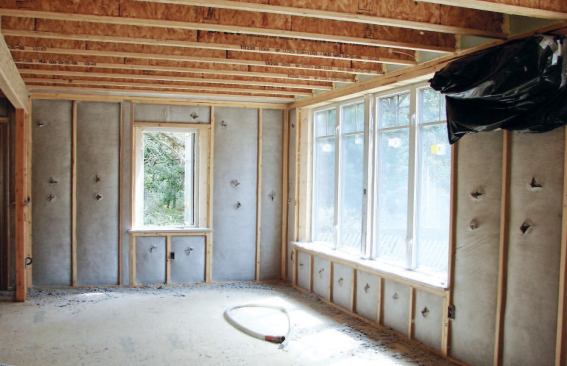
Double-Wall Framing
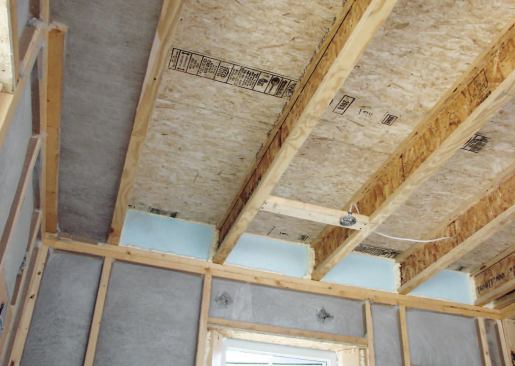
After years of experimentation with a variety of approaches, we have settled on cost-effective wall and roof assemblies that meet our insulation standards (R-31 walls and R-49 roofs) and minimize thermal bridging – and that our carpenters and other tradespeople are comfortable with.
We use double 2×4 walls with a 2 1/2-inch space between the inner and outer walls, and 14-inch wood I-joist rafters. Everything is framed 2 feet on-center. The double walls minimize thermal bridging because of the space in the middle, and the I-joists do so because their webs are so thin. The sheathing and air barrier are provided by 5/8-inch-thick Zip System panels (Huber Engineered Wood, www.huberwood.com).
Our framers speed up the process and reduce job-site waste by having the supplier precut all studs, joists, and rafters – including the plumb cuts. This also reduces overall material use, as the lumber company uses the smallest amount of stock possible to get the lengths needed.
There are some details to consider with double-wall framing. For example, if you frame square openings around deep windows, you decrease the amount of light getting into the room. We solve this by splaying the sides of the openings at 45 degrees. Rather than trying to put trim around the entire opening, we install wood sills before installing the drywall, which is finished to the window jambs. When the drywallers are finished, so is the opening.
Another issue is how to make a secure, stiff connection between the inner and outer walls. We do it by aligning the studs in both walls and nailing the bottom plates in place, then adding plywood gussets to the sides of every other pair of studs near the top of the wall.


