During the planning stages for a custom home we recently completed, I had encouraged the customer to upgrade some choices originally made by the architect and adopt some products and practices that I believed would add value to the home. For example, we decided to insulate with mineral wool instead of fiberglass, sheathe the house with Zip System sheathing and tape rather than commodity sheathing and housewrap, and upgrade the siding from channel-rustic to a vertically oriented Brazilian hardwood rainscreen siding.
As the cost of the upgrades started to escalate, however, we had to pull back the budget in some other areas. On this project, one place to carve out some savings was to install a less expensive alternative to composite decking on the home’s large wrap-around deck. In our area, the deck market is dominated by composite and PVC decking products. However, at a cost of about $8 to $10 per square foot (for the decking only), composite decks are not for every budget, nor do they satisfy everyone’s taste, so I presented a few other options to my clients.
We considered hardwood decking, but quickly ruled it out as prohibitively expensive, and due to COVID-19 supply-and-demand issues, the price of cedar was also too high. So, at first reluctantly, then more enthusiastically once we had calculated the potential cost savings, the client agreed that pressure treated decking would provide the best value. For additional cost savings, we would also install a pressure treated railing system.
Framing
My co-worker Ed Backus and I installed the deck ledger during the framing stage of the house to make sure that the ledger flashing would be properly counterflashed with the door sills and sill flashing and that all the layers of flashing tapes were properly lapped from the start of the project. Flashing the ledger under doors can be difficult as an afterthought if the doors are already installed with taped sills.
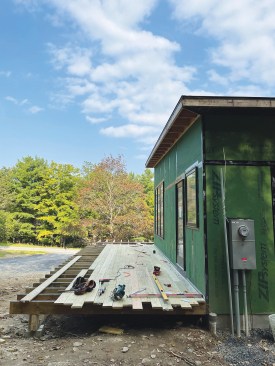
The footprint of the deck is a large “L” shape that hugs two sides of the house. The dimensions of the “L” are 63 feet by 10 feet along the front of the house and 28 feet by 10 feet along the side, for a total area of approximately 910 square feet.
Precast concrete piers were installed to support the deck, which wraps around the 63-foot-long front and 28-foot side of the house.
TechnoPost steel helical piles are typically our go-to deck footing. But on this project, our installer—who understands the soil conditions at our jobsites—talked us out of installing his product for a few reasons: The soil was too disturbed from excavating for the foundation of the house; the soil type didn’t have the lateral stability to support steel posts; and the bedrock is very high at the house site, and securing a helical pile to the ledge would be difficult. Rather than dig the 11 footings by hand and pour concrete into cardboard tube forms, we chose to install precast concrete deck piers. The piers have a wide base, a tapered body, and a female threaded fitting cast into the top that accepts a 1/2-inch-diameter bolt to secure the bottom of a post-base connector.
The excavation contractor already had equipment on site, so he dug a long trench and we worked with him to lay out and place the piers exactly where we wanted them. Because of the bedrock at the house site, some of the piers needed to be trimmed with a gas-powered cutoff saw so they wouldn’t sit too high above grade.
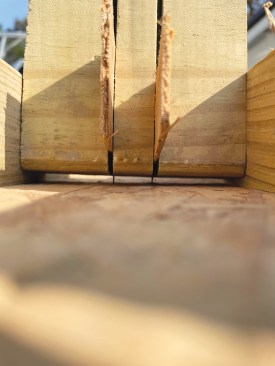
The 2×8 joists are spaced 16 inches on-center and bear on a two-ply 2×10 dropped beam at the outer edge of the deck. We made a point of laying out the joist framing to ensure there would be a full-width deck board at the house as well as at the perimeter of the deck.
Prior to installing the 6×6 support posts, Ed Backus applied liquid flashing membrane (above) to the post bases (below left) and the notches for a 2-ply dropped beam (below right). Backus first wrapped the posts with masking tape to give the application a finished look.
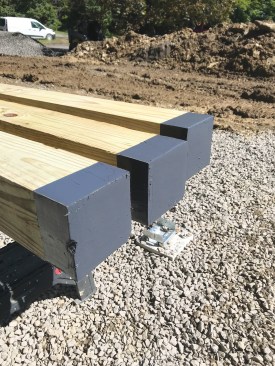
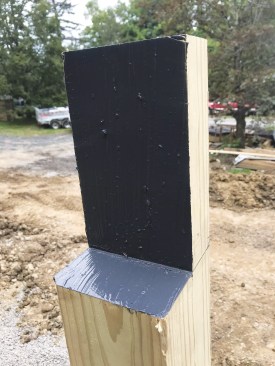
The 2×10 beam bears on 6×6 pressure treated posts connected to the precast concrete piers with metal hardware that provides a 1-inch standoff. We treated all end cuts of the beam and posts, including the shoulders that nest the beam, with Huber’s Zip Liquid Flash to prevent the end grain from wicking in water and shortening the life of the framing. We covered the top faces of all the deck framing with Vycor self-adhered flashing membrane, which we ripped to width using a site-made slitting jig.

To make a slitting jig, the author kerfed a 2-by block cut to the width of 4-inch-wide Vycor Deck Protector SAF tape, fitted the kerfs with utility knife blades held in place with shims, then tacked in place between a pair of scrap 2x4s as shown (left). Pulling the 4-inch-wide tape through the jig resulted in pairs of 1 1/2-inch-wide strips that were then used to cover the tops of the 2-by joists (above).
Decking
In our area, both standard and premium 5/4×6 pressure treated deck boards are available, and we felt the upgrade to the premium grade (from about $2.35 to about $2.53 per square foot) was worth the extra cost: The premium ACQ-treated southern yellow pine decking stocked by our local lumberyard has fewer knots and an overall nicer grain appearance.
During installation, we opted to create a random pattern for the decking—similar to a hardwood floor—rather than a racked look where each subsequent course has a repeated break in board length. Working from the ledger out, we started every course of decking with the offcut from the previous course, then infilled with full 16-foot boards.
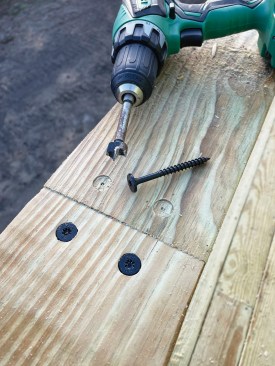
To ensure that the visible fastener heads would be aligned, the author snapped chalk lines on top of the pressure treated decking to mark the joist layout. The width of the deck was planned so that there would be no ripped deck boards; decking was installed from the ledger out toward the rim joist.
We face-screwed the decking to the joists with PamFast coated fasteners. To keep the screw heads aligned, we marked the joist locations by snapping baby-powder chalk lines, then eyeballed the spacing off the edge of each board.
We eased over all the end cuts with a 1/4‑inch roundover bit on a cordless router to match the long edges of the boards from the mill. For now, the client has chosen to leave the decking unfinished.

The author used a router fitted with a 1/4-inch roundover bit to ease all the end cuts on the decking and stair treads.
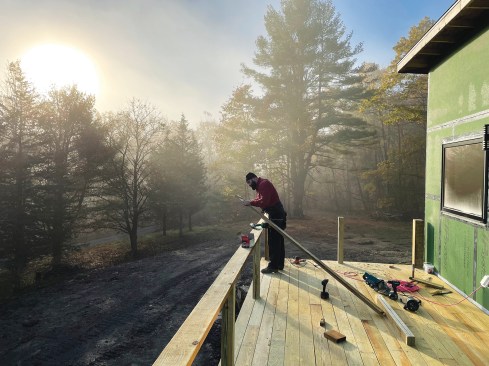
Cable Railing
The home sits on a heavily wooded private lot on the Helderberg Escarpment in upstate New York. The scenery from the deck is beautiful, and the client didn’t want to interrupt the view with the railing system that was suggested by the architect: a wood railing built with a 2×4 top rail fastened to 4×4 posts with typical 2×2 balusters. Instead of balusters, I suggested using a steel “hog fence” balustrade, but the client instead suggested cable rail.
To keep the deck budget to a minimum, I agreed to install customer-provided cable-rail components that the client had sourced online rather than a name-brand cable-rail system stocked by our local lumberyard. While my standard policy is not to provide a warranty on customer-provided materials, my customer would be able to save a few thousand dollars by installing a generic product.
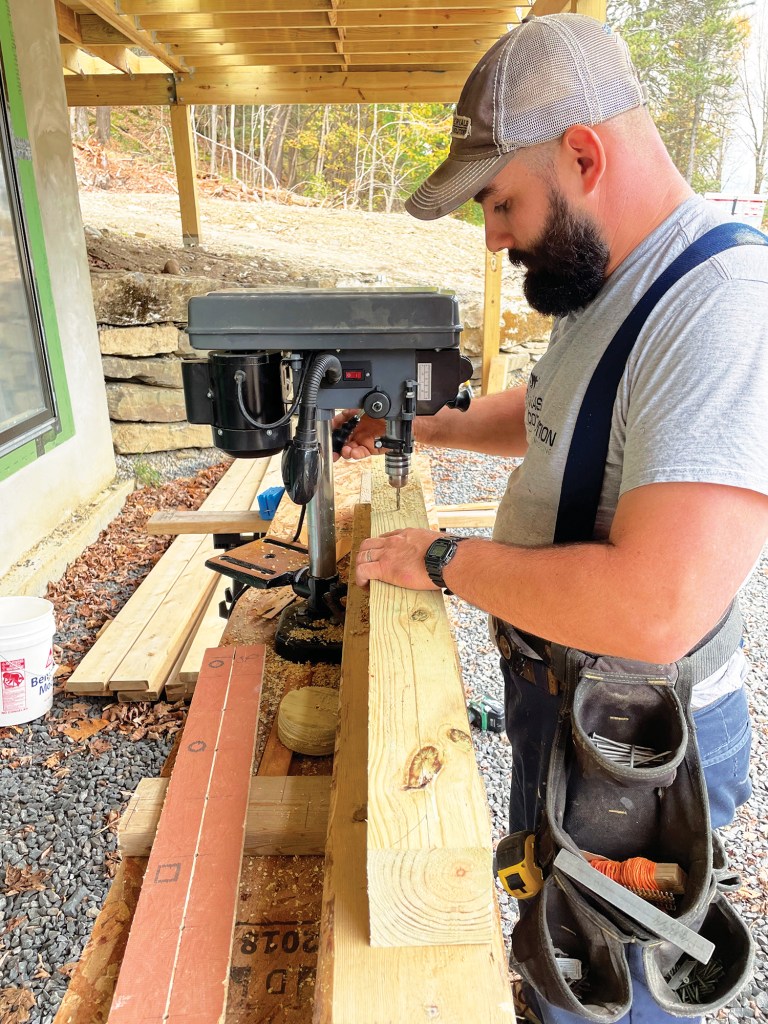
Posts. Before installing the posts, we set up a drill press and spacing jig and predrilled all of the holes for the cables. We wanted to make sure the holes for the coarse-thread fittings in the 6×6 corner posts and the stainless steel grommets through the 4×4 intermediate posts would be seated squarely. Then we dry-set the posts to the frame with a few Irwin Quick-Grip clamps, shimmed them plumb, then fastened them with plenty of solid 2×8 blocking and structural screws.
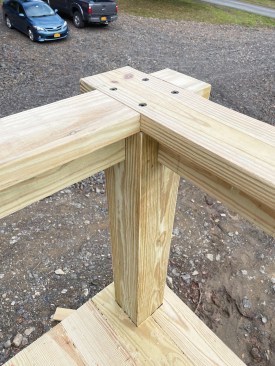
Top rail. The top rail (some people call this a “drink rail”) of our railing system is a pressure treated 2×6 on the flat, running over the tops of the 6×6 corner posts and the intermediary 4×4 posts. A 2×4 rail runs post-to-post under the 2×6 creating a “T.” We fastened the 2×4 to the 2×6 from the underside using 4-inch-long GRK Multi-Purpose Screws, countersunk 1/2 inch into the 2×4.
Jeremy Kassel
The 2×6 top rail features half-lap joints instead of miter joints at the corners; here, carpenter Ed Backus uses a chisel to clean up one of the half-laps before installing the rail.
Corner detail. At the two outside corners of the deck, a carpenter might typically miter the top rail, but I find that inevitably this miter will open up as the pressure treated lumber dries out. Instead, I suggested creating a half-lap joint. Ed quickly agreed, and with a stout corded router and a little bit of layout work, he executed the plan flawlessly.
We fastened the 2×6 top rail into the tops of the posts with 2 7/8-inch-long FastenMaster HeadLok structural screws, carefully laying out their positions because they would be exposed. Before driving the screws, I predrilled a slight recess for the screw heads with a 5/8-inch Forstner bit, which helped eliminate any mushrooming or flattening of the wood grain. The customer loves the intentional look of the black fastener heads.
HeadLok structural screws were used to fasten the 2×6 top rail to the posts; to create a slight recess for the broad-headed screws, the author predrilled the screw holes with a Forstner bit.
This is the half-lap detail used at the corners.
Cable installation. The cable rail fittings came in left-hand and right-hand versions, with a course thread on the side that is screwed into the post, and an open end on the other side where the cable is inserted. After each section of cable is precisely cut to length per the manufacturer’s installation instructions, the cable ends are inserted into the fitting and a hydraulic crimping tool is used to swage the fittings. In this system, the cable is then tensioned by simultaneously screwing the left-hand and right-hand fittings at the end of each length of cable into the end posts (for more on cable railing installation, see “Foolproof Cable Railings” by Tom Salas, PDB, Jun/15).
Final Touches
Before wrapping up, we dressed the posts with a 1/8-inch roundover bit to break the sharp edge from the mill, similar to the treatment we gave the end cuts of the decking. Finally, we sanded all the posts and top rails with a random orbit sander and 120-grit paper.

The 2×4 subrails that run between the posts are fastened to the continuous top “drink” rail with structural screws from below, reinforcing the assembly for the tension created by the cable rail system.
Pressure treated wood can be a good-looking alternative to pricier materials on the market. Many of the upgrades we made to spruce up the deck were not time consuming, nor were they expensive, thereby giving our client a pretty decent bang for his buck. ❖
Photos by the author.


