In the previous two issues of JLC, I wrote articles covering the processes of snapping layout lines for exterior walls (“Layout Lines for Exterior Walls,” Apr/16) and of laying out the plates for exterior walls (“Layout for Exterior Wall Framing,” May/16). Now it’s time to build those walls.
Preframing Fabrication
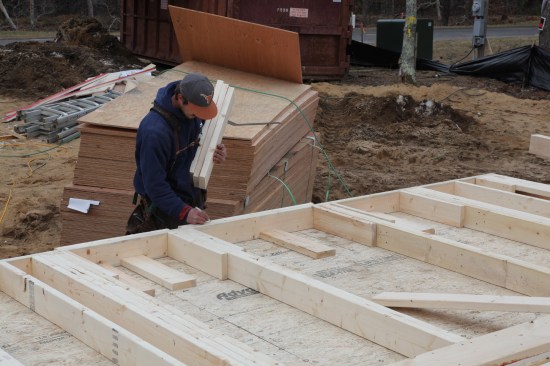
Tim Uhler pointed out in his excellent article “Efficient Framing” (Mar/16) that “high-quality framing and production comes from good organization and planning,” and I could not agree more. As with Tim’s crew, we have a crew hierarchy with one “crew chief,” or lead carpenter, who is in charge. On our crew, the lead carpenter worked with an experienced assistant doing the layout. After the layout was finished, both carpenters jumped in immediately to help the rest of the crew finish the preframing fabrication work.
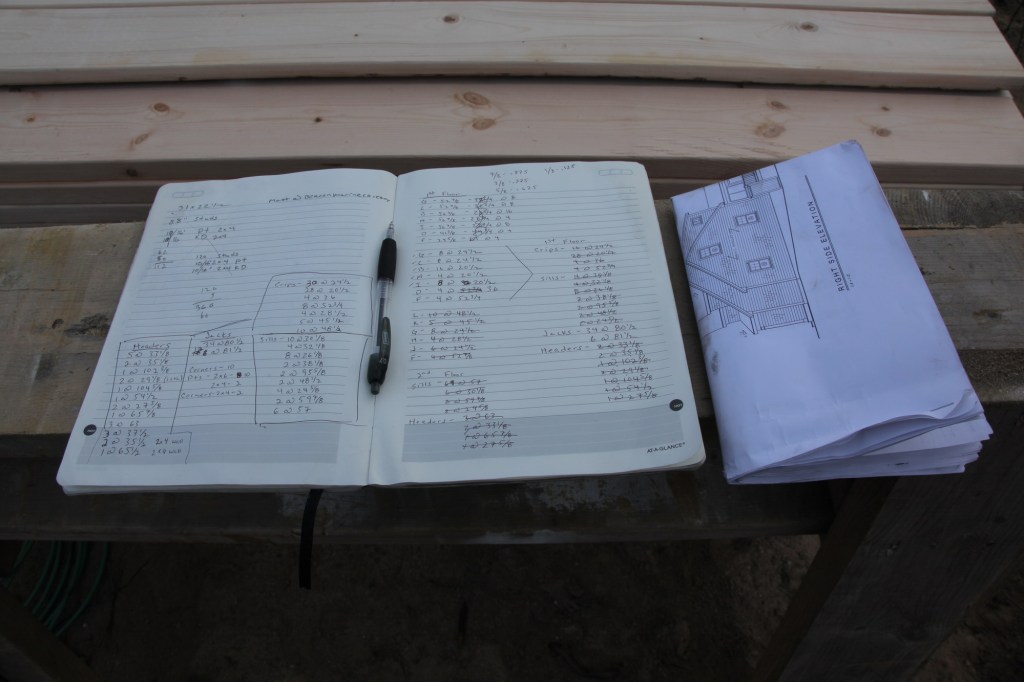
Every person on our crew has access to the plans, but instead of working directly from multiple sets of plans, we prefer to make a master list of all the parts that need to be built. Then each crew member copies the list for whatever parts he is making. On the list are the quantity and the length of every framing member that will be used to build the walls.
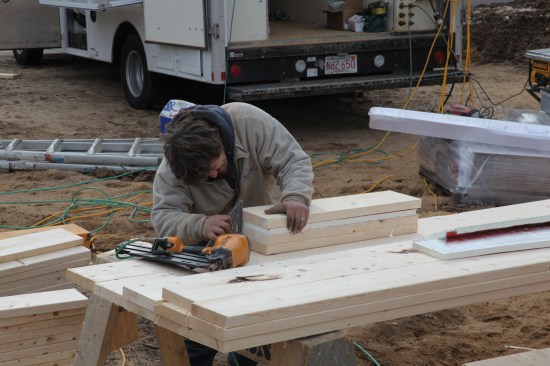
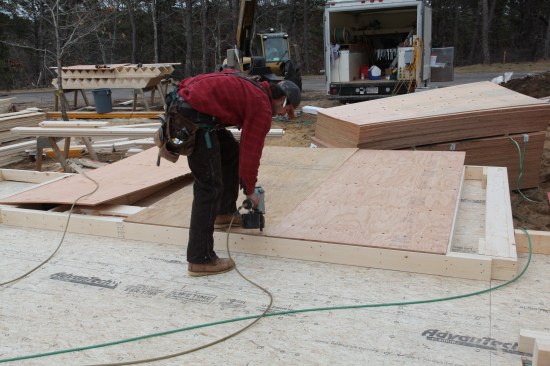
All headers are built before wall framing begins. For 2×6 walls, headers are made from three layers of 2-by material with a layer of 1-inch foam. Here the crew member squares the material before nailing it together.
Typically, one person makes all the headers. Unlike our colleagues on the West Coast who have ready access to thicker stock such as 6x8s, we make our headers from built-up layers, depending on the thickness of the wall framing. For 2×6 framing, headers are made from three layers of 2-by stock and a layer of 1-inch solid foam insulation. As each header is assembled, the crew member writes the length on the header, stacks it with others that are the same length, and then crosses it off his list.
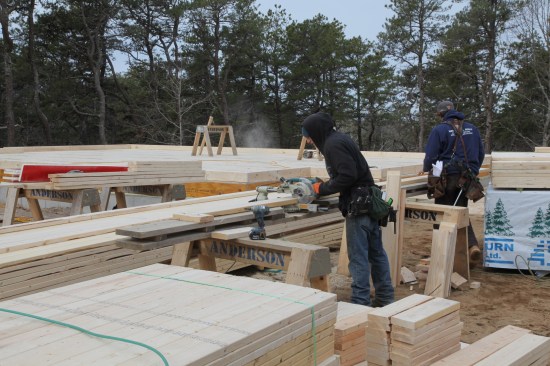
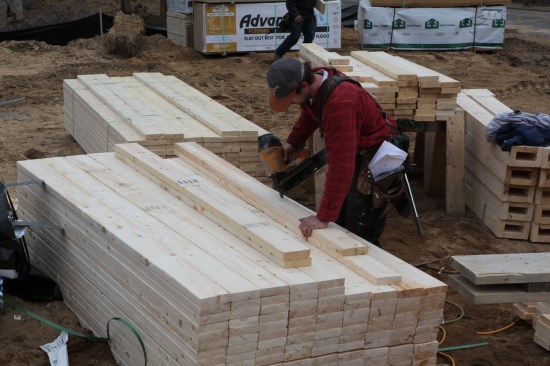
A chop saw station makes quick work of cutting cripples and sills. A stop attaches to the station table for making repetitive cuts.
As each piece is cut to length, it is labeled with the size and what the piece is. Then it is put in a stack with other matching pieces and crossed off the list.
In a different area of the jobsite, another crew member cuts sills and cripples. Cripples are the short studs that fill in the framing below window sills and above headers if needed. Each different window rough opening has its own size sills and cripples, and in most cases, there are many windows of the same size in a home. The crew member in charge of cutting these pieces works at a chop-saw station, where he can use a stop to make repetitive cuts. Working off the list, he cuts, labels, and stacks pieces in piles according to their length and function.
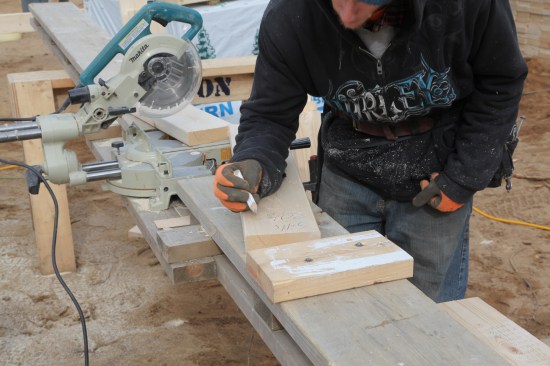
After cutting the jacks (trimmers), a crew member nails them onto full-length king studs.
We cut all the jacks (trimmers) for the window and door openings. These are nailed to full-length studs and then stacked. We generally do all the built-up framing required for prescriptive wind codes as the walls are being assembled. We also preassemble the corners. We make our corners U-shaped out of three 2x6s, with scraps of 2×6 nailed at each end to keep the “U” spread properly. Because of the many jogs in this house, we made a total of 10 corners for the first-floor walls. The L-shaped partition backers are also preassembled and stacked.

Corners are pre-assembled in a U-Shape with scrap blocks nailed on to keep the legs of the "U" spread while the wall framing is nailed together.
Most of the houses we frame use wall studs that come precut to a length of 92 5/8 inches from our lumber supplier. This length makes the interior walls the right height for two sheets of drywall without our having to piece in a narrow strip. Using precut studs not only saves us the time it would have taken to saw the boards to length, but also eliminates a ton of wasted wood. The exception to this is an area such as a garage where the walls are built on a stem wall rather than on a sheathed deck. The exact length of these studs is determined on site, and they need to be custom cut. For such studs, we cut a pattern with a stop nailed on one end. The crew member cutting the studs then simply butts the stop to the end of the stock, draws a line, and cuts the board to length.
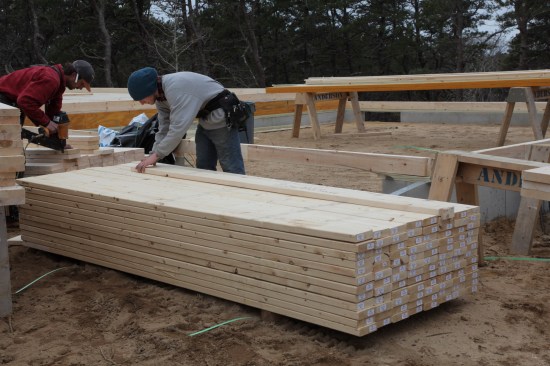
Studs for the house walls come pre-cut from the lumber supplier. But for areas such as the garage, studs have to be custom cut. Here a crew member uses a template with a stop on one end to mark the length before cutting.
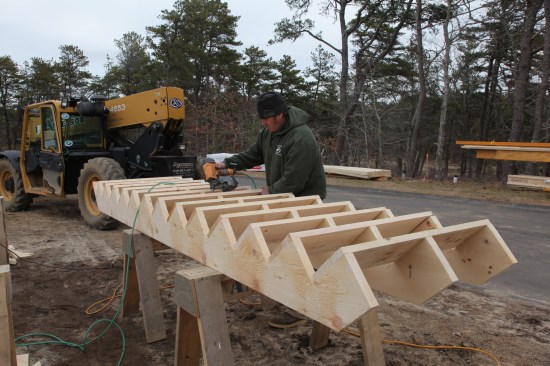
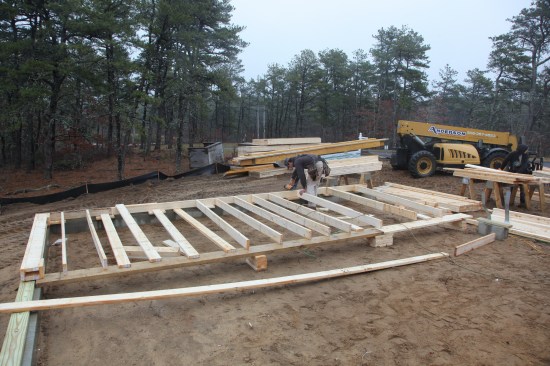
With rise and run taken from the plans, stairs are built ahead of time and installed when the deck framing is done. Solid stairs make it safer and more efficient for workers to move between floors during construction.
Most of the houses we frame are multistory and are built on full-depth poured basement foundations. Solid, safe stairs help the framers work much more quickly and efficiently, so we usually build the stairs as part of the prep work. Even if the contractor has called for a custom staircase, we build and install temporary stairs to allow crew members to move between levels quickly and safely. It’s easy to determine rise and run from the plans, and once a pattern stringer is made, a carpenter can usually build a set of stairs in less than a half-hour.
When all the framing parts are made, it's time to remove the tacks that were holding the pairs of plates together. The bottom plate is tacked to the layout line, with the ends set exactly where they're supposed to be.
Assembling the Wall Frame
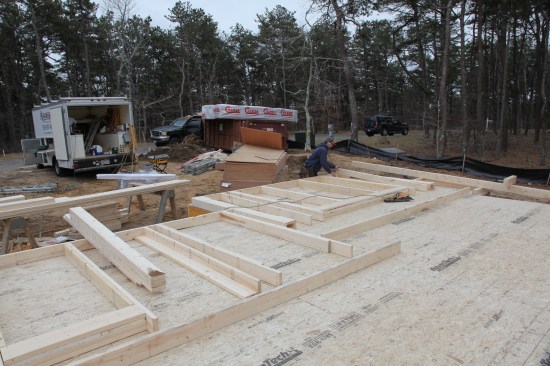
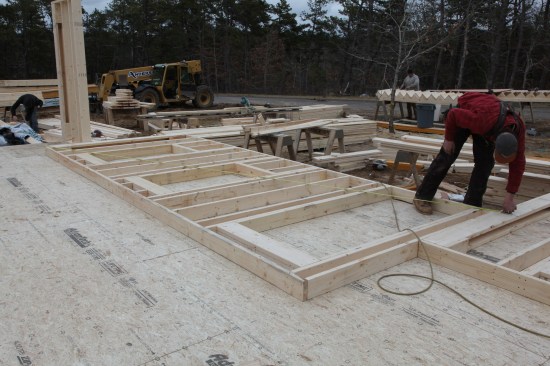
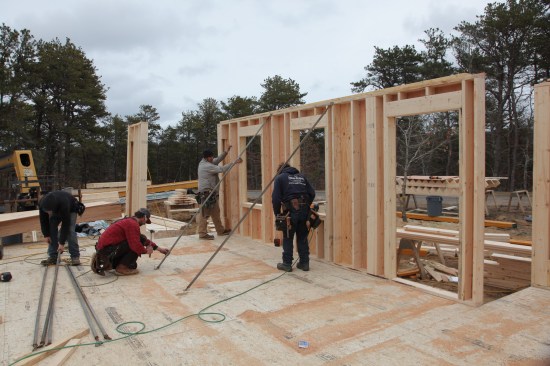
By lunch break, layout was done and most of the parts were cut and ready to go. At that point, one of the lead carpenters began building the walls. The first walls we choose to frame are the ones that extend all the way to the edge of the deck—in this case, the front and back walls of the house. The end walls fit in between those walls and are built after the first walls are raised. The front of this house was actually three walls separated by short jogs. To work efficiently, we assembled all three walls at the same time.
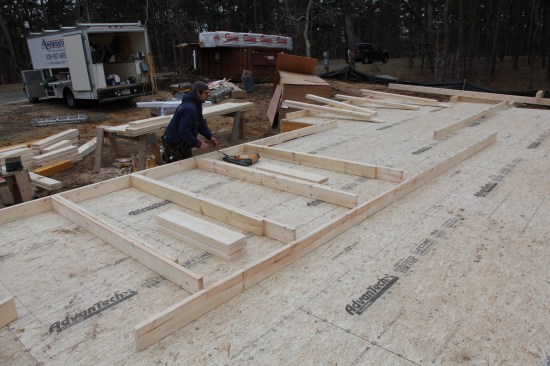
Working the three walls across the front of the house at once, the crew member sets king/jack assemblies where they go along with the right size header. He then works his way down the wall, nailing the king/jack assemblies to the bottom plate.
After removing the tacks that held the plates together during layout, we line up the edge of the bottom plate with the snapped line, making sure the ends are 5 1/2 inches from the layout line for the intersecting wall (or even with the layout for one of the jog walls). The tacks keep the plate in place while the wall is built and raised. The bottom plates are then tacked to the deck every 3 feet or so. The top plates are set on the deck more than the distance of a stud length away so they won’t be in the way during assembly.
Roe Osborn
Next he jumps up on the deck and nails the headers to the king studs after snugging them down to the top of the jacks. Additional nails secure the header to the jacks.
The first framing pieces loaded in are the king/jack stud combinations, which are set in place for the sides of each opening in the three walls. Based on the number written in the opening, the person loading the parts also grabs the right-size header and sets it in the opening. Working down the walls, we nail the king/jack studs to the bottom plates. Then, the headers are snugged into place, nailed through the side of the king stud, and toenailed to the jack as well.
Next the corner assemblies and partition backers are set in place along with the full-length studs. Again the crew member works his way down the walls nailing all of these parts to the bottom plate.
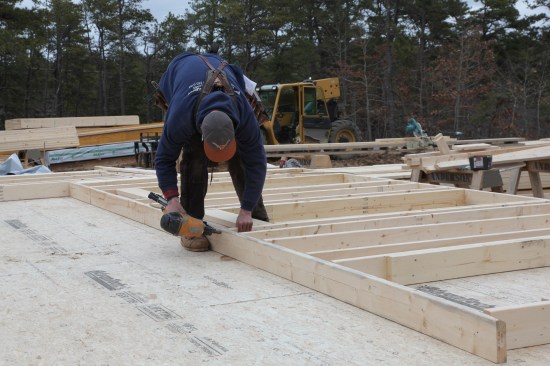
When all the full-length pieces are nailed to the bottom plate, the crew member drags the top plate over and nails it to the framing.
Corners, partition backers, and full-length studs come next, and the person doing the loading grabs them from their respective piles and sets them in place near the layout marks. When the walls are loaded, he nails these pieces to the bottom plate, working from one end of the house to the other. After nailing the last corner, he jumps up on the deck, scoots the top plates over to each of the walls, and nails them off one at a time.
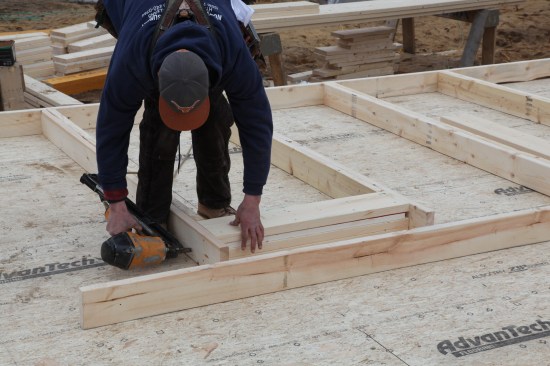
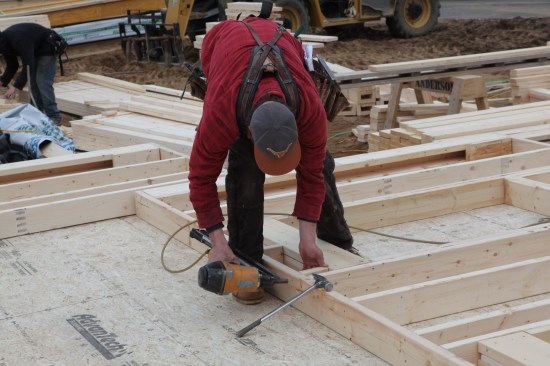
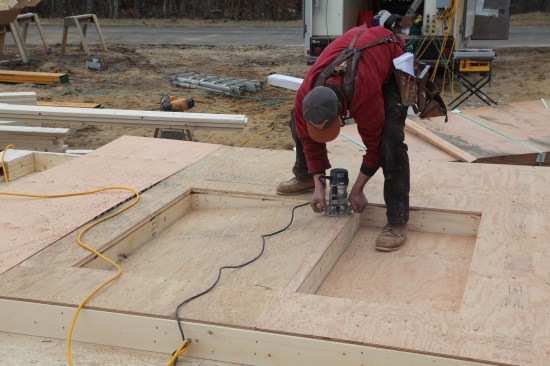
Next the cripples and sills are distributed to the window openings. At each opening one of the sills is positioned against the plate, and the layout for the cripples is transferred onto the sill.
Cripples and sills for the window openings are next in line. One framer grabs the proper-size pieces from the piles and distributes them to their respective openings. As these are set in the openings, the crew member positions one of the two sills against the bottom plate and transfers the layout for the cripples from the bottom plate onto the sill (14). The other sill stays in the opening until installation.

Cripples are first nailed to the bottom plate and then to the sill with the transferred layouts. A second sill nails in on top of the first one to complete the window rough opening.
If needed, short cripples are cut to fill in the framing between the top plate and the header.
To square the wall framing, a crew member takes diagonal measurements from corner to corner and adjusts the wall until those measurements match precisely.
The cripples are nailed to the bottom plate. Then, lining up the cripples with the transferred layout lines, we nail them to the sill. A second sill completes the framing for the rough opening. The wall height for this house worked out so that short cripples were also needed between the top of the header and the top plate. These short pieces are cut from scrap and nailed into place on the layout.
Square the Frame
Once each wall is framed, we check to make sure it’s square. We measure diagonally corner-to-corner and adjust the wall by moving the top plate (along with rest of the framing) one direction or the other. For this step, our measurements have to be absolutely the same.
Tacks driven through the header and into the deck hold the wall square while the sheathing is nailed on.
When the wall is perfectly square, we toenail through a window header to keep the wall in position while it is being sheathed. One tack is sufficient for shorter walls, but we may tack the wall in two or three places for longer walls. These tacks need to be removed before the walls are raised.

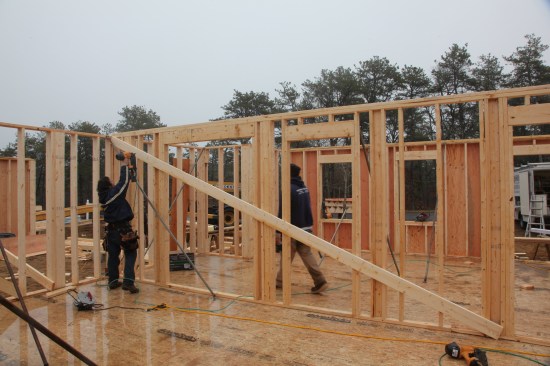
The last framing to be installed before the sheathing is the second top plate. Note that it is held back the width of a 2×6 to tie into the top plate of the adjacent wall.
After squaring each wall, we nail on the second top plate. This second plate overlaps from wall to wall to tie the walls together. Depending on the wall configuration, either we hold the top plate back the width of the wall framing (in this case, 5 1/2 inches) or we leave a longer section out that is installed later, extending over the end of an adjacent wall.
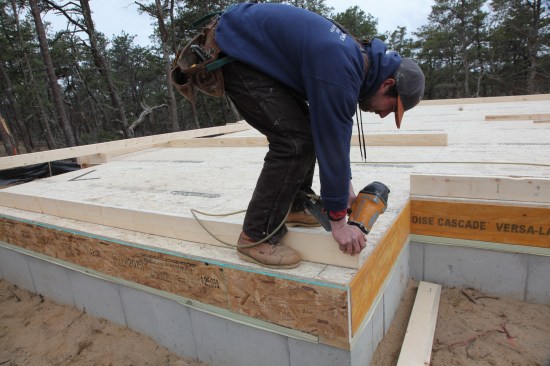
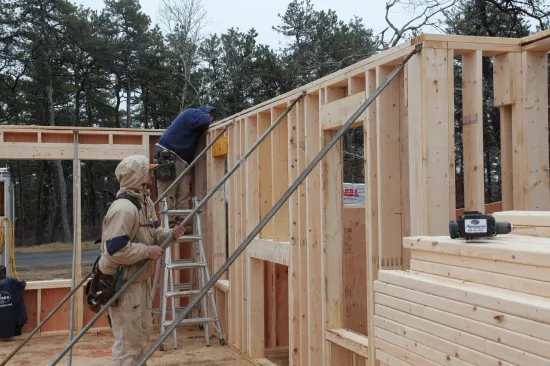
This house was built in a high-wind region and plans call for the sheathing to be installed vertically for shear strength. The plans are specific as to the placement of the plywood sheets. Typically, plans call for full sheets to span the openings whenever possible and to start at least one stud bay from the end of a wall. Ripped widths fill in the ends. We usually run the sheathing to the top edge of the second top plate unless plans call for a different strategy. If there is a second floor, we use metal straps to bridge the sheathing between the two floors to provide uplift resistance.
The sheathing for this house had to be installed according to an engineered plan for high-wind considerations. Here the corners of the plywood sheets are tacked to the frame.
After the sheathing is tacked on, a plunge router with a bearing-guided flush-trim bit cuts out the rough openings. The sheathing is then nailed off according to schedule.
We lay the sheathing panels on the wall framing one by one and tack them to the frame with a nail at each corner. When all the sheathing is tacked in place, we cut out the openings for the windows. We’ve found that the quickest way to cut openings is using a bearing-guided flush trim bit in a heavy-duty router. We simply plunge the bit through the sheathing and then rout the opening, letting the bearing ride along the framing of the rough opening.
When the window and door openings are cut out, we go back and nail off the sheathing. To comply with the high-wind code, we drive nails 4 inches on-center for the perimeter nailing (including around all openings) and 6 inches on-center in the field. The sheathing has to extend down to cover the deck framing when the walls are standing, so we trim off the excess sheathing along the bottom edge.
Raise and Brace the Walls
Before lifting, we have the wall braces and the laser level ready. The last thing we do before lifting the walls is remove the tacks that we drove to hold the wall square. You’ll know pretty quickly if you’ve missed any.
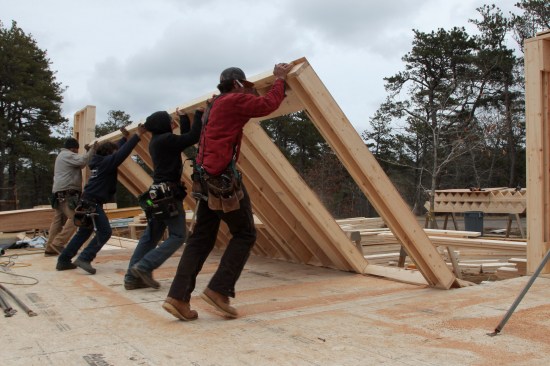
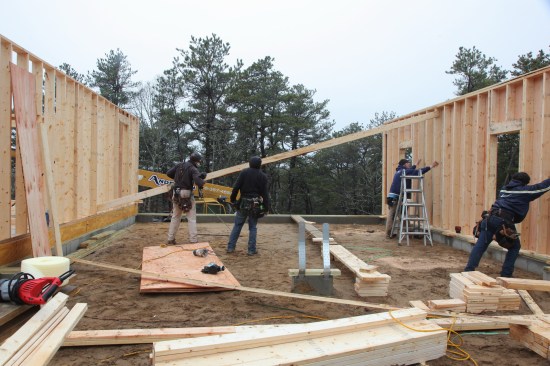
A coordinated effort by the crew makes raising most walls quick and easy. A telehandler can be used to lift the heaviest walls.
For most walls we build, a crew of four provides plenty of lifting power to raise them into position. Most walls are light enough that you can drive a hammer claw into the plate and lift it to get a grip. For longer, heavier walls, we slip blocks under the plates to get the most positive starting grip. On rare occasions, we use a telehandler to raise large, heavy walls, such as a tall gable wall. A coordinated effort sets the wall upright in just a few seconds.
After the walls are raised, the crew makes sure the bottom plate is even with the layout line before nailing it to the deck. Two nails are driven at the base of each stud.
After the wall is up, we check to make sure the bottom plate is right on the snapped layout line. If it needs to be moved in or out, a persuasive tap with a sledge hammer usually does the trick. At that point, the bottom plate is nailed to the deck with two nails at the base of each stud. (Some crews are not quite as careful where they drive these nails, and many an electrician or a plumber has cursed out such framing crews after hitting a nail while drilling a hole through the plate in the middle of a stud bay.)
When the walls are standing and the bottom plate is nailed to the deck, a crew member holds the wall steady while adjustable braces are attached. A laser level on the bottom plate is used to gauge the wall plumb.
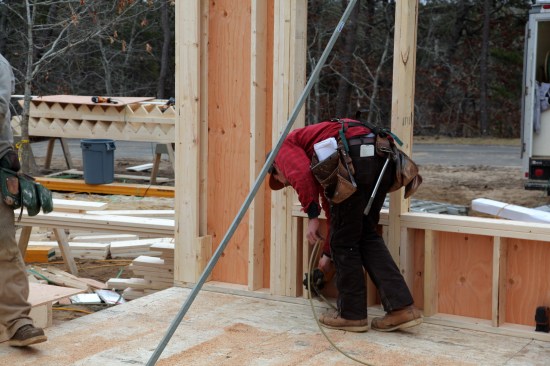
While one or two crew members hold the wall upright, the others work quickly to attach braces. There are many methods for bracing walls, including spring braces and scissor braces that use lumber that’s on site. We prefer using the adjustable metal braces from Proctor (proctorwalljacks.com) that attach to the top plate and angle back to the deck. After getting the wall close to plumb by eye, we nail the bottom of the brace to floor framing. We then set a laser level on the bottom plate and adjust the brace in or out until the wall is perfectly plumb. We put in one brace every 4 to 6 feet.
It’s important that the braces are nailed into floor joists (not just the deck) for maximum strength. This is easy for the walls that run perpendicular to the joists. If the wall is parallel to the joists, we nail a 2-by scrap across two floor joists and then attach the bottom of the brace to that.
Small Walls Are Sheathed Later
Smaller walls with no openings do not need to be built and lifted like the walls just described. It’s usually easier to build them on the deck near their final location. Then one person can lift them and scoot them into place. On the front of this house, the small walls help to tie the three jogs together. With only studs and corners, these walls go together and slip into place quickly.

Small walls can be framed without sheathing, so they are much lighter. One person can build these walls in nearby free space on the deck and then slide the wall over to its position.
Because the ends of these short walls lap onto adjacent walls, it’s easier to build them without sheathing. Later, a crew member goes around the house, filling in all the missing spaces.
To nail the corner intersection between two walls, nails are always driven through the last stud on a wall and into the corner assembly of the adjacent wall. We try to make sure the plane of the wall continues evenly through the end of the adjacent wall, so we use toenails to align the studs at the corner.
Special Strategy for the Garage
By the end of that first day, our crew of four had built all but one exterior wall. The next day, most of the crew went to work on the garage, while one of the crew finished up that final wall.
Because of the garage stem walls, there is no flat space on which to build the wall. Instead, the crew cribs up staging planks to support the top plate and sets the bottom plate on blocks next to the mudsills.
The garage presented a unique problem because the walls sat on top of stem walls—there was no flat surface to build the wall on. In cases such as these, we create a temporary support for the wall by setting staging planks on top of piles of 2-by scrap. The top plate lies on top of this support and blocks on top of the stem wall next to the mudsills support the bottom plate.
To brace the garage wall plumb, 2-bys are nailed together to form a long diagonal brace that extends to the framing on the other side of the garage.
The wall is built in the same progression, with the king/jack assemblies and full-length studs done first and then the opening details added afterward. The wall is squared, sheathed, and raised as before, but this time there isn’t a place to attach the metal braces to. Instead, we use a 2-by to brace the wall. The two-car garage was wider than the longest framing stock we had, so we sistered two boards together to span across the garage diagonally for the brace. With a calm wind, one brace was sufficient to hold the wall steady until other garage walls were built, which then effectively braced the ends of the first garage wall.
Bearing Wall
A 2×4 bearing wall in the middle of the house was the last wall to be built along with the first-floor exterior walls. No sheathing was required for this wall, so it was pretty light. Because of the weight factor, this wall can be built anywhere there is enough room on the deck, then raised and slid over to its layout line. Once it’s in place, we nail off the bottom plate and nail the end stud to the intersecting wall.
The bearing wall has no sheathing, so a diagonal brace is nailed on from corner to corner in order to hold the wall square and plumb.
We brace the wall plumb as before, but at this point, we still haven’t squared the bearing wall so that the ends are plumb. To do this, we first attach a metal brace to the intersecting wall and draw it in or out until it’s plumb. This in turn makes the bearing wall square and the end of the wall plumb. Then we nail on a diagonal 2-by to keep the wall square and plumb.
With an experienced framing crew, many tasks happen simultaneously, and crew members know to move to the next item on the list. So while two crew members work on the bearing wall, one crew member jumps on filling in the remainder of the doubled top plate, while another installs the sections of sheathing that had been left off during wall construction. This person also has the task of finding any nails that might have missed their mark, which he bangs back through from the inside. Not only are errant nails dangerous for people who do work in the stud bays, but they are also a red flag to an inspector that the sheathing might not be properly nailed in that spot. This framer goes back and re-nails any areas where the nails missed and makes sure that every sheathing panel is completely nailed off.
After the framing and sheathing has been completed on the walls, the crew straightens the walls. One person sights down the top plate and another turns the braces to make micro-adjustments until it is perfectly straight.
Straightening the Walls
The final task before we can start framing the second floor is straightening the walls. In the past, we have rigged up elaborate strings and blocks, but we’ve run into problems because of irregularities in the material. Despite our best efforts, there were always places where the walls weren’t completely straight, and the strings always seemed to be in the way as the framing continued. We discovered that the best way to straighten the wall is by eye.
Here is where the adjustable braces really shine. One of the crew stands on a ladder and sights down the edge of the top plate, and a second crew member literally dials in the walls by turning the screw adjustment to make micro-adjustments at every brace (29). With braces every 4 feet, we can usually make most walls perfectly straight very quickly. On the rare occasions that a wall bends in or out in between braces, we either reposition the braces to the trouble spots or simply add another brace. These braces usually stay in place until the second-floor deck is framed.
Photos by Roe Osborn


