Panel Basics
Sizes. Panels can be made as large as 8 ft. wide and 24 ft. long.
Thicknesses. 4 ½, 6 ½, 8 ¼, 10 ¼, and 12 ¼ inch thicknesses are available. The foam core thicknesses match the width of standard framing lumber. Thicker panels tend to be used for floors and roofs.
Panels generally include built-in wire chases.
Handling Panels
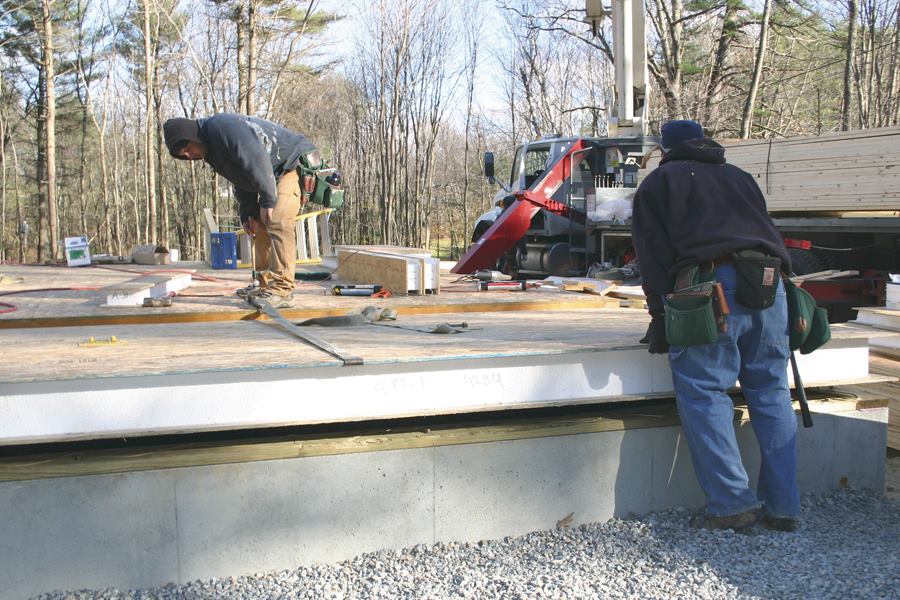
SIPs are pre-cut at the factory then assembled on site like a puzzle. A SIPs home can usually be framed in half the time of a stick frame home of the same design.
Small 4×8 panels are light enough to be moved by hand. Larger panels usually require a machine such as an all-terrain forklift or crane.
Assembling Walls
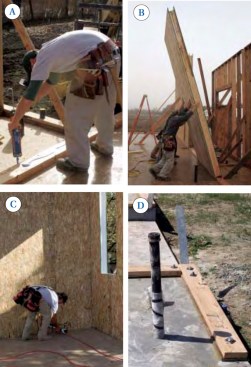
To install wall panels, start by running a bead of sealant along the face and edges of the sole plate (A). Then stand the panels over the plate (B), brace them plumb, and nail the bottom edges to the sides of the plate (C).
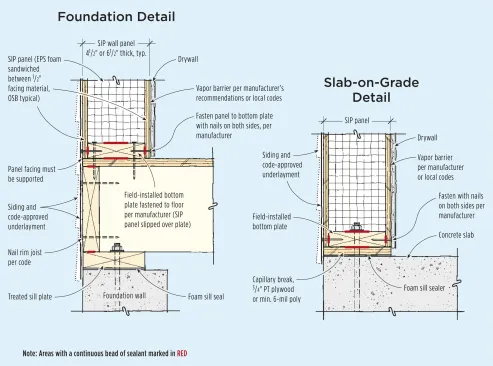
The bottom plate should be let-in to the bottom edge of a SIPs panel at the floor. If a panel sits on a stem wall or slab, the plate and panel must be isolated from the concrete with a strip of pressure-treated plywood — sealed to the concrete with foam sealant.
Making Connections
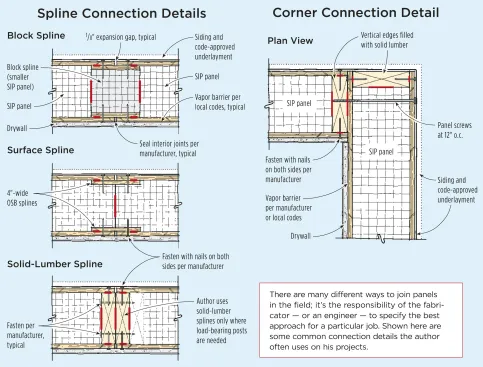
Panels are connected edge-to-edge with splines made from either OSB or solid lumber. The method used on a particular project will be specified by the fabricator or engineer.
Attaching Joists to SIP Walls
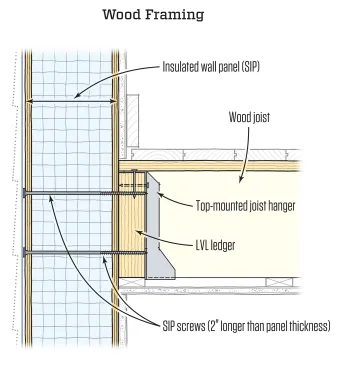
Tim Healey
Wood floor framing. Wood floor-framing members should be attached to a ledger. The tops of the joist are flush with the top of the ledger, and the joists hung on top-mounted joist hangers. Since the top edge of the ledger is usually more than 1 1/2 inches deep, the ledger should be an 1 3/4-in.-thick LVL.
Fasten the LVL ledger to the inner skin of the SIP by first tacking it in place with 3-inch screws.Specialized SIP screws are driven through the wall and into the ledger from the outside. (These screws should be 2 inches longer than the nominal wall-SIP thickness, so for a 6-inch-thick SIP, use 8-inch SIP screws.)
Depending on the loads, the SIP screws may or may not require washers under the head. The spacing will vary according to your engineer’s specifications, but I always recommend spacing the pairs of ledger-attachment screws no more than 12 inches on-center.
Steel floor framing. Flush-frame light-gauge-steel joists into a metal track by screwing the track to the inner skin of the SIP with No. 12 by 1 5/8-inch sheet-metal screws.
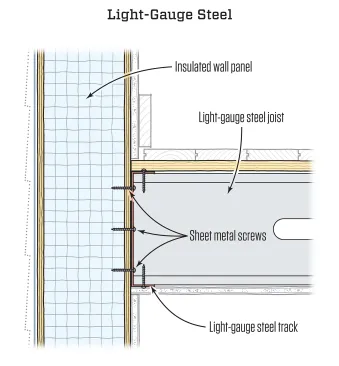
Tim Healey
The spacing and number of screws are a function of an engineer’s load calculations, but the spacing should be no greater than a pair of screws every 12 inches. Be sure the designer uses the correct shear value for the screws based on 7/16-inch-thick OSB, (the inner skin of a SIP).
Roof-To-Wall Connections
Where wall and roof panels connect, the tops of the wall panels are usually cut to match the roof pitch. Square-cut panels can also be used, but must be fitted with a triangular blocking assembly. However, the assembly and connections must be engineered to transfer loads from the roof to the wall.
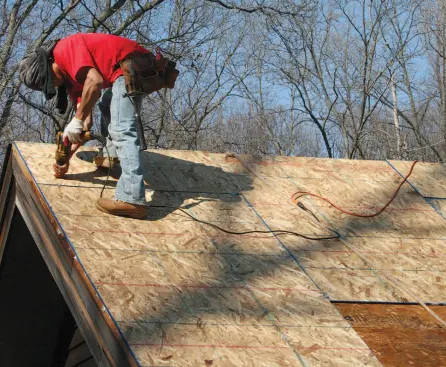
A second layer of OSB sheathing was laid over the entire roof.
Ridge details.
As with other connections, the ridge detail must be engineered by the panel manufacturer. Three common details are as follows:
- The ends can be bevel cut at the ridge. A V-shaped 3/4 in. gap is left at the peak and sealed with two-part foam.
- Panels can be overlapped at the ridge.
- 2x nailers can be embedded in the ends of the panels.
Making Field Adjustments
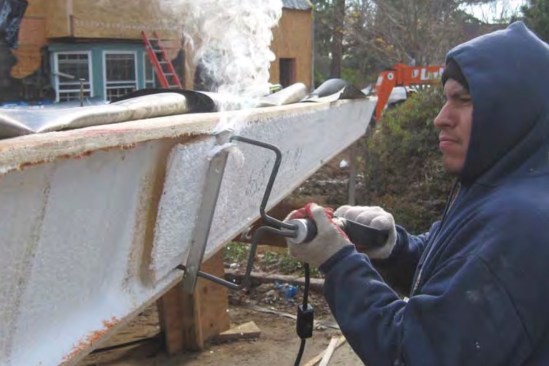
Mistakes and changes can force the crew to alter panels in the field. After trimming panels to size with a circular saw, an electric hot knife must be used to neatly remove the foam so there will be room for a block spline.
Special Considerations with SIPs
Asphalt roofing. Some asphalt roofing shingles may not be warrantied over unvented SIP roofs. Be sure to check.
Exterior cladding. The siding manufacturer may require an increased fastener schedule when installed over SIPs.
Wall cabinets. Ask the cabinet manufacturer for instructions on how to fasten its cabinets to a SIP wall. If they don’t have instructions, an architect or engineer can calculate a fastener schedule. One alternative is to fasten plywood strips to the wall behind the cabinets then screw the cabinets to the strips.
Recessed lights. Never embed recessed lights in SIPS. Instead, recessed lights can be installed in an interior soffit.
Plumbing. Don’t place plumbing runs inside exterior wall panels. Instead, build a plumbing chase. Where pipes must penetrate through an exterior wall, make sure the penetration is air sealed.


