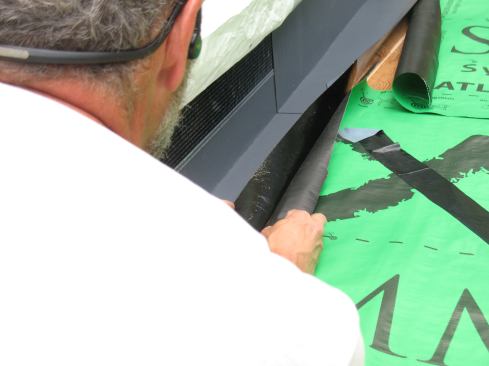
Because continuous flashing is less robust than step flashing, M…
Because continuous flashing is less robust than step flashing, Mike backs it up with 12-inch flashing tape. He bonds 6 inches of the flashing tape to the wall and 4 inches onto the roof sheathing.
Mike Guertin
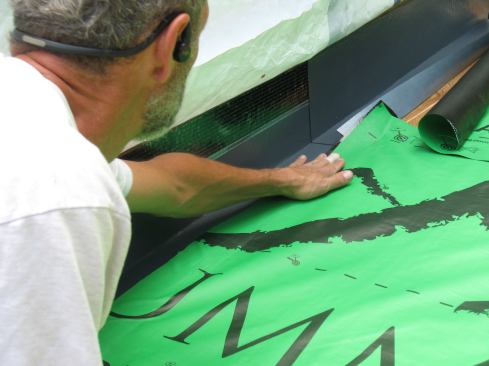
The remaining 2-inch portion of the flashing tape folds over on …
The remaining 2-inch portion of the flashing tape folds over on itself and bonds to the roof underlayment. The joined pieces then fold toward the wall.
Mike Guertin
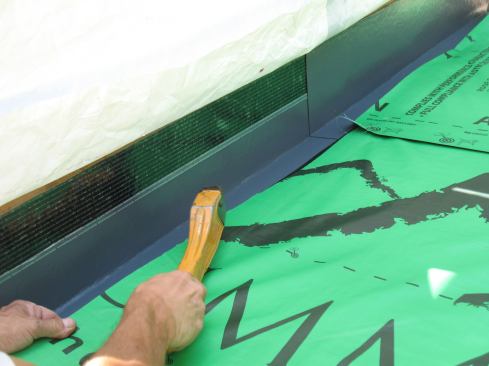
Mike tacks the joined pieces to the roof with staples.
Mike Guertin
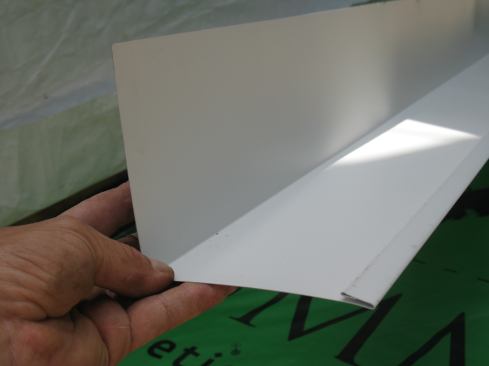
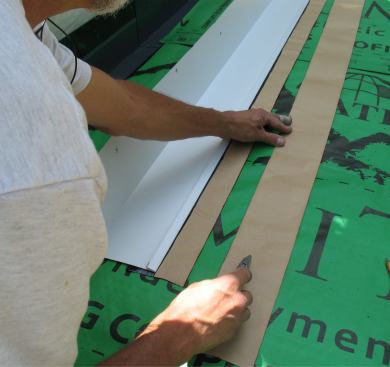
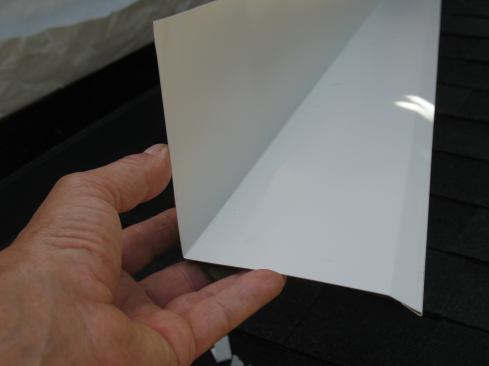
One of the few details provided by the code for continuous flash…
One of the few details provided by the code for continuous flashing is a 4-inch minimum for both the roof and the wall legs. Mike increases that to 5 inches to gain enough coverage for many types of siding. He makes a double folded J-roll along the edge to eliminate sharp edges that could cut the shingles.
Mike Guertin
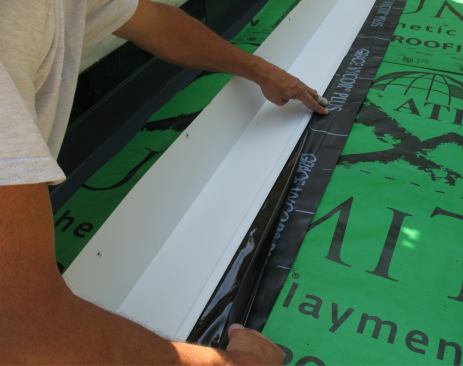
With this method the shingles lay on top of the flashing. The J-…
With this method the shingles lay on top of the flashing. The J-roll helps to divert water back onto the flashing where it drains down the slope. A bead of roofing cement can also help. Note that the J-roll might telegraph a hump through thinner 3-tab shingles.
Mike Guertin
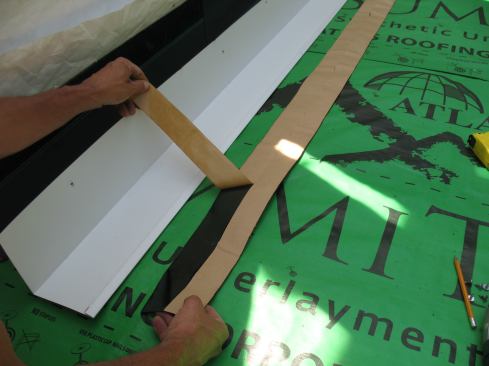
To further protect against water incursion with continuous flash…
To further protect against water incursion with continuous flashing, Mike back-flashes with two strips of 4-inch flashing tape. First he scores the middle of the first strip.
Mike Guertin
Then Mike removes the backing from half of the first strip …
Mike Guertin
… and bonds it to the outboard edge of the roof leg of the con…
… and bonds it to the outboard edge of the roof leg of the continuous flashing
Mike Guertin
Mike scores the second strip down the middle …
Mike Guertin
… then peels the release backing from the strip stuck to the f…
… then peels the release backing from the strip stuck to the flashing, and the backing from half of the second strip.
Mike Guertin
Then he bonds the sticky faces of the two pieces of flashing tap…
Then he bonds the sticky faces of the two pieces of flashing tape together.
Mike Guertin
Next, fold the flashing tape back on top of the continuous flash…
Next, fold the flashing tape back on top of the continuous flashing.
Mike Guertin
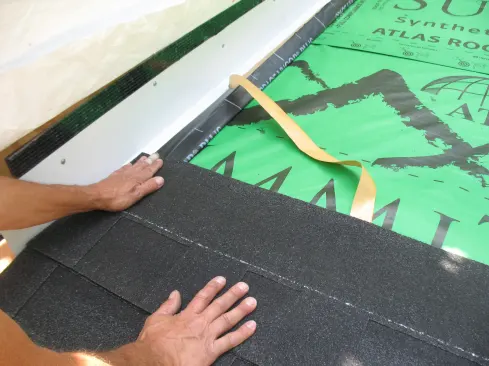
Remove the remaining release sheet from the flashing tape and be…
Remove the remaining release sheet from the flashing tape and bed the shingles into the adhesive as each one is placed on the roof. The back-flashed tape helps block water from reaching the underlayment.
Mike Guertin
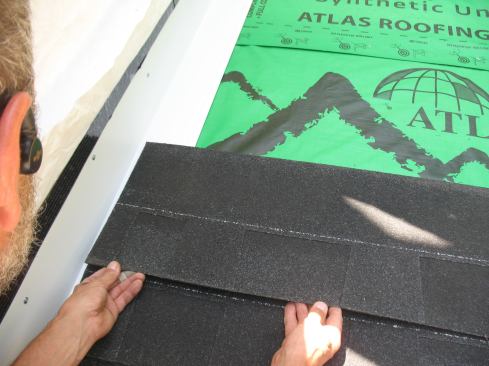
Or you can flash over the shingles
Mike Guertin
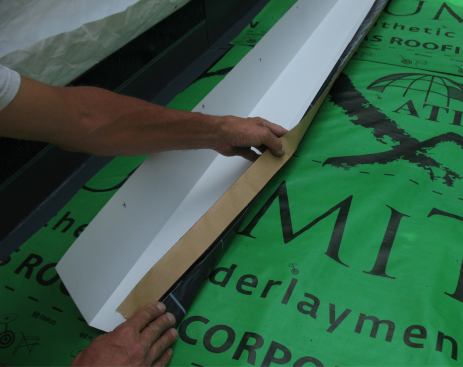
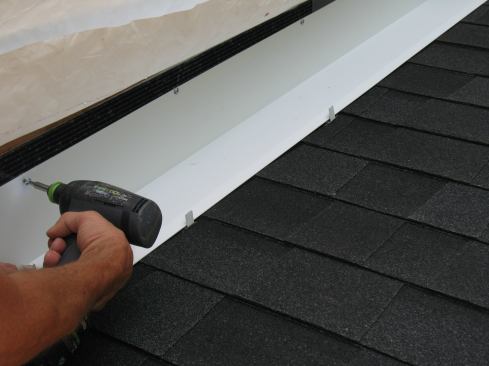
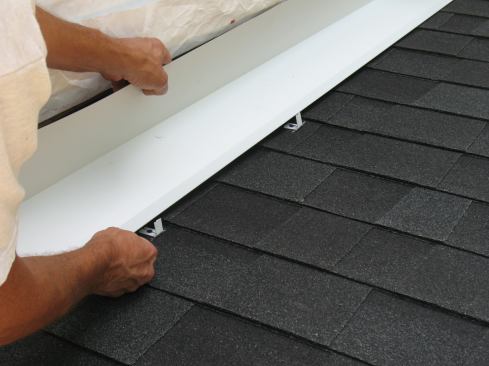
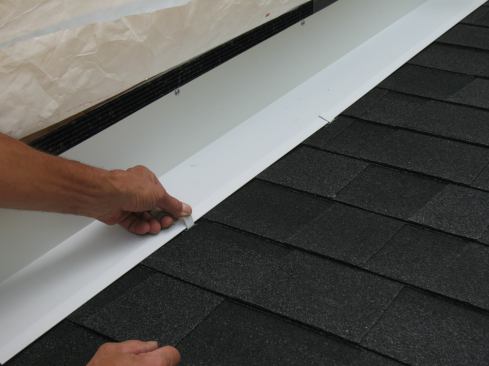
Mike avoids driving fasteners through the roof leg by using clip…
Mike avoids driving fasteners through the roof leg by using clips made from scraps of flashing metal to secure the outside edge. The clips are folded in the middle and fasten through the roof shingles in line with the outside edge of the continuous flashing every 16 inches or so.
Mike Guertin
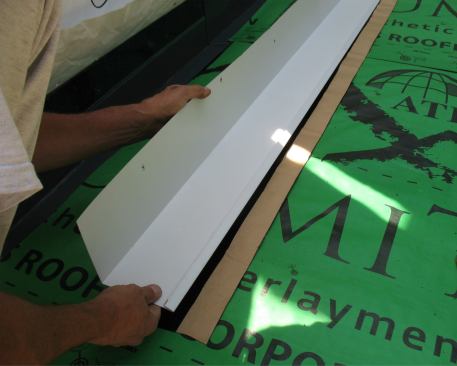
Next Mike sets the continuous flashing in place over the clips.
Mike Guertin
The wall leg is attached to the wall with nails or screws.
Mike Guertin
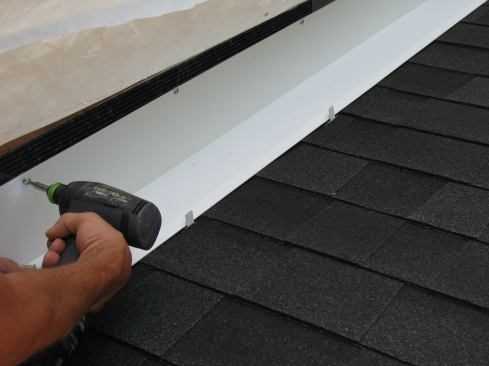
The final step is bending the clips over the edge of the continu…
The final step is bending the clips over the edge of the continuous flashing. As with the under-flashing method, flashing tape between the continuous flashing and the shingles can provide added protection.
In the Code’s Eye View section of JLC, code specialist Glenn Mathewson, took a look at a 2012 IRC provision that allows the use of continuous flashing at roofing-to-sidewall intersections as an alternative to traditional step flashing. The provision is short on installation details and requirements, so we asked Mike Guertin, who leads the roofing demonstrations for JLC Live to give us his take on installing continuous flashing, which he has taught in his classes since 2002. Here’s a look at the complete installation sequence for two continuous flashing methods allowed under the building code. Bear in mind that while Mike shows us how to get it done, he still prefers step flashing – a tried-and-true method that remains best practice regardless of what the code allows.
Mike Guertin is a builder and remodeler in East Greenwich, R.I., and frequent presenter at JLC Live and DeckExpo. You can follow him on Instagram @mike_guertin.