Finishing up a recent remodeling project, my company, New Dimension Construction, was tasked with installing custom-built cedar fencing around the home’s newly installed in-ground pool and garden area. The homeowners preferred to use wood instead of more durable materials for aesthetic reasons and chose a fence design made from western red cedar and heavy-gauge galvanized wire mesh.
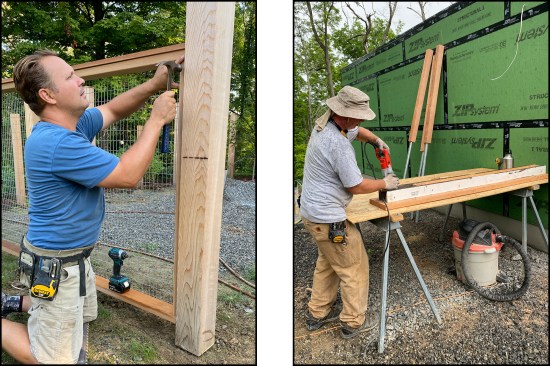
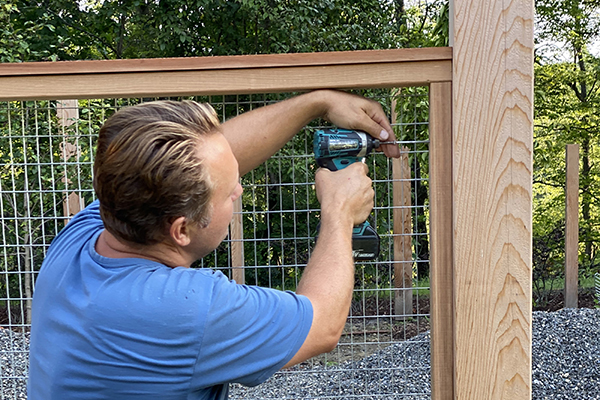
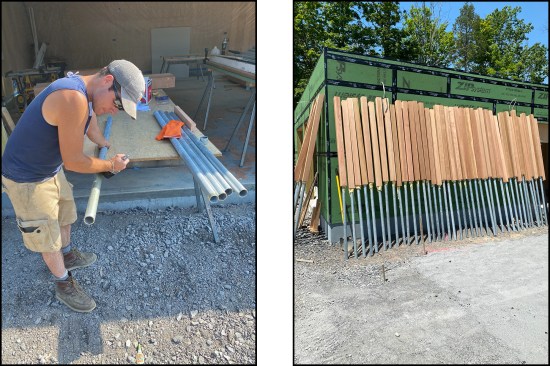
The author installs 1-by cedar face frame to secure the galvanized welded wired mesh in the garden area (left). Carpenter Ed Brady creates “pinned posts” using a site-built jig (right).
Our chief concern with using wood for the fencing was its lifespan; namely, we didn’t want to embed the posts in concrete and have them prematurely fail within 10 years and thus waste a large amount of expensive cedar. Also, the site had slow-draining clay soils, which had the potential to rot embedded posts at an even faster rate. To increase the longevity of the fencing, we decided to pin the cedar posts to concrete pier footings with lengths of 2-inch galvanized water pipe.
Durable Posts
The fence design called for 40 4×4 cedar posts for the pool enclosure, and 15 4x4s and 16 6x6s for the garden area. To accomplish our pinned post detail, we needed to bore large holes into the end grain of each cedar post—something easier said than done.
To hold the 4×4 posts while we bored the holes, we built a big three-sided jig out of scrap 2-by stock, which we used as a giant drill press. We first screwed two 2x4s on end to a 2×10 to act as guide rails. Then we cut a pair of 3 1/2-inch-square 2-by blocks with holes drilled in the center large enough for a 24-inch-long drill bit extension to run through. We screwed one of the blocks about 2 feet up from the end of the rails to act as a fixed point, while the other block served as a sliding guide for the drill as we plunged into the end grain of a post. We placed a post between the 2-by rails, set it against a stop at the opposite end of the jig, and started augering.
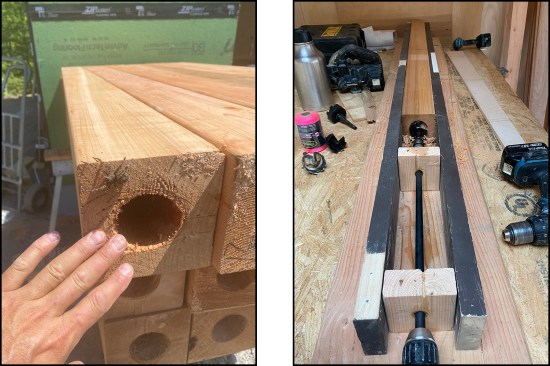
Large holes were bored through the end grain of the posts for piping that would pin them to concrete footings (left). A three-sided jig with a 2-by set block and a sliding 2-by block acted like a giant drill press (right).
To bore out the holes, we used a 2 1/4-inch-diameter Forstner bit (which was slightly larger than the pipe’s 2 1/8‑inch diameter) attached to the extension rod and a corded drill. We had to apply a fair amount of pressure to bore out the holes and took our time plunging into the posts.
We made a similar, larger jig with 5 1/2‑inch-square 2-by blocks to bore out the 6×6 posts for the garden.
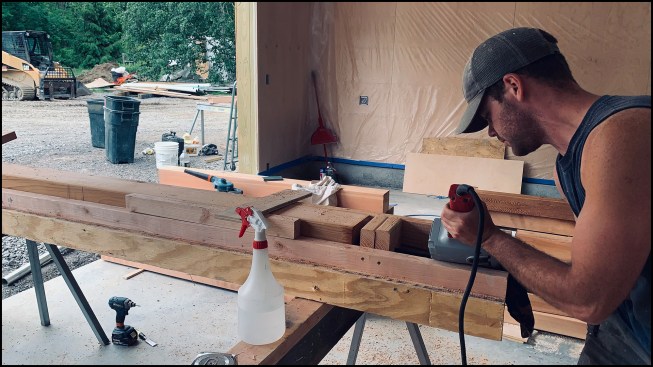
Crew member Nathan Tuttle bores into a 6×6 cedar post with a 2 1/4-inch-diameter Forstner bit attached to an extension rod and a corded drill.
Bonding Wood to Steel
The 2-inch hot-dipped galvanized water pipe came in 21-foot lengths, which we cut up into 66-inch lengths for our pins; we planned to embed the galvanized piping 48 inches into concrete pier footings and 18 inches into the western red cedar.
To assemble the posts, we first applied Gorilla glue with a paintbrush roughly 18 inches up one end of the pipe. To activate the adhesion of the glue, we sprayed some water into the bored-out hole. The Gorilla glue acted as a lubricant, so we were able to slide the piping into the cedar relatively easily.
Before sliding the 2-inch hot-dipped galvanized piping into the cedar posts, workers brushed Gorilla glue onto the pipe ends (left). With the post assemblies standing up against a wall, gravity did the work of settling the wood onto the steel (right).
We stood each post assembly vertically against a wall to let gravity do the work of settling the wood onto the steel and moved onto the next post. After curing, the resulting bond was rock-solid and the connection didn’t need through-bolts to strengthen it.
Fence Installation
Prior to marrying the steel pipe and wood together, we cut the 4×4 and 6×6 cedar post stock long so we’d be able to trim the post heights level to one another after installation. Although the pool and garden areas were fairly level, we wanted to account for any slight variations in the terrain and drilled-out pier footing depths.
We hired a local fencing company to help install the fence posts. The company has a Toro Dingo with a high-torque auger powerhead, which made quick work of boring 8-inch-diameter holes in the clay soils for pier footings. We worked hand and hand with the fencing workers to make sure the posts were perfectly aligned and plumb, and we helped mix and pour the concrete for the pier footings (two 80-pound bags of Pro-Grade Sakrete per hole).
At pool enclosures, fencing needs to be a minimum of 48 inches tall with no more than a 2-inch gap at the bottom of the fence as measured from outside the fence, according to New York state code.

A Toro Dingo with an auger powerhead (at left) bored 8-inch holes for the post footings.
After installation, the posts were trimmed level with a portable 6-inch battery-powered band saw.
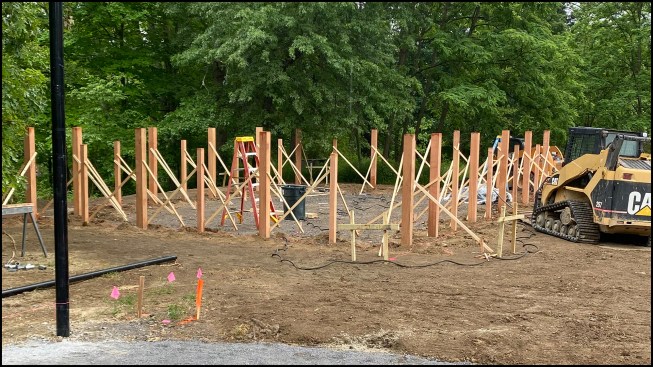
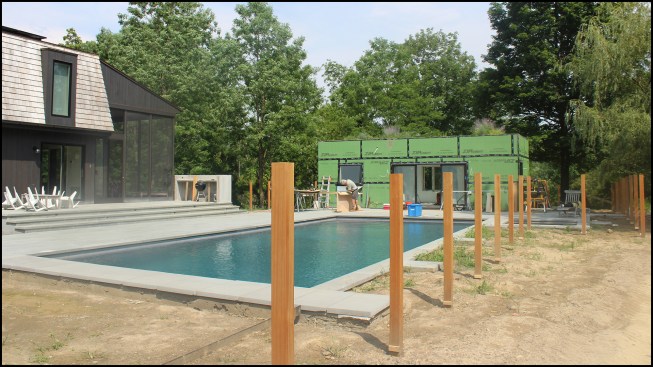
Alternating 6×6 and 4×4 cedar posts were installed in the garden area; here, they have been aligned, plumbed, and braced, and are ready for concrete.

In this area, the fence design required taller, 6×6 cedar posts with three stainless steel cables run between them at the top to prevent deer from bounding into the garden.
Pool Enclosure
For the pool fencing, we made panels by sandwiching welded wired mesh (mcnichols.com) between a 2×4 frame and a 1-by face frame (the 2×4 frame would face the pool area). We fastened the hot-dipped galvanized 2-inch-by-1-inch welded wired mesh to the cedar 2×4 frame with 1-inch-long by 1/4-inch stainless steel crown staples and screwed the cedar 1-by face frame over the edges of the mesh to hide the staples.
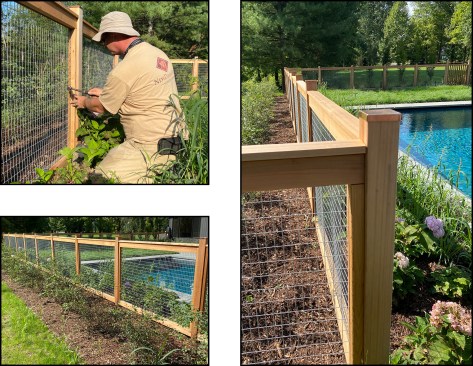
Workers prefabricated cedar fencing panels, sandwiching galvanized welded wired mesh between a 2×4 frame and a 1-by face frame, and then fastened them to the posts with stainless steel screws (left top and bottom). The posts were topped with site-fabricated copper caps (right).
For the top rail, we beveled 2×4 western red cedar stock using a molder in our shop, then secured the beveled rail with construction adhesive and three stainless steel trim-head screws screwed from above. We used stainless steel screws throughout to construct the panels and then attach the panels to the posts.
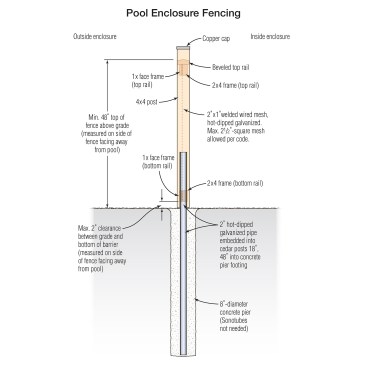
Pool fencing and code. When designing and building the pool enclosure, we adhered to code regulations mandated by the state of New York—see “Pool Enclosure Fencing,” above, for critical dimensions. In addition, gate latches needed to be mounted a minimum of 54 inches from the ground, and gates with self-closing hinges needed to swing away from the pool. An alarm was also required at the kitchen slider access door to the pool area (an audible voice alarm is activated when the slider door is opened).
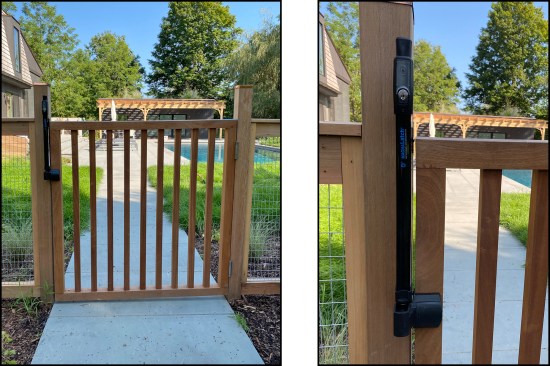
To meet code, the pool’s access gate is equipped with self-closing hinges that swing away from the pool (left) and a locking Magna-Latch mounted 54 inches above ground level (right).
Photos by New Dimension Construction, illustration by Tim Healey
Keep the conversation going—sign up to our newsletter for exclusive content and updates. Sign up for free.


