
A light-duty countertop that won’t see much moisture can be made using a mastic- or epoxy-based mortar applied directly to 3/4-in. plywood, as shown in the illustration below. Leave a 1/8- to 1/4-in. gap between sheets and screw a 1x batten under each joint.

For a counter that will get heavy use in a wet location, add a trowel-applied or sheet membrane over cementitious backerboard. Extend the membrane up into the backsplash area.
The backerboard should be laid over a 3/4-inch exterior-grade plywood substrate, attached with a leveling bed of thinset mortar in between. Secure the backerboard with ceramic- or epoxy-coat hi-lo screws (such as ITW Rock-On screws) or galvanized roofing nails. Do not use drywall screws.
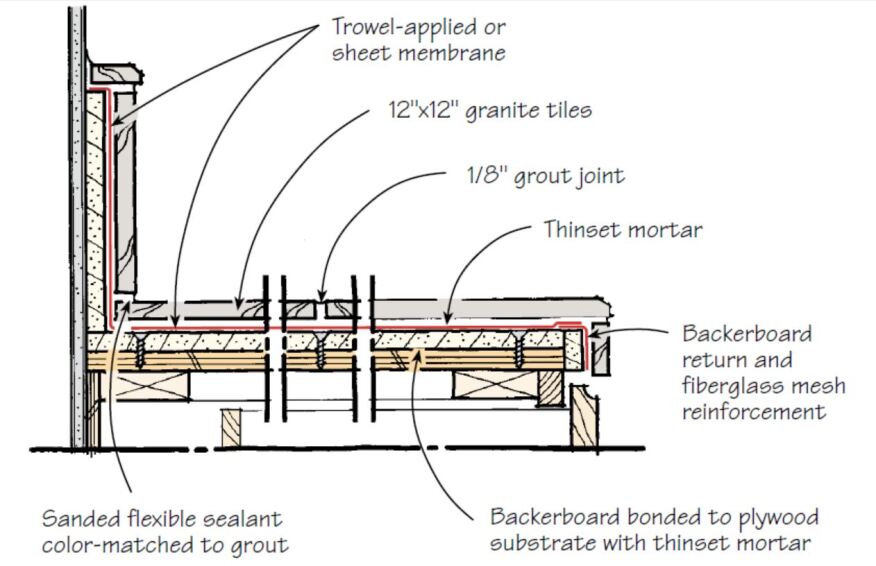
Use a natural cement-colored grout mixed with a latex additive (or use a polymer-modified grout). The width of the grout joint can vary, but narrow joints (1/8 inch or less) are easier to clean than wide joints. See Grouting Tile.
Use a heavy-duty sealer as well (not an inexpensive silicone liquid). Most important, include caulked expansion joints around sinks, cooktops, and chopping blocks and at the joint between the top and the backsplash, as shown in the illustration below.
Expansion Joints
Expansion joints are needed wherever a tiled surface meets another material or at a change in plane. In residential work, expansion joints are rarely needed within the fields of a tile surface, but are needed where a tile floor meets a wall and where counter tiles meet a backsplash, sink, or cooktop (as well as at corners in a shower enclosure or tub surround). Fill these joints with a flexible sealant, not hard grout. Use urethane sealants for maximum durability, and sanded, colored caulks to match the color and texture of the grout.
To learn more about ceramic tile installations, visit the JLC Field Guide.


