A decade or so ago when I still made my living as a carpenter, in part as a deck-building carpenter, I dreaded footings. The frost depth where I worked in northern New Jersey was 36 inches, and my home county was where the last glacier had stopped, depositing most of the rocks it had stripped from the land on its way down from Canada.
I tried all sorts of tacks to avoid digging footing holes. I’d cut my price if the homeowner dug them. That didn’t work so well, because homeowners rarely appreciated the importance of digging the holes exactly where I laid them out.
Once, I pulled $100 out of my wallet to entice a guy running a backhoe next door to drive on over. That didn’t work so well either, because the machine’s overdig was so large that I spent nearly as much time backfilling by hand as neatly digging the holes with a shovel would have taken in the first place. And I had to fill in the tire tracks in the lawn, and reseed the damaged areas. I was just lucky I didn’t have to come back and water the new grass every day.
Footings continue to be a fact of life, and I recently spent some hours interviewing deck builders from around the country about them. Geography makes a huge difference in how footings are built, but a lot of tricks apply across broad areas — I wish I’d known about some of them in my deck-building days.
Call Before You DigEven though excavation for deck footings isn’t heavy-duty earthwork, every state requires contractors to call their local utility-locating service before undertaking any excavation. It’s free, whereas the penalties for damaging an underground utility range from the cost of repair, to fines, to death from, for example, driving a rock bar through a power or gas line. Make the call. (See “New National Dig-Safe Number” in Decking News) |
Paul Mantoni, Connecticut
Rather than laying out footings the typical way — measuring out from the house, driving stakes, and stretching a string — Paul Mantoni, a deck builder in Terryville, Conn., came up with a different method: “I put the ledger on the house, and attach the two side joists and the rim joist, propping them up level; I check for square by measuring the diagonals. I usually build decks with the joists cantilevered a foot or two past the main beam. I stretch a string between the side joists where the beam will go, and lay out the footings from that. Because of the cantilever, there’s plenty of room to work digging the holes.”
“Our frost depth is 42 inches,” says Mantoni, “but I usually go down to 48 inches. It doesn’t take a lot longer, and it makes the building inspector happy. I charge about $200 per footing, more where I know the ground is rocky.”
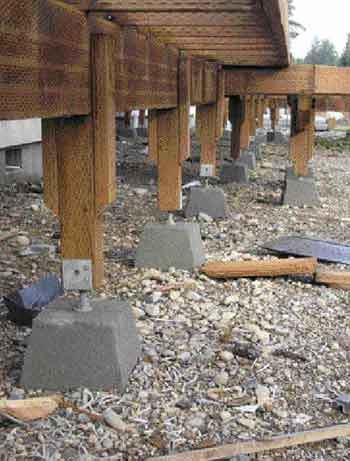
Like most other Connecticut builders, Mantoni doesn’t enlarge the base of the footing beyond the size of a 12-inch-diameter Sonotube. He slides the Sonotube into the hole, and has a helper hold it plumb while he carefully backfills. After filling the form with concrete mix, Mantoni uses galvanized column bases and 6×6 posts to support the beam.
Jack Hanson, Idaho
When I asked Jack Hanson of Woodpile Products in Boise, Idaho, what his biggest consideration with footings was, he replied, “To put them under the beam.” Humor aside, compared with those of us in the Northeast, Hanson has it pretty easy with footings. Because it’s so dry in Boise, the frostline is only 12 inches deep despite the cold winters.
For low-level decks, Hanson uses precast concrete piers he buys locally. To level them easily, Hanson fills the bottom of the footing hole with 2 to 3 inches of pea gravel.
One big advantage of the piers that Hanson uses is the integral Simpson EPB44T post base (Figure 1), which can be adjusted in height over a range of 2 1/2 inches. On very low decks, it’s possible to skip the posts entirely by resting the beam directly in the saddles of these post bases.
Figure 1. Footings incorporating a Simpson EPB44T post base can be adjusted up to 21/2 inches in height by turning the nut below the post base.
Kim Katwijk, Washington
Like Hanson, Kim Katwijk of Olympia, Wash., uses precast footing piers, but he sets them on several inches of dry concrete mix, and then backfills around the pier with more dry concrete mix (Figure 2). “The soil is so consistently wet in coastal Washington,” he explains, “that the concrete has usually set by the next day.”
Figure 2. Washington’s damp climate ensures that dry concrete mix placed below and around a footing pier has sufficient moisture to set up within one day.
A less desirable consequence of Washington’s wetness is an accelerated rate of wood decay, particularly where fastener penetration invites water into the untreated center of framing lumber. To combat this problem, Katwijk uses a turkey baster to inject wood preservative into the holes he drills for the lags that hold the hardware to the post.
Katwijk does occasionally need to dig deep footings — for example, when he’s building on a steep slope. Washington’s clay soils tend to creep downhill, and some engineered designs require footings and piers that extend 3 feet below where the pier hits the slope on the low side, and extend at least 6 inches above grade on the high side. In these cases, Katwijk reinforces the spread footing at the bottom with a mat of #4 rebar, and places vertical #4 bars in the pier to within 2 inches of its top (Figure 3).
Figure 3. Framing lumber holds a footing-form tube above the bottom of the hole, allowing for a thickened spread footing. Backfilling is done after placing the concrete.
Another strategy Katwijk offers has to do with cantilevers. He points out that deck joists can usually cantilever farther past their support beam than the tables in code books prescribe, because those tables apply to houses — where the cantilever picks up dead loads from walls, ceilings, and roofs that just aren’t a factor with decks.
Of course, varying from the code necessitates engineering, so Katwijk keeps on his Palm Pilot a spreadsheet his engineer created to show allowable cantilevers for various joist materials and deck configurations. Having this information to hand allows for field adjustments to the location of beams when there’s a problem placing a footing.
John Wilder, Florida
Hillsides and frostlines are no longer concerns for John Wilder, who started out in Minnesota — about whose long and woebegone winters Garrison Keillor waxes eloquent. I imagined that by moving to Jacksonville, Fla., Wilder had also escaped the curse of digging deep footings. Not so, he says. “Florida’s soils can be shifty sand, and I often have to dig down 3 feet to find good, solid ground.”
Digging 3 feet down in sand could be pretty tedious, but Wilder doesn’t do it by hand. He rents a walk-behind skid steer with a 2-foot-diameter auger (Figure 4).
Figure 4. A walk-behind skid steer with an auger attachment makes quick work of footing holes, and can be rented on a daily basis.
Now, 2 feet may seem kind of large, but that’s the diameter of the spread footings that Wilder uses. He fills the bottom of the hole with concrete, and wet-sets a Sonotube in that. After backfilling around the Sonotube, Wilder fills it with concrete.
William Bolton, California
Bill Bolton starts with an onsite review before bidding any job — a practice that can be applied anywhere in the country.
As in Florida, frost isn’t an issue in Santa Barbara, Calif.; Bolton’s footings, which he pours in place, are shallow and easily dug. Hence, he uses more of them and lighter framing — 4×6 beams and 2×6 joists in most cases.
The most common problem Bolton encounters is having to place footings close to the house. The first floor of many Santa Barbara houses consists of a slab — a troublesome place to hang a deck ledger — so Bolton frequently ends up building a freestanding deck with a line of footings near the house. To avoid drainage systems and questionable soils right next to the foundation, he installs a beam and cantilevers the joists the last couple of feet to the house.
Sometimes Bolton, who works alone, subs out the footing work for larger decks. (Frankly, I’m jealous. Not only does he live somewhere without a frostline, it’s possible to find a sub who’ll do deck footings there!)
Bobby Parks, Georgia
Bobby Parks runs an Archadeck franchise in metro Atlanta, where he faces challenges not from the frost depth or rocks, but rather from slopes and poor soils.
On slopes, Parks digs the footings to his geotechnical engineer’s depth and width specifications. Then he takes an extra step and digs out a keyway along the uphill side of the footing. Perhaps 6 inches wide and deep, once filled with concrete the key helps the footing to resist forces pushing downhill.
Other times, Parks finds poorly compacted soils with a limited bearing capacity. One solution would be to engineer a wide, steel-reinforced footing to spread out the loads. But bringing yard after yard of concrete into the backyard of most subdivision homes is a logistical nightmare.
Parks’ geotechnical engineer, John Stanhope, has an easier solution. He has Parks dig the hole substantially wider and deeper than normal, and fill it with ASTM 57 crushed stone, which is a blend ranging from 1 1/2 inches down to 1/4 inch. Poured concrete footings rest on the “57 stone.”
Alternative Footings
Most deck builders use fairly conventional concrete footings, whether poured in place or precast, but some other options are worth taking a look at, as well.
One engineered solution that works anywhere that’s not terribly rocky, and might be a good choice for problem soils is the Diamond Pier (Pin Foundations, 253/858-8809, www.pinfoundations.com). Holes through a reinforced concrete block guide pins — made from galvanized-iron pipe — that are driven into the ground by a demolition hammer (Figure 5). To determine the size and length of pipe, a soil report is necessary.
Figure 5. Pin footings are an alternative to conventional footings in most soils, and can sometimes provide a solution in problem soils or environmentally sensitive areas. Designing the loading requires a knowledge of the underlying soil.
Because no excavation is needed, Diamond Piers seem a good choice for environmentally sensitive areas. According to the manufacturer, Diamond Piers will in most cases resist uplift from both frost and expansive clay soils.
At the International Builders’ Show earlier this year, John Wilder discovered the Magnum Piering system (800/822-7437, www.magnumpiering.com), which consists of a 6-foot-long galvanized pipe with auger blades attached to the bottom (Figure 6). It’s driven by a skid steer, excavator, or tractor with an auger drive. As with the Diamond Pier, one advantage is there’s no excavation, so there’s minimal disturbance to the ground. If you use a tracked skid steer, the weight of the machine is distributed over a broad area, and the native soils will hardly be disturbed.
Figure 6. Like pin footings, helical footings are made from galvanized steel. No signifi-cant excavation is required for their installation, which can be done with a variety of machines with auger-driving capability.
Another product is the Redi-Footing (866/586-6082, www.redifooting.com), a combination base and cap that work with schedule 40 PVC pipe to form a footing (Figure 7). If your back is anything like mine, the light weight alone might tempt you to try it. According to the manufacturer, each Redi-Footing can support 10,500 pounds, when used with suitable soils. An ICC Evaluation Service report is still pending, but the manufacturer claims the Redi-Footing is accepted in Rhode Island and in various other jurisdictions nationwide.
Figure 7. Combined with a length of schedule 40 4-inch PVC pipe, plastic Redi-Footings are lightweight alternatives to conventional footings and are said to be capable of supporting over 5 tons each.
Finally, there are a couple of commercial forms — the Square Foot (Sound Footings, 877/924-2323, www.sqfoot.com) and the Bigfoot (Bigfoot Systems, 800/934-0393, www.bigfootsystems.com) — that affix to the bottom of a Sonotube to create a larger footing base (Figure 8). The advantage of these is that once the tube is attached, the entire assembly can be backfilled and inspected.
Figure 8. Footing forms attach to round form tubes to create a spread footing that can be backfilled and inspected prior to placing concrete.


