I’ve been in the drywall trade for 40 years, hanging and finishing drywall in Connecticut for most of my career. Now, I primarily do subcontract work as a drywall taper and finisher—or “mudder,” as they say here in Vermont, where I currently live—for a large construction company, which specializes in interior finishing.
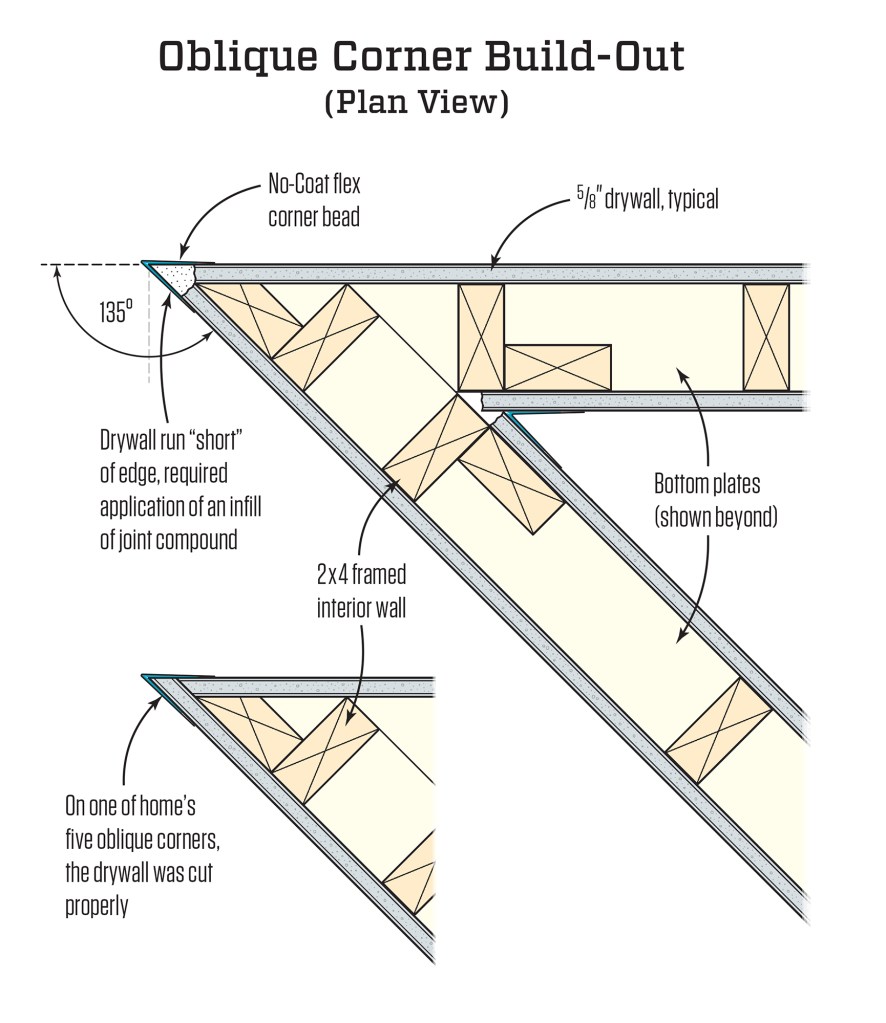
Last summer, I worked on a large custom home on the shore of Lake Champlain. This modern-style house was built to Passive House standards and featured numerous 45- and 135-degree angled walls, which were located in high-traffic areas of the home (the hallways) to help direct flow. When I first showed up on site, I knew the 45-degree corners would be easy enough to finish, but the 135-degree oblique angle corners would be another matter.
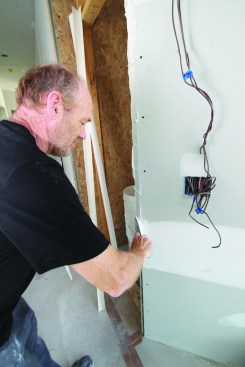
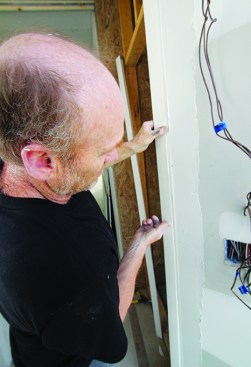
The author applies a deep fill of joint compound to shape the corner.
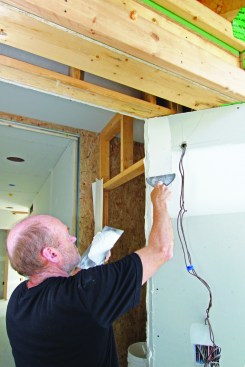
Then he applies additional compound to the adjacent surfaces to receive the corner bead.
A challenging home to drywall. Besides the angled walls, the home had tall ceilings, hidden pocket doors, and lots of electrical and mechanical penetrations to work around. Upping the ante, there were strict rules regarding hanging and cutting the drywall on the exterior walls for fear of tearing the home’s well-sealed vapor control barrier—the first drywall crew quit when they arrived on site and discovered that they couldn’t work “business as usual” and just buzz out the electrical and mechanical penetrations with their RotoZips.

Tim Healey
From my perspective as the mudder, the replacement crew did a good job overall hanging the drywall. But when it came to the 135-degree walls, they cut the drywall short on four of the home’s five oblique corners, so I needed to build out the corner to a sharp point (per the architect’s and homeowner’s “vision”) as well as was possible (see illustration, above).
Getting the Point
In my experience, oblique corners are rare, though not totally unheard of—more of a white rhino than a unicorn. I’ve come across them only a few times in my many years in the trade. So, it’s understandable the drywall crew didn’t cut the drywall at the corners correctly. To achieve the sharp corners desired by the clients, I used the same materials I used throughout the house to apply the three-coat finish; no specialty items were needed.
With the compound shaped to his liking, he installs a No-Coat 450 Flex corner bead, pressing it firmly into the compound.
This is done on both sides of the corner.
Corner bead. Paper corner bead has become ubiquitous on jobsites these days, and the company I do work for likes to use No-Coat 450 Flex Corner (certainteed.com). For 90-degree corners, I prefer to use metal corner bead because it allows you shape the metal and straighten a corner, compensating for out-of-whack framing. But with the 135-degree corners (and 45-degree ones, as well), the No-Coat corner bead is better to use because of its flexibility—the metal bead is tough to shape to these angles. Also, the No-Coat bead is surprisingly strong and resists impacts well.
Joint compound. For the project’s seam work and patching, I used ProForm Multi-Use Joint Compound (nationalgypsum.com). This is a standard mid-weight joint compound, which bonds well to drywall and is durable enough to provide the deep fill I needed to shape the sharp corners. It comes premixed, but it’s easier to work with and reduces pin-hole bubbling if it’s re-mixed. Another option would have been to use a setting-type joint compound, such as Durabond 45 or 90, which dries more quickly and is a little more durable.
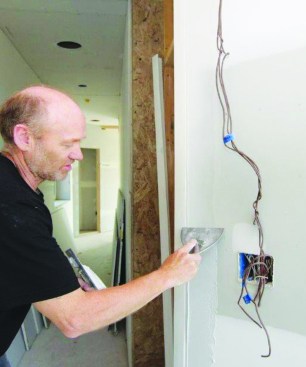
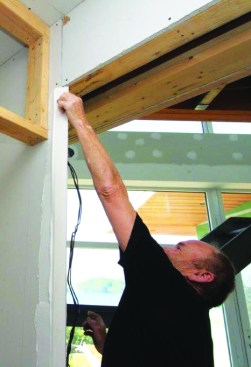
Then he uses a 6-inch drywall knife to apply the first of three coats of compound to smooth out the acute joint.

Filling the corner. I first applied a deep fill of compound to shape the corner, then applied additional compound on the adjacent drywall surfaces to receive the corner bead. With the compound shaped and smoothed out to my liking, I installed the No-Coat corner bead, precut to length, then pressed it firmly into the compound, top to bottom. Next, I tooled the corner bead and compound squeeze-out flat with my knife and completed the built-out corner’s first coat (of three).
On the corner where the drywall was cut short the most, two layers of No-Coat bead and compound were needed.
Photos by Tim Healey


