A quality tile installation includes an uncoupling membrane, such as DITRA, DITRA-XL and DITRA-HEAT. In addition to waterproofing, this critical membrane separates the tile assembly from movement in the underlying substrate, thereby eliminating the leading cause of cracking in a tiled surface. Here are some tips to working efficiently with these membranes.
1. How do I remove the memory from a role of DITRA?
A roll of DITRA can hold memory or shape, sometimes causing it to bounce or curl during installation, especially at the end of a roll.
The easiest solution is to:
Step 1: Bring the matting up to room temperature
Step 2: Measure and cut the material needed
Step 3: Back-roll the section to take out the memory
2. How do I stop chalk lines from rubbing-off?
Chalk lines are commonly used to mark the floor and matting during installation. However, since DITRA is made of plastic, the chalk can be rubbed-off easily.
To stop this, try:
Option 1: Spray hairspray over the lines. You don’t have to worry about this acting as a bond-breaker, because the thin-set is mechanically locked into the dovetailed inlays on the topside of the DITRA.
Option 2: Use an ink line instead!
3. How do I achieve proper thin-set coverage?
Full thin-set mortar coverage is essential for ensuring a secure bond and support for the tile.
There are three steps to this:
Step 1: Ensure correct mortar consistency
When installing DITRA, ensure the thin-set mortar is mixed to a fairly fluid consistency, but still able to hold a notch. If the mortar is too thick, it may not transfer to the bonding fleece under the DITRA as required.
Step 2: Mortar application
Apply thin-set to the area where the DITRA is to be installed, using the correct trowel size: ¼” x 3/16” (6mm x 5mm) v-notch OR A DITRA trowel: 11/64” x 11/64” (4.5mm x 4.5mm) square-notch.
Apply a thin layer of mortar with the flat side of the trowel, to produce solid contact with the substrate. Then comb additional mortar using the notched side of the trowel. When combing mortar, hold the trowel at a 45-degree angle. If pulled at a lower angle, this can mean less mortar in place, resulting in poor coverage. Combing the mortar in one direction also helps, making it easier to collapse the mortar ridges when embedding the DITRA.
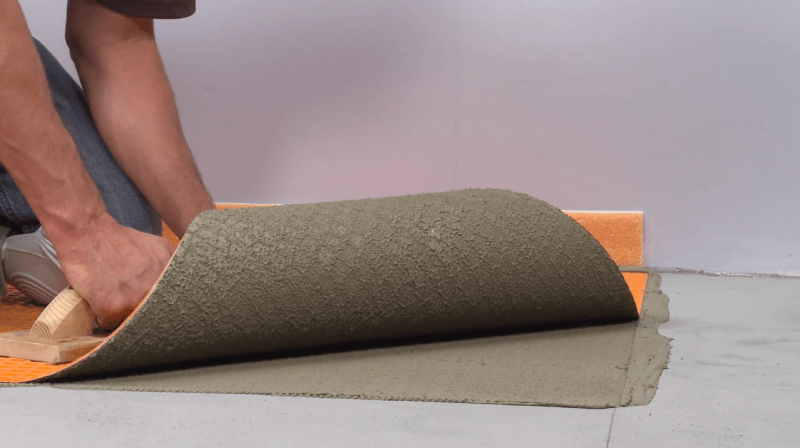
Step 3: Embedding the DITRA
First, apply the DITRA fleece-side down and solidly embed using a float or a DITRA roller. Make sure to observe the open time of the thin-set. If the mortar skims over, remove and reapply before installing the membrane.
Next, lift up a corner to check coverage. You should see full contact between the fleece-webbing and the thin-set mortar. Re-embed the DITRA.
If full coverage has not been achieved, remove, verify proper mortar application and reapply the DITRA membrane. More information here.