Schluter Systems
A linear drain topped with tile in place of a conventional metal…
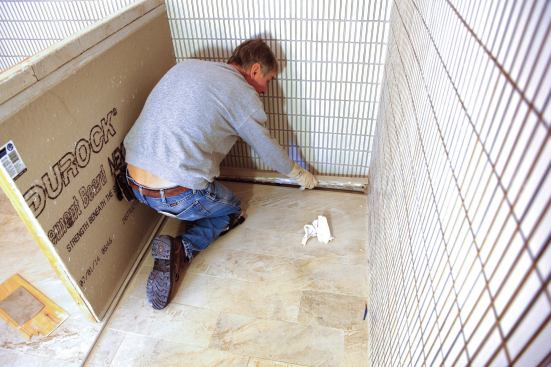
Linear drains have been manufactured for many years, mostly for commercial and industrial applications. In recent years, however, linear drains have been finding their way into our homes, providing a sleek alternative to the ubiquitous circular center drain for shower drainage. In addition to their stylish look, one of the more practical applications for linear drains is for accessible, curbless showers. The single sloping plane required for a shower floor with a linear drain makes for easier navigation and a more stable surface for a wheelchair user than the conical shape required for traditional center-drains.
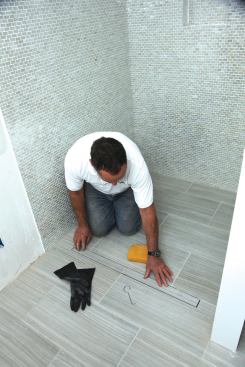
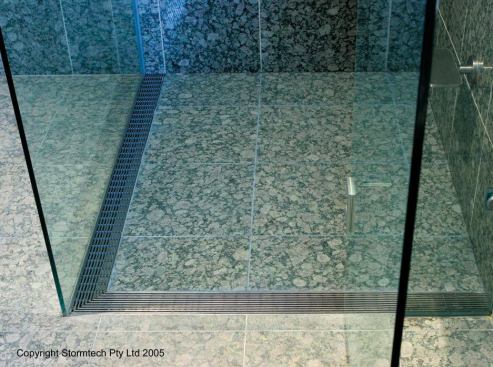
But usefulness aside, most linear drains are being used in projects by designers and architects as a design element that offers a clean, elegant look for both curbed and curbless showers. The flat plane of the shower floor allows the installation of large-format tile, which expands design possibilities even further. Also, linear drains can be made practically invisible through the use of a tile-top strainer in place of a conventional metal grate or strainer. In this configuration, drain water seems to vanish as it exits through the open grout joints surrounding the drain.
With the almost endless design and application potential of linear drains, I only wish that they had been readily available for residential installations when I began installing tiles back in the 1960s.
Manufacturers seem to come out with new linear drain offerings almost daily. This article takes a look from an installer’s point of view at some of the available options. It’s not intended to be an evaluation, rating, or comparison of the different brands. It’s more of an outline of the basic components of each system and an explanation of how they are installed and how each system’s drain connects to a shower or bathroom floor membrane.
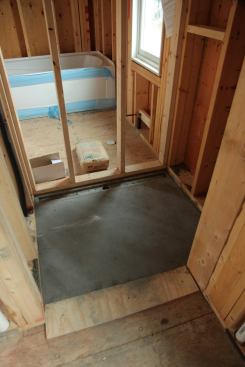
Because the floor for a linear drain requires a single sloping plane instead of the curved shape needed for a center drain, linear drains can make fabrication of a shower faster and easier. In curbed showers, the linear drain can be located against the curb or along any of the shower walls. For curbless showers, the simplest configuration locates the linear drain at the transition from the bathroom to the shower, allowing the drainage slope to be built directly on top of the subflooring. But with appropriate construction, a linear drain in a curbless shower can also be positioned against the wall opposite the bathroom floor. With proper methods and accessories, two or more linear drains can be joined to create a long continuous drain or an L-shaped one along two walls that meet in a corner. For best results, all linear drains should extend the full length of a shower wall; for longer lengths, some linear drains are available with two or more drainage holes to increase their drainage capacity.
On the Internet, linear drain prices vary greatly, running anywhere from $327 for a 32-inch drain to $1,035 for a 60-inch drain. But I found discounts for every kit I looked at, so I didn’t include prices for the linear drain kits in this article—it pays to shop around. Prices also varied between brands depending on the components available, as well as on what was included in the kits (such as sloping and extension panels to create the necessary sloped floor for the linear drain installation). And oddly enough, tile-top strainers are often less expensive than metal strainers.
FreeStyle Linear Drain
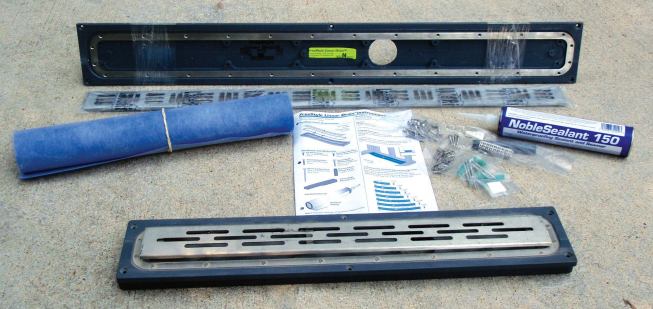
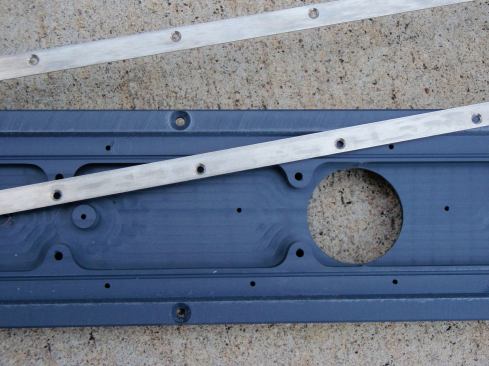
The Noble Co.’s FreeStyle linear drain kit includes the drain body, membrane flashing, a cartridge of sealant that’s compatible with the flashing, a drain grate, and hardware. Drains come in lengths from 24 inches to 60 inches; custom lengths are available in quantities of 50 or more. There are four stainless grate designs that can be ordered with the kit, along with a tile-top strainer that allows ceramic or stone tile to replace the standard stainless steel grate. The drain body (or trough that collects the waste water) connects directly to ABS or PVC waste lines and can be joined to two or more additional drains. Versions are available with center or off-center drain outlets.
The FreeStyle drain is designed to be used with its companion surface-applied sheet membrane (NobleSeal TS); however, with an adapter kit, the drain can also be used on mortar-bed installations. The FreeStyle drain can be installed directly on top of a code-compliant plywood subflooring or concrete slab, or it can be recessed into a concrete slab, which would entail blocking the drain up (for a pour) or chiseling out the concrete in an existing slab. The drain can also be installed flush with a plywood floor in a slot cut into the subflooring, but this scenario would require supplemental framing to tie the floor together and fully support the drain.
The FreeStyle drain’s clamping ring secures the drain to the membrane flashing (included in the installation kit), which is then joined to the main membrane with the kit’s sealant. The clamping ring can also secure the drain directly to a continuous membrane that covers the entire floor of the shower.
Both the printed and online instructions for the FreeStyle Linear Drain are clear and to the point. Particularly helpful for a first-time user is an online installation sequence animation that gives an easy-to-understand overview of the drain, membrane, and tile installation process for the FreeStyle drain system.
Find more information at noblecompany.com.
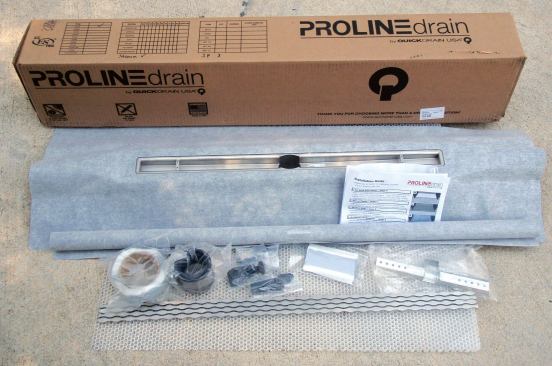
PROLINE Drain
The ProLine linear drain system by QuickDrain USA consists of a variety of drain bodies, connectors, strainers, and other components that let you use the system with both wood subflooring and concrete slabs. ProLine offers standard length options from 18 inches to 68 inches, with custom lengths available up to 100 inches. Nine strainer styles, including a tile-top option, are available.
Connection to the waste line is through a hubless connector; for increased capacity, ProLine offers drain bodies with two or three drain outlets. Connectors are also available for multiple-drain installations. The drain outlet for the ProLine Drain is available centered or off-center. ProLine has an extensive array of other auxiliary components, including flat panel supports, sloping panels, and pre-formed curb sections.
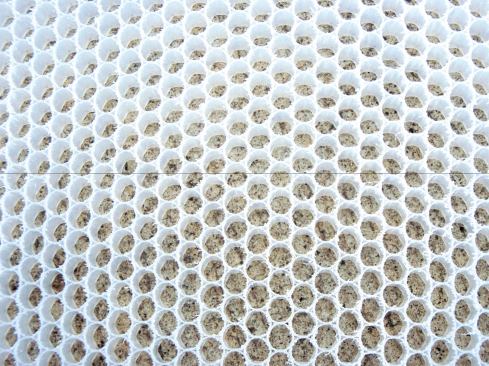
The hardware included in the kit can be used to install the ProLine linear drain on any floor surface, thin-bed, or thick mortar bed. The company’s flat panels and sloping panels are made out of an innovative honeycomb material and bond to the plywood or concrete subflooring (and to each other) with thinset mortar, which also fills the individual honeycomb cells for increased compressive strength.
A section of membrane flashing (that comes from the factory already bonded to the flange of the drain body) is then joined to the main membrane with the system’s adhesive tape. Inside and outside corners as well as curb covers complement the system’s sheet membrane system.
The company’s website contains instructions and drawings for a wide range of drain positioning: for either curbless or curbed showers; for drains mounted in the front, rear, or side of the shower; and for installations over plywood subflooring or concrete. The list of instructions and illustrations is rather lengthy and a bit daunting for the installer to get through, but the ProLine system appears to have all the bases covered.
Find more information at quickdrainusa.com.
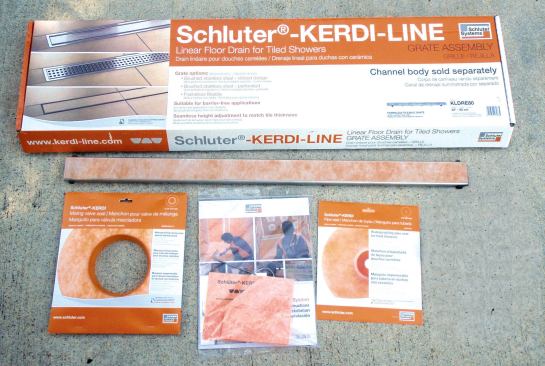
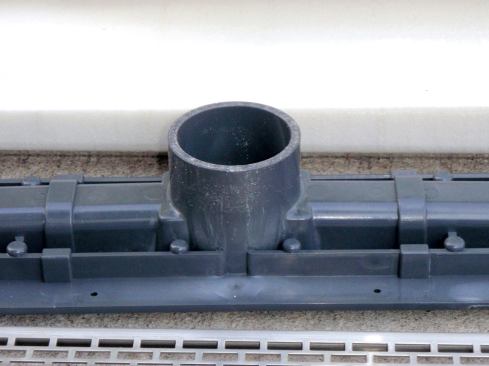
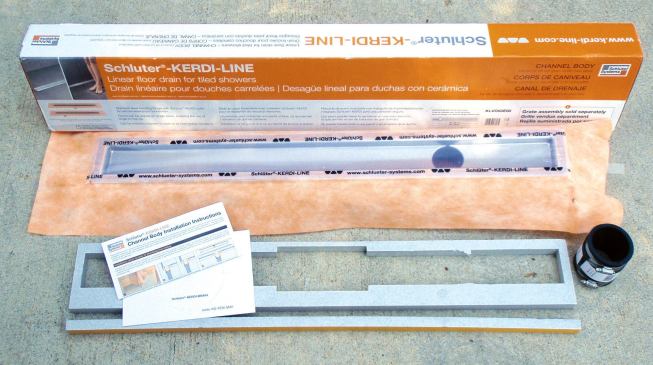
KERDI-LINE Linear Floor Drain
Manufactured by Schluter, the Kerdi-Line system’s drain body (called the channel body) and grate assembly are sold separately. The Kerdi-Line system is designed to work with Schluter’s Kerdi or Ditra sheet membranes, waterproofed backerboard, and shower trays, as well as with the company’s line of tile-finishing profiles. Depending on the style you choose, Kerdi-Line drains are available in lengths from 20 inches to 72 inches with either centered or off-center drain outlets that connect to the waste line by a hubless connector. The company offers three grate options—a perforated stainless-steel strainer, a solid stainless steel cover, and a tile-top strainer. To complement its system, Schluter also makes expanded-foam curb sections, sloped waterproof panels, and membrane-covered backerboard.
Product brochures and online brochures provide descriptions of the Kerdi-Line products along with some illustrations. These brochures are detailed, but for the best version of Schluter’s installation instructions, visit the Kerdi-Line website and watch the videos there.
Find more information at schluter.com.
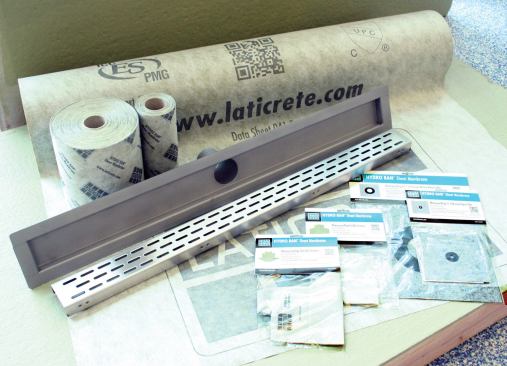
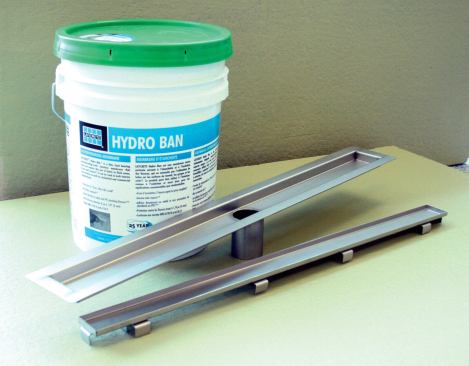
Hydro Ban Linear Drain
Manufactured by Laticrete International, the Hydro Ban linear drain system is available in six lengths, from 24 inches up to 60 inches. The company offers three stainless steel grate options—brushed bronze, polished bronze, and oil-rubbed bronze—in addition to a tile-top strainer option. The Hydro Ban drain body is available with a standard vertical drain outlet or with a horizontal drain outlet that exits the drain body at 90 degrees. Two or more drain bodies can be connected for applications longer than 60 inches. Connection to the waste line is by hubless connector. The drain body connects to the membrane section using Hydro Ban Waterproofing/Anti-Fracture Fabric that bridges between the setting bed and drain body. The fabric then embeds in Hydro Ban liquid membrane. The Hydro Ban drain can be installed over plywood subflooring or concrete slabs, for showers with or without a curb.
The Hydro Ban Linear Drain system is rather simple in that it comprises a drain body and a strainer. Each grate strainer has four adjustable feet for positioning it to sit 1/16 inch below the surface of the finished tile for optimal drainage. The drain body is simply positioned in the mortar bed, which is required to provide a slope of 1/4 inch per foot to the drain. Once the properly sloped mortar bed has been installed and allowed to dry, and backerboard has been attached to the shower walls, Hydro Ban liquid membrane is applied to the walls, floor, and drain body flange (and to the mortar bed curb, if one is incorporated in the design) to make the installation waterproof.
The online installation instructions for Laticrete’s Hydro Ban Linear Drain system are concise and easy to understand. With my experience installing tile, applying liquid-applied membrane systems, and reading blueprints, I got the gist of how to install the Laticrete system from the four drawings found in the five-page brochure. These four drawings condense the complete details onto just two pages.
Find more information at laticrete.com.
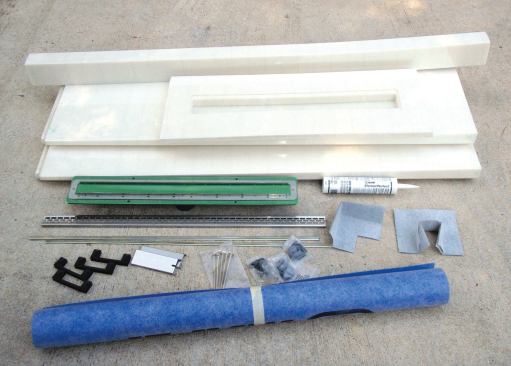
Mapei ShowerPerfect
The final entry into our linear drain lineup is the Mapei ShowerPerfect Linear Drain system. The day it was delivered to my office, the size of its box made a memorable first impression—it was huge. It turns out that the ShowerPerfect system is designed to convert a space that was previously occupied by a bathtub into a shower stall.
Sizes for the ShowerPerfect system kits run from 26 inches by 32 inches (for smaller showers), up to 36 inches by 61 inches (for the more typical tub/shower conversion). There are three grate options, plus a tile-top strainer. The ShowerPerfect’s drain outlet can be connected to the waste line with either a standard glue-in connector or a hubless connection. As with other drains in this article that use a hubless connection, instructions call for an elongated hole so the screws on the connector can be tightened from above. The ShowerPerfect linear drain can be installed with either a sheet-membrane or a liquid-applied waterproofing system (both manufactured by Mapei). In both cases, the membrane section supplied with the kit is site-bonded to the drain body flange.
A unique aspect of this system is that the materials needed for installation (with the exception of the actual waste-pipe connector), are all available from Mapei sales outlets. These materials include the Shower Perfect kit, liquid and sheet membranes, and thinset mortars to install the drain and the tile, as well as optional components, such as the panels needed to create the sloped floor. Mapei offers a separate installation guide for installing the ShowerPerfect system using its 4 to 1 mortar mix to create a sloped mortar bed instead of using sloping panels. And I don’t see why the ShowerPerfect system would not work for larger shower installations if you connected two or more drains using its drain extenders.
The ShowerPerfect system is designed to be installed directly over a plywood subflooring or a concrete slab using only components in the kit. The kit’s drain support frame—which slopes to both the front and rear—allows the drain body to be installed 3 inches to 6 inches from the wall. Depending on which kit you purchase, the drain body can be joined to sheet or liquid-applied membranes.
Mapei offers separate instructions for installations with the sheet membrane and liquid-applied membrane systems that are clear and easy to understand. These instructions along with installation videos are also available online.
Find more information at mapei.com.
JLCcontributing editor Michael Byrne is a veteran tilesetter and moderator of theceramic tile forumat jlconline.com.


