My company has built numerous outdoor living projects using a multitude of materials and products, but when it comes to the framing for decks, our go-to has been light gauge steel (LGS). When we first started using LGS approximately seven years ago, it was new to the market and the options were limited. With the help of our architect and approval of the local building inspector, we cobbled together our first design from several LGS manufacturers.
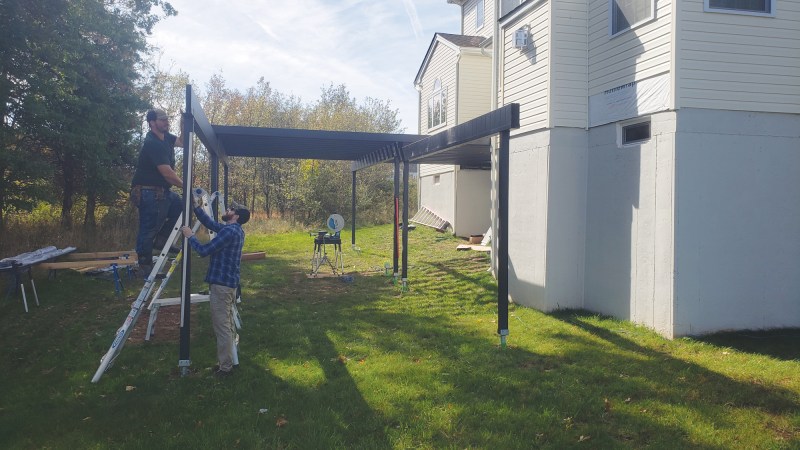
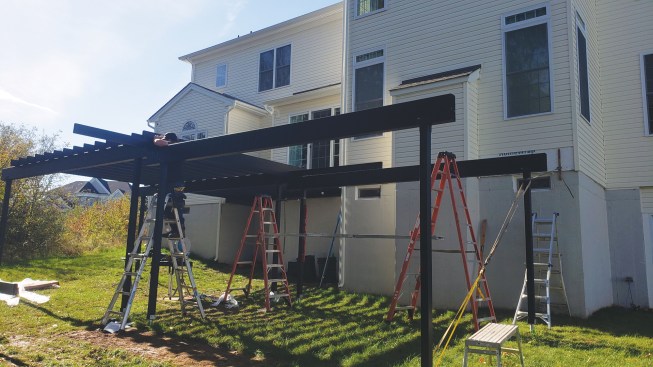
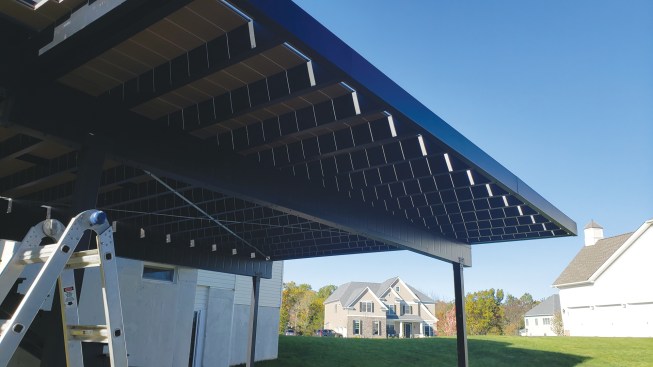
Since that time, it has become easier to obtain steel deck framing materials, with several manufacturers now offering exterior steel decking products. On our most recent deck project, the homeowners wanted to use Fortress Evolution steel framing, primarily because they liked the look of the framing once completed. Because the deck is 11 feet above grade, the underside would be highly visible.
Corrosion-Resistant Design
Evolution framing has a duplex coating system—the steel is first galvanized and then powder-coated—which drastically increases the expected life span of the steel, even in harsh conditions. Because of this corrosion protection, Fortress offers a 25-year limited warranty on the product (10 years when installed within one mile of saltwater).
This compares favorably with pressure-treated (PT) lumber, which in our area is southern yellow pine, though even the premium PT products containing water repellents and mold inhibitors don’t have the same life expectancy as the CCA-treated lumber of the past. Meanwhile, several composite-decking manufacturers offer 30- to 50-year warranties on their products. To us, it didn’t make sense to frame a deck with PT or LGS (neither came with warranties a few years ago) to support decking that’s expected to last several years or even decades longer than the framing. Now that there are manufacturers backing their framing products with warranties, it is easier to upsell premium decking products to our clients.
System Details
For help with our project, we contacted the Evolution design staff, who provided us with technical help, material take-offs, and help with engineering. Load and span charts for the joists and beams are available in the company’s detailed installation instructions, where you’ll also find typical designs and spans for both single and double beams. With the documentation and guidance provided by Fortress, our architect was able to produce drawings that allowed for the most efficient use of the materials, with limited waste.
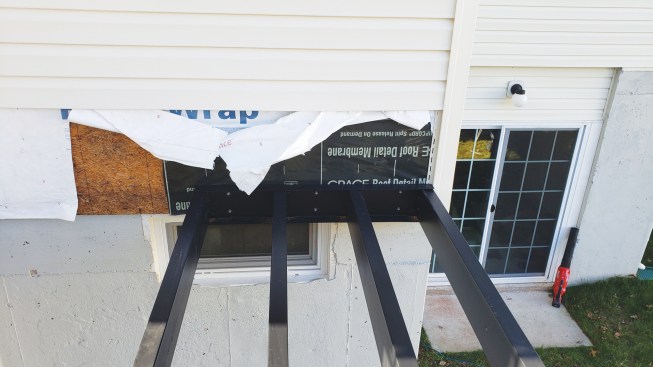
In the Fortress Evolution steel framing system, the ledger brackets that support the joists can be screwed to the S-ledger, but they can also be fit into punched openings in the S-ledger without requiring additional fasteners.
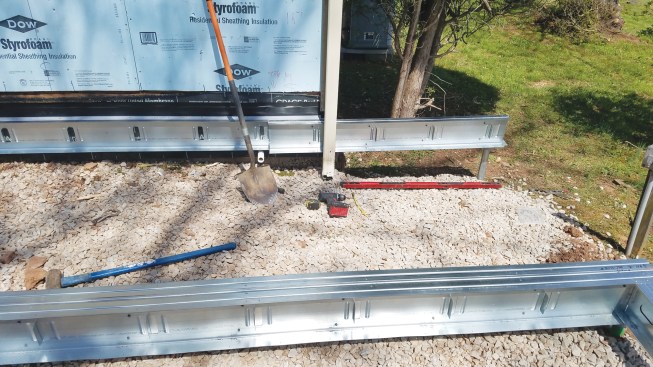
Ledgers. Evolution has a unique ledger and joist-hanger system. Its S-ledger, which comes in 12-foot or 20-foot lengths, is available prepunched with standard 12- or 16-inch-on-center spacing. Matching ledger brackets are then inserted into those openings before the ledger is fastened to the house. The ends of the joists then slide over the brackets. Because only one screw is needed on each side of a joist to attach it to a bracket, laying out and installing the joists is much faster than with other systems we’ve used.
The ledger also comes with prepunched 3⁄8-inch-diameter holes for attachment to the house; somewhat like with joist hangers, a fastener is required in each hole. If local building codes require larger-diameter fasteners, the factory-drilled holes can be enlarged. For this project, the architect specified 1⁄4-inch-diameter fasteners with tapered shafts that fit perfectly in the openings.
To support the other end of the joists, prepunched, prespaced U-Rim Joists are available, though these aren’t the only rim-joist options. Where the start points of the ledger and rim align, no measuring is needed to install the joists.
With typical light gauge steel (LGS) framing, the ledger track has bent tabs for fastening the joists to the ledger, requiring five or more fasteners per joist-to-ledger connection.
In the Evolution system, the joists just slip over the brackets, and are held in place with a pair of screws per bracket.
On this deck, we needed to space some of the joists 12 inches, rather than 16 inches, on-center to support an outdoor kitchen. For nonstandard spacing of joists, there are solid ledger and rim joists available, along with adjustable joist brackets. Changing the ledger and rim to accommodate the closer joist spacing for those areas was easy and made layout simple and mistake-free. When, for example, additional joists for decking are needed or blocking for railings is required, we can use F50 brackets to attach the joists to the ledger and rim, similar to the way we frame LGS decks.
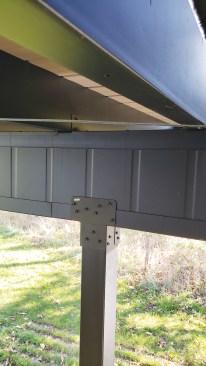
Posts and beams. Like 4×4 PT wood posts, Evolution steel columns measure 3 1⁄2 inches by 3 1⁄2 inches. Because they install the same way, they can be attached to standard footings using post brackets. Fortress also manufactures a column base that can be used with concrete footings, though on this project the posts are supported by 10 Techno Metal Post P2 helical piers. TMP’s standard U-shaped bracket for 4×4 wood posts perfectly fits the Evolution column, and the fastener holes were the correct size for the screws specified by Fortress.
Evolution support posts are sized to fit standard 4×4 PT post hardware, such as the U-shaped helical pier brackets used on this project.
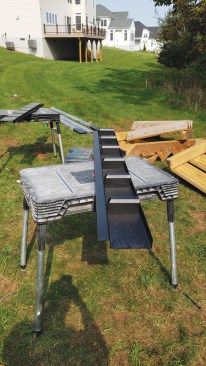
Evolution beams are designed for long spans between support columns. Measuring 2 inches by 11 inches, the rectangular beams can be either a single or double, depending on the load and span. They can also function as either drop or flush beams. The longest beam span on this deck was 15 feet 6 inches, but according to the load charts provided by Fortress, the beams can span up to 20 feet.
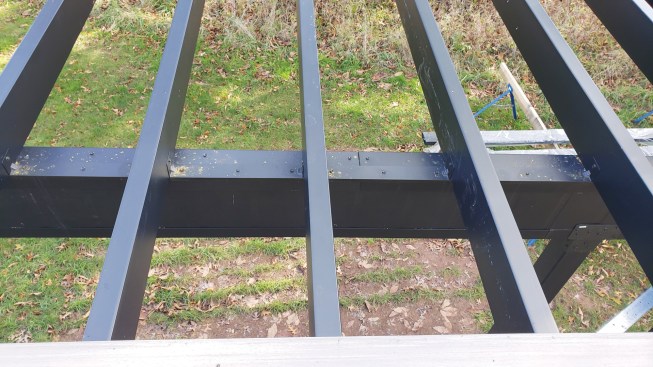
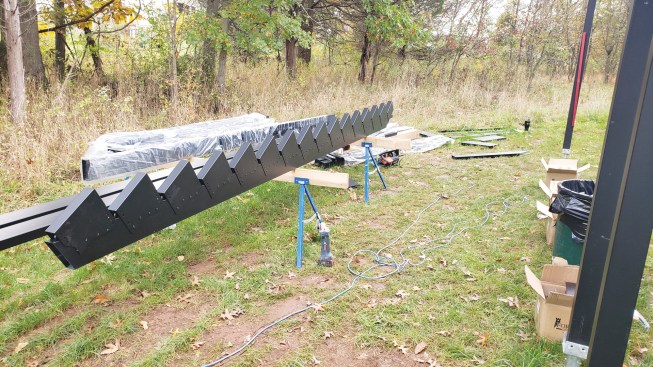
Evolution beams measure 2 inches by 11 inches, and can be joined together with tracks to form double beams. The author found that the 4-foot-long tracks, which can also be used with joists, needed to be accounted for when determining column heights and elevations.
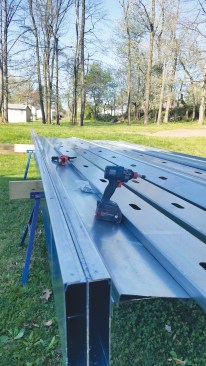
In addition to affecting the height of two-ply beams, the short Evolution tracks (visible in the photo, left) are more labor-intensive to install compared with the longer tracks used to assemble doubled LGS framing (shown here).
To create a double beam, 4-foot-long top and bottom tracks, similar to steel stud tracks, have to be fastened to the beams. We did not fully account for the time and materials required for this assembly; compared with wood or LGS multi-ply beams, these took longer to put together and created inconsistent heights and widths for the beams. Because we had temporarily built part of the deck and set elevations before all the materials were on site, we needed to adjust the column heights because of the unexpected thickness of the final beam assembly.
Joists. Unlike the C-shaped joists in LGS and some other steel framing systems, Evolution joists are rectangular tubes. With a look that mimics a more traditional wood-framed deck, the joists are a full 2 inches wide by 6 inches deep, and are available in 12-foot to 20-foot lengths. We used 16-gauge framing on this project; 18-gauge also is available. Compared with LGS, the rectangular joist shape allows for longer spans, doesn’t hold water on the bottom leg (holes along the bottom edge of the framing members allow for drainage), and eliminates the possibility of the top leg bending down when the decking is fastened.
Evolution joists measure 2 inches by 6 inches and can be fastened to dropped beams with 12- or 16-inch-on-center blocking brackets.
Another major advantage of the Evolution framing over LGS is that the system requires fewer fasteners. For example, there are several areas of LGS-framed decks that require a boxed joist, where track is connected to the joist to create a tube. This requires additional material, changes the height of the framing in that location, and requires fasteners through the top leg of the joist, which pose a problem when decking. We use rivets when possible, but they have a reduced load capacity compared with screws. Also, because most manufacturers don’t include rivets on their fastening schedules, we need an architect or engineer associated with the project to approve their use.
When needed to accommodate a different layout, Evolution joists can be fastened to dropped beams with F10 angle brackets.
In addition to allowing longer spans, Evolution joists have the capacity for exceptionally long cantilevers. According to the Fortress span charts, cantilevers can measure up to 5 feet; one portion of this deck has a 4-foot cantilever.
Cantilevers of up to 5 feet are possible with the steel joists, which here are capped at the ends with U-Rim Joist material. The maximum beam cantilever is 24 inches.
Blocking and bracing. Another feature unique to the Evolution system is the method for blocking between joists, which is required for joist spans greater than 8 feet. Evolution strapping for midspan blocking comes in 4-foot lengths and is prenotched for either 12- or 16-inch-on-center joist spacing. The straps lay on top of the joists and don’t require any fasteners (though fasteners are required when the straps are installed on the underside of joists).
As is the case with the ledger and rim, nonstandard spacing needs to be adjusted for in the field. In our case, we used a grinder to make the necessary notches in the straps.
On this deck, in addition to midspan joist blocking, we installed diagonal strapping on the underside of the joists. Our architect added cross bracing to the bottom of the deck because of the long spans and because half the deck was free-standing. At the bottom of the stairs, a small section of framing was added to act as a trellis, but that was aesthetic and not structural.
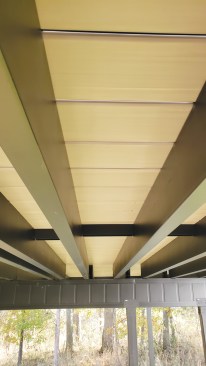
Where joist spans exceed 8 feet, midspan blocking is required, typically with Evolution prenotched 12- or 16-inch-on-center straps. Here, the straps simply lie across the tops of the joists and don’t require fasteners, but they could be fastened to the underside of joists.
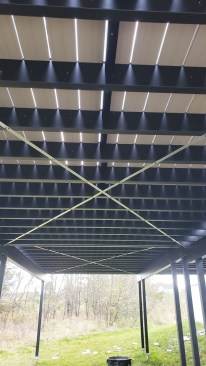
On this project, diagonal strapping was also added to the underside of the deck framing to reduce lateral movement and make the freestanding portion of the deck feel stiffer.
Where extra reinforcement is needed for railings, stairs, or picture framing, Evolution joist material can be cut to length for blocking and fastened to the framing with F50 brackets. To maintain the warranty, all cut framing members have to be sprayed with a touch-up paint, supplied by the manufacturer in a rattle can. Beam and joist caps are available to seal up the ends of framing members and prevent pests from taking up residence.
Decking Installation
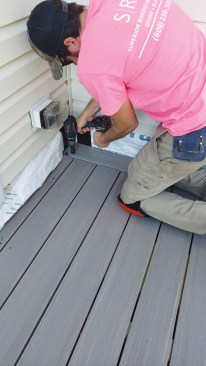
We have tried several decking fasteners with our steel framing. On this deck, we used Starborn’s Proplug system of face-plugged screws and Camo Edgexmetal clips to fasten the decking to the steel framing.
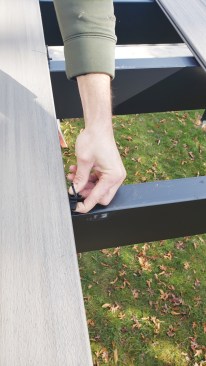
Camo Edgexmetal clips were used to fasten the grooved decking to the steel framing.
This was our first time using the Camo hidden fastener system, which allowed us to dry lay most of the field boards, and then work backward to install several rows without having to face-screw any boards down. Using the Camo lever to make sure the boards were tight together before going back to install the screws, we were comfortable working with up to 15 rows of boards at a time.
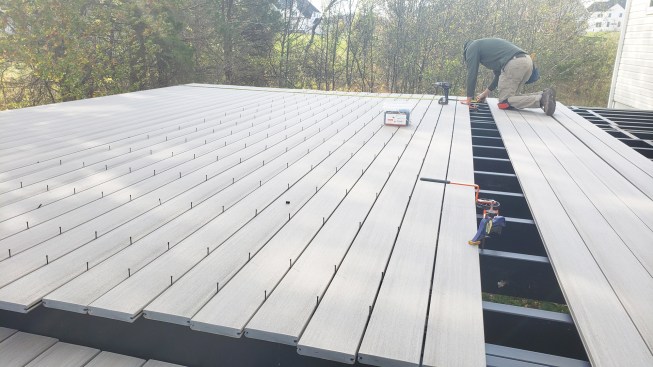
Crew members worked several courses at a time when installing the decking, using the Camo lever tool to straighten the boards and snug them up as they drove the fasteners in.
To me, the biggest benefit to the Camo Edgexmetal fasteners is that the screws are already preloaded into the spacers. While we had a little trouble with the Drive stand-up tool (probably because the long fasteners were difficult to orient vertically while we waited for the self-tapping threads to engage the steel), we came away impressed with the system, which is at least twice as fast as anything else we have tried.
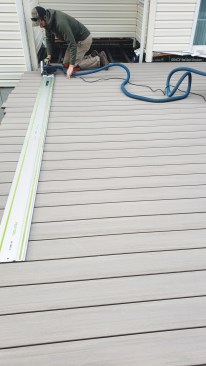
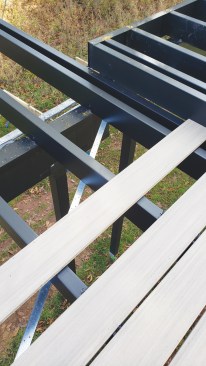
After the decking was installed, workers trimmed it to length with a track saw for the deck’s picture-frame detail.
Starborn Proplug face screws and plugs were used to fasten the border decking to the framing
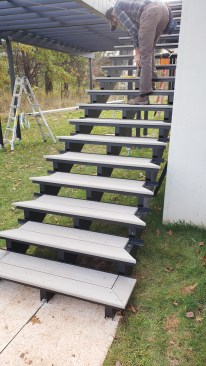
Stairs
Building stairs with LGS is less than ideal, and the stairs for this deck required a long set of stringers that would have been impossible with standard PT lumber. The Fortress system—which incorporates standard Evolution joists, stair trays, and adjustable stair brackets—solved many of the problems that we would have had using these other methods. While it’s not perfect, I consider it to be the best we have used so far.
There are three stair bracket options: one with a 7-inch rise and 11-inch run; one with a 7 3⁄4-inch rise and 11-inch run; and one that’s adjustable, with rise and run constraints forgiving enough to make just about any situation work.
To build stair stringers, proprietary brackets – available with both fixed and adjustable rise and run dimensions – are fastened to standard Evolution joists.
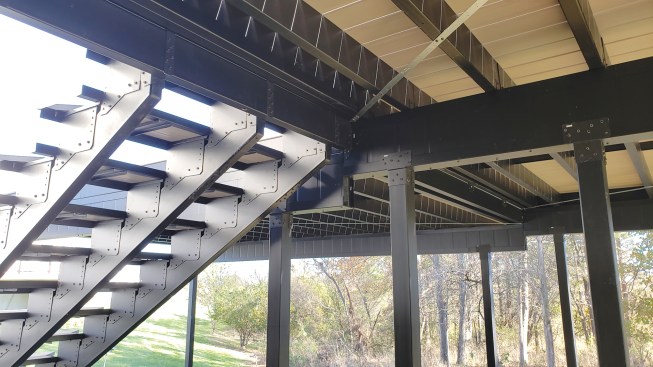
The assembled stringers are then fastened to the framing with adjustable strap-like hanger brackets.
Once the brackets are fastened to the joist/stringers, the stair trays make final assembly fast. Because we used rivets for all of the top fasteners, we didn’t have to counterbore the back of every deck board where a screw head was located. One downside that we weren’t aware of until the stairs were started, however, is that the tread dimension is locked in by the stair trays. At 11 inches deep, a standard two-board tread made with 5 1⁄2-inch-wide deck boards wouldn’t have the required nose overhang. Because the decking the client had chosen was available in a 7-inch-wide board, we were able to use the wider decking for the second board and rip it to fit the tread.
Usually we have a landing or use helical piers to support the bottom of the stringers. On this project, the hardscaping was being done after the deck was built, and we had to temporarily support the stairs on a stone pad. Though it was not necessary structurally, we added a brace at the middle of the stringer span both to reduce any vibration or nuisance swaying of the stairs and to support them while the new hardscaping was being installed.
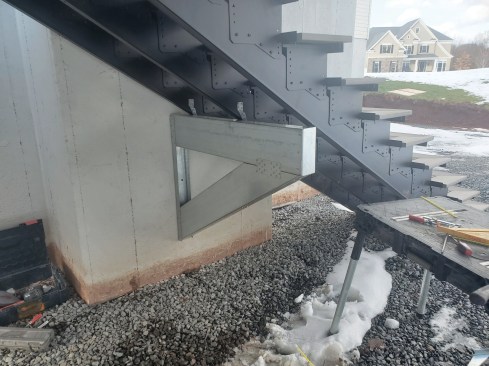
Though not required for structural support, this midspan bracket allowed the author to install the stairs before the landing and associated hardscaping was completed.
Our client liked the look of the black framing so much, they decided to leave it exposed as much as possible, so we did not cover the trellis, fascias, stringers, and risers with decking or vinyl. Because of the height of our rise and the dimensions of the stair tread, we were able to leave the risers “open.”
The Evolution stair trays fix the tread width at 11 inches; fortunately, wider, 7-inch versions of the deck boards used on the project were available so that the author could use two-board treads and still provide an overhang.
Cost
One of the downsides of metal deck framing has always been the cost of the materials. In our area, as is the case across most of the country, the cost and availability of building materials has been turbulent. At the time we built this deck, we would not have been able to source pressure-treated materials from the manufacturer we prefer to use. And even if we had been able to, the expected cost would have been more than double what it was a year prior. Today, the cost for the Fortress Evolution framing would be a little less than double the cost of pressure-treated lumber and about 35% more than LGS. When labor and future maintenance is included in the calculation, the Evolution framing pencils out to cost only about 25% more than pressure-treated lumber and LGS. This, added to the fact that the steel will last as long as the decking being installed on it, makes this steel framing system a worthwhile investment for any of our composite deck projects.
Photos by the author.
❖