Most of the time, we sub out the roof work on our projects, but not always. Occasionally—because of scheduling issues or some unique aspect of the job—we tackle the roofing ourselves. That was the case for a renovation project we recently completed, which included two 15-square, low-slope roofs with planned solar arrays. Because of the numerous roof-to-deck anchors needed to support the PV panel stanchions, we decided to install Acrylabs, a seamless, fluid-applied acrylic elastomeric roof system, rather than an EPDM or other single-ply membrane.
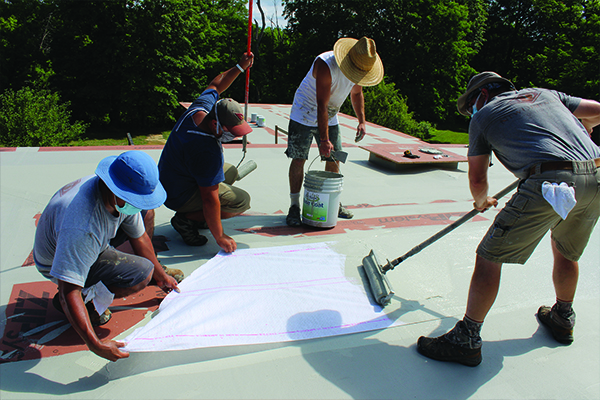
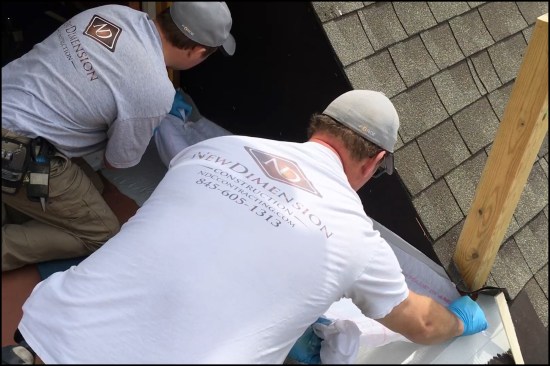
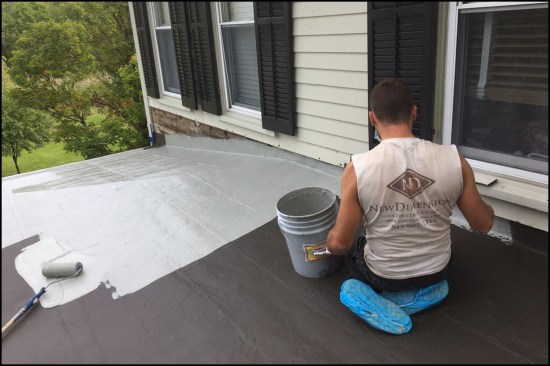
Acrylabs is a versatile product that we’ve successfully used over the past 15 years or so on all types of jobs, from large roofs like the one in the photo above to small deck-over-living-space projects. To fix leaks, we’ve also applied it as a re-roof material over a number of different types of roofing. The system is easy to install, doesn’t require respirators or other special equipment, and doesn’t require a big investment in tools: basically, just a roller, paintbrushes, and a good pair of scissors to cut the reinforcing fabric that gets embedded in the elastomeric coating. Some contractors spray-apply the material for a smoother appearance, but we haven’t invested in that equipment.

NDC crew members apply Acrylabs fluid-applied roofing to a 30-square roof located in New York’s Hudson River Valley.
Our cost for materials is about $2.50 to $3 per square foot with shipping; for estimates, pricing with materials can range anywhere from $5 to $15 per square foot, depending on the size of the roof and whether it’s a new roof or a roof-over.
In this article, I’ll lay out how we install the system, with a focus on three different types of projects: a small rooftop deck with some tricky flashing details; the large roof referred to above, with the solar array; and an aging flat-seam metal roof with a built-in gutter.
Waterproof Deck Over Living Space
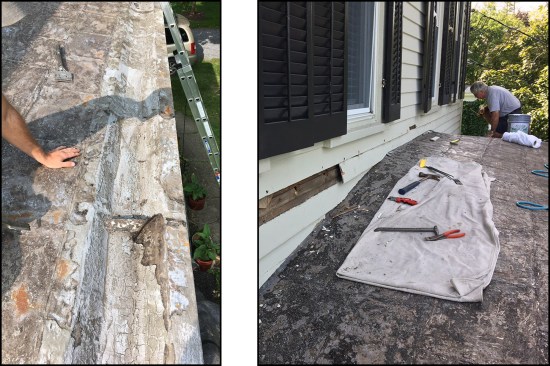
A few years ago, we remediated a walkout deck that served as a fire egress for a third-floor apartment. Because of some faulty flashing details, water had been leaking into the apartment and the living space below, both through the door opening and around the perimeter of the small roof deck, following severe weather events. Wind was driving rain up behind the siding and into the wall and floor framing, so we needed to repair the deck and reflash the deck-to-wall joint to stop the leaks. The project also included a new railing system with new posts.
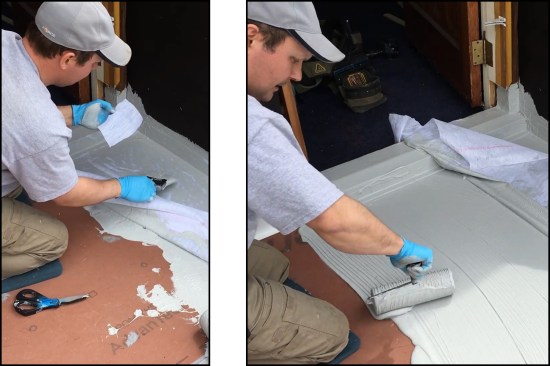
We started by removing the old railing, siding, and roof deck down to the framing. Then we installed new 4×4 pressure treated posts and 5/8-inch Zip System floor sheathing. Normally, we would apply Zip tape to weatherproof the joints in the sheathing, but we’ve found that taped joints telegraph through the Acrylabs coating, which also sometimes causes the tape adhesive to bubble. Instead, we troweled Sikaflex sealant into the joints and nail holes, taking care to smooth out the sealant.
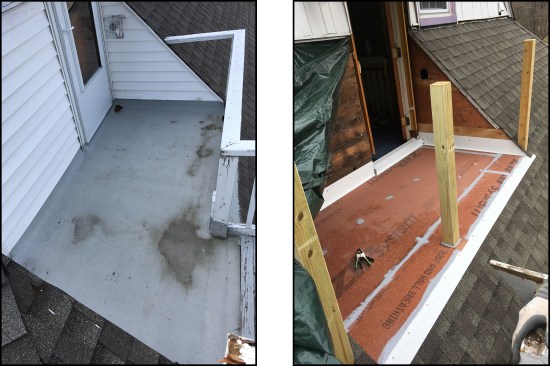
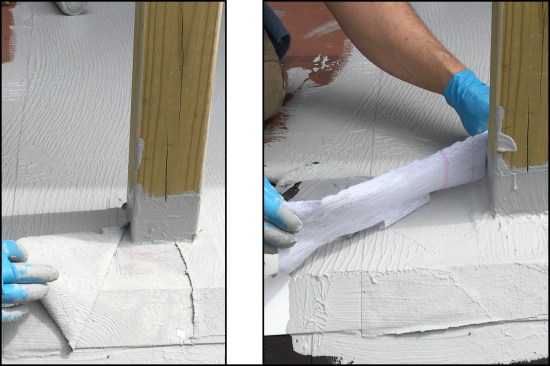
Wind-driven rain caused the home’s walkout deck above living space to leak at the roof-to-wall juncture (left). Instead of sealing the sheathing joints on this small upper-story deck with Zip tape, which would telegraph through the Acrylabs coating, workers troweled on a smooth layer of Sikaflex sealant (right).
Next, we cut and folded custom aluminum flashing to fit around the deck perimeter, up into the door opening, and out over the edge of the deck. It’s a kind of belt-and-suspenders approach, with the flashing providing a smooth and durable substrate for the Acrylabs waterproofing layer that will cover it.
Reinforcing fabric. Mesh 2000 stitchbonded reinforcing fabric comes in various widths up to 40 inches. We use narrow widths to flash joints and seams, and wider widths to cover larger areas. On a small roof like this with a lot of corners and edges, we use full-width fabric but cut the corners to fit prior to applying the elastomeric coating. It’s not critical that the corners are perfectly cut to form “pig ear”-type folded inside corners, because the fabric only reinforces the coating; instead, the goal is to make sure each corner is smooth and fully reinforced with embedded fabric.
The fabric has a smooth side and a fuzzy side; we orient the fabric with the smooth side up, and so that it will lap up over the aluminum corner flashing by at least 2 inches. At the door, we left plenty of material to completely cover the threshold. At the edge of the deck where the aluminum flashing extends out over the asphalt shingles, we let the fabric run long and slipped some felt paper under the flashing to protect the shingles from the coating.

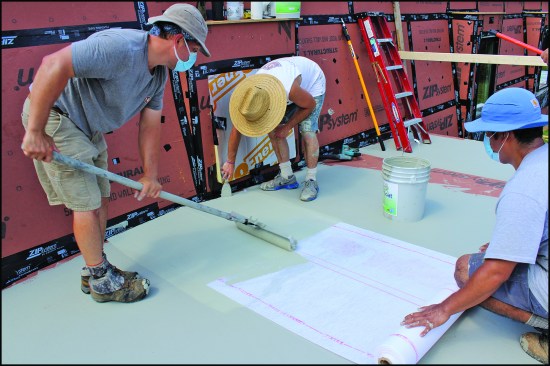
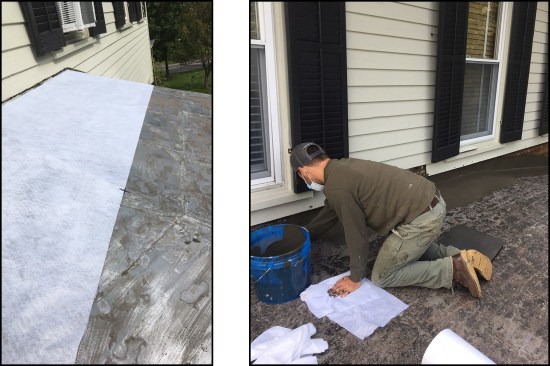
Before applying the Acrylabs tack coat, the reinforcing fabric was carefully cut to fit, then rolled up for later application. The fabric has a smooth side and a fuzzy side; the fabric is installed smooth side up.
Base coat. The only difference between the Acrylabs 2100B base coat and 2100 finish coat is that the finish coating contains a mildew-cide (both have UV inhibitors); you can use finish coat as the base material, but you can’t use base material as the finish coat. The base material is applied in two coats, for total coverage of about 2 1/2 gallons per 100 square feet.
We start by pouring some material onto the roof, then use a 4-inch brush to spread a fairly thick tack coat around the perimeter over the flashing, into corners, and around posts. To apply the material to bigger areas, we switch to a 9-inch roller fitted with a Foam Pro slit foam roller cover, which leaves just enough coating thickness without creating puddles of material that take much longer to dry.
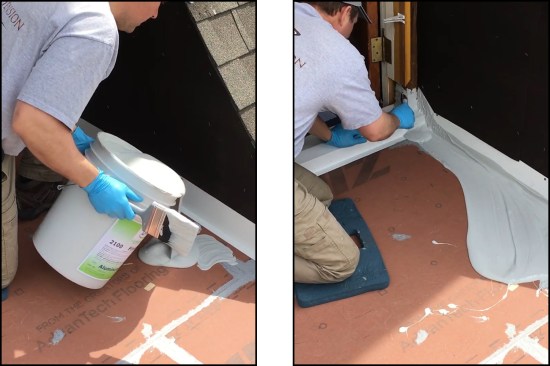
Starting out, the base coat material is poured onto the roof (left), then applied by brush (right)…
…or “squeegee-style” with a 1/2-inch nap slit foam roller.
Because embedding fabric with precut corners in the tack coat can be a little tricky, we stopped applying base coat at the edge of the deck when the layer was about 16 inches wide. Then we carefully rolled out the fabric, using our hands to push the cuts and folds into the edges and corners. It’s a good idea to wear latex gloves to protect your hands while doing this, but when we don’t expect quite as much close contact with the coating, we simply use lots of suntan lotion on our hands, which makes cleanup afterwards much easier.
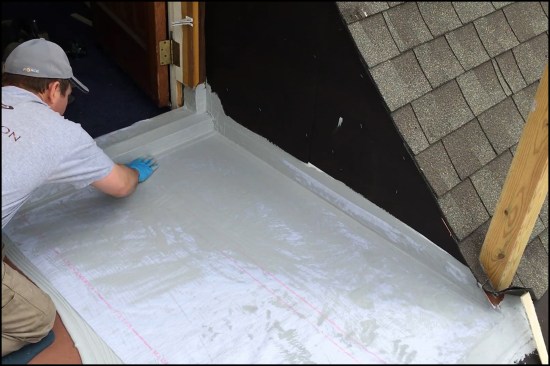
The fabric is embedded in the tack coat smooth side up; workers used the red line woven into the fabric to note where the upturned leg of the fabric at the wall should be.
After embedding the edges, we rolled the remaining fabric back and finished applying the tack coat. Then we finished embedding the first fabric layer into the tack coat, making sure that there was plenty of coating material between each fabric layer at the folds. Sometimes leaves or insects land in the coating, so we take care to remove those as we go; any bump or wrinkle in the fabric and initial coating layer will show up in the finished surface.
Half of the prefitted reinforcing mesh is set in the base coat, then a small piece of mesh is cut and later applied to the inside corner with base coat to reinforce this tricky spot (left). Base coat material is poured onto the roof and rolled out to set the remaining precut length of mesh (right).
After the fabric has been carefully worked into the tack coat to smooth it out and remove air bubbles…
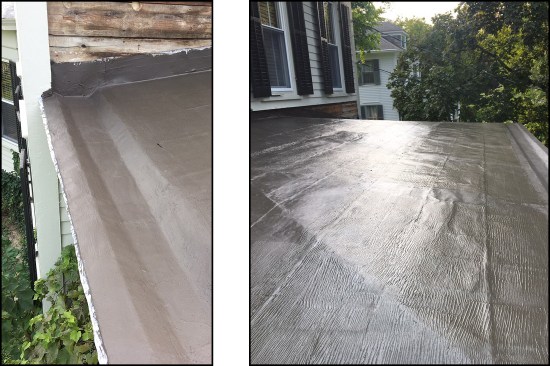
Next, we apply the saturation coating. This has to be done while the tack coat is still wet, so on a big job it’s important to have enough workers to maintain a wet edge during the process. At the corners and edges where there are small flaps of fabric, working with a very wet brush will help to avoid pulling the fabric away from the tack coat. We use both the brush and our hands to press the fabric into the corners to ensure there are no voids or air bubbles. Then, we roll out the rest of the saturation coating so that the total thickness of the base coat is consistent—about 25 mils—and smooth, keeping in mind that the surface appearance of the coating after this step will be reflected in the appearance of the final finish. On subsequent courses, we overlap the fabric by 3 inches.
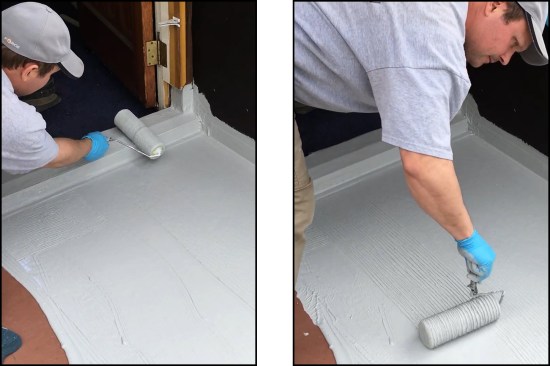
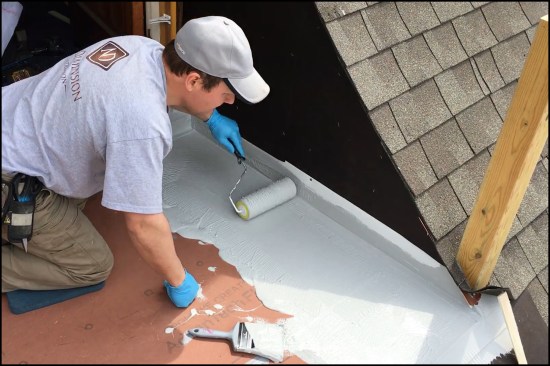
…the saturation coat is roller-applied to the door threshold (left) and main deck areas (right).
Posts and other roof penetrations. When we installed the PT railing posts, we flashed them with reglet cut copper, which was covered by the base coat and reinforcing fabric. We also lapped the base coat up a few inches on all four sides of each post, and then embedded a piece of fabric that wrapped all the way around the post and was precut at 3 1/2-inch intervals so that it extended an inch or so out over the roof deck. Each layer of fabric was embedded in the coating material.
The field fabric is cut around the posts (which had already been flashed with copper) (left), then wrapped the upturned legs of the fabric with another narrower strip of fabric, which is precut at 3 1/2-inch intervals so that the legs would extend out over the field fabric (right).
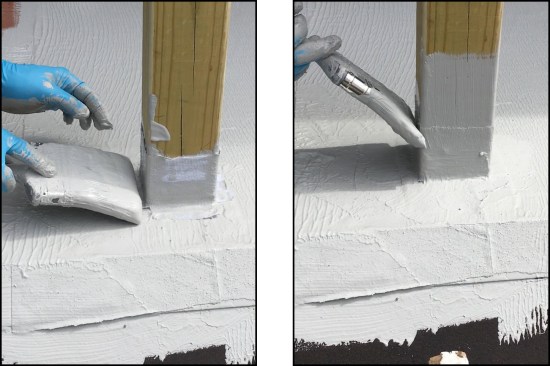
Additional base coat material is then brushed on to the roof (left) over the post flashing (right). Later, excess Acrylabs can be sanded smooth prior to painting.
Finish coats. Depending on the temperature, humidity, and sun exposure, it can take up to eight hours or more before the base coat is dry enough to apply the first finish coat. We apply two finish coats, with the drying time between these coats typically much shorter, usually one to two hours. Each coat uses about 1 1/4 gallons per 100 square feet. After we’re done, the total dry film thickness of the system should be about 45 mils.
One strong selling point of this system is the large number of colors—at least 24—that the material is available in. The finish coats can be roughed up with sand broadcast by hand between coats to give the surface more traction. In addition, for frequently used rooftop decks that see a lot of foot traffic, a high-strength (2100 HT) finish coating material is available.
Big Low-Slope Solar Roof
Technically a hip roof, the 30-square roof (an upper and lower roof, each measuring about 15 squares) that we recently completed for a renovation project demonstrates how versatile the Acrylabs system is. As on the smaller roof deck, we used 5/8-inch Zip System panels to sheathe the roof, but instead of using tape or sealant on the joints, we used narrow strips of Acrylabs reinforcing fabric embedded in base-coat material. That way, we were able to quickly dry in the roof while we waited on delivery of the solar panels and their supporting hardware. We also had to wait for a stretch of good weather.
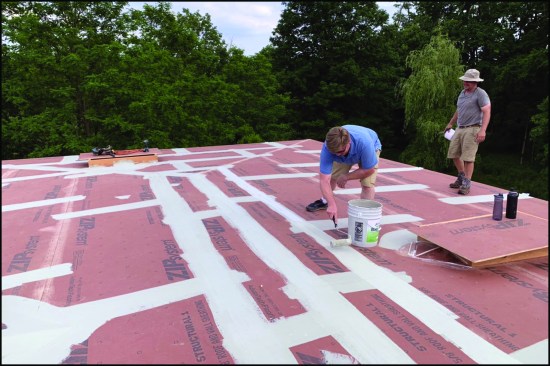
To dry-in the large solar roof project, workers applied base coat and fabric to the Zip System sheathing seams.
Weather window. One of the main limitations of the Acrylabs system is that installation requires dry, seasonable weather both prior to installation and afterwards. It can’t be installed over a wet surface, so even morning dew is problematic. And if it rains while the coating is wet, the coating will wash away, though the product becomes “rain ready” after a few hours, with the outer layer skinning up. If it’s hot and sunny, the coating may dry too quickly, while it dries extremely slowly in cool, humid conditions. We won’t install it when temperatures dip below 40°F or when a freeze is expected within 24 hours. Wind, too, can be a problem, as it can blow leaves and other debris into the wet surface.
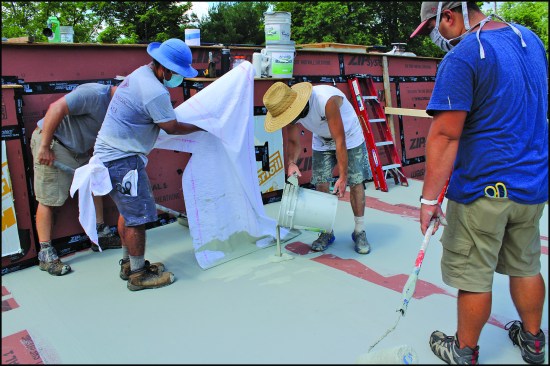
While a small roof can be installed by one or two workers, a large roof requires a crew of four or five, especially on a warm, sunny day, when the material dries quickly. To spread the coats rapidly, we use double-headed roller cages that accept two 9-inch-wide roller covers, and fit them with long, heavy-duty extensions. To make sure that the tack and saturation coats don’t dry prematurely while we embed the fabric, we set up our workers so that each is performing a dedicated function, like taking care of the coating bucket, rolling out the fabric, or using a roller to spread the material.

Workers bedded fabric in the coating.
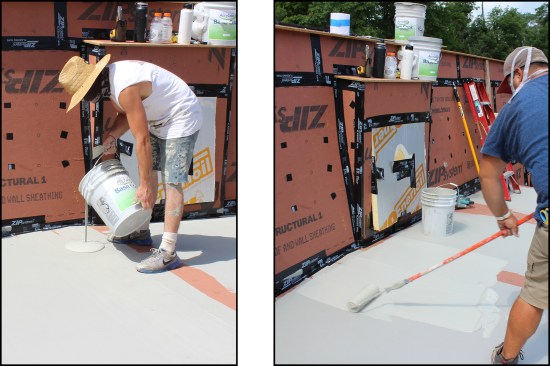
Zip tape was used to seal a roof-to-wall intersection (left). After spreading out the tack coat with a roller (right)…
they applied the saturation coat …
…taking care to smooth out wrinkles in the fabric as they squeegeed the coating to the desired 25-mil thickness.
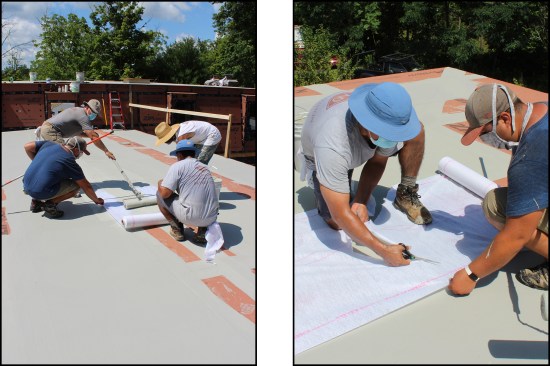
Installing the fabric in weatherboard fashion is not critical. On this large roof, workers started the base-coat application in the center and worked toward the eaves in sections (left), allowing each section to dry before applying the adjacent one and lapping the fabric by 3 inches. The reinforcing mesh is trimmed at the “hip” juncture (right)…

…the base coat tooled with a hand trowel (left) and the point-shaped fabric set in the saturation coat (right).
Solar mounts. After allowing the base coat to cure, we worked with the solar sub to lay out the locations for the 160 EcoFasten Solar SimpleGrip-SQ mounts. After the sub mounted the base plates to the roof deck, we flashed the compression plates that fit over them to the base coat with additional 12-inch squares of fabric, each with a hole cut out of the middle, and additional coating material.
Drip edge. On low-slope roofs, we’ve found that water tends to pond along the edge of the roof where the Acrylabs coating laps over the drip edge. To provide a smooth transition from the roof membrane over the drip edge that allows water to drain off the roofing material unimpeded, we use a power planer to rout a 3-inch-wide by 1/8-inch-deep dado along the edge of the sheathing to receive the drip edge.
Finally, once we finished flashing the roof vents, skylights, and other roof penetrations with Acrylabs, we came back and applied two finish coats.

At the home’s mansard-style roof, the Acrylabs system is also applied to numerous small low-slope roofs located above the second-story windows. Here, a shallow 3-inch-wide dado is plowed in the sheathing with a power planer to avoid creating a “speed bump” of material that could cause ponding along the edge of the low-slope roof (top left)—the main roofs were similarly power planed. The base coat with embedded reinforcing fabric is applied over the L-flashing at the wall (top right), then the top edge of the fabric is set, while base coat material is brushed over the sheathing and copper edge flashing (bottom left). The saturation coat is applied (bottom right) and later, the fabric-embedded base is trimmed to the drip edge with cut edges covered with additional reinforcing fabric and base coat to prevent delamination of the roof over time.
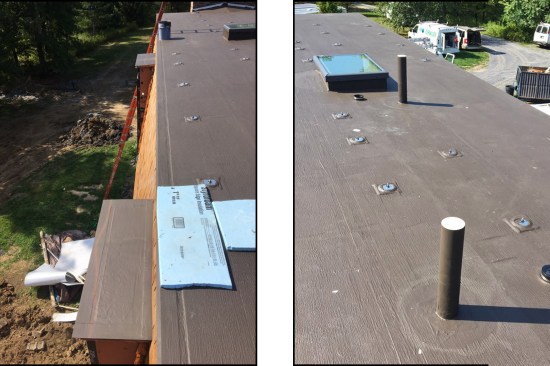
Solar mounts and other roof penetrations are easily flashed and integrated into the Acrylabs base coat with additional fabric and coating material prior to application of the two colored finish coats (left, right). The low-slope mansard roofs are similarly finished (left).
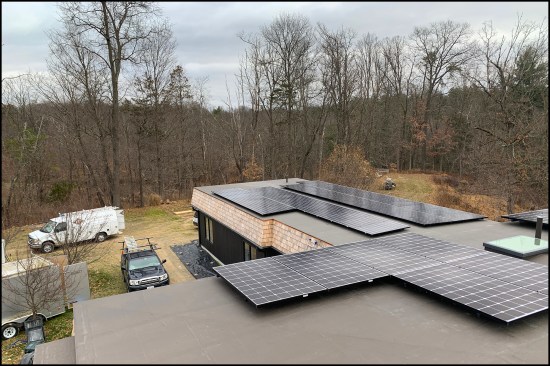
The completed Acrylabs and solar array installation.
Acrylabs Over An Existing Roof
We’ve recoated a number of different types of roofing materials with Acrylabs, including both flat- and standing-seam metal roofs, BUR asphalt roofs, and EPDM. Recently, for example, we used Acrylabs to fix a troublesome flat-seam terne metal roof with built-in gutters. While the material tenaciously adheres to almost anything (I still have some on a belt that I wore for a project seven years ago), thorough prep work of the existing roofing is the key to success.
On a metal roof, the process starts with pressure-washing the roofing, followed by scraping to remove patches and other repairs. The idea is to make the final project visually pleasing, keeping in mind that surface irregularities will telegraph through the Acrylabs.
To repair an existing flat-seam metal roof with a built-in gutter (left), workers first power-washed the roof, scraped it clean, and gained access to roof-to-wall flashing (right).
Once the existing roofing was prepped, we applied the base coat, following the same protocol as on other projects (tack coat, reinforcing fabric, and saturation coat). On sloped standing-seam roofs, it isn’t necessary to use the reinforcing fabric when applying the base coat. In this case, the base coat is finish coat left over from another project, which explains the dark bronze color in the photos above.
With the roof power-washed and scraped clean, the reinforcing fabric was laid out and precut to fit (left). Starting with the L-flashing at the wall (right), workers applied the base coat (leftover colored finish coat from another project); the reinforcing fabric was later embedded in the tack coat smooth side up.
The base coat (with the embedded fabric) was applied over the entire roof, including the built-in gutters (left, right).
This roof had an integrated gutter, which is one of the reasons why Acrylabs was such a good choice for the repair. The material conforms to complex shapes and is self-flashing, so we simply coated over the downspout opening for the gutter when we applied the base coat and cut it out later after the base coat had dried. Then, to cover the cut edges that could lead to delamination of the roof over time, we flashed around the drain opening with additional reinforcing fabric and coating. Finally, we applied two colored finish coats to complete the repair.
Here, a worker is applying the first of two silver-colored finish coats using a 1/2-inch nap slit foam roller and brush.
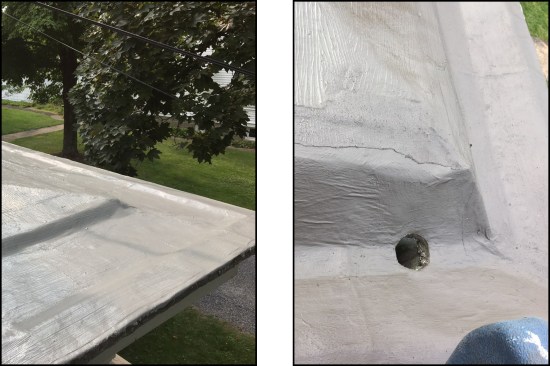
After completing the finish coats (left), workers cut out the hole for the gutter’s downspout, flashing the cut edge with additional fabric and coating material to avoid delamination of the membrane (right).
Photos by New Dimension Construction and Tim Healey.


