The first time I watched a crew shingle a wave, they cut and fastened the shingles one at a time. I knew there had to be a faster and easier way, so instead of fighting gravity and marking and cutting shingles individually, I turned the process into a production operation from shingle layout to installation.
The key step that keeps the processes of marking, cutting, and installation simple is collating the shingles into strips that are 3 to 4 feet long. This is done by gluing thin cardboard drywall shims near the top of the shingles to join them together. Handling the strips is easier than fumbling with a bunch of small, loose shingles, and being able to use a basic template to mark the cut lines keeps the wave contours consistent. As every efficient carpenter knows, when you have to repeat a step more than three times, it’s worth setting up a jig and a process. Not only does the job go faster, but the work is uniform.
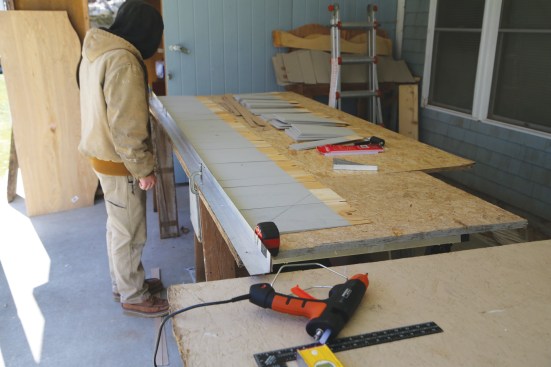
Most of the work can be done on a bench workstation, either on the jobsite or in a shop. When it’s time to nail up the shingles, the strips make installation lightning fast.
Four Gables
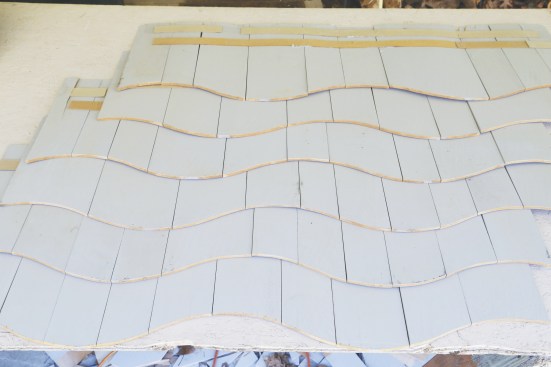
On this project, the contractor had a crew siding the house, and we were brought in just to shingle the wave design on four street-facing gable ends. We met with the owner to review wave samples so she could make the decision about the wave design. To show owners and designers what different patterns will look like, I save extra shingle strips from previous jobs with different wave heights (the distance from trough to crest) and frequency (distance from top of one wave crest to the next). Heights and frequencies can be adjusted to suit the gable size, roof slope, and designer or owner preference. The shingle exposure can be adjusted, too, though I prefer to stick with the same exposure as the field shingles—on this job, that was 5 inches.
Mike Guertin
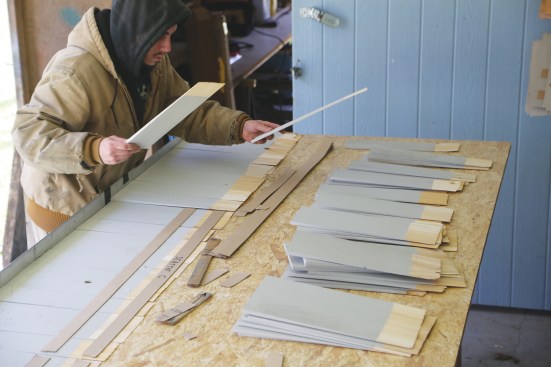
To help the homeowner visualize the wave-pattern options for her…
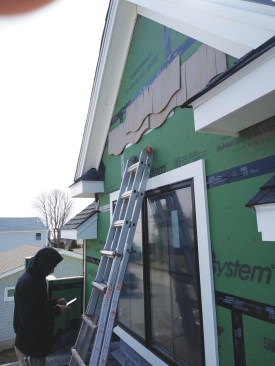
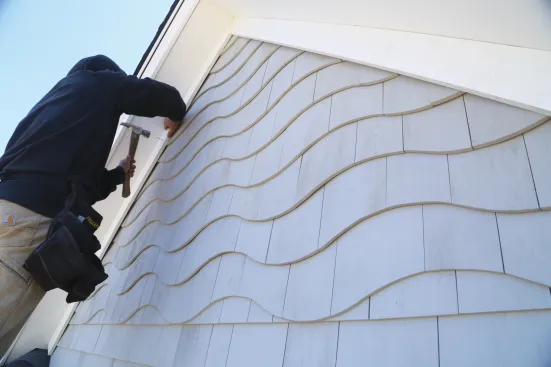
After the height and frequency of the wave, the biggest decision for the owner is choosing whether to have the wave crests stack evenly above each other or shift slightly for an offset. The appearance of stacked and offset shingles changes with the view angle. It’s only when you see them up on a gable end and walk along the front of the house that you get the sense of how the angle affects the appearance, so we tacked shingle samples on a gable for final confirmation from the owner. On this project, the owner also needed to select the shingle course where the wave would begin.
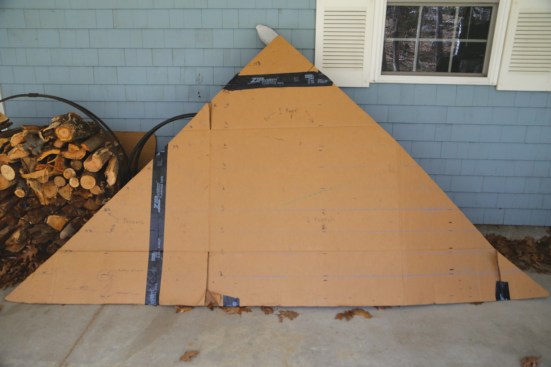
Since the gables were small and uniformly sized, we made a cardboard template, and on it we marked the course exposures the siding crew was using on the rest of the house. Cardboard templates aren’t practical on large gable ends, but the advantage to using them on small gables is we can cut the ends of the shingle strips to match the roof slope on the bench. When shingling large gables, we fabricate the shingle strips long and cut them during installation.
We instructed the siding crew to apply shingles up to a level two courses below where the wave design started. We needed to install two regular courses ourselves to adjust the shingle-joint offset—a minimum of 1 1/2 inches—in order to blend the joints in the sider’s last course to the joints in our wave base course.
Shop Production
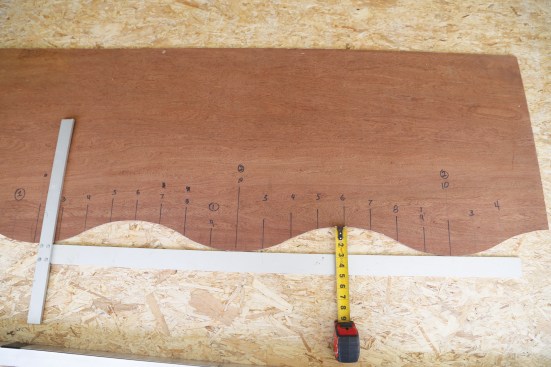
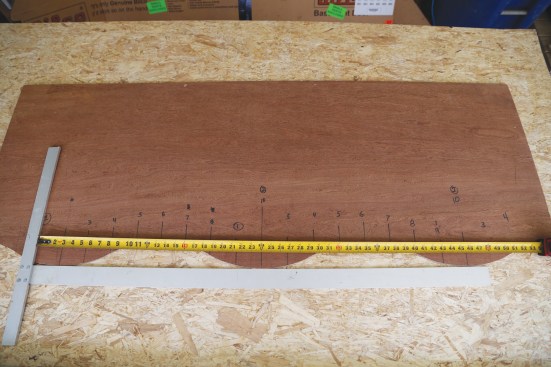
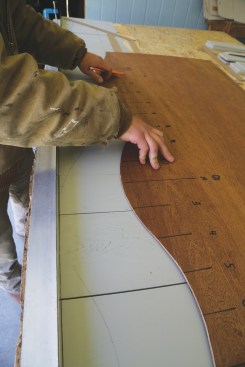
All we need to mark a wave pattern on shingle strips is a 3/16‑inch plywood template about 4 to 6 feet long that includes two or three crests and troughs. Since the shingles are cut shorter at the wave crests, you have to consider what the limits are to the height of the waves. With 15-inch-tall white cedar shingles and a 5-inch exposure, I like to limit the wave height to 3 inches. When using taller red cedar shingles with a 7-inch exposure, I have gone with a wave as tall as 4 1/2 inches. On this job, we went with a 2 9/16‑inch wave height, with a 21 1/2-inch wave frequency.
Mike Guertin
The template has a wave pattern with a 2 9/16-inch wave height ….
Using a combination of compass arcs on newsprint paper, I drew a crest and trough, then blended the crest and trough arcs together freehand. Next, I folded the paper at the center of a crest (you could also fold it at the center of a trough), cut out the pattern—like making paper cutout dolls—and transferred the paper sketch to the plywood. For a 2 11/16-inch wave offset between courses, I divided the wave frequency by 8.
I lay out a wave pattern on a gable by focusing on the top few courses rather than the base, because that’s where peoples’ eyes are drawn. If a gable’s top courses look unbalanced, the whole wave effect can be distracting rather than interesting—especially when the wave crests are offset. For this project, we decided the center of a wave trough should land at the course below the top one, figuring that only a couple of inches of the top course would be noticeable. This would help balance the wave form on the gable. From there, we counted courses downward to determine which offset line would orient the lowest wave course. The offset line for that bottom course is labeled #1 and all the other offset lines are marked numerically #1 to #8 in sequence until it repeats at the ninth course.
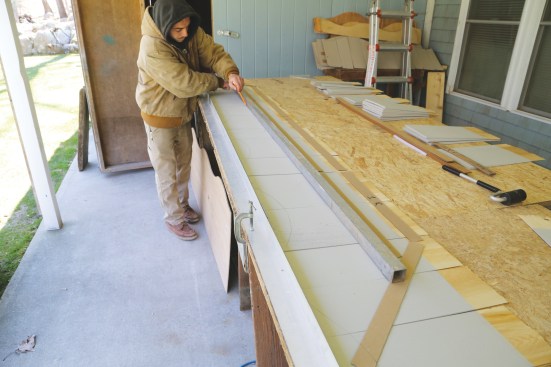
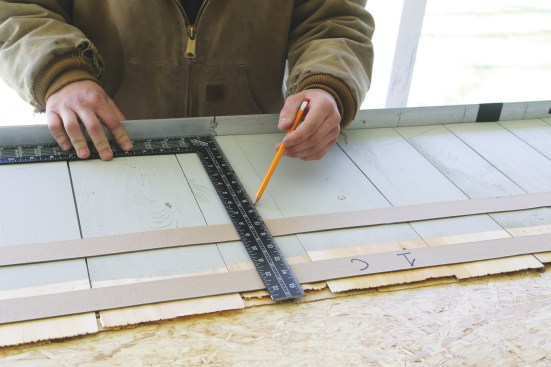
A couple of sheets of OSB laid across horses make a good workbench. We clamped 1 1/2-inch aluminum angle to the OSB as a straightedge stop to align the shingle courses and to guide the width of each course. The gable is a 12 pitch, so with course exposure at 5 inches, each course from rake to rake is 10 inches shorter than the previous one. We marked the center point of the gable and the measurement for the first wave-shingle course width on the straightedge. We made additional marks 5 inches in from each of the outer points of the previous course. Having the straightedge double as a layout jig simplifies measuring out the shingles and end cuts for each course.
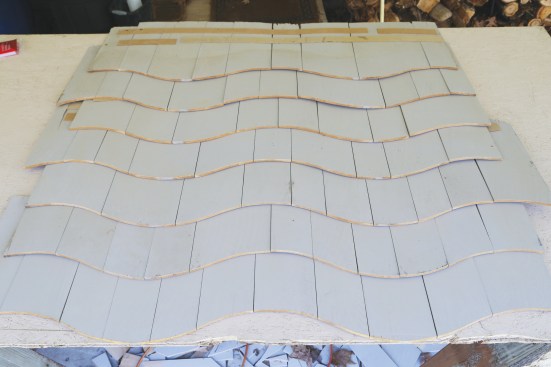
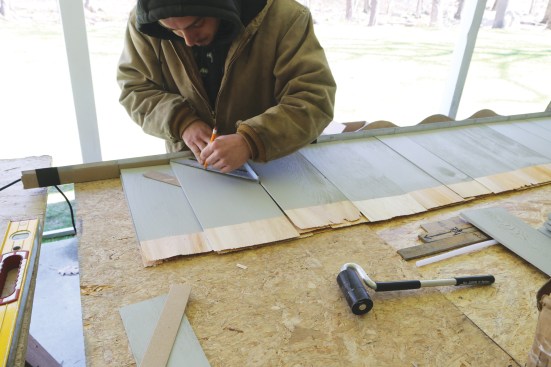
The first course of the wave pattern is a double course. The base course is a straight course of shingles, and the first course of wave shingles lies on top of it, with the troughs of the waves in the first wave course matching the butt line of the base course. The shingles are dry laid on the bench and butted to a straightedge in the same fashion as installing shingles on a ledger nailed to a wall. Using a measuring stick marked to locate the position of the two cardboard drywall shims, we make a couple of tick marks every 3 feet to which we align the shims for gluing.
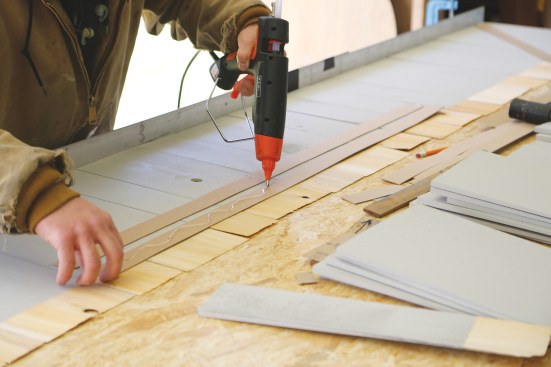
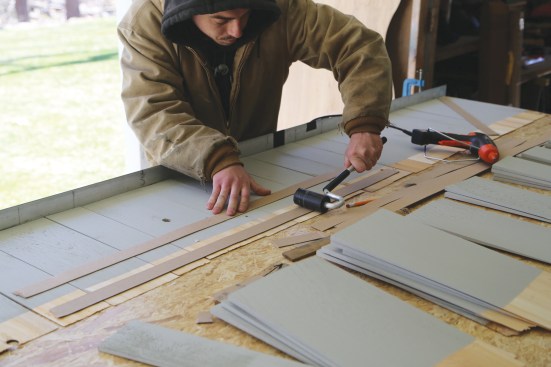
Two rows of drywall shims are glued to the shingles a couple of inches apart near the top so the strips stay straight. The collated strips are easy to mark, cut, and handle without falling apart. We start with full-length drywall shims, gluing the middle group of shingles into strips about 40 to 48 inches long. This is the first project we’ve used hot-melt adhesive on, but we’ve also tried CA glue, spray contact adhesive, and construction adhesive. Each works, but I keep experimenting to see if there’s one that works better than another. So far, I like hot-melt because it has a little open time to line shingles up, bonds aggressively, and sets quickly.
After applying the adhesive to the shim, we flip it over and press it onto the shingles by hand, being careful to keep the butts square to the straightedge and the joint spaces even. Running a J-roller along the shims afterward ensures a good bond.
Starting the Wave
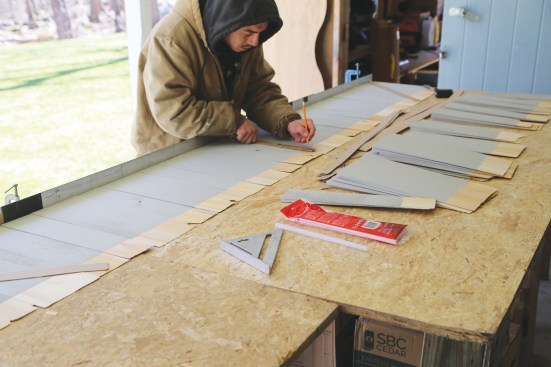
The first course is made up of a double row of three collated strips of shingles. At the ends of the course, diagonal drywall shims match the slope of the roof and align with the underside of the rake overhang. The portions of the shingles above the diagonal shims will be cut off later. To keep track of the collated strips, we label them by course number and as left, center, or right so bundles can be stacked and later keyed into position on the wall.
Mike Guertin
A worker labels the three collated shingle strips making up the …
The next course—the first wave course—is laid directly on top of the previous row of shingle strips. This makes it easy to see and ensure that the shingle joints have the minimum 1 1/2-inch offset. As with the course below, the shingle butts are aligned with the straightedge and the gaps between shingles are set. To speed up selecting shingles to lay out on a course, we rough-sort them by width into piles on the bench.
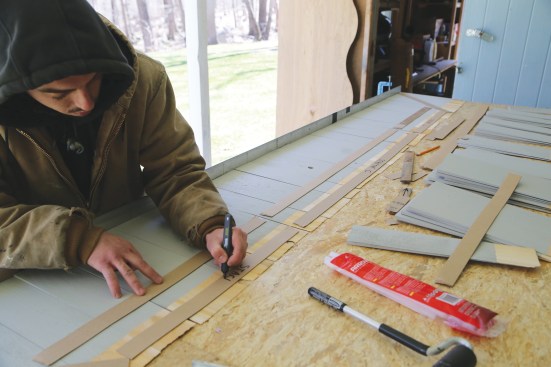
The end shingles in each course are matched to the course-width marks on the straightedge. The roof slope is 45 degrees, which we mark on the end shingles using a tri-square; a shingle edge extends the line along the top of the shingles. Then we glue drywall shims along the 45-degree roof-slope line.
On each course, we transfer the center reference marked on the straightedge to the middle shingle in the course. Later, when the shingles are installed on the wall, aligning the center marks ensures a precise installation.
The shingle collation process is the same for each successive course: Glue drywall shims along the top of the shingles in groups; label each group by course number and location (left/right/center); align the wave-template offset line for the first wave course to the center mark on the straightedge; draw the template shape onto the shingle strips; and shift the template along the shingle course to extend the wave pattern to the end of the course.
Overlying Shingle Courses
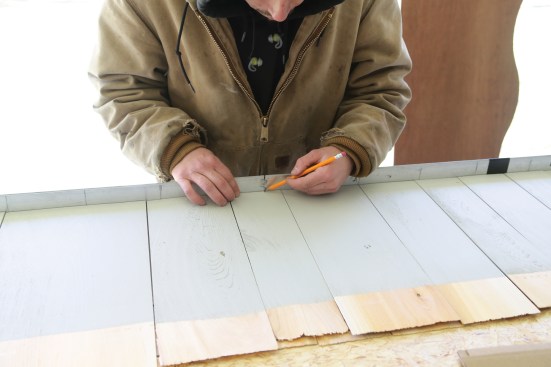
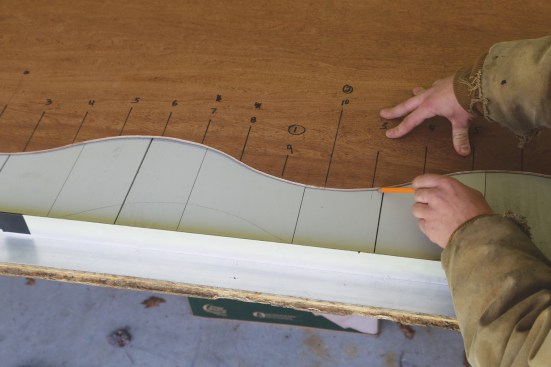
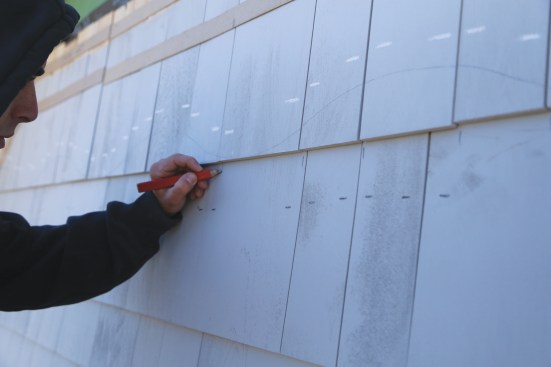
When installing straight-shingle courses on a wall, siding installers snap a chalk line across the shingles to align the shingle butts of the overlying course. This process doesn’t work when installing wave shingles, so we mark a guideline on the wave-shingle course while the shingles are still on the bench. We measure up from the straightedge to the top of the wave crests of the overlying course. This distance—7 9/16 inches—is the course-exposure height (5 inches) plus the wave height (2 9/16 inches). Using a straightedge, we draw a faint pencil line at the crest height and then draw the centerline up the face of the shingle.
Mike Guertin
After marking the crest height of the next course onto the first…
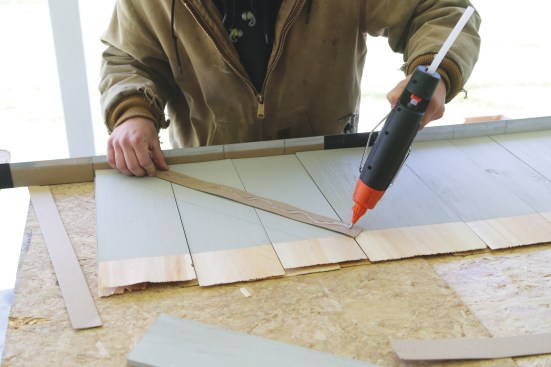
With the template oriented so the crests align with the faint pencil line for the next course exposure and positioned with the next template offset line (#2) registered to the centerline, we draw a faint pencil line along the template. This line is used to orient the wave course above when the shingle strips are installed on the wall and to mark the fastener locations.
Since shingle fasteners follow the wave shape rather than a straight line, we make a chalk mark for each fastener 3/4 inch in from the edge of each shingle and about 1 inch above the wave line marked for the overlying course. Marking the shingle fasteners at this point minimizes the chance of mislocating a fastener when installing the shingles on the wall.
Each shingle course is stacked on top of the previous course during assembly, with the shingle joints offset 1 1/2 inches. Shingle courses end at the marks on the straightedge, 5 inches shorter on each end from the previous course. Then we mark 45 degree–angle cut lines at the ends, along which we apply the drywall shims, gluing and rolling them to make the shingle strips.
The procedure is the same for each successive wave course: Place the shingles along the straightedge on top of the previous course, collate and label the strips, orient the template along the straightedge and draw the wave cut line, mark the crest of the overlying course and orient the template to it, and draw the overlying course guide line. Then repeat. The only steps that change in the process are shifting the template offset mark by one position and narrowing each course according to the straightedge layout.
Cutting Out the Design
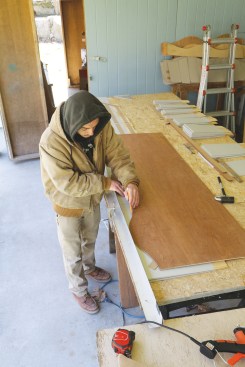
After four or five courses are stacked, collated, and marked along the straightedge, it’s time to cut the wave shape and stack the strips out of the way so that we can move on to the next batch. To orient the next course of shingles for the shingle-joint offset, we leave only the top course of shingle strips from the previous batch along the straightedge as we work our way up the wall.
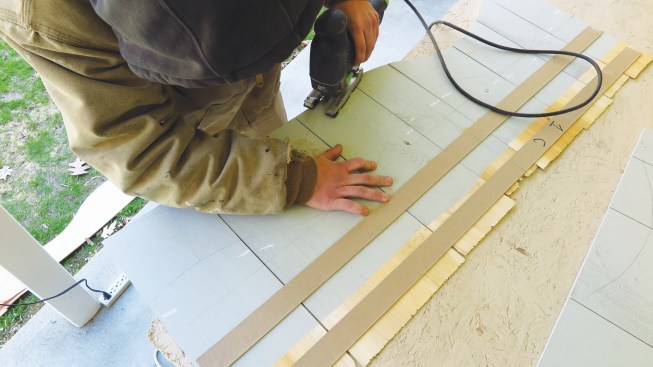

Mike Guertin
After the strips for four or five courses have been assembled, a…
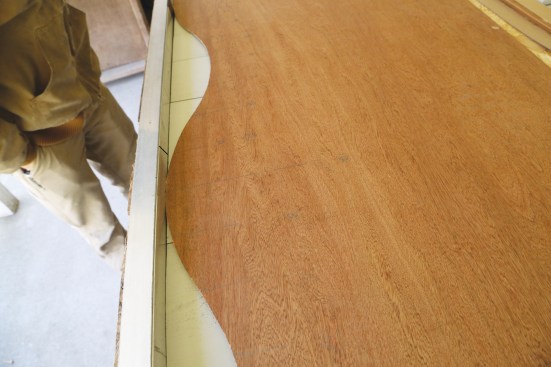
Placing each shingle strip along the bench edge for support, we use a jigsaw with a fine-tooth blade to cut the wave shape. Sometimes, there’s a little tear-out on the cut edges, so we keep a palm sander and 120-grit sandpaper handy to smooth them. The shingles on this project were prefinished, so we applied two coats of matching stain to the cut edges.
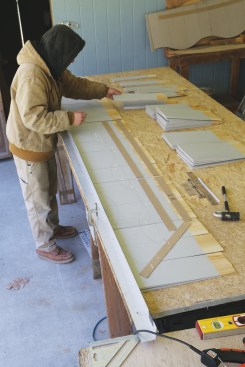
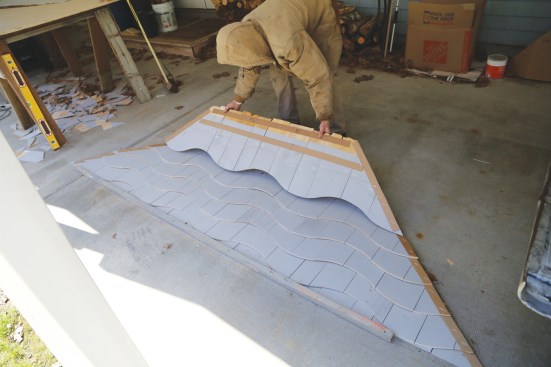
Once we’ve finished collating the shingle strips and cutting them out, we lay them out flat on the floor to make sure we haven’t missed any courses. We also check that the shingle-joint offsets are correct, the faint guide lines for the overlying courses are right, and the fastener chalk lines aren’t missing or positioned too low. Then the shingle strips can be stacked and protected for delivery to the jobsite. On this project, four gable ends of precut shingle strips fit in the back of a pickup truck.
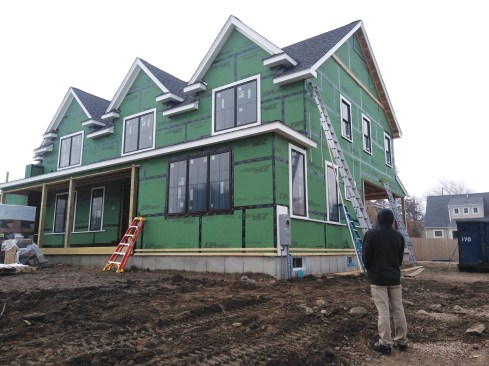
Beginning the Installation
At our direction, the siding sub had stopped his shingle installation two courses lower than the base course for the wave shingles. We started our installation by marking the center of the gable and snapping a plumb chalk line to guide the shingle-strip installation. The base course for the first wave course helps guide where to locate the shingle joints in the two interceding courses below the wave pattern, so we tack-staple it temporarily to the wall.
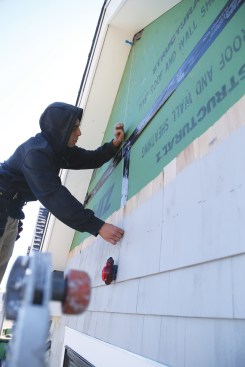

Mike Guertin
A worker snaps a plumb centerline on the gable wall to guide the…
Using our best judgment, we blend the shingle joints of the interceding courses to make sure to maintain a minimum 1 1/2-inch offset. We’ve found that using wider shingles than normal in the interceding courses makes it easier to avoid close joints.
After the first of the two interceding courses is installed, the base-course shingle strips have to be removed in order to install the second straight-shingle course. First, though, we mark the locations of the base-course shingle joints on the shingles underneath. The joints on the second straight-shingle course have to be offset from both the joints in the first course as well as the marks indicating the base-course joints.
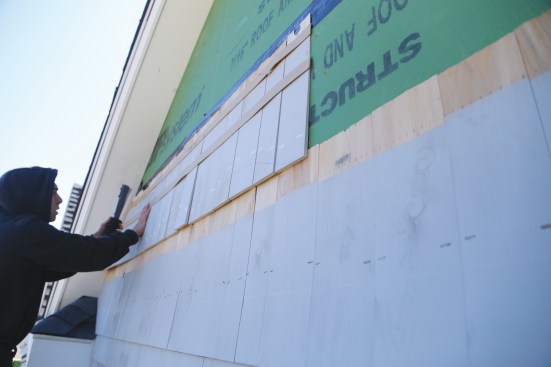
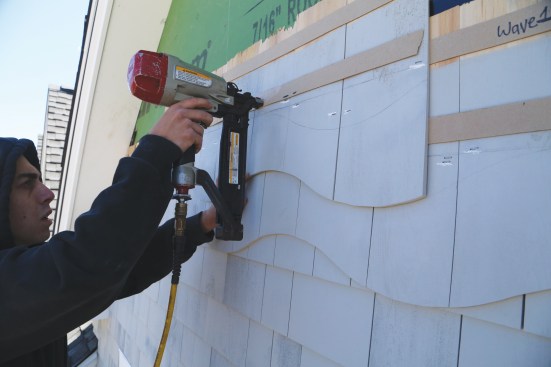
After we fasten the second straight course of shingles, we install the base-course strips for the wave shingles, driving fasteners at the chalk marks just above the overlying wave-course pencil line.
Completing the Waves
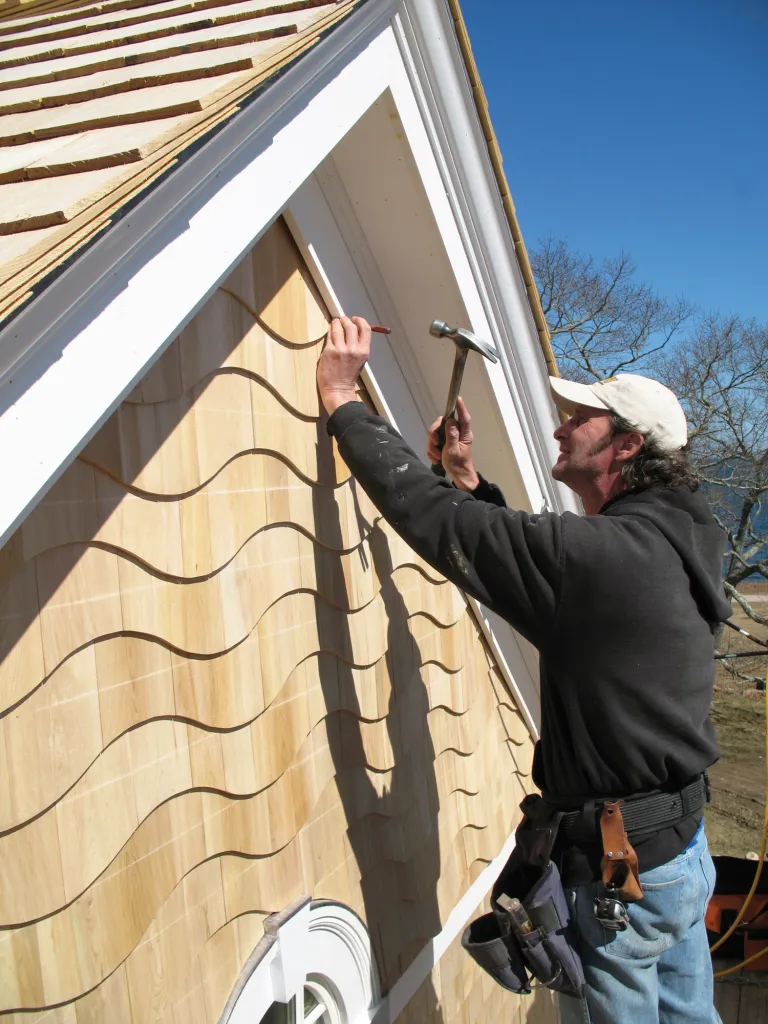
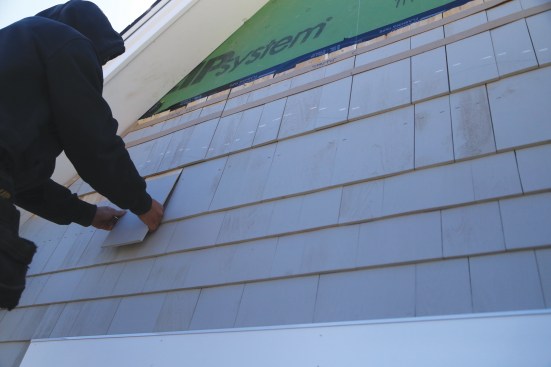
From this point on, installation is a breeze. We start by aligning the center wave-shingle strip with the centerline of the gable end, and the wave troughs with the butts of the base-course shingles, then fasten it in place. Then we install the shingle strips to the left and right of the center strip until we reach the end of the row. We move on to each course above until reaching the top. After nailing up the final course, we install the rake frieze trim.
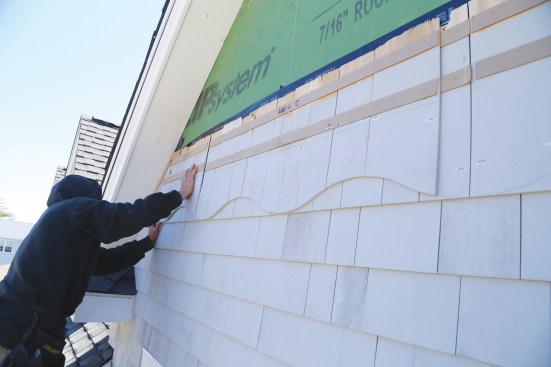
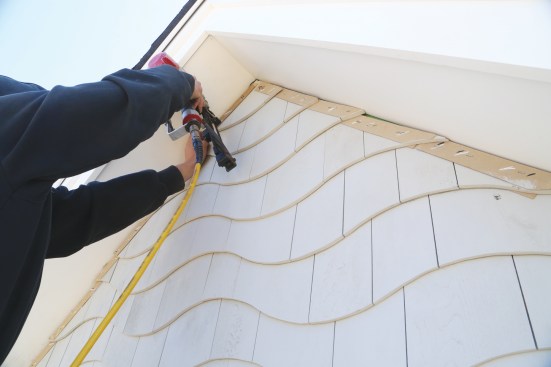
Mike Guertin
A worker aligns the center strip of wave shingles with the cente…
On this project, the first set of wave-shingle strips for the four gables took one person 4 1/2 hours to lay out, collate, cut, sand, and paint the edges. By the third and fourth gable sets, the shop process was down to two hours.
Installation of the two regular transition courses took about an hour and a half for one person, mostly for the extra work positioning shingles for the minimum joint offset. The collated wave strips went up fast—about an hour per gable, not counting staging set-up time.
Photos by Mike Guertin